
Checking for Compatibility
Before embarking on the activation process for your new iPhone 14, it's crucial to ensure that the device is compatible with your current cellular network. This step is essential to guarantee a seamless activation experience and uninterrupted connectivity. Here's a detailed guide on how to check for compatibility:
-
Network Compatibility: The first step is to verify whether your iPhone 14 is compatible with your preferred network carrier. Different carriers operate on distinct network technologies, such as GSM or CDMA. To determine compatibility, you can visit the carrier's official website or contact their customer support for detailed information. Additionally, you can utilize online tools provided by the carrier to input the device's IMEI or MEID number and receive instant compatibility feedback.
-
SIM Card Compatibility: If you're planning to use an existing SIM card with your new iPhone 14, it's essential to confirm that the SIM card is compatible with the device. The iPhone 14 supports various SIM card types, including nano-SIM and eSIM. Ensure that your current SIM card aligns with the supported types to facilitate a smooth activation process.
-
Network Bands: Another critical aspect of compatibility is verifying whether the iPhone 14 supports the necessary network bands utilized by your carrier. Different regions and carriers operate on specific frequency bands, and it's imperative to ensure that your device is compatible with the bands used in your location. You can obtain this information from the iPhone 14 specifications provided by Apple or by consulting your carrier's network band compatibility documentation.
By meticulously checking for compatibility based on these key factors, you can preemptively address any potential issues that may arise during the activation process. This proactive approach not only streamlines the activation of your iPhone 14 but also minimizes the likelihood of encountering compatibility-related challenges post-activation.
Ensuring compatibility is the foundational step towards a successful iPhone 14 activation, setting the stage for a seamless transition to your new device. With this crucial groundwork in place, you can proceed confidently to the subsequent steps of the activation process, knowing that your device is fully compatible with your network and ready to be seamlessly integrated into your digital lifestyle.
Gathering Necessary Information
Gathering the necessary information is a pivotal preparatory step before initiating the activation process for your iPhone 14. This phase involves collecting essential details and credentials that will be instrumental in seamlessly setting up and configuring your device. By meticulously gathering the required information beforehand, you can expedite the activation process and ensure a smooth transition to your new iPhone 14. Here's a comprehensive guide on the crucial information you need to gather:
-
Personal Details: Begin by gathering your personal details, including your full name, date of birth, and residential address. These details are typically required during the activation process to verify your identity and associate your device with your account.
-
Contact Information: Ensure that you have your current contact information readily available. This includes your primary phone number, email address, and any alternative contact details. Having this information at hand enables you to seamlessly update your device with the latest contact details during the activation process.
-
Apple ID Credentials: Your Apple ID serves as a gateway to a myriad of Apple services, including iCloud, the App Store, and Apple Music. Prior to activating your iPhone 14, gather your Apple ID credentials, comprising your email address and password. Additionally, if you utilize two-factor authentication, ensure that you have access to the trusted devices or phone numbers associated with your Apple ID for seamless verification during activation.
-
Wireless Network Details: If you plan to connect your iPhone 14 to a Wi-Fi network during the activation process, gather the network's SSID (Service Set Identifier) and password. This information is essential for establishing a secure and stable connection to your preferred Wi-Fi network.
-
Backup Information: If you intend to restore your new iPhone 14 from a previous iCloud or iTunes backup, ensure that you have the necessary backup details, such as the iCloud account credentials or the location of the iTunes backup file. This ensures a smooth transition by seamlessly transferring your previous device's data to the new iPhone 14.
-
Security Information: For enhanced security features such as Face ID or Touch ID, ensure that you have the relevant biometric data or passcode readily available. This information is crucial for setting up and configuring these security features during the activation process.
By diligently gathering these essential details and credentials, you can streamline the activation process and mitigate potential delays or interruptions. This proactive approach empowers you to seamlessly configure your iPhone 14, ensuring that it is personalized to your preferences and seamlessly integrated into your digital ecosystem from the moment of activation.
Connecting to Wi-Fi or Cellular Network
Upon unboxing your new iPhone 14, one of the initial steps in the activation process involves connecting to a Wi-Fi or cellular network. This pivotal step is instrumental in establishing a reliable and high-speed internet connection, enabling your device to seamlessly access online services, download essential updates, and synchronize your data with cloud-based platforms. Here's a detailed guide on how to effectively connect your iPhone 14 to a Wi-Fi or cellular network:
Wi-Fi Connection:
-
Accessing Wi-Fi Settings: To initiate the Wi-Fi connection process, navigate to the "Settings" app on your iPhone 14 and tap on "Wi-Fi." This action opens the Wi-Fi settings interface, displaying a list of available Wi-Fi networks within range.
-
Selecting the Preferred Network: From the list of available Wi-Fi networks, select your preferred network by tapping on its name. If the network is secured with a password, you will be prompted to enter the network's password to authenticate the connection.
-
Establishing the Connection: Once the correct password is entered, tap "Join" to establish the connection. Your iPhone 14 will then attempt to connect to the selected Wi-Fi network, providing access to high-speed internet connectivity.
Cellular Network Connection:
-
Inserting the SIM Card: If you are opting to activate your iPhone 14 using a cellular network, ensure that the SIM card is correctly inserted into the device. The SIM card slot is typically located on the side of the iPhone 14. Insert the SIM card according to the provided instructions, ensuring it is securely in place.
-
Activating Cellular Data: After inserting the SIM card, navigate to the "Settings" app and select "Cellular." Toggle the "Cellular Data" switch to enable cellular connectivity. If prompted, enter any additional settings provided by your carrier to configure the cellular connection.
-
Verifying Signal Strength: Once cellular data is enabled, verify the signal strength indicator on your iPhone 14. A strong signal ensures reliable connectivity and optimal performance when accessing cellular data services.
By effectively connecting your iPhone 14 to a Wi-Fi or cellular network, you pave the way for a seamless activation process and ensure that your device is primed for online connectivity. This foundational step sets the stage for subsequent configuration and personalization, empowering you to harness the full potential of your new iPhone 14 from the moment of activation.
Turning on the iPhone 14
Turning on your new iPhone 14 is an exciting moment that marks the beginning of your journey with this cutting-edge device. The process of powering on the iPhone 14 is straightforward and sets the stage for the subsequent steps in the activation process. Here's a detailed guide on how to effectively turn on your iPhone 14 and initiate the initial setup:
-
Locating the Power Button: The power button, also known as the side button, is situated on the right-hand side of the iPhone 14. It is easily identifiable by its distinct design and placement, allowing for convenient access when powering on the device.
-
Press and Hold the Power Button: To turn on the iPhone 14, press and hold the power button for a few seconds until the Apple logo appears on the screen. This action triggers the device to boot up, initializing the hardware and software components in preparation for the setup process.
-
Release the Power Button: Once the Apple logo is displayed, release the power button. The iPhone 14 will continue to boot up, indicating that the device is powering on and transitioning to the initial setup phase.
-
Welcome Screen: After the boot-up process is complete, the iPhone 14 will display the welcome screen, signaling that the device is ready to be configured and personalized according to your preferences.
-
Language and Region Selection: Upon reaching the welcome screen, you will be prompted to select your preferred language and region. This step allows you to customize the device to align with your linguistic and geographical preferences, ensuring a tailored user experience.
-
Connect to Wi-Fi or Cellular Network: Following the language and region selection, you have the option to connect your iPhone 14 to a Wi-Fi network or activate it using a cellular connection. Establishing a network connection is essential for accessing online services, downloading updates, and seamlessly integrating your device into your digital ecosystem.
-
Data Transfer and Privacy Settings: As part of the initial setup, you will have the opportunity to transfer data from a previous device, configure privacy settings, and set up security features such as Face ID or Touch ID. These options enable you to personalize the device and ensure that it aligns with your preferences and security requirements.
By effectively turning on your iPhone 14 and navigating through the initial setup process, you lay the foundation for a personalized and seamlessly integrated user experience. This pivotal step marks the commencement of your journey with the iPhone 14, setting the stage for exploring its innovative features, accessing a myriad of apps and services, and harnessing the full potential of this advanced device.
Setting Up Face ID or Touch ID
Setting up Face ID or Touch ID on your iPhone 14 is a pivotal step in enhancing the security and convenience of accessing your device. These advanced biometric authentication features provide a seamless and secure method of unlocking your iPhone, authorizing app purchases, and safeguarding sensitive data. Here's a comprehensive guide on how to effectively set up Face ID or Touch ID on your iPhone 14:
Face ID Setup:
-
Initiating Face ID Configuration: To begin setting up Face ID, navigate to the "Settings" app on your iPhone 14 and select "Face ID & Passcode." You will be prompted to enter your device passcode to access the Face ID settings.
-
Enrolling Your Face: Tap on "Set Up Face ID" to initiate the enrollment process. Position your face within the designated frame on the screen and follow the on-screen prompts to complete the facial recognition scan. During this process, ensure that your face is fully visible and that you adjust the positioning as instructed to capture different angles for comprehensive facial recognition.
-
Completing Face ID Enrollment: Once the initial facial scan is completed, the iPhone 14 will prompt you to perform a second facial scan to further enhance the accuracy and reliability of Face ID. Follow the on-screen instructions to capture additional facial data, ensuring a comprehensive and secure enrollment process.
-
Face ID Configuration Completion: Upon successful completion of the facial scans, Face ID will be configured and ready for use. You can customize additional settings, such as enabling Face ID for device unlocking, app authentication, and secure access to sensitive data.
Touch ID Setup:
-
Accessing Touch ID Settings: If you prefer using Touch ID for biometric authentication, navigate to the "Settings" app on your iPhone 14 and select "Touch ID & Passcode." Enter your device passcode to access the Touch ID settings.
-
Registering Your Fingerprint: Tap on "Add a Fingerprint" to initiate the fingerprint enrollment process. Follow the on-screen instructions to place your finger on the Touch ID sensor, adjusting the positioning to capture different areas of your fingerprint. This ensures comprehensive fingerprint recognition for seamless authentication.
-
Multiple Fingerprints: For added convenience, you have the option to register multiple fingerprints, allowing for versatile and personalized access to your iPhone 14. This feature is particularly beneficial for accommodating different fingers or enabling trusted individuals to access the device with their registered fingerprints.
-
Completing Touch ID Enrollment: Once the fingerprint enrollment process is finalized, Touch ID will be successfully configured and ready for use. You can customize additional settings, such as enabling Touch ID for unlocking the device, authorizing app purchases, and securing sensitive data.
By effectively setting up Face ID or Touch ID on your iPhone 14, you elevate the security and accessibility of your device, ensuring a seamless and personalized user experience. These advanced biometric authentication features not only enhance the overall security posture of your iPhone 14 but also streamline the process of unlocking the device and authorizing secure transactions, empowering you to leverage the full potential of these innovative security technologies.
Signing in with Apple ID
Signing in with your Apple ID is a pivotal step in the activation process of your iPhone 14, as it serves as the gateway to a myriad of Apple services, including iCloud, the App Store, Apple Music, and more. By seamlessly integrating your Apple ID with your iPhone 14, you gain access to a unified ecosystem that facilitates seamless data synchronization, app installations, and personalized user experiences across multiple devices. Here's a comprehensive guide on how to effectively sign in with your Apple ID on your iPhone 14:
-
Accessing Apple ID Settings: Begin by navigating to the "Settings" app on your iPhone 14 and selecting "Sign in to your iPhone." If you already have an Apple ID, tap "Sign in to your iPhone" and proceed to the next step. If you don't have an Apple ID, you can create one by selecting "Don't have an Apple ID or forgot it?" and following the on-screen instructions to create a new account.
-
Entering Apple ID Credentials: Upon selecting "Sign in to your iPhone," you will be prompted to enter your Apple ID and password. Ensure that you accurately input your credentials to facilitate a seamless sign-in process. If you utilize two-factor authentication, you may receive a verification code on a trusted device or phone number associated with your Apple ID. Enter the verification code to securely authenticate the sign-in process.
-
Two-Factor Authentication: If you have enabled two-factor authentication for your Apple ID, follow the on-screen prompts to complete the verification process. This additional layer of security enhances the protection of your account and ensures that only authorized users can access and utilize your Apple ID across devices.
-
Agreeing to Terms and Conditions: After successfully signing in with your Apple ID, you may be prompted to review and agree to the updated Terms and Conditions. It's essential to carefully review the terms and provide consent to proceed with the activation process. This step ensures compliance with Apple's policies and sets the stage for seamless integration of your Apple ID with your iPhone 14.
-
Enabling iCloud Services: Upon signing in with your Apple ID, you have the option to enable iCloud services such as iCloud Drive, Photos, Contacts, and more. These services facilitate seamless data synchronization across your devices, ensuring that your content is readily accessible and up to date across your digital ecosystem.
By effectively signing in with your Apple ID, you seamlessly integrate your iPhone 14 with a comprehensive suite of Apple services, enabling a personalized and interconnected user experience. This foundational step not only grants access to a multitude of apps, content, and services but also establishes a cohesive digital environment that enhances productivity, entertainment, and connectivity across your Apple devices.
Restoring from iCloud or iTunes Backup
Restoring your new iPhone 14 from an iCloud or iTunes backup is a seamless and efficient way to transfer your previous device's data, settings, and content to your new device. Whether you prefer the convenience of iCloud's wireless backup or the comprehensive backup capabilities of iTunes, the restoration process ensures that your iPhone 14 is personalized to align with your existing digital footprint. Here's a detailed guide on how to effectively restore from an iCloud or iTunes backup:
iCloud Backup Restoration:
-
Initial Setup: During the initial setup of your iPhone 14, you will encounter the "Apps & Data" screen. Select "Restore from iCloud Backup" to initiate the restoration process.
-
Sign in to iCloud: Enter your Apple ID and password to sign in to your iCloud account. This step is crucial for accessing your iCloud backups and initiating the restoration process.
-
Select Backup: After signing in, choose the relevant iCloud backup from which you wish to restore your iPhone 14. The backups are listed chronologically, allowing you to select the most recent backup for restoration.
-
Progress and Completion: The restoration process commences, and your iPhone 14 begins downloading the selected iCloud backup. The duration of this process depends on the size of the backup and your internet connection speed. Once the restoration is complete, your device will reboot, and the transferred data and settings will be available on your iPhone 14.
iTunes Backup Restoration:
-
Connect to Computer: If you prefer using an iTunes backup for restoration, connect your iPhone 14 to a computer with the latest version of iTunes installed. Launch iTunes to begin the process.
-
Select Device: In iTunes, select your iPhone 14 when it appears in the device list. If prompted, enter the device passcode or choose to "Trust This Computer" to establish a secure connection.
-
Initiate Restoration: Under the "Summary" tab for your iPhone 14, locate the "Restore Backup" option. Select the desired backup from the list of available backups and click "Restore." iTunes will then proceed to restore your iPhone 14 from the selected backup.
-
Completion and Sync: Once the restoration process is finalized, your iPhone 14 will reboot, and the transferred data and settings from the iTunes backup will be synchronized with the device. This comprehensive restoration ensures that your new iPhone 14 mirrors the configuration and content of your previous device.
By effectively restoring your iPhone 14 from an iCloud or iTunes backup, you seamlessly transition to your new device while retaining your familiar settings, apps, and content. This streamlined process ensures continuity and familiarity, empowering you to seamlessly resume your digital activities on the advanced platform of the iPhone 14.
Setting Up Siri
Setting up Siri on your new iPhone 14 introduces you to a world of voice-activated convenience and personalized assistance. Siri, Apple's intelligent virtual assistant, empowers you to perform a myriad of tasks, from sending messages and setting reminders to accessing information and controlling smart home devices, all through natural voice commands. Here's a comprehensive guide on how to effectively set up Siri and harness its full potential on your iPhone 14:
-
Enabling Siri: To initiate the setup process, navigate to the "Settings" app on your iPhone 14 and select "Siri & Search." Toggle the "Listen for 'Hey Siri'" switch to enable hands-free activation of Siri using the voice command "Hey Siri." This feature allows you to seamlessly invoke Siri without physically interacting with your device, enhancing accessibility and convenience.
-
Voice Recognition: Proceed to the "Set Up 'Hey Siri'" prompt to train Siri to recognize your voice. Follow the on-screen instructions to speak a series of voice commands and phrases, allowing Siri to adapt to your unique vocal patterns and accent. This personalized voice recognition enhances the accuracy and responsiveness of Siri, ensuring that it accurately interprets and executes your commands.
-
Language and Voice Selection: Within the Siri settings, you have the option to select your preferred language for interacting with Siri. Additionally, you can choose from a variety of voice options to customize Siri's speaking style and tone. Select the voice that resonates with your preferences, creating a personalized interaction experience with Siri.
-
Siri Suggestions: Enable Siri Suggestions to allow Siri to proactively provide personalized recommendations based on your usage patterns and activities. These suggestions encompass app recommendations, shortcuts, and contextual information, enhancing the proactive assistance offered by Siri and streamlining your daily interactions with your iPhone 14.
-
App Integration: Explore the "Siri & Search" settings to customize Siri's integration with specific apps installed on your iPhone 14. You can configure Siri to interact with third-party apps, enabling seamless voice commands for tasks such as sending messages, making reservations, and accessing app-specific functionalities.
By effectively setting up Siri on your iPhone 14, you unlock a wealth of capabilities and personalized assistance, transforming your device into a proactive and intuitive digital companion. Siri's seamless integration with your daily routines and interactions empowers you to navigate tasks, access information, and control your device with unparalleled ease and efficiency. With Siri at your disposal, your iPhone 14 becomes a dynamic and responsive extension of your digital lifestyle, enhancing productivity and connectivity in diverse contexts.
Enabling Find My iPhone
Enabling the "Find My iPhone" feature on your iPhone 14 is a crucial step in enhancing the security and traceability of your device. This powerful feature not only facilitates the location of your iPhone in the event of misplacement or theft but also offers additional functionalities such as remote locking, data erasure, and activation lock, bolstering the overall protection of your device and the confidentiality of your data. Here's a comprehensive guide on how to effectively enable and configure the "Find My iPhone" feature on your iPhone 14:
-
Accessing iCloud Settings: Begin by navigating to the "Settings" app on your iPhone 14 and selecting your Apple ID profile at the top of the screen. From there, tap on "iCloud" to access the iCloud settings interface.
-
Locating Find My iPhone: Within the iCloud settings, locate and tap on "Find My iPhone." This action opens the Find My iPhone settings, providing access to essential features for locating and securing your device.
-
Enabling Find My iPhone: Toggle the "Find My iPhone" switch to enable the feature. This action activates the location tracking and security functionalities associated with Find My iPhone, ensuring that your device is traceable and safeguarded in various scenarios.
-
Enabling Send Last Location: Consider enabling the "Send Last Location" feature within the Find My iPhone settings. This feature automatically sends the last known location of your iPhone to Apple's servers when the battery is critically low, enhancing the likelihood of locating your device even in challenging circumstances.
-
Activation Lock: As a supplementary security measure, ensure that the "Send Last Location" feature within the Find My iPhone settings. This feature automatically sends the last known location of your iPhone to Apple's servers when the battery is critically low, enhancing the likelihood of locating your device even in challenging circumstances.
By effectively enabling the "Find My iPhone" feature on your iPhone 14, you fortify the security and traceability of your device, empowering you to swiftly locate, secure, and manage your iPhone in diverse scenarios. This proactive approach not only enhances the safeguarding of your device and data but also provides peace of mind, knowing that your iPhone 14 is equipped with robust security features to mitigate potential risks and ensure its safekeeping.
Completing the Activation Process
Upon successfully configuring the essential settings and features outlined in the preceding steps, you are poised to finalize the activation process for your iPhone 14. This pivotal phase marks the culmination of the setup journey, ensuring that your device is fully integrated into your digital ecosystem and primed for seamless usage. Here's a detailed guide on how to effectively complete the activation process and embark on your immersive experience with the iPhone 14.
-
Verification and Review: Take a moment to verify and review the configured settings, ensuring that your preferences, security features, and personalized options align with your expectations. This step allows you to confirm that the device reflects your desired configurations and is ready for immediate use.
-
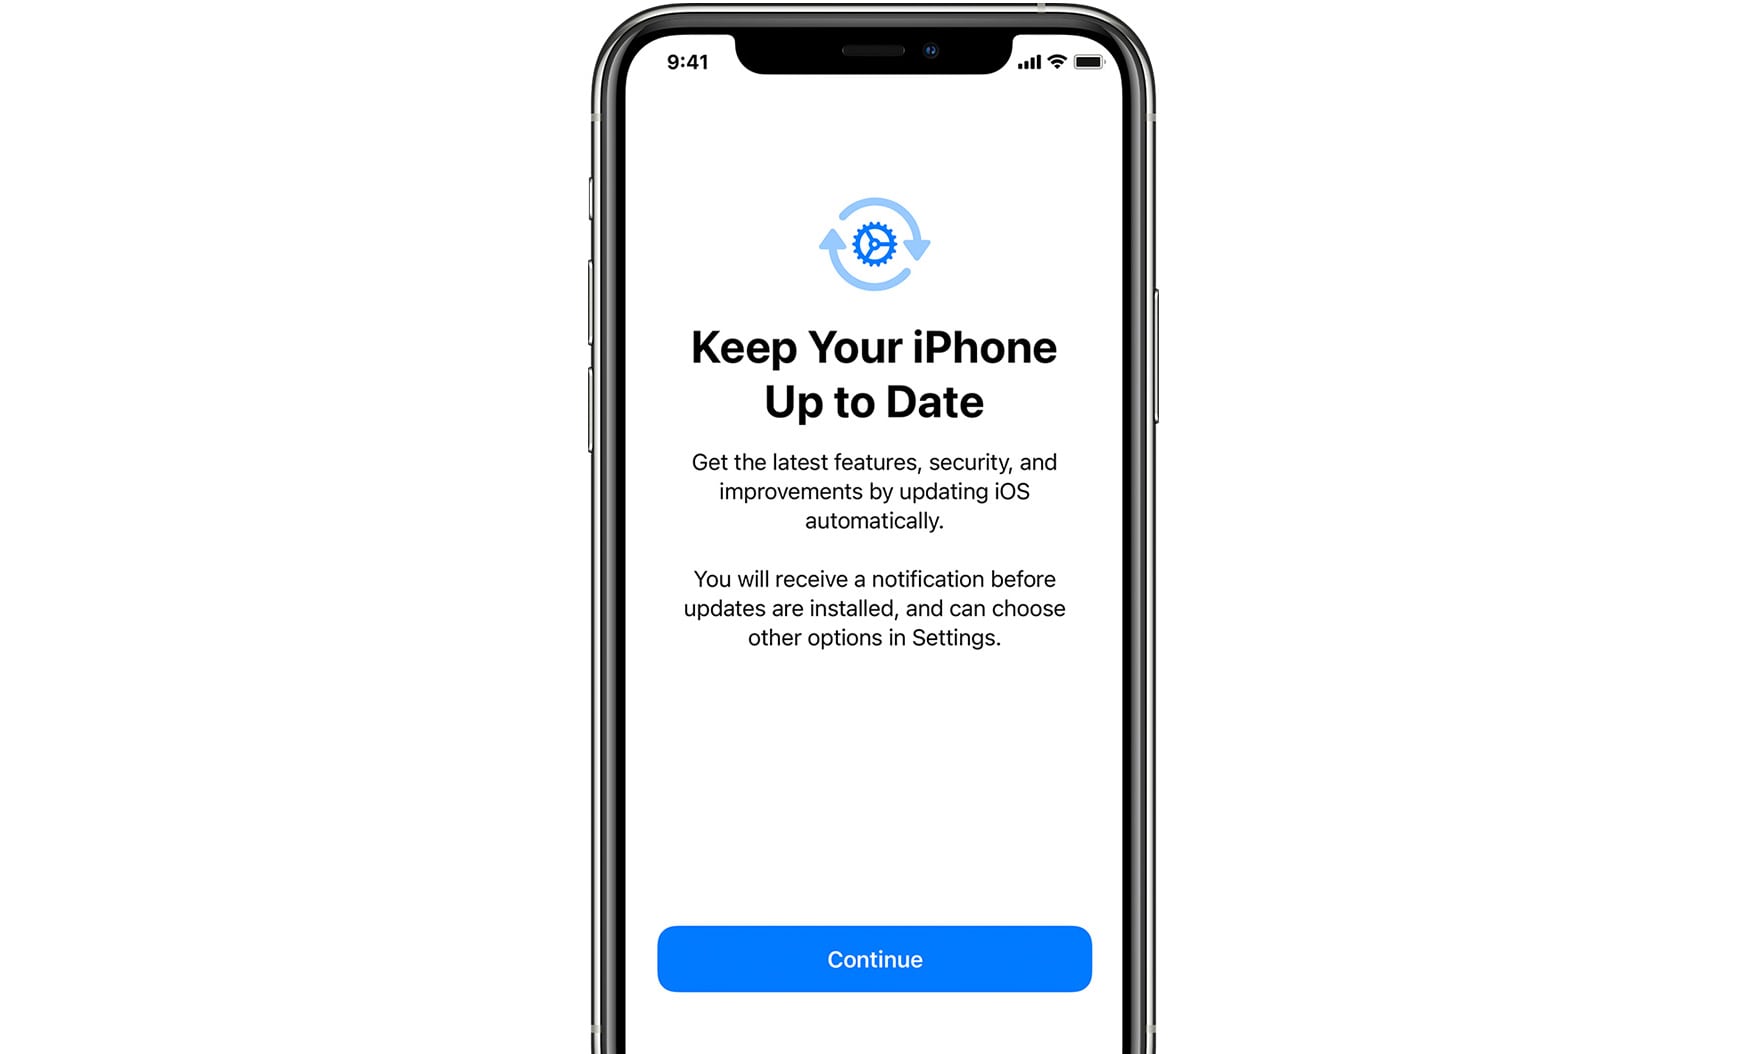
Software Updates: Check for any available software updates by navigating to the "Settings" app, selecting "General," and tapping on "Software Update." Installing the latest updates ensures that your iPhone 14 benefits from enhanced performance, security patches, and feature enhancements, optimizing the overall user experience.
-
Data Synchronization: If you restored your iPhone 14 from a previous backup, monitor the data synchronization process to ensure that your apps, photos, contacts, and other content are seamlessly transferred and accessible on your new device. This step validates the successful migration of your digital content to the iPhone 14.
-
Accessibility and Personalization: Explore the accessibility settings and personalization options available on the iPhone 14 to tailor the device to your unique preferences. Adjust display settings, customize app layouts, and explore accessibility features to optimize the user interface according to your individual needs.
-
Security Confirmation: Verify that all security features, including Face ID, Touch ID, passcodes, and Find My iPhone, are functioning as intended. This confirmation ensures that your device is fortified with robust security measures, safeguarding your data and privacy in various usage scenarios.
-
Exploration and Engagement: Take the opportunity to explore the diverse capabilities of the iPhone 14, from its innovative camera features and immersive display to the seamless integration of Apple services. Engage with the device to familiarize yourself with its functionalities and discover the myriad of possibilities it offers.
By meticulously completing the activation process and attending to these essential steps, you set the stage for an enriching and seamless experience with your iPhone 14. This comprehensive approach ensures that your device is fully optimized, secure, and personalized, empowering you to leverage its advanced capabilities and embark on a journey of productivity, creativity, and connectivity in the dynamic digital landscape.