Setting Up OBS Studio
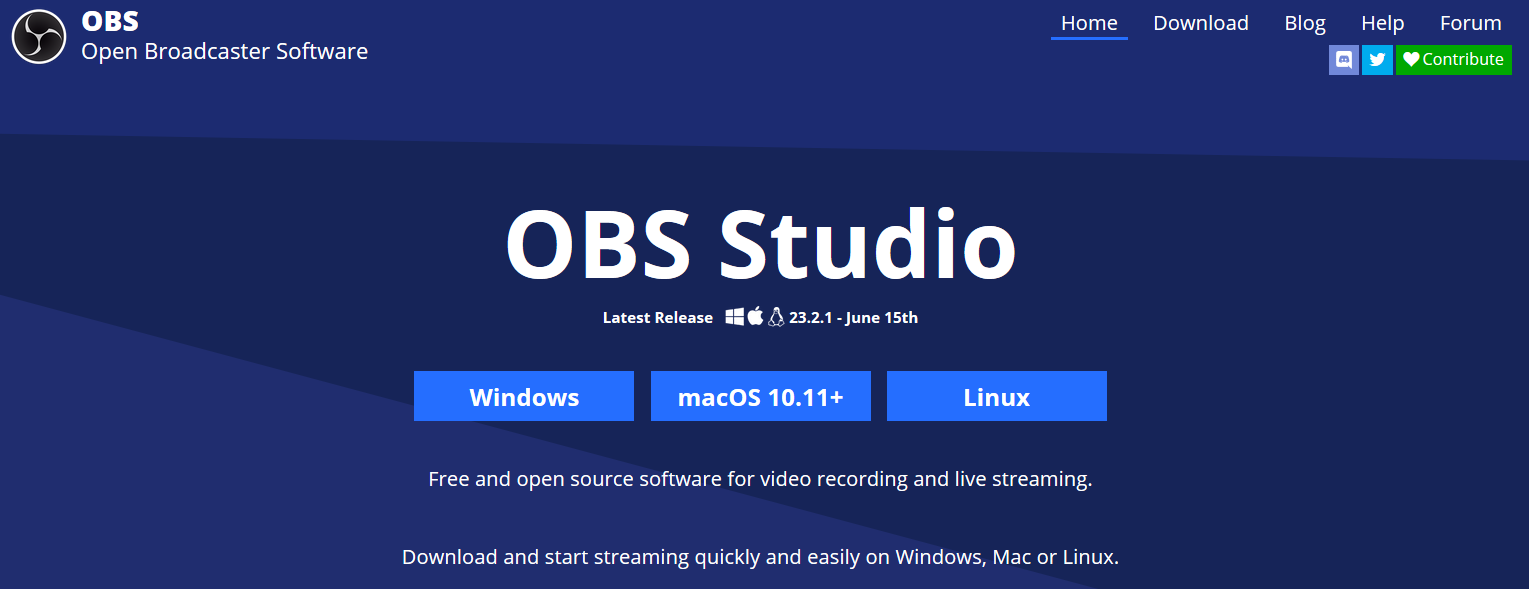
Setting up OBS Studio is the first step towards starting your Twitch streaming journey. OBS Studio, short for Open Broadcaster Software, is a free and powerful software that allows you to capture and stream your gameplay, webcam, and audio sources to various streaming platforms.
To begin, visit the official OBS website and download the software. Once installed, launch OBS Studio and follow these initial setup steps:
- Configure Output Settings: Access the “Settings” menu and navigate to the “Output” tab. Here, you can define the streaming bitrate, encoder, and other settings that determine the quality of your stream.
- Set Up Video and Audio Sources: In the “Sources” panel, you can add different sources such as your gameplay capture, webcam feed, and microphone audio. This allows you to customize your stream layout and provide a more engaging experience for your viewers.
- Adjust Video and Audio Settings: OBS Studio offers granular control over video and audio settings. Take some time to fine-tune these settings depending on your hardware capabilities and streaming preferences.
- Configure Hotkeys: Consider setting up hotkeys for convenient control over your stream. This enables you to easily start and stop your stream, switch between scenes, and perform other actions without having to manually navigate the software interface.
As you progress with OBS Studio, you may discover additional settings and features to enhance your streaming experience. It’s important to regularly explore the software’s capabilities and experiment with different configurations to find the optimal setup for your Twitch streaming ambitions.
Remember, setting up OBS Studio is just the first step in your Twitch streaming journey. In the following sections, we’ll delve deeper into advanced configuration, stream customization, and troubleshooting common issues to help you become a successful Twitch streamer.
Configuring Your Stream Settings
Configuring your stream settings in OBS Studio is crucial to ensure a smooth and high-quality streaming experience for both you and your viewers. Let’s explore the key settings you need to consider:
- Streaming Platform: Decide which streaming platform you want to use, such as Twitch, YouTube, or Facebook Live. Each platform may have specific settings and requirements, so familiarize yourself with their recommended streaming settings.
- Video Settings: In the “Settings” menu of OBS Studio, under the “Video” tab, you can adjust the base and output resolution, as well as the FPS (frames per second). It’s important to choose settings that match your internet upload speed and the capabilities of your streaming hardware.
- Bitrate: The bitrate determines the amount of data transmitted per second during your stream. A higher bitrate allows for better video quality but requires a higher internet connection speed. Experiment with different bitrates to find the optimal balance between streaming quality and internet stability.
- Encoder: OBS Studio offers multiple encoding options, such as software (x264) and hardware encoders (NVENC, AMD VCE). Hardware encoding can offload the CPU, but software encoding offers greater flexibility. Choose the encoder that best suits your hardware capabilities and streaming requirements.
- Audio Settings: Configure your audio settings to ensure your audience can hear you clearly. OBS Studio allows you to select your desired audio devices for both the microphone and desktop audio. Consider using a dedicated microphone and headphones for better audio quality.
- Stream Key: Most streaming platforms require a stream key to authenticate OBS Studio with your account. You can usually find this key in the settings or dashboard of your chosen platform. Input the stream key in OBS Studio’s “Stream” settings to establish the connection.
Remember to regularly test your stream settings and make adjustments as needed. It’s essential to monitor the stream’s performance and adapt if you encounter any issues such as dropped frames or audio desync. By fine-tuning your stream settings, you can deliver an immersive streaming experience that keeps your viewers engaged and coming back for more.
In the following sections, we will explore additional aspects of Twitch streaming, including customizing your stream layout, adding overlays and alerts, and troubleshooting common issues.
Selecting Your Streaming Platforms
When it comes to streaming your content to a wider audience, choosing the right streaming platform is crucial. There are several popular options available, each with its own unique features and audience. Consider the following factors when selecting your streaming platform:
- Twitch: Twitch is one of the most popular platforms for streaming gameplay and has a large and dedicated gamer community. It offers various features like built-in chat, emotes, and the ability to monetize your streams through subscriptions and donations.
- YouTube Live: YouTube Live is a great choice if you already have an established YouTube channel or if you plan to create content outside of just gaming. It offers wide visibility, integration with your existing YouTube content, and the potential for monetization through ads.
- Facebook Live: If you have a strong presence on Facebook or want to connect with your existing social circle, streaming on Facebook Live can be beneficial. It allows for easy sharing, interaction with followers, and potential reach to a broader audience.
- Mixer: Mixer, now integrated with Microsoft’s streaming service, offers unique features like interactive elements such as MixPlay, low-latency streaming, and a welcoming community. It can be a great choice if you seek a more interactive streaming experience.
- Other Platforms: Consider exploring other platforms that cater to specific niches or audiences. Some examples include DLive for cryptocurrency enthusiasts, Periscope for Twitter users, and Trovo for emerging streamers. Research these platforms to understand if they align with your content and goals.
It’s important to research and understand the terms, conditions, and community guidelines of each platform to ensure your content aligns with their policies. Additionally, consider the platforms’ streaming requirements, such as recommended stream settings, supported encoders, and integration options with streaming software like OBS Studio.
Lastly, don’t be afraid to multi-stream to different platforms simultaneously or switch platforms based on your growth and audience preferences. Experimenting and adapting to your audience’s needs can play a significant role in your streaming success.
Once you’ve chosen your streaming platform, the next step is to configure the necessary settings in OBS Studio, as discussed in the previous section, to establish a seamless connection and begin streaming your content to the world.
Adjusting Video and Audio Settings
Ensuring optimal video and audio settings in OBS Studio is vital to deliver a high-quality streaming experience. Let’s explore how you can fine-tune these settings to enhance the visual and audio aspects of your streams:
- Video Resolution: The video resolution determines the clarity and detail of your stream. It’s important to choose a resolution that suits your content and internet bandwidth. Common options include 720p (1280×720 pixels) and 1080p (1920×1080 pixels). Keep in mind that higher resolutions require more processing power and a stable internet connection.
- Frames Per Second (FPS): FPS refers to the number of images displayed per second in your stream. A higher FPS, such as 60fps, can result in smoother gameplay, but it requires more computing power. Consider your hardware capabilities and the demands of your content when selecting an appropriate FPS.
- Video Bitrate: The video bitrate determines the amount of data allocated to your video stream. It impacts the quality of your stream but also affects the required internet bandwidth. Higher bitrates result in better visual quality but require a more stable and faster internet connection. Experiment with different bitrates to find the optimal balance between quality and performance.
- Audio Levels: Properly adjusting audio levels ensures your audience can hear your voice clearly and the game sounds are balanced. OBS Studio allows you to control the audio levels of individual sources in the audio mixer. Test your audio levels beforehand and make necessary adjustments to avoid distorted or overpowering audio.
- Microphone Noise Suppression: OBS Studio offers different noise suppression filters to reduce background noise and improve the audio quality of your microphone. Experiment with these filters until you achieve a clean and crisp sound.
- Audio Monitoring: Enabling audio monitoring allows you to hear your streams’ audio in real-time. This is useful for ensuring the audio mix is well-balanced and that there are no issues with your audio sources during live broadcasts.
Take the time to test your video and audio settings before going live. Check for any pixelation, audio clipping, or other quality issues. It’s also advisable to consider the capabilities of your streaming hardware and internet connection to ensure a smooth streaming experience.
By adjusting and optimizing your video and audio settings, you can provide your viewers with an enjoyable and immersive streaming experience, keeping them engaged and coming back for more of your content.
Customizing Your Stream Layout
Customizing your stream layout is an essential aspect of creating a visually appealing and unique streaming experience. OBS Studio provides a range of options to help you design a layout that aligns with your brand and content. Let’s explore some key elements to consider when customizing your stream layout:
- Overlay: An overlay is a graphical element that sits on top of your gameplay or webcam feed. It can include your channel logo, social media handles, latest subscriber counts, and other relevant information. Creating a well-designed and branded overlay adds professionalism and helps establish your channel’s identity.
- Alerts: Alerts are visual and audio cues that appear on your stream when certain events happen, such as new subscribers, followers, or donations. OBS Studio allows you to configure and integrate different alert systems, such as Streamlabs or StreamElements, to enhance interactivity and engage with your audience.
- Chat Box: Integrating a chat box into your stream allows your viewers to interact with you and each other during the broadcast. OBS Studio provides options to display your chat box within the stream or on a separate screen. This fosters a sense of community and helps build relationships with your audience.
- Webcam Frame: If you use a webcam to show your face during the stream, consider adding a webcam frame to enhance its visual appeal. You can create a frame that matches your branding or theme, making your webcam feed more visually appealing without obstructing important gameplay elements.
- Scene Transitions: Scene transitions are visual effects that occur when switching between different scenes in OBS Studio. This adds a professional touch to your stream and makes transitions smoother and more visually appealing. Experiment with different transition styles to find the one that suits your content and style.
- Branding Elements: Incorporate your personal brand elements, such as logos, colors, and fonts, throughout your stream layout. Consistent branding helps viewers recognize your channel and builds a sense of familiarity and professionalism.
Remember, while customizing your stream layout is important, it’s crucial to avoid cluttering the screen or overwhelming your viewers with too many elements. Keep the overall design clean and focused, ensuring that the most important aspects, such as gameplay footage and your facecam, remain prominent.
Regularly review and update your stream layout as your channel evolves and grows. This shows your dedication to delivering a high-quality streaming experience and keeps your viewers engaged and excited to tune into your broadcasts.
Adding Overlays and Alerts
Adding overlays and alerts to your stream is a fantastic way to enhance the visual appeal and interactivity of your broadcasts. These elements can captivate and engage your viewers, creating a more immersive experience. Let’s explore how you can incorporate overlays and alerts into your stream using OBS Studio:
- Overlay: An overlay is a graphic layer that displays on top of your gameplay or webcam feed. It can include elements like your channel logo, social media handles, latest subscriber count, and donation goals. To add an overlay, create a graphic file with transparent sections for your OBS scenes. Then, add the image as a source in OBS Studio and position it accordingly.
- Alerts: Alerts are visual and audio cues that notify you and your viewers when certain events happen, such as new follows, subscribers, donations, or chat messages. OBS Studio allows integration with popular alert systems like Streamlabs or StreamElements. To set them up, create accounts with these platforms, customize the alert designs, and then link them to OBS Studio using URL sources or plugins.
- Widget Integration: Besides overlays and alerts, you can add interactive widgets to your stream that provide real-time information or engage your audience. Examples include donation tickers, chatbots, follower goals, and activity feeds. OBS Studio supports a variety of widget integration methods, such as browser sources or specific plugins, allowing you to easily incorporate these elements into your stream.
- Transition Effects: Transition effects are animations that occur when switching between scenes in OBS Studio. You can use these effects to create smooth transitions and add visual interest. For example, you might use a fade or slide effect to seamlessly transition from your starting screen to your gameplay scene. Explore the available transition options in OBS Studio and choose the ones that best suit your stream’s style.
- Customization: Customizing your overlays and alerts allows you to align them with your branding. Consider using matching colors, fonts, and design elements that reflect your personal style or the theme of your content. This consistency strengthens your brand identity and makes your stream visually appealing and professional.
When adding overlays and alerts, it’s important to strike a balance. Overloading your stream with too many elements can be distracting and take away from the main content. Experiment with different designs and placements to find the optimal setup that complements your stream without overwhelming your viewers.
Regularly update your overlays and alerts to keep them fresh and reflect any changes in your branding or channel goals. By incorporating these visually engaging elements, you can captivate your audience and create an interactive streaming experience that leaves a lasting impression.
Setting Up Scenes and Sources
Setting up scenes and sources in OBS Studio is essential for creating a dynamic and professional-looking stream. Scenes act as containers for different layouts, while sources are the individual elements you add to your scenes. Let’s explore how you can effectively set up scenes and sources in OBS Studio:
- Create Scenes: Start by organizing your stream layouts into different scenes. For example, you could have a scene for your starting soon screen, one for your gameplay, and another for your facecam. To create a scene, simply click on the “+” icon under the “Scenes” panel, give it a name, and customize it as needed.
- Add Sources: Once you have your scenes set up, it’s time to add sources. Sources are the visual, audio, and capture elements that make up your stream. Common sources include gameplay capture, webcam, microphone audio, overlays, chat box, and browser/webpage capture. You can add sources by clicking on the “+” icon in the “Sources” panel and selecting the appropriate option.
- Arrange and Resize Sources: After adding your sources, you can arrange them within your scenes to create your desired layout. Click and drag the sources to position them on the screen. You can also resize them by clicking and dragging the edges. Utilize the alignment and snapping features in OBS Studio to ensure precise placement and symmetry.
- Manage Source Order: The order in which you stack your sources determines their priority. Sources on top will appear in front of sources beneath them. To change the source order, simply click and drag them up or down in the “Sources” panel until you achieve the desired layering. This is especially important when arranging overlays or other elements that need to be displayed on top of your main content.
- Create Scene Transitions: Scene transitions add a professional touch to your stream by providing smooth visual effects when switching between scenes. To set up scene transitions in OBS Studio, go to the “Settings” menu, click on the “Transition” tab, and choose from the available transition types. Select a duration and customize other transition settings as desired.
Take the time to experiment with different scene layouts and source configurations to find the most visually appealing arrangement for your stream. Regularly review and adjust your scenes and sources based on changes to your content or branding to keep your stream fresh and engaging.
Remember, OBS Studio offers a variety of advanced features and customization options for scenes and sources. Don’t be afraid to explore plugins, third-party integrations, and community resources to enhance your stream’s visual appeal and interactivity.
Now that you have set up your scenes and sources, you’re ready to move on to optimizing OBS Studio specifically for streaming and engaging with your viewers during your live broadcasts.
Optimizing OBS Studio for Streaming
To ensure the best possible streaming experience, it’s important to optimize OBS Studio for smooth performance and efficient streaming. By following these optimization techniques, you can reduce latency, minimize dropped frames, and deliver high-quality streams to your viewers:
- Stream Settings: Review and fine-tune your stream settings, including the video bitrate, resolution, FPS, and encoder. Consider your internet upload speed and the capabilities of your hardware to find the optimal balance between streaming quality and stability.
- Hardware Acceleration: If your computer supports it, consider enabling hardware acceleration in OBS Studio. This offloads some of the encoding tasks to your GPU, freeing up your CPU for other processes and improving overall performance.
- Stream Keyframe Interval: Adjusting the stream keyframe interval can optimize video quality and reduce buffering. A keyframe interval of 2 seconds is usually recommended, but experiment with different values to find what works best for your stream and audience.
- Network and Bandwidth: Ensure a stable internet connection by connecting your computer directly to your router or using an Ethernet cable for improved reliability. Close unnecessary background applications that may consume bandwidth and cause network interruptions during your stream.
- Reduce CPU Usage: OBS Studio can be CPU-intensive, so it’s essential to minimize CPU usage to prevent performance issues. Reduce the load on your CPU by closing unnecessary applications, disabling resource-heavy features in OBS, and optimizing your encoding settings.
- Monitoring Performance: Keep a close eye on OBS Studio’s performance during your streams. Monitor your stream health through OBS Studio’s statistics window, which displays information like dropped frames, stream latency, and encoding bitrate. Tweak your settings if you notice any issues during your broadcasts.
- Regular Updates: Keep OBS Studio up to date by installing the latest version available. Updates often include bug fixes, performance improvements, and new features that can enhance your streaming experience.
- Backup Settings: Backup your OBS Studio settings periodically to ensure you can restore them if needed. This is especially important if you make significant changes or experiment with different configurations to avoid having to set everything up from scratch in case of any issues or computer crashes.
- Community Support: Take advantage of the vast OBS Studio community for assistance, tips, and resources. Join forums, watch tutorials, and participate in discussions to learn from experienced streamers and troubleshoot any problems you encounter.
Optimizing OBS Studio for streaming may require some trial and error as you fine-tune settings and discover what works best for your specific setup. Regularly evaluate your streaming performance and adapt your optimization techniques as needed to ensure a high-quality streaming experience for both you and your viewers.
With OBS Studio optimized, you’re now ready to go live and interact with your viewers. The next section will cover strategies for engaging with your audience and building a thriving community around your stream.
Going Live and Interacting with Viewers
Once you’ve optimized OBS Studio and prepared your stream, it’s time to go live and engage with your viewers. Interaction is key to building a loyal and supportive community around your stream. Here are some strategies for going live and effectively interacting with your audience:
- Announce Your Stream: Let your audience know in advance when you’ll be going live. Use your social media channels, Discord server, and email newsletter to announce the upcoming stream. Providing a schedule or regular streaming times helps your viewers plan to attend your broadcasts.
- Start with a Warm Welcome: As soon as you go live, greet your viewers and thank them for joining the stream. Creating a warm and welcoming atmosphere encourages interaction from the start.
- Monitor and Respond to Chat: Maintain an active presence in your chat to engage with your viewers. Respond to comments, questions, and messages. Incorporate chat interactions into your stream, calling out usernames and having conversations with your viewers to foster a sense of community.
- Encourage Viewers to Follow and Subscribe: Remind your viewers to follow or subscribe to your channel, and let them know about any benefits they’ll receive by doing so, such as access to exclusive emotes, badges, or subscriber-only events. Display alerts or notifications to recognize new followers or subscribers to make them feel appreciated.
- Incite Conversation: Pose questions, topics, or prompts to encourage your viewers to engage in chat discussions. This helps create an interactive and lively atmosphere during your stream.
- Host Giveaways and Contests: Organize occasional giveaways or contests during your streams to reward your viewers and encourage participation. This can involve giveaways of game keys, digital merchandise, or even viewer challenges within the game you’re playing. Make sure to clearly communicate the rules and guidelines for these events.
- Interact with Stream Elements: Incorporate interactive elements into your stream, such as games, polls, or real-time viewer voting, through plugins or third-party integrations. This allows your viewers to actively participate and impact the stream, making the experience more engaging and memorable.
- Show Appreciation: Throughout your stream, express gratitude for the support of your viewers. Recognize and thank those who subscribe, donate, or contribute in any way. This helps build a positive and appreciative atmosphere within your community.
- Take Constructive Feedback: Encourage your viewers to provide feedback on your stream. Listen to their suggestions and consider how you can improve your content, stream quality, or channel experience based on their input. This not only enhances the viewer experience but also demonstrates that you value their opinions.
Remember, effective interaction with your viewers goes beyond just one stream. Maintain consistent engagement across your content, social media channels, and other community platforms to build long-lasting relationships and foster a supportive community around your stream.
By actively interacting with your viewers, you create a friendly and enjoyable experience that encourages them to return to future streams and become advocates for your channel.
Troubleshooting Common Issues
Despite careful preparation, technical issues can still arise during your streams. It’s important to be proactive in troubleshooting common problems to minimize interruptions and deliver a consistent streaming experience. Here are some common issues you may encounter and strategies for addressing them:
- Internet Connectivity: If you experience a sudden drop in stream quality or buffering issues, check your internet connection. Ensure that you have a stable and sufficient upload speed. If necessary, reset your router, close bandwidth-intensive applications, or consider upgrading your internet plan.
- Encoding Performance: If your stream is dropping frames or suffering from stuttering, your encoding settings may be too demanding for your hardware. Try lowering your video bitrate, reducing the resolution or FPS, or enabling hardware encoding if available. OBS Studio’s statistics window provides real-time feedback on stream health and can help identify encoding issues.
- Audio Problems: If your viewers are having difficulty hearing your voice or if the audio quality is poor, ensure that your microphone is properly connected and configured in OBS Studio. Adjust audio levels and noise suppression settings to optimize audio clarity. Test your audio setup before each stream to catch any potential issues.
- Overlay Display Issues: If your overlays are not appearing or are displaying incorrectly in your stream, review their positioning and layer order within OBS Studio. Ensure that they are properly configured as sources and that they have transparency where needed. Refresh your browser sources if you’re using web-based overlays, and double-check source visibility settings.
- Game Compatibility: Some games may not capture properly or may have performance issues when using OBS Studio. Ensure that you are using the appropriate game capture mode (window, screen, or game capture), and check for any available game-specific compatibility updates or fixes from OBS Studio. In some cases, running the game in borderless windowed mode can resolve capturing issues.
- Stream Key Authentication: If you’re unable to connect to your streaming platform or receive an invalid stream key error, double-check that you have entered the correct stream key in OBS Studio’s stream settings. Verify that the stream key is still valid and hasn’t expired. If necessary, regenerate a new stream key from your streaming platform’s settings.
- Hardware and Software Conflicts: Occasionally, conflicts between OBS Studio and other hardware or software on your computer can cause issues. Update OBS Studio to the latest version, ensure that your operating system and drivers are up to date, and close any unnecessary background applications that could be causing conflicts or performance issues.
- Monitor Stream Health: Regularly monitor OBS Studio’s statistics, such as dropped frames, encoding bitrate, and stream latency, during your stream. If you notice any abnormalities, investigate the potential causes and make adjustments to address the issues promptly.
- Community Support: Leverage the OBS Studio community for assistance and advice when troubleshooting issues. Participate in online forums, chat groups, or dedicated OBS Studio communities to seek guidance from experienced streamers and community members who may have encountered similar problems.
Remember, troubleshooting is an ongoing process, and it’s essential to address issues promptly and learn from them. By staying proactive and responsive to technical difficulties, you can maintain a smooth and enjoyable streaming experience for both you and your viewers.