
What is Discord’s ‘Go Live’ Option?
Discord’s ‘Go Live’ option is a feature that allows users to stream their gameplay or screen to a select group of friends. It provides a convenient way to share your gaming experience or showcase your work in real-time without the need for third-party software.
With ‘Go Live’, you can broadcast your screen, including gameplay, videos, or any application window, directly to a voice channel on Discord. This means that your friends can watch the stream and interact with you through voice chat, creating an immersive and interactive streaming experience.
Whether you want to showcase your gaming skills, collaborate with others on a project, or simply hang out with friends and watch videos together, ‘Go Live’ can be a valuable feature in Discord.
It’s worth noting that Discord’s ‘Go Live’ option is currently available for PC users only and is compatible with Windows and macOS operating systems. However, friends on other platforms, such as mobile or the web version of Discord, can still join the voice channel and participate in the stream.
Now that you have a brief understanding of what Discord’s ‘Go Live’ option is, let’s explore how to enable and make the most out of this exciting feature.
How to Enable ‘Go Live’ on Discord
Enabling ‘Go Live’ on Discord is a straightforward process that allows you to start streaming in no time. Here’s a step-by-step guide on how to enable ‘Go Live’ on Discord:
- Open Discord on your PC and make sure you’re logged in to your account.
- Select a voice channel where you want to stream your content.
- Click on the ‘Settings’ icon located at the bottom left corner of the Discord window. It resembles a gear or cogwheel.
- In the settings menu, navigate to the ‘Voice & Video’ tab on the left sidebar.
- Scroll down until you find the ‘Advanced’ section and make sure the ‘Enable Quality of Service High Packet Priority’ option is checked. This helps optimize your streaming experience.
- Next, go to the ‘App Settings’ section, located just below the ‘Advanced’ section.
- Scroll down in the ‘App Settings’ section until you find the ‘Game Activity’ option.
- Toggle on the ‘Display currently running game as a status message’ option. This allows Discord to recognize the game or application you wish to stream.
- Once the ‘Display currently running game as a status message’ option is enabled, open the game or application you want to stream.
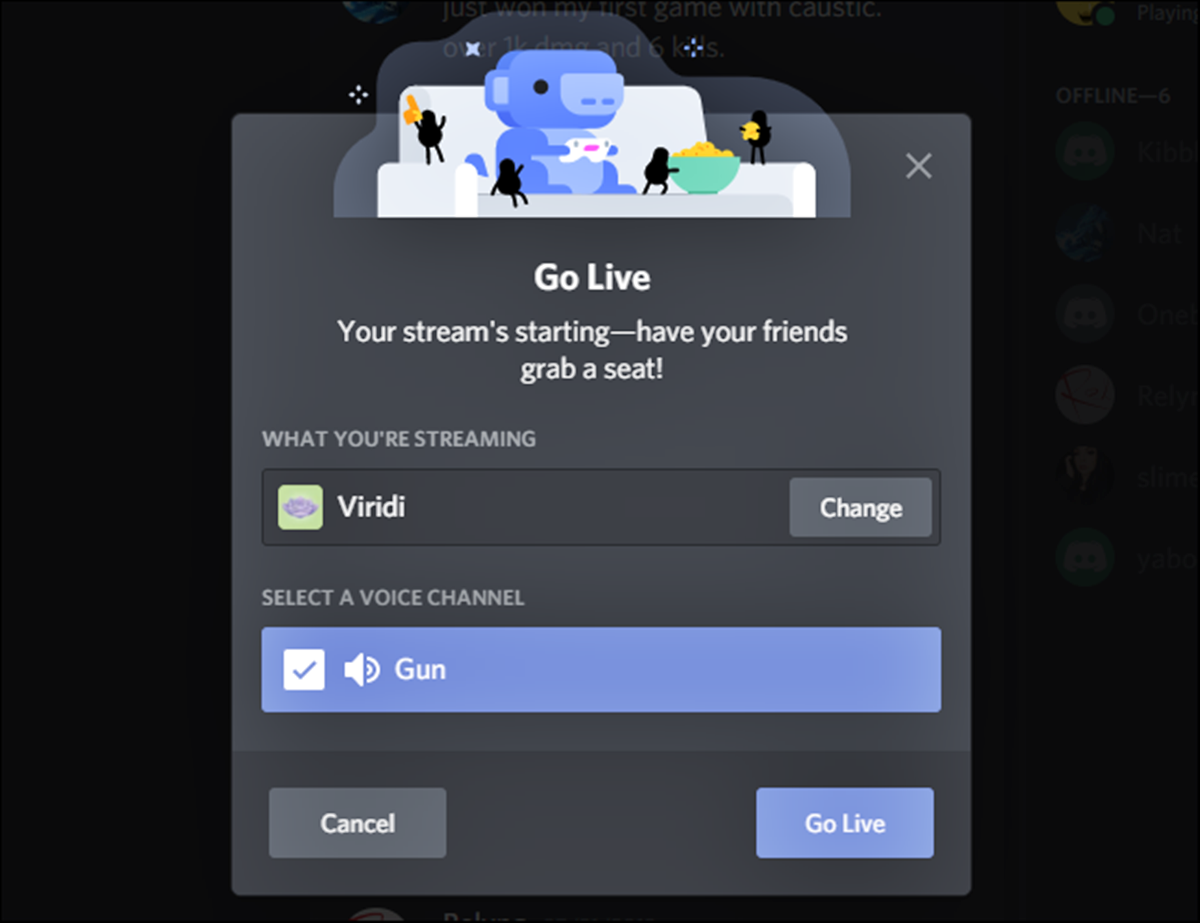
- Return to the Discord window, and you’ll see a purple ‘Go Live’ button at the bottom left corner next to your username.
- Click on the ‘Go Live’ button to start streaming your game or screen to the selected voice channel.
That’s it! You have successfully enabled ‘Go Live’ on Discord and are ready to share your content with your friends. Remember that while streaming, your friends can join the voice channel and engage with you through voice chat.
Note that Discord’s ‘Go Live’ has some limitations, such as a maximum stream quality of 720p and a limit of 50 viewers. However, for most casual streaming purposes, these limitations should not pose a significant issue.
Now that you know how to enable ‘Go Live’ on Discord, let’s move on to the next section, where we’ll explore how to prepare your streaming setup for the best experience.
Preparing Your Streaming Setup
Before you start streaming with Discord’s ‘Go Live’ option, it’s essential to ensure that your streaming setup is optimized for the best experience. Here are some key steps to consider:
1. Check your internet connection:
A stable and fast internet connection is crucial for smooth streaming. Make sure you have a reliable internet connection with sufficient upload speed to handle the stream.
2. Choose the right game or application:
Select a game or application that you want to stream to your audience. Ensure that the game or application you choose supports Discord’s ‘Go Live’ feature.
3. Stream settings:
Open Discord’s ‘Streaming’ settings and configure the appropriate settings, such as selecting the desired voice channel, setting the stream quality, and adjusting the stream volume.
4. Audio and video setup:
Make sure your microphone and webcam, if applicable, are properly connected and configured. Test the audio and video quality to ensure clear and high-quality output during the stream.
5. Overlay and notifications:
If you want to enhance your stream with overlays or notifications, consider using third-party tools or Discord’s built-in overlay feature. Customize them to your liking for a visually appealing streaming experience.
6. Monitor performance:
Keep an eye on your computer’s performance while streaming. Monitor your CPU and GPU usage, as well as your system temperature, to prevent any issues or overheating.
7. Engage with your audience:
Before you start streaming, think about how you’ll interact with your audience. Encourage viewers to engage in the chat or voice channel, and consider setting some ground rules to maintain a positive and enjoyable streaming environment.
By preparing your streaming setup, you’ll be able to provide your audience with a seamless and immersive experience while showcasing your content through Discord’s ‘Go Live’ feature.
Now that your setup is ready, let’s move on to the next section, where we’ll explore how to customize your stream to make it stand out.
Customizing Your Stream
Customizing your stream with Discord’s ‘Go Live’ option allows you to add a personal touch and make your stream stand out. Here are some tips for customizing your stream:
1. Stream title and description:
Give your stream an interesting and descriptive title that reflects the content you’ll be streaming. Consider adding a brief description to provide more context for your audience.
2. Overlay and graphics:
Add overlays, webcam frames, or other graphics to enhance the visual appeal of your stream. You can use third-party software or Discord’s built-in overlay feature to add these elements to your stream.
3. Camera placement:
If you’re using a webcam, experiment with different camera placements to find the best position. It’s important to ensure that the camera does not obstruct important elements of your game or application.
4. Stream quality and settings:
Adjust the stream quality and settings based on your internet connection and computer specifications. Be mindful of balancing the quality of your stream with smooth performance to provide the best experience for your viewers.
5. Microphone settings:
Tweak your microphone settings to achieve the best audio quality. You can adjust the volume, noise cancellation, and other settings to ensure your voice comes through clearly during the stream.
6. Background music:
If allowed by the game or application you’re streaming, consider adding background music to create an enjoyable ambiance for your viewers. Make sure the music is not too loud and does not overshadow your voice.
7. Stream moderation:
Establish clear guidelines for chat and voice channel behavior. Assign moderators to help manage the chat and ensure a positive and friendly streaming environment for everyone.
8. Stream branding:
Consider creating a unique stream brand with a logo or consistent visual elements. This helps viewers recognize your stream and creates a cohesive and professional look.
By customizing your stream, you can create a unique and memorable experience for your audience. Now that you’ve learned how to customize your stream, let’s move on to the next section, where we’ll explore how to invite friends to watch your stream.
Inviting Friends to Watch Your Stream
One of the great aspects of Discord’s ‘Go Live’ option is the ability to invite your friends to watch and interact with your stream. Here are a few ways to invite your friends to watch your stream:
1. Direct voice channel invitation:
The most straightforward way to invite your friends is to send them a direct invitation to join the voice channel where you’re streaming. You can do this by right-clicking on their name in Discord and selecting ‘Invite to Voice Channel.’
2. Server-wide announcement:
If you want to invite everyone on your server to watch your stream, you can make a server-wide announcement. This can be done by using the ‘@everyone’ or ‘@here’ mention in a text channel, accompanied by a brief message about your stream.
3. Personal messages:
If you prefer a more personal approach, you can send individual messages to your friends, letting them know about your stream and providing them with the necessary details to join.
4. Discord server link:
If you have a dedicated Discord server for your streaming community, you can share the server link with your friends and encourage them to join. This provides a centralized place for all your streams and allows friends to receive notifications whenever you go live.
5. Social media promotion:
Extend your reach beyond Discord by promoting your stream on social media platforms. Share the link to your Discord server or directly inform your friends about the stream through platforms like Twitter, Facebook, or Instagram.
6. Stream announcements:
Make use of different communication channels to announce your stream. Utilize your personal website, blog, or email newsletters to inform your friends and followers about your streaming schedule and provide them with the necessary details to join.
7. Follow-up reminders:
If your friends are busy or tend to forget, consider sending follow-up reminders closer to your stream start time. This can help ensure they don’t miss out on watching and interacting with your stream.
By using these methods to invite your friends, you can gather an enthusiastic audience that will support and engage with your stream. Now that you know how to invite your friends to watch your stream, let’s move on to the next section, where we’ll explore troubleshooting common issues with ‘Go Live’.
Troubleshooting ‘Go Live’ Issues
While Discord’s ‘Go Live’ option generally works smoothly, you may encounter some issues that can hinder your streaming experience. Here are some common issues and troubleshooting steps:
1. Discord not recognizing the game or application:
If Discord doesn’t detect the game or application you’re trying to stream, make sure you have the ‘Display currently running game as a status message’ option enabled in Discord’s ‘App Settings’. If the issue persists, try restarting Discord or your computer.
2. Low stream quality or lag:
If you’re experiencing low stream quality or lag, check your internet connection speed. Ensure that you have a stable and fast internet connection with sufficient upload speed. Additionally, close any unnecessary applications or processes that may be eating up your bandwidth.
3. Audio or microphone issues:
If you’re having audio or microphone issues during your stream, confirm that your microphone is properly connected and configured. Check Discord’s audio settings to ensure the correct input and output devices are selected. You can also try restarting Discord or your computer.
4. Stream freezing or stuttering:
If your stream is freezing or stuttering, it may be due to performance issues on your computer. Reduce the graphics settings in the game or application you’re streaming to ease the strain on your system. Close any unnecessary programs or background processes that may be hogging system resources.
5. Friends unable to join the voice channel:
If your friends are having trouble joining the voice channel where you’re streaming, ensure that the voice channel has the appropriate permissions for everyone to join. Check the server settings and verify that voice channel permissions allow for access and participation.
6. ‘Go Live’ button grayed out:
If the ‘Go Live’ button is grayed out and you’re unable to start the stream, make sure you’re in a voice channel and have the correct permissions. Additionally, check that you have Discord’s ‘Go Live’ feature enabled in your account settings.
7. Discord client or app issues:
If you’re experiencing general issues with Discord’s client or app, consider updating to the latest version. Check Discord’s official channels, such as their Twitter or website, for any known issues or service disruptions. You can also try reinstalling Discord to resolve any potential software conflicts.
If you’re still encountering issues with ‘Go Live’ after troubleshooting, it may be worthwhile to reach out to Discord’s support team or seek assistance from the Discord community for further guidance and solutions.
Now that you’re equipped with troubleshooting knowledge, let’s explore some alternatives to Discord’s ‘Go Live’ option in the next section.
Alternatives to Discord’s ‘Go Live’ Option
While Discord’s ‘Go Live’ option is a convenient and popular choice for streaming, there are alternative platforms that offer similar features. Here are some alternatives to Discord’s ‘Go Live’ option:
1. OBS Studio:
OBS Studio (Open Broadcaster Software) is a free and open-source software that enables you to capture and stream your screen. It provides extensive customization options and supports various streaming platforms, making it a favorite among professional streamers.
2. Streamlabs OBS:
Streamlabs OBS is a user-friendly streaming software that integrates with popular streaming platforms. It offers intuitive controls for setting up and customizing your stream, as well as additional features like chat overlays, alerts, and donation integrations.
3. XSplit:
XSplit is a popular streaming software that offers both free and premium versions. It provides a user-friendly interface, extensive customization options, and supports various streaming platforms. XSplit also offers additional plugins and features to enhance your streaming experience.
4. Twitch Studio:
Twitch Studio is a streaming software specifically designed for Twitch streamers. It offers a simplified setup process and provides tools to customize your stream layout, add overlays, and interact with your audience. It’s particularly suitable for beginners looking for an easy-to-use streaming solution.
5. YouTube Live:
If you’re primarily focused on streaming to YouTube, YouTube Live is an excellent alternative. It allows you to stream directly to the YouTube platform, interact with your viewers through live chat, and provides various tools for managing your stream, including adjustable stream quality.
6. Facebook Gaming:
If you’re looking to stream on the Facebook platform, Facebook Gaming provides tools and features specifically tailored for gaming streamers. It offers options for streaming from various devices, engaging with your viewers, and monetizing your content.
These are just a few of the alternative options available for streaming if Discord’s ‘Go Live’ option doesn’t meet your needs. Each platform has its own unique features, customization options, and community, so it’s worth exploring different options to find the one that best suits your streaming goals.
With the availability of these alternatives, you can find the perfect streaming solution that aligns with your preferences and requirements.