
System Requirements
Before you dive into the world of broadcasting with Open Broadcaster Software (OBS), it’s important to ensure that your system meets the necessary requirements. By having the right hardware and software, you can optimize OBS’s performance and create high-quality streams or recordings. Here’s what you need:
Operating System: OBS is compatible with Windows, macOS, and Linux. Ensure that your system meets the minimum requirements for the specific operating system you’re using.
Processor: A multi-core processor is recommended for smooth operation. The faster the processor, the better the performance. OBS can utilize multiple cores, allowing for efficient encoding and streaming.
Memory (RAM): Having sufficient memory is crucial, especially when dealing with resource-intensive tasks like streaming. Aim for at least 8GB of RAM to ensure smooth operation.
Graphics Card: A dedicated graphics card is recommended, as it offloads the encoding process from the CPU. This helps improve performance and overall stream quality. Make sure your graphics card has the necessary capabilities for encoding, such as NVIDIA NVENC or AMD VCE.
Internet Connection: A stable and high-speed internet connection is essential for streaming. OBS recommends a minimum upload speed of 3-5 Mbps for standard definition streaming and 10 Mbps or higher for high-definition streaming.
Storage: OBS requires space to store recordings or local files during streaming. Ensure that you have enough free disk space to accommodate your recordings and other media.
Additional Hardware: Depending on your streaming needs, you may require additional equipment such as a microphone, webcam, or capture card. Consider the specific requirements of your setup and ensure that any additional hardware is compatible with OBS.
Software Dependencies: OBS relies on various software dependencies to function properly. Make sure you have the necessary dependencies installed, such as DirectX, Microsoft Visual C++, and the latest graphics card drivers.
By meeting these system requirements, you’ll be on your way to a smooth and seamless broadcasting experience with OBS. Take the time to ensure that your system is up to par before diving into the world of streaming and recording. With a well-equipped setup, you can unleash your creativity and engage your audience through captivating broadcasts.
Downloading OBS
Downloading Open Broadcaster Software (OBS) is a straightforward process that allows you to quickly get started with your broadcasting journey. OBS is an open-source software, which means it’s completely free to download and use. Follow the steps below to download OBS:
Step 1: Visit the OBS Website: Open your preferred web browser and navigate to the official OBS website at https://obsproject.com.
Step 2: Choose Your Operating System: On the OBS website homepage, you’ll find different options for Windows, macOS, and Linux. Click on the corresponding download button for your operating system.
Step 3: Download OBS: Once you click on the download button, your browser will initiate the download process. OBS is a relatively small file, so the download should complete quickly. Be patient while the file is being downloaded.
Step 4: Run the Installer: Locate the downloaded OBS installer file on your computer and double-click on it to run the installation process. Follow the on-screen prompts to proceed with the installation.
Step 5: Choose Installation Options: During the installation process, you may be prompted to choose additional options, such as creating desktop icons or starting OBS automatically when your computer boots up. Make sure to select the options that suit your preferences.
Step 6: Complete the Installation: Once you’ve selected your desired installation options, the OBS installer will complete the installation process. It may take a few moments to install all the necessary files.
Step 7: Launch OBS: After the installation is complete, you can launch OBS by clicking on the desktop shortcut, if you selected that option, or by searching for OBS in your computer’s applications or programs list.
By following these steps, you’ll have successfully downloaded and installed OBS on your computer. With OBS now on your system, you’re one step closer to creating captivating broadcasts and sharing your content with the world. In the next sections, we’ll explore the initial setup and configuration of OBS, allowing you to personalize your streaming experience and create professional-quality broadcasts.
Installing OBS
Once you have downloaded the Open Broadcaster Software (OBS) installer, it’s time to install the software on your computer. The installation process is simple and straightforward. Follow the steps below to install OBS:
Step 1: Locate the Installer: Navigate to the folder where you saved the OBS installer file after downloading it. It is usually located in the Downloads folder or the location you specified during the download process.
Step 2: Run the Installer: Double-click on the OBS installer file. This will launch the installation wizard and guide you through the installation process.
Step 3: Choose the Installation Language: The installation wizard will prompt you to select the language for the installation. Choose your preferred language from the options provided and click “Next” to proceed.
Step 4: Review the License Agreement: Read through the OBS license agreement carefully. If you agree to the terms and conditions, select the checkbox indicating your acceptance and click “Next.”
Step 5: Select the Installation Location: Choose the destination folder where you want OBS to be installed. By default, OBS will be installed in the Program Files folder on your primary disk. Click “Next” to continue.
Step 6: Choose Components: The installation wizard will present you with a list of components to install. These components include the core OBS software, browser source, and plugins. By default, all components are selected. If you want to customize your installation, you can uncheck the components you don’t need. Click “Next” to proceed.
Step 7: Select Additional Tasks: This step allows you to choose additional tasks, such as creating desktop shortcuts or starting OBS automatically. Select the desired options and click “Next.”
Step 8: Install OBS: Review your selected options and click “Install” to begin the installation process. OBS will now be installed on your computer. This may take a few moments.
Step 9: Complete the Installation: Once the installation is complete, click “Finish” to exit the installation wizard.
Step 10: Launch OBS: You can now launch OBS by double-clicking the desktop shortcut or searching for OBS in your computer’s applications or programs list.
With OBS successfully installed on your computer, you are now ready to explore its features and start creating professional-quality broadcasts. The next sections will guide you through the initial setup and configuration process to help you personalize your streaming experience.
Setting up OBS for the First Time
Now that you have installed Open Broadcaster Software (OBS) on your computer, it’s time to set it up for the first time. This initial setup process involves configuring basic settings and adjusting preferences to ensure a smooth and personalized streaming experience. Follow the steps below:
Step 1: Open OBS: Launch OBS by double-clicking the desktop shortcut or searching for OBS in your computer’s applications or programs list.
Step 2: Run the Auto-Configuration Wizard: When you launch OBS for the first time, you’ll be prompted to run the Auto-Configuration Wizard. This wizard will help optimize OBS’s settings based on your computer’s hardware and internet connection. Click “Yes” to run the wizard.
Step 3: Select Optimization Preferences: The Auto-Configuration Wizard will present you with different optimization options. Choose the appropriate settings based on your streaming needs. If you’re unsure, select the “Optimize just for recording” option, as it provides a good balance between streaming and recording performance.
Step 4: Complete the Optimization Process: Once you’ve selected your preferences, click “Next” to proceed with the optimization process. OBS will run a series of tests to determine the best settings for your system.
Step 5: Review the Recommended Settings: After completing the optimization process, OBS will display a summary of the recommended settings. Review these settings and click “Apply Settings” to save them.
Step 6: Adjust Video and Audio Settings: Once the optimization process is complete, you can adjust your video and audio settings to fit your preferences. Go to the “Settings” menu in OBS and navigate to the “Video” and “Audio” sections. Here, you can configure aspects such as video resolution, frame rate, and audio devices.
Step 7: Customize Hotkeys: Hotkeys allow you to control various functions in OBS with the press of a key. You can assign hotkeys for tasks like starting/stopping your stream, switching scenes, or muting/unmuting your microphone. Go to the “Hotkeys” section in OBS settings to customize your hotkey preferences.
Step 8: Configure Stream/Recording Settings: If you plan to stream or record your broadcasts, you’ll need to configure your stream/recording settings. Go to the “Stream” or “Output” sections in OBS settings to enter your stream platform and streaming/recording preferences. This includes selecting the streaming service, adjusting bitrate, and choosing the desired resolution and framerate.
Step 9: Save and Apply Settings: Once you’ve adjusted all the desired settings, make sure to save and apply the changes. OBS will now be configured according to your preferences.
With OBS set up for the first time, you’re ready to start creating captivating broadcasts and sharing your content with the world. The next sections will guide you through adding sources, setting up scenes, and customizing your OBS setup to enhance your streaming experience.
Configuring OBS Settings
Once you have completed the initial setup of Open Broadcaster Software (OBS), it’s time to dive into the configuration of OBS settings. Configuring the settings will allow you to fine-tune your streaming experience and optimize OBS for your specific needs. Here’s how you can configure OBS settings:
Step 1: Open OBS: Launch OBS by double-clicking the desktop shortcut or searching for OBS in your computer’s applications or programs list.
Step 2: Access Settings: Click on the “Settings” button at the bottom right corner of the OBS interface. This will open the settings window where you can configure various OBS settings.
Step 3: Video Settings: In the “Video” tab, you can adjust the base and output resolution, frames per second (FPS), and other video-related settings. Choose the resolution and FPS that best suit your needs and ensure they align with your hardware capabilities.
Step 4: Audio Settings: Navigate to the “Audio” tab to configure the audio settings. Here, you can select the audio devices for your microphone and speakers/headphones. Adjust the volume levels to ensure proper audio balance during your broadcasts.
Step 5: Hotkeys and Shortcuts: The “Hotkeys” tab allows you to customize the shortcuts for various actions in OBS. Assign hotkeys for tasks like starting/stopping streams, switching scenes, muting/unmuting audio sources, and more. Customize these shortcuts to streamline your workflow and improve efficiency.
Step 6: Encoding Settings: In the “Output” tab, you’ll find the encoding settings for your streams or recordings. Adjust the bitrate, encoder, and other relevant settings based on your internet upload speed and desired stream quality. Experiment with these settings to find the right balance between video quality and network stability.
Step 7: Stream/Recording Settings: The “Stream” or “Output” tab also allows you to configure stream-specific settings. Enter the details of your streaming platform, including the stream key and server location. If you’re recording locally, set the output directory and adjust the recording format and quality according to your preferences.
Step 8: Advanced Settings: For more advanced configuration options, click on the “Advanced” tab. Here, you can fine-tune settings related to networking, scene buffering, and other OBS features. Unless you have specific requirements, it’s generally recommended to leave most of the advanced settings at their default values.
Step 9: Apply and Save: Once you have configured all the necessary OBS settings, click on the “Apply” button to save the changes. OBS will now use these settings for your future broadcasts or recordings.
By taking the time to configure OBS settings to suit your needs, you can optimize your streaming experience and ensure high-quality broadcasts. Remember to experiment with different settings and adjust them as needed to achieve the desired results. In the next sections, we’ll explore adding sources, setting up scenes, and customizing your OBS setup further to enhance your streaming creativity.
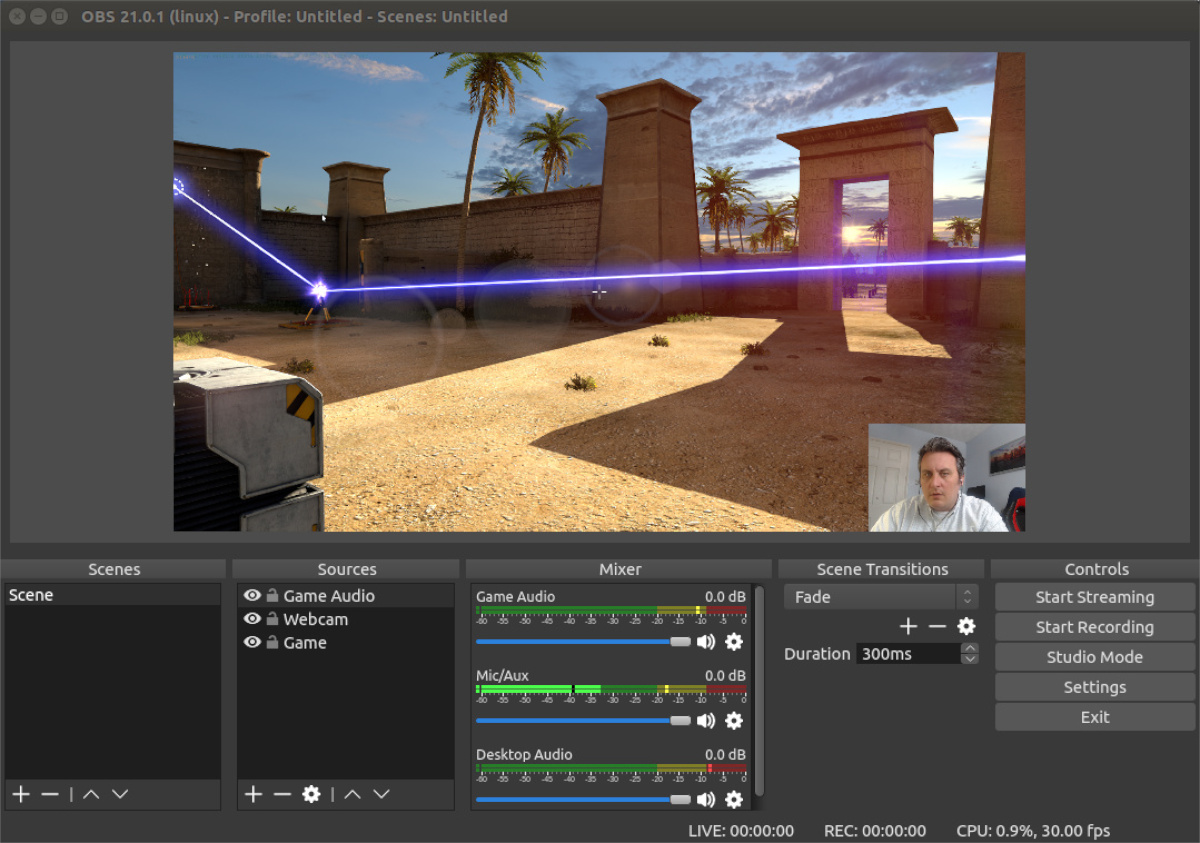
Adding Sources to OBS
One of the key features of Open Broadcaster Software (OBS) is the ability to add different sources to your scenes. Sources are the various elements that make up your broadcast, such as your webcam feed, images, videos, text overlays, and more. By adding sources, you can customize your streams with professional-looking visuals and engaging content. Here’s how you can add sources to OBS:
Step 1: Open OBS: Launch OBS by double-clicking the desktop shortcut or searching for OBS in your computer’s applications or programs list.
Step 2: Set Up Your Scene: Before adding sources, you need to create and set up your scene. A scene is a collection of sources that will be displayed together in your broadcast window. To create a scene, click on the “+” icon under the “Scenes” section in the OBS interface, and give it a name.
Step 3: Add a Source: To add a source, click on the “+” icon under the “Sources” section in the OBS interface, and select the type of source you want to add. OBS offers a variety of source options, including “Display Capture” (captures your entire screen), “Window Capture” (captures a specific window), “Video Capture Device” (for webcams), “Image” (to add images), and “Text” (to add text overlays).
Step 4: Configure the Source: Once you’ve selected the type of source you want to add, a new window will appear where you can configure its settings. This may include selecting the specific screen or window to capture, adjusting the video settings, browsing for image files, or customizing the text overlays. Configure the settings as per your requirements and click “OK” to save the changes.
Step 5: Arrange and Edit Sources: OBS allows you to rearrange and edit the sources within your scene. You can drag and drop sources to reposition them, resize them by dragging the edges, and adjust their properties by right-clicking on the source and selecting “Properties.” This gives you full control over how your sources are displayed in your broadcast.
Step 6: Add Multiple Sources: Repeat Steps 3 to 5 to add additional sources to your scene. You can add multiple sources, such as images, webcams, text overlays, videos, browser sources, and more. Experiment with different combinations of sources to create personalized and dynamic scenes.
Step 7: Preview Your Scene: Before going live or recording, it’s essential to preview your scene to ensure everything looks and functions as expected. Click on the “Preview” button in the OBS interface to see how your scene will appear to the viewers. Make any necessary adjustments to the sources or scene layout if needed.
Step 8: Go Live or Start Recording: Once you’re satisfied with your scene setup, you can go live by clicking on the “Start Streaming” button or start recording by clicking on the “Start Recording” button. OBS will begin broadcasting your scene, including all the added sources, to your selected stream platform or record it locally.
By adding sources to your scenes, you can elevate the quality of your broadcasts and engage your viewers with visually appealing content. Take the time to explore and experiment with the different source options offered by OBS to create captivating and professional-looking streams.
Setting up Scenes in OBS
Scenes are an essential component of Open Broadcaster Software (OBS) that allow you to organize and switch between different layouts or setups during your streams or recordings. With scenes, you can create seamless transitions and present specific content to your audience. Here’s how you can set up scenes in OBS:
Step 1: Open OBS: Launch OBS by double-clicking the desktop shortcut or searching for OBS in your computer’s applications or programs list.
Step 2: Create a New Scene: In the OBS interface, navigate to the “Scenes” section and click on the “+” icon. Enter a name for your scene and click “OK.” This will create a new scene where you can add sources and configure your layout.
Step 3: Add Sources to the Scene: To populate your scene, click on the “+” icon under the “Sources” section and select the source you want to add. This can include video sources, image files, text overlays, webcams, and more. Configure the properties of each source to your preference (e.g., adjust sizes, positions, and opacity).
Step 4: Arrange Sources in the Scene: Once you have added the desired sources to the scene, you can rearrange them by dragging and dropping. OBS allows for easy positioning and resizing of sources within the scene canvas. Experiment with different layouts and arrangements to achieve the desired visual composition.
Step 5: Create Multiple Scenes: To set up additional scenes, repeat Steps 2 to 4. Each scene can have a different combination of sources and layouts. For example, you may have one scene for a full-screen display capture and another for a webcam overlay. You can switch between scenes during your stream or recording to present different content.
Step 6: Transition Between Scenes: OBS offers various transitions that you can use to switch between scenes smoothly. To apply a transition effect, right-click on a scene, select “Transition,” and choose the desired transition type. You can choose from options like fade, swipe, stinger, and more. Test different transitions to find the one that suits your style and content.
Step 7: Preview and Edit Scenes: Prior to going live or recording, use the OBS preview feature to review each scene. Click on the “Preview” button located in the lower-right corner to see how the scene will appear to your viewers. Make any necessary adjustments to the sources, positions, or transitions to ensure everything is visually appealing and functions correctly.
Step 8: Switch between Scenes: To switch between scenes during your stream or recording, you can use the OBS interface, keyboard shortcuts, or assign hotkeys to specific scenes. This enables you to seamlessly transition from one layout to another, enhancing the viewer’s experience and keeping your content engaging.
By setting up scenes in OBS, you have the flexibility to present your content in a dynamic and organized manner. It allows you to adapt your visuals for different segments, activities, or transitions, ensuring your broadcasts are visually appealing and captivate your audience.
Customizing Sources and Scenes
Open Broadcaster Software (OBS) offers a wide range of customization options, allowing you to personalize your sources and scenes to create unique and visually appealing broadcasts. By customizing your sources and scenes, you can enhance the overall quality and engagement of your streams or recordings. Here’s how you can customize them:
Customizing Sources:
1. Positioning and Resizing: Each source added to a scene can be positioned and resized within the canvas. Click and drag the edges of the source to adjust its size, and click and drag the source itself to reposition it. Experiment with different placements to find the best arrangement for your content.
2. Source Properties: Right-click on a source and select “Properties” to access its specific properties. Depending on the source type, you can adjust settings such as video resolution, chroma keying, opacity, font styles for text overlays, and more. Tweak these properties to fine-tune the appearance and behavior of your sources.
3. Filters: OBS offers various filters that can be applied to sources to enhance their visuals. Filters include options like color correction, crop/resize, chroma key, noise suppression, and more. Experiment with different filters to add professional touches to your sources and create unique visual effects.
4. Source Order: The order of sources in a scene determines how they are layered and displayed. You can change the source order by dragging and dropping them within the scene hierarchy. This allows you to control which sources appear in front or behind others, creating depth and ensuring the desired visibility of your content.
Customizing Scenes:
1. Scene Transitions: OBS provides different transition effects to smoothly switch between scenes. Right-click on a scene, select “Transition,” and choose a transition type such as fade, swipe, stinger, or others. Experiment with different transitions to create visually appealing switches between scenes.
2. Scene Thumbnails: You can customize the thumbnail image that represents a scene in the OBS interface. Right-click on a scene, select “Properties,” and click on the “Set Thumbnail” button. Choose an image that visually represents the content of the scene, making it easier for you to navigate between scenes during a stream or recording.
3. Scene Collection: OBS allows you to save and load different scene collections. This is beneficial if you have multiple templates or setups for different streams or recording sessions. Save your scene layouts as collections to access them quickly, making it easier to switch between different configurations for specific content or events.
4. Scene Transitions Transition between scenes to create smooth and visually pleasing switches. Use OBS’s built-in transition features to add fade-outs, fade-ins, wipes, and other effects that provide a professional look and feel to your broadcasts.
By customizing your sources and scenes, you can create a visually captivating and unique broadcasting experience. Experiment with various settings, filters, and scene transitions to find the perfect blend that reflects your branding and style. Customization not only enhances the visual appeal of your content but also adds that creative touch that sets your broadcasts apart.
Adding Audio to OBS
Audio plays a crucial role in creating an immersive and engaging streaming or recording experience with Open Broadcaster Software (OBS). By adding audio sources to your scenes, you can provide commentary, play background music, or include sound effects to enhance your content. Here’s how you can add audio to OBS:
Step 1: Open OBS: Launch OBS by double-clicking the desktop shortcut or searching for OBS in your computer’s applications or programs list.
Step 2: Access Audio Settings: Click on the “Settings” button at the bottom right corner of the OBS interface. This will open the settings window where you can adjust various OBS settings, including audio settings.
Step 3: Set Default Devices: In the “Audio” tab, you’ll find options for selecting your audio devices. Choose the appropriate devices for your microphone and speakers/headphones. It’s important to ensure that you have the correct input and output devices selected to capture and play back audio effectively.
Step 4: Add Audio Capture Source: To capture audio from your microphone or an external device, such as a mixer or audio interface, add an audio capture source to your scene. Click on the “+” icon under the “Sources” section, select “Audio Input Capture,” and choose the desired audio source from the dropdown menu.
Step 5: Adjust Audio Levels: Once you’ve added an audio capture source, OBS provides options to adjust the audio levels. Simply click on the gear icon next to the audio source, select “Properties,” and adjust the volume levels as needed. You can also enable filters to improve audio quality, such as noise suppression or equalization.
Step 6: Add Audio Output Capture: If you want to capture audio from your computer or a specific application, such as game audio or music, add an audio output capture source. Click on the “+” icon under the “Sources” section, select “Audio Output Capture,” and choose the desired audio source from the dropdown menu.
Step 7: Adjust Audio Output Levels: Similar to adjusting audio levels for input sources, you can also modify the volume levels for output sources. Click on the gear icon next to the audio output capture source, select “Properties,” and adjust the volume as necessary.
Step 8: Accommodate Multiple Audio Sources: OBS allows you to add multiple audio sources to your scenes. This enables you to mix and control the volume levels of each source independently. You can also use the mixer section in OBS to adjust audio levels in real-time during your stream or recording.
Step 9: Test and Monitor Audio: Before going live or recording, it’s important to test and monitor your audio to ensure it’s coming through correctly. Use OBS’s audio monitoring feature to listen to your audio sources in real-time. This ensures that your voice, background music, or other audio elements are balanced and clear.
Step 10: Preview and Adjust: While in preview mode, carefully listen to your audio sources along with your video sources. Make any necessary adjustments to volume levels, filters, or audio sources themselves to achieve the desired audio quality and balance.
By adding audio sources and adjusting audio settings in OBS, you can create an immersive and engaging experience for your viewers. Whether it’s adding commentary, playing music, or incorporating sound effects, audio brings your content to life and enhances the overall quality of your streams or recordings.
Adding Filters to Sources in OBS
Open Broadcaster Software (OBS) provides a wide range of filters that allow you to enhance and modify your audio and video sources. Filters can help you improve the quality, appearance, and overall presentation of your sources, creating a polished and professional look for your streams or recordings. Here’s how you can add filters to sources in OBS:
Step 1: Open OBS: Launch OBS by double-clicking the desktop shortcut or searching for OBS in your computer’s applications or programs list.
Step 2: Add a Source: Click on the “+” icon under the “Sources” section to add the desired audio or video source to your scene. This can include a webcam feed, image file, video file, audio capture, or any other supported source.
Step 3: Access Source Filters: Right-click on the source you added and select “Filters” from the context menu. This will open the filters window, where you can add and customize various filters for the selected source.
Step 4: Add a Filter: In the filters window, click on the “+” icon and choose the filter you want to apply to the source. OBS offers a wide range of filters, such as crop/resize, color correction, noise suppression, chroma key, and more.
Step 5: Configure the Filter: Once you’ve added a filter, select it from the list and configure its settings according to your requirements. Each filter has different parameters that can be adjusted to achieve the desired effect. For example, with the Color Correction filter, you can change the brightness, contrast, saturation, or apply a specific color overlay.
Step 6: Modify Filter Order: The order of filters can impact their effects on the source. You can change the order by selecting a filter and using the up and down arrows to move it higher or lower in the list. This allows you to fine-tune the appearance and behavior of the filters to achieve the desired result.
Step 7: Apply Additional Filters: You can add multiple filters to a single source to combine their effects. Experiment with different filters and their settings to create unique visual enhancements or audio improvements for your sources. For example, you can combine color correction, noise suppression, and sharpness filters for a webcam feed to achieve a more professional look.
Step 8: Preview and Fine-tune: Use the preview function in OBS to see how the applied filters affect your source in real-time. Tweak the filter settings as needed to achieve the desired outcome. Pay attention to how the filters interact with each other and adjust accordingly to maintain visual coherence.
Step 9: Save and Apply: Once you’re satisfied with the applied filters and their settings, click “OK” to save the changes. OBS will now apply the selected filters to the source in your scene.
By adding and customizing filters to your sources in OBS, you can elevate the quality and appearance of your streams or recordings. Filters allow you to enhance visuals, remove noise, correct colors, and apply other adjustments to make your content more visually appealing and professional-looking.
Setting up Hotkeys in OBS
Hotkeys in Open Broadcaster Software (OBS) serve as keyboard shortcuts for performing various actions during your streams or recordings. They allow you to quickly and efficiently control your broadcast without having to navigate through menus or click on buttons. Setting up hotkeys in OBS is straightforward and can greatly enhance your workflow. Here’s how you can do it:
Step 1: Open OBS: Launch OBS by double-clicking the desktop shortcut or searching for OBS in your computer’s applications or programs list.
Step 2: Access Hotkey Settings: Click on the “Settings” button at the bottom right corner of the OBS interface. This will open the settings window where you can configure various OBS settings, including hotkeys.
Step 3: Navigate to Hotkey Settings: In the settings window, locate and click on the “Hotkeys” tab. Here, you’ll find a list of available actions and their associated hotkey assignments.
Step 4: Assign Hotkeys: To assign a hotkey to a specific action, click on the empty space next to the action and press the desired key combination on your keyboard. OBS will automatically register the key combination as the hotkey for that action.
Step 5: Remove or Modify Hotkeys: To remove or modify a hotkey assignment, simply click on the existing assignment and press the Backspace key to remove it. Alternatively, you can press a new key combination to replace the existing assignment.
Step 6: Test Hotkeys: After assigning the hotkeys, it’s important to test them and ensure they function as expected. Click on the “Start Streaming” or “Start Recording” button, or any other action you assigned a hotkey to, and use the corresponding hotkey to trigger the action. Verify that the action is executed correctly.
Step 7: Customize Advanced Hotkeys: In the “Hotkeys” tab, you’ll also find options for advanced hotkeys. These allow you to set up hotkeys for more specific actions, such as individual scene transitions or specific filters. Experiment with these advanced hotkeys to further customize your broadcasting experience.
Step 8: Save and Apply: Once you have configured your hotkeys, click on the “Apply” button to save the changes. OBS will now use the assigned hotkeys for the specified actions.
Setting up hotkeys in OBS can greatly enhance your streaming or recording workflow, allowing you to control various actions with ease and efficiency. By assigning hotkeys to frequently used functions, you save time and maintain a smooth broadcasting experience.
Setting up Streaming and Recording Settings
Open Broadcaster Software (OBS) provides the flexibility to adjust streaming and recording settings to optimize the quality and performance of your broadcasts. By properly configuring these settings, you can ensure smooth streaming, high-quality recordings, and compatibility with your chosen platforms. Here’s how you can set up streaming and recording settings in OBS:
Step 1: Open OBS: Launch OBS by double-clicking the desktop shortcut or searching for OBS in your computer’s applications or programs list.
Step 2: Access Settings: Click on the “Settings” button at the bottom right corner of the OBS interface. This will open the settings window where you can configure various OBS settings, including streaming and recording settings.
Step 3: Configure Stream Settings: In the “Stream” or “Output” tab, you’ll find options to set up streaming settings. Select the streaming service you want to use from the dropdown menu. OBS supports popular platforms like Twitch, YouTube, and Facebook Live. Enter your stream key, which can be obtained from your streaming platform account settings.
Step 4: Adjust Video Settings: OBS allows you to configure video settings for streaming or recording. Set the desired resolution, frame rate, and video bitrate based on your hardware capabilities and intended quality. Consider the recommended settings provided by your streaming platform for optimal performance.
Step 5: Set up Audio Settings: In the “Audio” tab of the settings window, you can adjust audio settings for your streams or recordings. Select the appropriate audio devices, such as your microphone and speakers, and set their respective volume levels. Ensure the audio settings align with your streaming goals and desired audio quality.
Step 6: Choose Recording Format: If you plan to record your broadcasts locally, you can configure the recording settings in the “Output” tab. Choose the desired recording format, such as MP4 or FLV, and set the output directory where your recordings will be saved. Adjust the recording quality settings, including resolution and bitrate, based on your preferences.
Step 7: Set advanced output settings: OBS provides advanced options for output encoding. Depending on your streaming or recording needs, you can adjust settings like keyframe interval, encoder preset, and various audio encoding settings. These options allow for further customization and optimization of your streams or recordings.
Step 8: Test and Adjust Settings: After configuring the streaming and recording settings, it’s important to test them before going live or starting a recording. Initiate a test stream or record a short clip to verify that the configured settings match your expectations. Make any necessary adjustments to achieve the desired streaming or recording quality.
Step 9: Save and Apply: Once all the desired streaming and recording settings are configured, click on the “Apply” button to save the changes. OBS will now utilize these settings for your future streams or recordings.
By setting up streaming and recording settings in OBS, you can ensure optimal performance and quality for your broadcasts. Different streaming platforms may have specific requirements, so it’s important to refer to their guidelines while configuring OBS settings. Regularly review and fine-tune these settings to adapt to your evolving streaming or recording needs.
Going Live with OBS
After setting up your scenes, configuring audio and video settings, and finalizing all necessary adjustments, it’s time to go live with Open Broadcaster Software (OBS). Whether you’re streaming on platforms like Twitch, YouTube, or Facebook Live, or simply recording locally, OBS provides a seamless way to share your content with your audience. Here’s how you can go live with OBS:
Step 1: Ensure Everything is Set Up: Double-check that all your scenes, sources, audio settings, and video settings are properly configured and ready for broadcasting. Make sure you’ve tested your stream or recording settings, including video resolution, audio levels, and any additional filters or effects.
Step 2: Start Your Stream or Recording: Depending on your broadcasting goals, click on either the “Start Streaming” or “Start Recording” button in the OBS interface. The “Start Streaming” button will begin streaming to your selected platform, while the “Start Recording” button will initiate a local recording to your specified directory.
Step 3: Monitor Your Stream or Recording: As you’re live or recording, keep an eye on the OBS interface to ensure that everything is functioning as intended. Pay attention to audio and video quality, scene transitions, and any on-screen alerts or overlays. Use the preview feature to monitor how your stream or recording appears to viewers.
Step 4: Interact with Your Audience: Engage with your viewers by monitoring chat messages and responding to comments or questions. Keep an eye on the chat window of your streaming platform and consider using a chat overlay to have it displayed on your stream. Interacting with your audience helps create an immersive and interactive broadcasting experience.
Step 5: Make Adjustments on the Fly: While you’re live or recording, you might encounter unexpected issues or find opportunities to improve your broadcast. OBS allows you to make adjustments on the fly. You can switch scenes, modify audio levels, adjust source positions, or apply filters during your stream or recording. Continuously monitor and improve your content as you go.
Step 6: End and Review Your Stream or Recording: Once you’re ready to end your stream or recording, click on the “Stop Streaming” or “Stop Recording” button in the OBS interface. Take the time to review your content and evaluate its quality and performance. Make notes of any improvements or adjustments you can implement for future streams or recordings.
Step 7: Save Your Recording (if applicable): If you’re recording locally, ensure that you save your recording to the appropriate directory. This allows you to access and edit your recordings later, or upload them to various platforms.
Step 8: Analyze and Learn: After your broadcast, take the time to review your analytics, viewer feedback, and any recorded footage. This helps you identify areas of improvement, understand your audience, and refine your broadcast strategy for future streams or recordings.
Going live with OBS gives you the freedom to share your content with the world. By following these steps and continuously refining your broadcast, you can engage your audience, build a community, and create captivating broadcasts that leave a lasting impression.
Troubleshooting Common Issues in OBS
While using Open Broadcaster Software (OBS), you may encounter occasional technical issues that can interrupt your streaming or recording process. Fortunately, many common issues have simple solutions. Here are some troubleshooting steps you can take to resolve common problems in OBS:
1. Monitor System Resource Usage: OBS relies on system resources, such as CPU, GPU, memory, and internet bandwidth. If you experience performance issues or dropped frames, monitor your system resource usage. Close any unnecessary applications or processes that might be consuming resources and ensure you have a stable internet connection.
2. Check Audio Settings: If you encounter audio-related issues, ensure that the correct audio devices are selected in the OBS settings. Verify that the input and output devices match your intended setup and that their volume levels are properly configured. Test your audio sources by recording a short clip or previewing your stream to confirm proper functionality.
3. Verify Video Sources: If certain video sources are not displaying as intended, check their properties in OBS. Ensure that the correct screen or window is selected for screen capture or that the video input device is connected and functioning properly. Adjust the source position, size, or any applicable filters to resolve any visibility issues.
4. Test Streaming and Recording Settings: If your stream or recording does not appear as expected, verify your streaming and recording settings in OBS. Check your streaming platform settings, such as resolution, bitrate, and keyframe interval, and ensure they match OBS. For local recordings, ensure that you have selected the desired file format and that the output directory has sufficient space.
5. Update OBS and System Drivers: Ensure that you are using the latest version of OBS. Regularly check for updates and install them accordingly. Additionally, update your system drivers, including graphics card drivers and audio drivers, as outdated drivers can sometimes cause compatibility issues.
6. Troubleshoot Capture Card Issues: If you are using a capture card to capture external video or audio sources, ensure that it is properly connected and recognized by your operating system. Check the capture card manufacturer’s website for any specific troubleshooting steps related to your device. Adjust capture card settings in OBS and confirm that the correct device is selected.
7. Explore OBS Forums and Support: If you’ve encountered a specific issue, it’s advisable to explore the OBS forums, subreddit, or online support guides. Many times, other users have experienced similar issues and solutions may already be posted. Engaging with the OBS community can provide valuable insights and guidance.
8. Reinstall OBS: If you continue to experience persistent issues, consider reinstalling OBS. Uninstall the current version and download the latest version from the OBS website. Ensure that you save your scene collections and settings before uninstalling to avoid losing any customizations.
By following these troubleshooting steps, you can address common issues that may arise when using OBS. Patience and persistence are key as sometimes it takes a few attempts to identify and resolve the root cause of the problem. With time and experience, you can become proficient in troubleshooting OBS and enjoy a smooth and satisfying streaming or recording experience.
Additional Tips and Tricks for Using OBS
Open Broadcaster Software (OBS) is a powerful tool for creating professional-quality streams and recordings. To help you maximize its potential and enhance your broadcasting experience, here are some additional tips and tricks for using OBS:
1. Backup and Import Your Scene Collections: Scene collections are valuable assets that contain your customized scenes and sources. Create regular backups of your scene collections and import them when needed. This allows you to easily switch between different setups or share your scene collections with others.
2. Use Hotkeys Effectively: Hotkeys in OBS can greatly streamline your workflow. Assign hotkeys to frequently used actions, such as starting/stopping streams, switching scenes, muting/unmuting audio sources, or adjusting volume levels. Utilize this feature to improve efficiency during your broadcasts.
3. Utilize Scene Transitions: Take advantage of scene transitions to enhance the visual flow of your content. Experiment with different transition effects to create professional and smooth switches between scenes. A well-executed transition can add polish to your streams and keep your viewers engaged.
4. Create Scene Thumbnails: Assign thumbnail images to your scenes within OBS. Thumbnails provide a visual representation of your scenes, making it easier to navigate between them during your broadcast. Choose images that visually represent the content of each scene to improve your workflow.
5. Leverage OBS Studio Mode: OBS Studio Mode allows you to preview and make adjustments to scenes before switching them live. This feature enables you to make on-the-fly modifications and ensures a polished and seamless broadcast. Utilize Studio Mode to enhance the quality and aesthetics of your content.
6. Use the “Browser Source” for Overlays: The “Browser Source” option in OBS allows you to incorporate interactive elements, such as alerts, chat overlays, or donation tickers, into your stream. Explore web-based services and widgets that can be integrated as browser sources to enhance viewer engagement.
7. Explore OBS Plugins: OBS offers a wide range of plugins created by the community. These plugins can extend OBS’s functionality and provide additional features. Browse the OBS plugin library to find plugins that align with your needs, such as stream management tools, advanced filters, or integration with external services.
8. Engage with the OBS Community: Join the OBS community through online forums, subreddits, Discord channels, and social media groups. Interact with other streamers and enthusiasts to gather insights, share ideas, and learn from their experiences. Engaging with the community can provide valuable guidance and inspiration for your broadcasts.
9. Regularly Test and Update: Continually test different settings, layouts, and new OBS features to refine your streaming experience. Stay updated on the latest OBS releases and patch notes to take advantage of new improvements and bug fixes. Regular testing and updating will ensure that your broadcasts are optimized and up to date.
10. Practice and Experiment: Lastly, practice is key to improving your skills as a broadcaster. Experiment with different scenes, sources, and settings to discover your unique style. Be open to feedback, adapt to viewer preferences, and continuously strive to enhance the quality and entertainment value of your streams.
By implementing these tips and tricks, you can elevate your streaming experience, captivate your audience, and create impressive broadcasts with Open Broadcaster Software.