
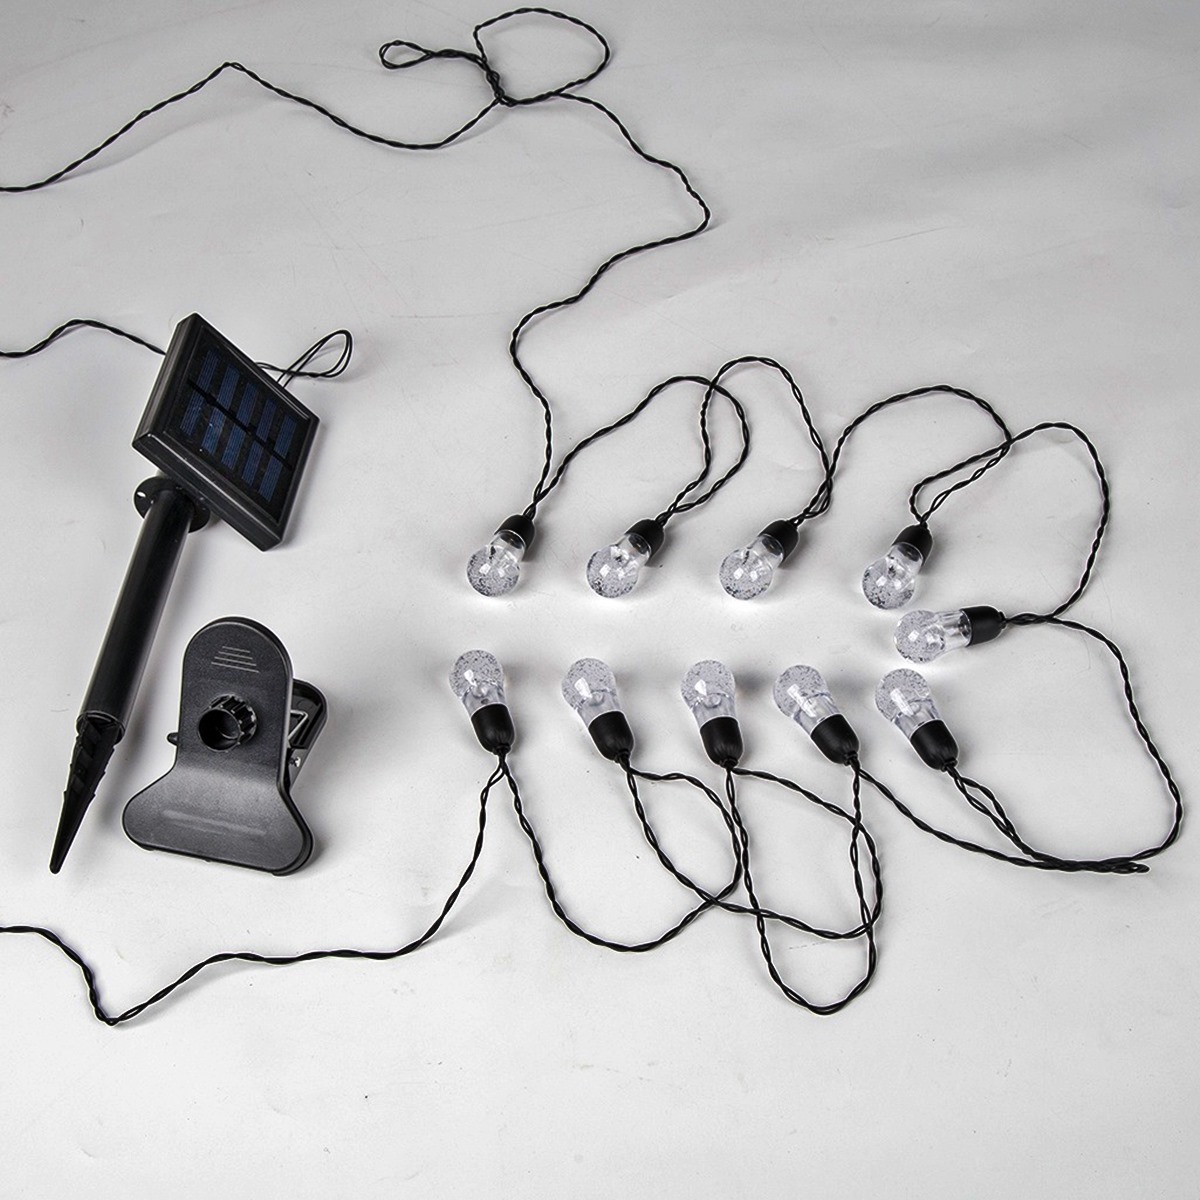
Hanging Your Solar String Light Panel from a Tree Branch
One of the most charming and natural ways to display your solar string light panel is by hanging it from a tree branch. This placement creates a whimsical and enchanting ambiance in your outdoor space. Here’s how you can do it:
- Choose a sturdy tree branch that is thick enough to support the weight of the solar panel and the string lights. It should also be in a location that gets adequate sunlight throughout the day.
- Securely fasten a sturdy hook or loop around the chosen tree branch. Make sure it is firmly attached and can hold the weight of the panel.
- Hang the solar string light panel from the hook or loop, ensuring that it is positioned correctly to receive optimal sunlight exposure.
- Adjust the angle of the solar panel to face south, if possible, to maximize its exposure to the sun.
- Ensure that the panel is securely attached and does not sway or move excessively with the wind. You can use additional fasteners or ties to provide extra stability, if needed.
- Place the solar battery or control unit in a safe and accessible location, such as on the ground below the tree branch or attached to the trunk. This will allow you to easily control the lights and ensure they receive a sufficient charge from the sun.
- Once the solar panel is properly installed, hang the string lights from the branches surrounding the panel, creating a beautiful and magical effect.
Remember to regularly check the placement of the solar panel to ensure it receives maximum sunlight exposure, as the position of the sun changes throughout the year.
Hanging your solar string light panel from a tree branch not only adds a touch of whimsy to your outdoor space, but it also brings the benefits of sustainable lighting. By utilizing natural sunlight, you can enjoy the beauty of your surroundings without relying on electricity or batteries. So go ahead and create your own enchanting oasis by hanging your solar string light panel from a tree branch.
Attaching Your Solar String Light Panel to a Fence or Wall
If you don’t have a tree branch or prefer a more structured approach, attaching your solar string light panel to a fence or wall is a great alternative. Follow these simple steps to properly install it:
- Choose a suitable location on your fence or wall that receives sufficient sunlight throughout the day. Ideally, it should be facing south to maximize sun exposure.
- Attach a sturdy bracket or mounting plate to the fence or wall using screws or other suitable fasteners. Make sure it is securely fixed to the surface to prevent any movement or instability.
- Place the solar string light panel onto the bracket or mounting plate, ensuring it is secured in place. Some panels may come with pre-drilled holes or mounting brackets for easy installation.
- Adjust the angle of the solar panel to face the sun as directly as possible. This will optimize its charging efficiency and ensure the string lights illuminate brightly at night.
- Check the stability of the panel and make any necessary adjustments or reinforcements to ensure it remains securely attached.
- Position the solar battery or control unit nearby, within easy reach. This will allow you to conveniently switch the lights on and off and monitor their performance.
- Once the solar panel is in place, hang the string lights along the fence or wall, securing them with hooks or clips. Space them evenly for a uniform and visually appealing display.
Attaching your solar string light panel to a fence or wall not only adds ambient lighting to your outdoor space but also enhances the aesthetic appeal of your surroundings. It’s a practical and efficient way to illuminate your patio, garden, or walkway without the need for additional electrical wiring.
Remember to regularly clean the solar panel to remove any dirt or debris that may obstruct its ability to absorb sunlight. This will ensure optimal performance and extend the lifespan of your solar string light panel.
So go ahead and transform your fence or wall into a captivating display of solar-powered lights, adding warmth and charm to your outdoor area.
Securing Your Solar String Light Panel to a Pole or Post
If you have a pole or post in your outdoor space, it can serve as an excellent anchor for securing your solar string light panel. Follow these simple steps to ensure a secure installation:
- Select a sturdy and vertical pole or post that is capable of supporting the weight of the solar panel and the string lights. Ensure that it is positioned in a location that receives ample sunlight throughout the day.
- Use sturdy brackets or clamps designed for outdoor use to attach the solar panel to the pole or post. Make sure the brackets are tightly fastened to prevent any movement or instability.
- Ensure that the solar panel is positioned in a way that it receives maximum sunlight exposure. Adjust the angle of the panel to face the sun directly, if possible.
- Double-check the stability of the panel and make any necessary adjustments or reinforcements to ensure it remains securely attached to the pole or post.
- Place the solar battery or control unit in a convenient and accessible location near the pole or post. This will make it easier for you to operate the lights and monitor their performance.
- Hang the string lights from the pole or post, making sure to secure them with hooks or clips. Space them evenly to create a visually appealing display.
Securing your solar string light panel to a pole or post is a practical and versatile option that allows you to bring ambient lighting to any part of your outdoor space. Whether you have a deck, patio, or garden, this installation method can help you create a warm and inviting atmosphere.
Remember to periodically check the panel’s positioning to ensure it continues to receive optimal sunlight exposure. Additionally, maintain the cleanliness of the solar panel by removing any dirt or debris that may hinder its ability to absorb sunlight effectively.
With a securely mounted solar string light panel on a pole or post, you can transform your outdoor area into a beautifully illuminated retreat for relaxation and enjoyment.
Installing Your Solar String Light Panel on a Shepherd’s Hook
For a charming and versatile way to showcase your solar string light panel, consider installing it on a shepherd’s hook. This classic outdoor accessory provides an elegant and elevated display option. Here’s how you can do it:
- Choose a suitable location in your outdoor space for the shepherd’s hook. It should be a spot that receives ample sunlight throughout the day and complements the overall aesthetics of the area.
- Push the pointed end of the shepherd’s hook into the ground until it is firmly planted and stable. Ensure it is secure and can withstand wind and weather conditions.
- Place the solar string light panel onto the hook or hanger, making sure it is securely positioned. Some hooks may have specific attachment mechanisms or slots for easy installation.
- Adjust the angle of the solar panel to face the sun as directly as possible. This will optimize its charging efficiency and ensure the string lights shine brightly at night.
- Check the stability of the panel and make any necessary adjustments to ensure it remains securely attached to the shepherd’s hook.
- Position the solar battery or control unit at the base of the shepherd’s hook, within easy reach. This will allow you to conveniently control the lights and monitor their performance.
- Once the solar panel is in place, hang the string lights from the hooks or loops surrounding the panel. Space them evenly for a visually appealing and symmetrical arrangement.
Installing your solar string light panel on a shepherd’s hook adds an element of elegance and versatility to your outdoor space. Whether you have a garden, patio, or walkway, this installation method allows you to effortlessly incorporate charming lighting into your surroundings.
Remember to periodically adjust the position of the solar panel to ensure it receives maximum sunlight exposure, as the sun’s angle changes throughout the year. Additionally, keep the solar panel clean from any dirt or debris that may hinder its ability to absorb sunlight effectively.
With a shepherd’s hook as the backdrop for your solar string light panel, you can create a delightful and inviting atmosphere, perfect for outdoor gatherings or peaceful evenings spent in your outdoor sanctuary.
Mounting Your Solar String Light Panel on a Gazebo or Pergola
If you have a gazebo or pergola in your outdoor space, mounting your solar string light panel on it can create a stunning and inviting atmosphere. Follow these steps to ensure a secure and visually appealing installation:
- Determine the ideal location on your gazebo or pergola to mount the solar panel. It should be a spot that receives ample sunlight throughout the day and allows for easy access to the controls or battery.
- Attach a sturdy bracket or mounting plate to the chosen area using screws or other appropriate fasteners. Ensure that it is securely fixed and can support the weight of the solar panel.
- Place the solar panel onto the bracket or mounting plate, making sure it is firmly attached and positioned correctly to receive optimal sunlight exposure.
- Adjust the angle of the solar panel to face the sun directly, if possible, maximizing its charging efficiency and ensuring bright illumination from the string lights at night.
- Check the stability of the panel and make any necessary adjustments or reinforcements to ensure it remains securely mounted to the gazebo or pergola.
- Position the solar battery or control unit nearby, within easy reach. This will allow you to conveniently operate the lights and monitor their performance.
- Hang the string lights along the beams or rafters of the gazebo or pergola, securing them with hooks or clips. Create a pattern or layout that complements the structure and adds a touch of charm.
By mounting your solar string light panel on a gazebo or pergola, you can transform this outdoor feature into a captivating centerpiece. The soft glow of the lights will enhance the ambiance and provide an inviting atmosphere for relaxation and entertainment.
Regularly check the positioning of the solar panel to ensure it continues to receive maximum sunlight exposure. Additionally, maintain the cleanliness of the solar panel by removing any dirt or debris that may hinder its ability to absorb sunlight effectively.
With a beautifully mounted solar string light panel on your gazebo or pergola, you can enjoy enchanting evenings in your outdoor space and create lasting memories with loved ones.
Placing Your Solar String Light Panel on a Patio Umbrella
Adding solar string lights to your patio umbrella is a wonderful way to create a cozy and inviting atmosphere for outdoor gatherings or quiet evenings. Here’s how you can place your solar string light panel on a patio umbrella:
- Choose a patio umbrella with a fabric that is compatible with your desired installation method. Umbrellas made of canvas or other sturdy fabrics are ideal for securely attaching the solar panel.
- Determine the best location on the umbrella to mount the solar panel. It should be an area that receives sufficient sunlight throughout the day without being obstructed by the umbrella’s frame or fabric.
- Attach a sturdy adhesive or Velcro strips to the back of the solar panel or the top of the umbrella canopy, depending on the design and materials of your umbrella. Ensure that the adhesive or Velcro is securely fixed and can support the weight of the panel.
- Place the solar panel onto the adhesive or Velcro, making sure it is firmly attached and positioned correctly to receive optimal sunlight exposure.
- Adjust the angle of the solar panel to face the sun directly, if possible. This will maximize its charging efficiency and ensure a beautiful glow from the string lights at night.
- Check the stability of the panel and the adhesive or Velcro attachments. Make any necessary adjustments or reinforcements to ensure the panel remains securely mounted on the umbrella.
- Route the string lights along the umbrella’s ribs, securing them with hooks or clips. Space the lights evenly for a balanced and visually appealing arrangement.
Placing your solar string light panel on a patio umbrella not only adds a touch of charm to your outdoor space but also provides functional lighting for late-night gatherings or tranquil evenings on the patio.
Regularly check the positioning of the solar panel to ensure it continues to receive maximum sunlight exposure. Additionally, keep the solar panel clean from any dirt or debris that may hinder its ability to absorb sunlight effectively.
With a well-placed solar string light panel on your patio umbrella, you can create an inviting ambiance and enjoy magical evenings under the stars.
Positioning Your Solar String Light Panel on a Balcony Railing
Transforming your balcony into a cozy and well-lit space is easy with the addition of solar string lights. One popular placement option is to position the solar panel on the balcony railing. Here’s how you can do it:
- Select a suitable location on your balcony railing for the solar panel. Make sure it is a spot that gets ample sunlight throughout the day and is easily accessible for maintenance and control.
- Attach a sturdy mounting bracket or clip to the railing using screws or other appropriate tools. Ensure that it is securely fastened and can support the weight of the solar panel.
- Place the solar panel onto the bracket or clip, making sure it is firmly attached and positioned to receive maximum sunlight exposure.
- Adjust the angle of the solar panel to face the sun directly, if possible. This will optimize its charging efficiency and allow the string lights to illuminate brightly at night.
- Check the stability of the panel and the mounting bracket or clip. Make any necessary adjustments or reinforcements to ensure the panel remains securely positioned on the balcony railing.
- Route the string lights along the top edge of the balcony railing, securing them with hooks or clips. Space them evenly for a balanced and visually appealing display.
Positioning your solar string light panel on a balcony railing not only adds a touch of warmth and charm to your outdoor space but also creates a cozy atmosphere for relaxation and entertainment.
Remember to periodically adjust the position of the solar panel to ensure it receives maximum sunlight exposure, as the angles of the sun change throughout the year. Additionally, keep the solar panel clean from any dirt or debris that may hinder its ability to absorb sunlight effectively.
With a well-positioned solar string light panel on your balcony railing, you can enjoy enchanting evenings and create a delightful ambiance that will make your balcony a favorite spot to unwind and entertain.
Hanging Your Solar String Light Panel from a Trellis or Arbor
Adding solar string lights to a trellis or arbor is a beautiful way to enhance the charm and ambiance of your outdoor space. Follow these steps to hang your solar string light panel from a trellis or arbor:
- Select a suitable location on your trellis or arbor for the solar panel. It should be a spot that receives ample sunlight throughout the day and is easily accessible for maintenance and control.
- Attach a sturdy hook or hanging mechanism to the trellis or arbor, ensuring that it is securely fastened and can support the weight of the solar panel.
- Hang the solar string light panel from the hook or hanging mechanism, making sure it is firmly attached and positioned to receive optimal sunlight exposure.
- Adjust the angle of the solar panel to face the sun directly, if possible. This will maximize its charging efficiency and ensure a beautiful glow from the string lights at night.
- Check the stability of the panel and the hook or hanging mechanism. Make any necessary adjustments or reinforcements to ensure the panel remains securely suspended from the trellis or arbor.
- Route the string lights along the trellis or arbor, weaving them through the framework or securing them with hooks or clips. Create a pattern or arrangement that complements the structure and adds a magical touch.
Hanging your solar string light panel from a trellis or arbor allows you to create a captivating and romantic atmosphere in your outdoor space. The soft glow of the lights against the backdrop of vines or flowers adds a touch of enchantment to your garden or patio.
Remember to periodically adjust the position of the solar panel to ensure it receives maximum sunlight exposure, as the sun’s angle changes throughout the year. Additionally, keep the solar panel clean from any dirt or debris that may hinder its ability to absorb sunlight effectively.
With a solar string light panel gracefully suspended from your trellis or arbor, you can transform your outdoor space into a charming and inviting haven for relaxation and entertainment.
Attaching Your Solar String Light Panel to a Garden Shed or Garage Wall
Adding solar string lights to your garden shed or garage wall can instantly brighten up your outdoor space and give it a cozy and inviting appeal. Here’s how you can securely attach your solar string light panel to a garden shed or garage wall:
- Determine the ideal location on the garden shed or garage wall for the solar panel. It should be a spot that receives ample sunlight throughout the day and is easily accessible for maintenance and control.
- Attach a sturdy bracket or mounting plate to the wall using screws or other appropriate fasteners. Make sure the bracket is securely affixed to the wall and can support the weight of the solar panel.
- Place the solar string light panel onto the bracket or mounting plate, ensuring it is firmly attached and positioned correctly to receive optimal sunlight exposure.
- Adjust the angle of the solar panel to face the sun directly, if possible. This will maximize its charging efficiency and ensure a beautiful glow from the string lights at night.
- Check the stability of the panel and the bracket. Make any necessary adjustments or reinforcements to ensure the panel remains securely attached to the garden shed or garage wall.
- Position the solar battery or control unit nearby, within easy reach. This will allow you to conveniently operate the lights and monitor their performance.
- Once the solar panel is securely in place, hang the string lights around the garden shed or along the garage wall, securing them with hooks or clips. Create a pattern or arrangement that complements the architecture and adds a delightful touch.
Attaching your solar string light panel to a garden shed or garage wall not only illuminates your outdoor space but also adds a decorative element to the surrounding area. It can transform an otherwise ordinary structure into a visually appealing focal point.
Remember to periodically adjust the position of the solar panel to ensure it continues to receive maximum sunlight exposure. Additionally, keep the solar panel clean from any dirt or debris that may hinder its ability to absorb sunlight effectively.
With a well-attached solar string light panel on your garden shed or garage wall, you can enjoy a warm and welcoming ambiance in your outdoor area, perfect for relaxation or entertaining guests.
Securing Your Solar String Light Panel to a Deck Railing
Deck railings provide a convenient and sturdy location to secure your solar string light panel. By attaching it to the railing, you can create a captivating and well-lit outdoor space. Follow these steps to properly secure your solar string light panel to a deck railing:
- Identify the ideal spot on the deck railing to mount the solar panel. Choose a location that receives ample sunlight throughout the day and is easily accessible for maintenance and control.
- Attach a sturdy bracket or mounting base to the deck railing using appropriate fasteners such as screws or clamps. Ensure that the bracket is securely fixed to the railing and can support the weight of the solar panel.
- Place the solar panel onto the bracket or mounting base, making sure it is firmly attached and positioned correctly to receive optimal sunlight exposure.
- Adjust the angle of the solar panel to face the sun directly, if possible. This will maximize its charging efficiency and ensure a bright and captivating glow emitted by the string lights at night.
- Check the stability of the panel and the bracket. Make any necessary adjustments or reinforcements to ensure the panel remains securely fastened to the deck railing.
- Position the solar battery or control unit nearby, within easy reach. This will allow you to conveniently operate the lights and monitor their performance.
- Hang the string lights along the deck railing, securing them with hooks or clips. Space them evenly for a visually pleasing and harmonious arrangement.
Securing your solar string light panel to a deck railing not only provides functional lighting but also enhances the overall look and atmosphere of your outdoor space. It allows you to enjoy evenings on the deck with a warm and inviting ambiance.
Remember to periodically adjust the position of the solar panel to ensure it continues to receive maximum sunlight exposure, as the sun’s angle changes throughout the year. Additionally, keep the solar panel clean from any dirt or debris that may hinder its ability to absorb sunlight effectively.
With a securely mounted solar string light panel on your deck railing, you can create a charming and inviting atmosphere that will make your outdoor gatherings, parties, or quiet nights on the deck even more enjoyable.
Mounting Your Solar String Light Panel on a Flagpole
Mounting your solar string light panel on a flagpole is not only a unique way to illuminate your outdoor space but also adds a touch of patriotism and charm. Here’s how you can do it:
- Ensure that your flagpole is sturdy and capable of supporting the weight of the solar panel and the string lights. Make sure it is in a location that receives ample sunlight throughout the day.
- Attach a mounting bracket or clamp designed specifically for flagpoles to the pole using appropriate fasteners. Ensure that the bracket is securely affixed and can support the weight of the solar panel.
- Place the solar panel onto the mounting bracket, making sure it is firmly attached and positioned correctly to receive optimal sunlight exposure.
- Adjust the angle of the solar panel to face the sun directly, if possible. This will maximize its charging efficiency and ensure a vibrant glow from the string lights at night.
- Check the stability of the panel and the mounting bracket. Make any necessary adjustments or reinforcements to ensure the panel remains securely mounted on the flagpole.
- Route the string lights along the length of the flagpole, securing them with hooks or clips at regular intervals. You can wrap them around the pole or create patterns, depending on your preference.
Mounting your solar string light panel on a flagpole not only provides functional illumination but also adds a unique visual element to your outdoor space. It allows you to showcase your patriotism and create an inviting atmosphere.
Remember to periodically adjust the position of the solar panel to ensure it continues to receive maximum sunlight exposure. Additionally, keep the solar panel clean from any dirt or debris that may hinder its ability to absorb sunlight effectively.
With a securely mounted solar string light panel on your flagpole, you can proudly display your love for your country while enjoying beautiful and energy-efficient outdoor lighting.