
Stem Cuttings
Stem cuttings are one of the most popular and easiest methods of propagating plants. This technique involves taking a piece of the stem from a healthy parent plant and encouraging it to root and grow into a new plant.
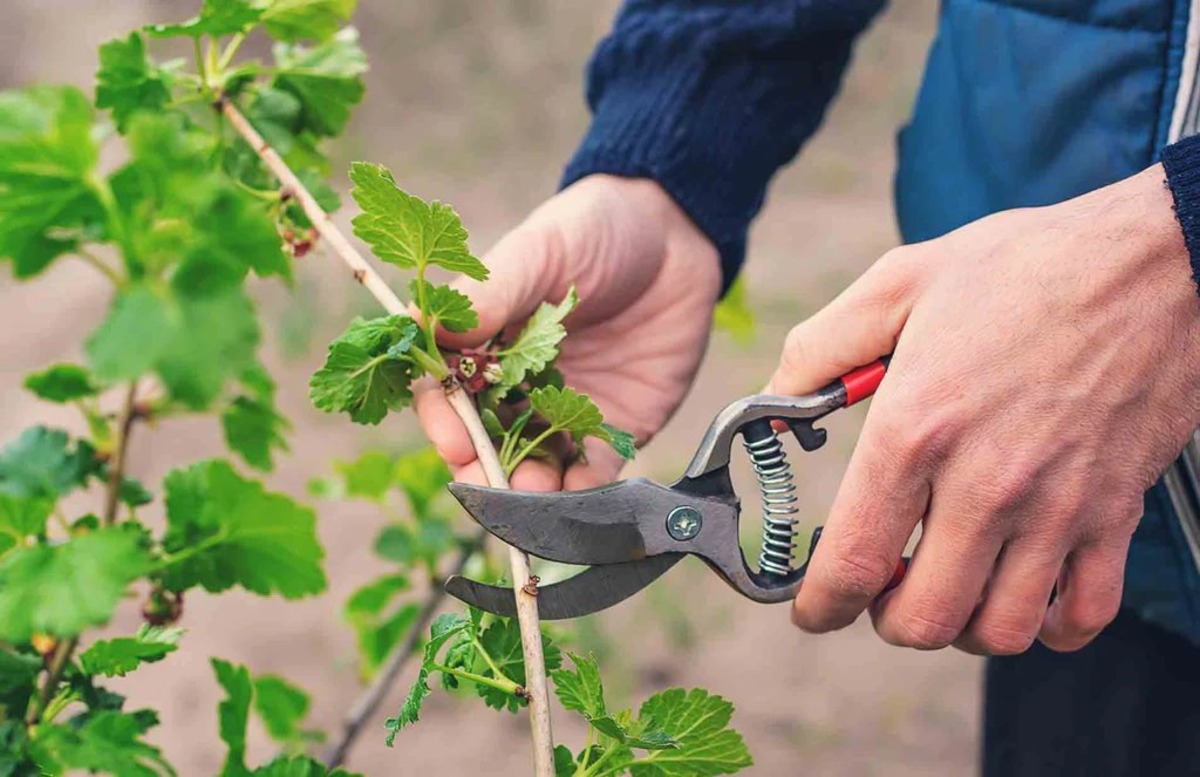
To start, choose a healthy and disease-free stem from the parent plant. Make sure the stem is flexible, yet mature enough to have developed some lignin, which helps with root formation. Using a sharp and sterile knife or pruners, make a clean cut just below a node, which is the area where leaves or branches emerge. It’s essential to cut at a 45-degree angle to increase the surface area for rooting.
Remove the lower leaves or branches from the stem to create a clean cutting. Leaving a few upper leaves intact will allow the cutting to continue photosynthesizing and provide energy for root development. If the remaining leaves are large, you can trim them to minimize water loss through transpiration.
Next, prepare a well-draining rooting medium, such as a mix of perlite, vermiculite, or a combination of peat moss and sand. Moisten the medium to make it damp but not soggy. Dip the cut end of the stem in a rooting hormone powder for better root development.
Insert the cutting into the prepared medium, making sure at least one or two nodes are buried below the surface. Gently press the medium around the cutting to ensure good contact and support. Place the cutting in a warm and humid environment, preferably under a propagating dome or covered with plastic to maintain high humidity.
After a few weeks, check for root development by gently tugging on the cutting. If there is resistance, it means roots have formed. At this point, you can gradually acclimate the new plant to normal growing conditions by increasing air circulation and reducing humidity.
Stem cuttings can be taken from a wide range of plants, including herbs, flowering plants, and woody shrubs. With proper care and attention, stem cuttings offer a fantastic way to multiply your plant collection and share your favorite plants with friends and family.
Leaf Cuttings
Leaf cuttings are a unique method of plant propagation that involves using individual leaves to create new plants. This technique is especially suitable for plants with thick, fleshy leaves, such as succulents and some tropical houseplants.
When choosing a leaf for propagation, select a healthy leaf that is free from any damage or disease. Gently twist or cut the leaf from the parent plant, ensuring that a small piece of the stem, known as the petiole, is still attached to the base of the leaf. The petiole will serve as the point of origin for new roots to grow.
Once you have your leaf, allow the cut end to dry for a day to form a callus. This step helps to prevent potential infection or rotting during the rooting process. Once the callus has formed, you can proceed to the next stage.
Prepare a well-draining rooting medium, such as a mixture of perlite and peat moss. Gently insert the cut end of the leaf into the soil, burying the base of the leaf just enough to provide stability. It’s essential to position the leaf in an upright or slightly slanted position to allow for proper root formation.
Maintain a warm and humid environment for the leaf cutting, preferably by covering it with a plastic dome or placing it in a sealed container. This will help retain moisture and create the ideal conditions for root development. Be careful not to overwater, as excessive moisture can lead to rotting.
Over time, small plantlets or roots will begin to emerge from the base of the leaf. This is a sign of successful rooting and indicates that the new plant is ready to be established in its own container. Gently separate the newly formed plantlets from the parent leaf and pot them in a well-draining soil mix.
Leaf cuttings offer an exciting and rewarding way to propagate plants, allowing you to create multiple plants from a single leaf. Although not all plant species are suitable for this method, it is an excellent technique to try with succulents or houseplants that have the capacity to sprout new growth from their leaves.
Root Cuttings
Root cuttings are a less common but effective method of plant propagation that involves using a piece of a plant’s root to create a new plant. This technique is particularly useful for plants that have thick and fleshy roots, such as some perennials and shrubs.
To begin, select a mature and healthy plant that has well-developed roots. Dig around the base of the plant and locate a suitable section of roots to use for cuttings. Choose roots that are approximately the thickness of a pencil and have several branching points.
Using a sharp, sterile knife or pruners, carefully cut a section of the root from the main plant. Aim for a piece that is around 2 to 6 inches in length, depending on the plant species and its growth characteristics. It’s crucial to make a clean cut, ensuring that the ends are straight and not ragged or torn.
After obtaining the root cutting, it’s time to prepare it for propagation. Trim off any damaged or excessive root material, leaving just the healthy portion. In some cases, you may need to make additional cuts on the side of the root to encourage multiple shoots to form.
Next, prepare a well-draining potting mix or rooting medium. Moisten the soil to make it slightly damp but not waterlogged. Make a small hole in the soil using a dibber or your finger and insert the root cutting, ensuring it is positioned upright or at a slight angle. Gently press the soil around the cutting to secure it in place.
Place the container with the root cutting in a warm and protected area, away from direct sunlight. Maintain consistent moisture in the soil, ensuring it does not dry out or become too soggy. It may take several weeks or even months for the roots to develop and for new shoots to emerge.
Once the new plant has established a sufficient root system and has started to produce new growth, it can be transplanted into a larger container or directly into the garden. Provide the necessary care and attention, including proper watering and suitable growing conditions, to help the plant thrive.
Although root cuttings require a bit more patience and time compared to other propagation methods, they offer a reliable way to propagate certain plant species. By using root cuttings, you can create new plants that are genetically identical to the parent plant, preserving its desirable traits.
Apical Cuttings
Apical cuttings, also known as tip cuttings, are a popular method of plant propagation that involves using the tip or upper portion of a plant’s stem. This technique is effective for a wide range of plants, including herbs, houseplants, and flowering specimens.
To start, select a healthy and vigorous plant with a well-developed apical shoot. The apical shoot is the topmost portion of the stem, typically characterized by new growth and terminal buds. Using a sharp and sterile knife or pruners, make a clean cut just below a node, which is the area where leaves or branches emerge.
It’s important to ensure that the cutting is approximately 4 to 6 inches in length to provide enough stem to work with. Remove any lower leaves or branches from the cutting, leaving a few upper leaves intact to support photosynthesis and energy production.
Prepare a well-draining rooting medium, such as a mix of perlite and peat moss. Moisten the medium to make it slightly damp, ensuring it’s not oversaturated. Dip the cut end of the stem in a rooting hormone powder to stimulate root growth and enhance rooting success.
Make a small hole in the rooting medium using a dibber or your finger and gently insert the cutting into the hole. Bury the lower part of the stem, ensuring that at least one or two nodes are covered with the rooting medium. Firmly press the medium around the cutting to create good soil-to-stem contact.
Place the container with the cutting in a warm and bright location, but away from direct sunlight. It’s important to maintain a humid environment to prevent excessive moisture loss and aid in root development. You can cover the cutting with a plastic bag or place it under a propagating dome to retain moisture.
Check the cutting regularly for signs of root formation, which typically occurs within several weeks. Gently tug on the cutting to feel if there is resistance, indicating the presence of roots. Once the roots have formed, slowly acclimate the new plant to normal growing conditions by gradually increasing air circulation and reducing humidity.
Apical cuttings provide an excellent way to propagate plants with desirable characteristics. By using the top portion of the stem, you can ensure that the new plant retains the same growth habits and traits as the parent plant.
Nodal Cuttings
Nodal cuttings are a popular and effective method of plant propagation that involves using a piece of stem that includes one or more nodes. Nodes are the points on a stem where leaves, branches, or buds emerge. This technique is commonly used for a wide variety of plants, including ornamental shrubs, perennials, and houseplants.
To begin, choose a healthy and disease-free plant with well-developed stems. Using sharp and sterile pruning shears or a knife, make a clean cut just below a node to ensure that the cutting has at least one node. The length of the cutting can vary depending on the plant species, but it is typically around 4 to 6 inches.
After obtaining the cutting, remove any leaves or branches from the lower portion of the stem, leaving one or two leaves intact near the top. This will allow the cutting to continue photosynthesizing and providing energy for root development. If the remaining leaves are large, you can trim them to reduce water loss through transpiration.
Prepare a well-draining rooting medium, such as a mixture of perlite and peat moss. Moisten the medium to make it slightly damp, ensuring it’s not overly saturated. Dip the cut end of the stem in a rooting hormone powder to promote root development and increase the chances of successful rooting.
Create a hole in the rooting medium using a dibber or your finger and gently insert the cutting into the hole. Bury the lower portion of the stem, ensuring that at least one node is covered with the rooting medium. Firmly press the medium around the cutting to provide support and good contact with the stem.
Place the container with the cutting in a warm, bright, and humid location, but avoid direct sunlight. To retain moisture and create a suitable environment for rooting, you can cover the cutting with a plastic bag or place it in a propagating dome.
Check regularly for signs of root development, such as resistance when gently tugging on the cutting. This indicates that roots have formed. Once roots have established, gradually acclimate the new plant to normal growing conditions by increasing air circulation and reducing humidity.
Nodal cuttings offer a reliable and effective way to propagate plants, allowing you to create multiple new plants from a single parent plant. By selecting healthy stems with well-defined nodes, you can increase your plant collection and share your favorite plants with others.
Hardwood Cuttings
Hardwood cuttings are a propagation method commonly used for deciduous trees, shrubs, and some perennial plants. This technique is performed during the dormant season when the plant material is fully mature and no longer actively growing.
To begin, select healthy, disease-free stems that are fully matured and have hardened off. These are typically the thicker, older stems from the previous season’s growth. Using sharp and sterile pruning shears or a knife, make a clean cut at the base of the stem, just below a node.
Prepare the cuttings by removing any leaves or side shoots from the lower portion of the stem. Leave a few buds intact near the top, as these will develop into new growth. Make sure the uppermost bud is facing upwards to ensure correct orientation when planting.
Next, prepare a well-draining rooting medium, such as a mixture of sand and perlite or a specialized propagation mix. Moisten the medium to make it slightly damp but not saturated. You can also dip the cut end of the hardwood cutting in a rooting hormone powder to promote root development.
Make a hole in the rooting medium using a dibber or your finger and insert the cutting into the hole. Bury at least two-thirds of the cutting below the surface, with only a few buds remaining above. Gently firm the medium around the cutting to ensure good soil-to-stem contact.
Place the container with the hardwood cuttings in a cool and protected environment, away from direct sunlight. It’s important to maintain consistent moisture levels in the rooting medium without overwatering. You can cover the container with a plastic bag or use a propagating dome to create a more humid microclimate.
Root development in hardwood cuttings can be slow, often taking several months or even a year. Regularly check the cuttings for signs of root growth by gently tugging on them. If there is slight resistance, roots are forming, and you can gradually acclimate the new plants to normal growing conditions.
Hardwood cuttings are a reliable and cost-effective way to propagate woody plants. They offer the advantage of preserving the exact genetic traits of the parent plant and can be a rewarding method for expanding your garden or sharing favorite plants with others.
Softwood Cuttings
Softwood cuttings are a popular and effective method of propagating a wide range of plants, particularly those with fast growth rates, such as many woody shrubs and perennials. This technique involves taking cuttings from new, flexible, and rapidly growing stems, typically during the early part of the growing season.
To start, select healthy and vigorous stems that are still young and have not fully matured. These stems should be green, flexible, and easily snap when bent. Using clean and sharp pruning shears or a knife, make a diagonal cut just below a node on the selected stem.
Remove any lower leaves or side branches from the cutting, leaving a few leaves intact at the top. If the remaining leaves are large, you can reduce their size to minimize water loss through transpiration. This helps the cutting in focusing its energy on rooting rather than water regulation.
Prepare a well-draining rooting medium, such as a mixture of peat moss and perlite or a specialized propagation mix. Moisten the medium to make it slightly damp but not waterlogged. You may also use a rooting hormone powder or solution to stimulate root development.
Create a hole in the rooting medium using a dibber or your finger and gently insert the stem cutting into the hole. Make sure the cutting is planted deep enough so that at least one or two nodes are buried in the medium. Firmly press the medium around the cutting to provide support and proper contact with the stem.
Place the container with the softwood cuttings in a bright area with indirect sunlight. Maintaining a warm and humid environment is crucial for successful root formation. You can cover the container with a plastic bag or use a propagating dome to create a greenhouse-like atmosphere.
Regularly monitor the softwood cuttings for signs of root development. Gently tug on the cuttings to check for resistance, indicating that roots have formed. This process can take several weeks or even a few months, depending on the plant species and environmental conditions.
Once the softwood cuttings have established strong roots, you can gradually acclimate them to normal growing conditions by increasing air circulation and reducing humidity. Transplant them into individual pots or a suitable growing medium, and continue providing the necessary care to help them thrive.
Softwood cuttings are a reliable way to propagate plants, offering the advantage of rapid root development and faster establishment compared to other methods. With proper technique and care, you can create new plants and expand your garden with ease.
Semi-Hardwood Cuttings
Semi-hardwood cuttings are a versatile and effective method of plant propagation that involves using partially matured stems from woody plants. This technique is commonly used for a wide range of shrubs, trees, and some perennials, and it is typically performed in late summer to early autumn.
To begin, select stems that are neither too floppy nor too stiff. Semi-hardwood stems should have slightly hardened bark, be flexible but not overly pliable, and snap with a bit of resistance when bent. Using clean and sharp pruning shears or a knife, make a diagonal cut just below a node on the stem.
Trim away any lower leaves or side branches, ensuring that a few leaves remain at the top of the cutting. These leaves will provide energy for the growth and development of the cutting. If the remaining leaves are large, you can trim them to reduce water loss through transpiration.
Prepare a well-draining rooting medium, such as a mix of peat moss and perlite or a specialized propagation mix. Moisten the medium to make it slightly damp but not soggy. You may dip the cut end of the semi-hardwood cutting in a rooting hormone powder or solution to encourage root formation.
Make a hole in the rooting medium using a dibber or your finger and gently insert the stem cutting into the hole. Ensure that at least one or two nodes are buried below the surface. Firmly press the medium around the cutting to secure it in place and provide good soil-to-stem contact.
Place the container with the semi-hardwood cuttings in a protected area with bright, indirect light. It is important to maintain a slightly humid environment to support root development. You can cover the container with a plastic bag or use a propagating dome to create a mini greenhouse effect.
Monitor the semi-hardwood cuttings regularly for signs of root development. Gently tug on the cuttings to check for resistance, indicating that roots have formed. This process may take several weeks to a few months, depending on the plant species and environmental conditions.
Once the semi-hardwood cuttings have established a strong root system, you can gradually acclimate them to normal growing conditions by increasing air circulation and reducing humidity. Transplant them into individual pots or a suitable growing medium, and continue providing the necessary care for their continued growth.
Semi-hardwood cuttings offer a reliable and efficient means of propagation, allowing you to create new plants that share the characteristics of their parent plants. With proper preparation and care, you can successfully increase your plant collection and enjoy the satisfaction of nurturing new growth.
Cane Cuttings
Cane cuttings are a commonly used method of propagating plants that produce long, flexible stems, such as berries, grapes, and roses. This technique utilizes a section of a stem known as a cane, which is taken from the plant during its dormant phase.
To start, select a healthy and disease-free cane from the parent plant. Canes should be about pencil-thickness and around 6 to 12 inches long, with nodes spaced at regular intervals along the stem. Using sharp and sterilized pruning shears or a knife, make a clean cut just above a bud or node at the top of the cane and another clean cut just below a bud or node at the bottom of the cane.
Remove any leaves or lateral shoots from the lower portion of the cane, leaving a few leaves or buds intact at the top. This foliage will provide energy for the cutting as it develops roots and new growth. If the remaining leaves are large, you can trim them to reduce water loss through transpiration.
Prepare a well-draining rooting medium, such as a mixture of vermiculite and peat moss or a specialized propagation mix. Moisten the medium to make it slightly damp but not waterlogged. You can also dip the bottom end of the cane in a rooting hormone powder or solution to stimulate root growth.
Insert the bottom end of the cane into the rooting medium, burying it at least halfway to two-thirds of its length. Gently press the medium around the cane to ensure stability and good contact with the stem. If you are propagating multiple canes, allow sufficient space between them to prevent overcrowding.
Place the container with the cane cuttings in a protected area with bright, indirect light. Maintaining high humidity around the cuttings is crucial for successful root development. You can cover the container with a plastic bag or use a propagating dome to create a humid microclimate.
Check the cane cuttings regularly for signs of root development. Gently tug on the cuttings to feel if there is resistance, indicating that roots have formed. This process may take several weeks to a few months, depending on the plant species and environmental conditions.
Once the cane cuttings have developed a strong root system, you can gradually acclimate them to normal growing conditions by increasing air circulation and reducing humidity. Transplant them into individual pots or a suitable growing medium, providing the necessary care to encourage healthy growth.
Cane cuttings present an effective way to propagate plants with long stems and are particularly well-suited for vines and shrubs that produce canes. By utilizing this technique, you can expand your garden and enjoy the beauty of new growth from these propagated plants.
Cavity Cuttings
Cavity cuttings, also known as hollow stem cuttings, are a specialized method of plant propagation that is commonly used for plants with hollow stems, such as bamboo and some grasses. This technique involves creating a cavity or hollow section within the stem to encourage new roots to develop.
To begin, select a healthy and robust stem from the parent plant. The stem should be at least pencil-thick and preferably mature, as younger stems may not have developed enough lignification. Using a sharp and sterilized knife or pruners, make a clean and diagonal cut just above a node on the selected stem.
Instead of removing the lower leaves or branches as in other cutting methods, leave a few nodes with leaves intact on the stem. These nodes will provide the necessary energy for rooting and new growth. You may trim the remaining leaves to reduce water loss through transpiration.
Next, make another cut about 1 to 2 inches below the first cut, creating a hollow section within the stem. The size of the hollow can vary depending on the plant species and the desired rooting success. It is crucial to ensure that the cavity is clean and free from any debris or pests.
Prepare a well-draining rooting medium, such as a mix of perlite and peat moss or a specialized propagation mix. Moisten the medium to make it slightly damp, ensuring it’s not overly saturated. You can also apply a rooting hormone powder or solution to the bottom of the stem to encourage root development.
Insert the bottom end of the stem into the rooting medium, ensuring that the hollow section is partially submerged. Gently press the medium around the stem to provide support and good soil-to-stem contact. If propagating multiple cavity cuttings, allow sufficient space between them to prevent overcrowding.
Place the container with the cavity cuttings in a bright area with indirect sunlight. Keeping the humidity levels high around the cuttings is essential for successful root development. You can cover the container with a plastic bag or use a propagating dome to create a humid microclimate.
Regularly check the cavity cuttings for signs of root development, such as resistance when gentle tugging on them. This indicates that roots have formed and the cuttings are successfully rooting. This process may take several weeks to a few months, depending on the plant species and environmental conditions.
Once the cavity cuttings have established strong roots, you can gradually acclimate them to normal growing conditions by increasing air circulation and reducing humidity. Transplant them into individual pots or a suitable growing medium, providing the necessary care for their continued growth and development.
Cavity cuttings provide a unique and effective way to propagate plants with hollow stems. By utilizing this method, you can expand your collection of hollow-stemmed plants and enjoy their unique characteristics and beauty.
Heel Cuttings
Heel cuttings are a common and effective method of plant propagation that involves taking a piece of a stem with a small section of the parent plant’s older wood, also known as the “heel.” This technique is often used for plants with woody stems, such as roses, hydrangeas, and many deciduous shrubs.
To begin, select a healthy and mature stem from the parent plant. Using clean and sharp pruning shears or a knife, make a diagonal cut just below a leaf node. The cut should be made at a 45-degree angle and include a small section of older wood attached to the stem, creating a heel.
Remove any leaves or lateral branches from the lower portion of the cutting, leaving a few leaves intact near the top. These leaves will provide energy for the cutting as it develops roots and new growth. If the remaining leaves are large, you can trim them to reduce water loss through transpiration.
Prepare a well-draining rooting medium, such as a mixture of peat moss and perlite or a specialized propagation mix. Moisten the medium to make it slightly damp but not waterlogged. You can also apply a rooting hormone powder or solution to the bottom of the stem to promote root development.
Make a small hole in the rooting medium using a dibber or your finger and insert the cutting into the hole. Ensure that the heel, with the older wood, is buried in the medium while keeping the top part of the stem and leaves above the surface. Gently firm the medium around the cutting to provide support and good contact with the stem.
Place the container with the heel cuttings in a bright area with indirect sunlight. Maintain a slightly humid environment by covering the container with a plastic bag or using a propagating dome. This will help the cuttings retain moisture and create an ideal setting for root development.
Regularly monitor the heel cuttings for signs of root growth. Gently tug on the cuttings to see if there is resistance, indicating that roots have formed. This process can take several weeks to a few months, depending on the plant species and environmental conditions.
Once the heel cuttings have developed strong roots, you can gradually acclimate them to normal growing conditions by increasing air circulation and reducing humidity. Transplant them into individual pots or a suitable growing medium, providing the necessary care to promote healthy growth.
Heel cuttings offer a reliable and efficient way to propagate plants with woody stems. By utilizing this method, you can expand your collection of woody plants and enjoy their beauty and benefits in your garden or landscape.
Leaf-Bud Cuttings
Leaf-bud cuttings are a specialized method of plant propagation that involves utilizing a leaf and its attached bud to create new plants. This technique is commonly used for plants with fleshy or succulent leaves, such as begonias, African violets, and some tropical houseplants.
To begin, select a healthy and fully developed leaf with a visible bud attached to the leaf petiole. The leaf petiole is the slender stalk that connects the leaf to the stem. Using clean and sharp pruning shears or a knife, make a clean diagonal cut just below the leaf bud.
Remove any other leaves from the leaf petiole, leaving only the targeted leaf bud attached. This ensures that the energy of the cutting is focused on the development of the new plant rather than sustaining additional foliage. If the remaining leaf is large, you can trim it to reduce water loss through transpiration.
Prepare a well-draining rooting medium, such as a mixture of peat moss and perlite or a specialized propagation mix. Moisten the medium to make it slightly damp but not waterlogged. Consider using a rooting hormone powder or solution to enhance root development.
Make a hole in the rooting medium using a dibber or your finger and gently insert the leaf-bud cutting into the hole. Ensure that the leaf bud is partially submerged in the medium while keeping the leaf above the surface. Press the medium around the petiole to provide support and good contact with the stem.
Place the container with the leaf-bud cutting in a bright area with indirect sunlight. It is important to maintain high humidity levels to promote successful rooting. You can cover the container with a plastic bag or use a propagating dome to create a humid microclimate.
Monitor the leaf-bud cutting regularly for signs of root development and new growth. Although root formation may take longer compared to other cutting methods, you can gently tug on the petiole to check for resistance, indicating that roots have formed. This process may take several weeks to a few months.
Once the leaf-bud cutting has developed a strong root system and new growth, you can gradually acclimate it to normal growing conditions by increasing air circulation and reducing humidity. Transplant the cutting into a suitable growing medium, providing the necessary care for its continued growth and development.
Leaf-bud cuttings offer a unique way to propagate plants, especially those with fleshy leaves. With proper technique and care, you can successfully create new plants and enjoy the beauty of their foliage and blooms in your home or garden.
Rhizome Cuttings
Rhizome cuttings are a specialized propagation method commonly used for plants that have horizontal, underground stems called rhizomes. This technique is often employed for plants like ginger, iris, and canna lilies.
To begin, select a healthy and mature rhizome from the parent plant. The rhizome should be firm and free from any signs of disease or damage. Using clean and sharp pruning shears or a knife, cut a section of the rhizome that is about 2 to 4 inches long.
Ensure that the cutting includes at least one or two nodes, which are points on the rhizome where roots and new shoots can develop. Nodes are often evident as small raised areas on the rhizome surface.
Prepare a well-draining rooting medium, such as a mixture of equal parts perlite and peat moss or a specialized propagation mix. Moisten the medium slightly, making sure it is not overly saturated. You can also apply a rooting hormone powder or solution to the cut ends of the rhizome to encourage root development.
Place the rhizome cutting horizontally on the surface of the rooting medium, ensuring that the nodes are in contact with the medium. Gently press the rhizome into the medium to ensure good soil-to-stem contact.
Keep the container with the rhizome cutting in a warm and bright location, but away from direct sunlight. Maintaining a slightly humid environment is important for successful rooting. You can cover the container with a plastic bag or use a propagating dome to create a mini greenhouse effect.
Monitor the rhizome cutting regularly for signs of root development and new shoot growth. It may take several weeks to a few months for roots to form. To check for root development, gently tug on the rhizome cutting to feel if there is resistance.
Once the rhizome cutting has developed a strong root system and new shoots have emerged, you can gradually acclimate it to normal growing conditions by increasing air circulation and reducing humidity. Transplant the cutting into a suitable growing medium, providing the necessary care for its ongoing growth.
Rhizome cuttings provide an excellent way to propagate plants that have underground rhizomes. By utilizing this method, you can expand your collection of rhizomatous plants and enjoy their unique growth habit and beauty.
Bulb Cuttings
Bulb cuttings are a specialized method of plant propagation that involves using cut sections of bulbs to create new plants. This technique is commonly used for bulbous plants such as tulips, daffodils, and lilies.
To begin, select a healthy and mature bulb from the parent plant. Choose a bulb that is firm and free from any signs of disease or damage. Using clean and sharp pruning shears or a knife, make a clean cut horizontally across the bulb, dividing it into sections.
Each section should contain a portion of the basal plate, which is the flattened bottom part of the bulb where roots emerge, as well as a portion of the stem or stem base called the basal plate. The number of sections you make will depend on the size and vigor of the parent bulb.
Prepare a well-draining rooting medium, such as a mixture of equal parts perlite and peat moss or a specialized propagation mix. Moisten the medium slightly, ensuring that it is not excessively wet or waterlogged.
Place the bulb sections on the surface of the rooting medium, making sure that the basal plate is in contact with the medium. Gently press the sections into the medium to provide stability and good soil-to-bulb contact.
Keep the container with the bulb cuttings in a cool and bright location, but away from direct sunlight. It is important to provide a slightly humid environment to promote successful rooting. You can cover the container with a plastic bag or use a propagating dome to create a mini greenhouse effect.
Monitor the bulb cuttings regularly for signs of root development. It may take several weeks to several months for roots to form. Gently tug on the bulb cuttings to check for resistance, indicating the presence of roots.
Once the bulb cuttings have developed a strong root system and new shoots have emerged, you can gradually acclimate them to normal growing conditions by increasing air circulation and reducing humidity. Transplant the cuttings into individual pots or a suitable growing medium, providing the necessary care for their continued growth.
Bulb cuttings offer a unique method of propagating bulbous plants, allowing you to expand your collection and enjoy their vibrant flowers and unique forms. With proper care and attention, the bulb cuttings can develop into healthy and vigorous plants.
Offset Cuttings
Offset cuttings are a commonly used method of plant propagation that involves utilizing the small, naturally occurring offshoots, known as offsets, that develop around the base of certain plants. This technique is particularly effective for plants that produce offsets, such as succulents, some bulbs, and perennial plants.
To begin, identify and select a healthy offset that has formed near the base of the parent plant. An offset is a small plantlet that emerges from the main plant and has its own roots and shoots. Using clean and sharp pruning shears or a knife, carefully detach the offset from the parent plant.
Prepare a well-draining rooting medium, such as a mixture of equal parts perlite and peat moss or a specialized propagation mix. Moisten the medium, making sure it is slightly damp but not overly wet. It is not usually necessary to apply rooting hormone to offset cuttings, as they already have their own root systems.
Make a small hole in the rooting medium using a dibber or your finger and gently insert the offset into the hole. Ensure that the base of the offset is in contact with the medium. Gently press the medium around the offset to provide support and good soil-to-root contact.
Place the container with the offset cuttings in a bright location with indirect sunlight. It is important to maintain a slightly humid environment to promote successful rooting. You can cover the container with a plastic bag or use a propagating dome to create a mini greenhouse effect.
Check the offset cuttings regularly for signs of root development and new growth. This process may take several weeks to a few months, depending on the plant species and environmental conditions. Gently tug on the offset to check for resistance, indicating that roots have formed.
Once the offset cuttings have developed a strong root system and new shoots have emerged, you can gradually acclimate them to normal growing conditions by increasing air circulation and reducing humidity. Transplant each offset into individual pots or a suitable growing medium, providing the necessary care for their continued growth.
Offset cuttings offer a convenient way to multiply plants that naturally produce offsets. By utilizing this method, you can expand your plant collection and enjoy the beauty and resilience of these propagated plants.