
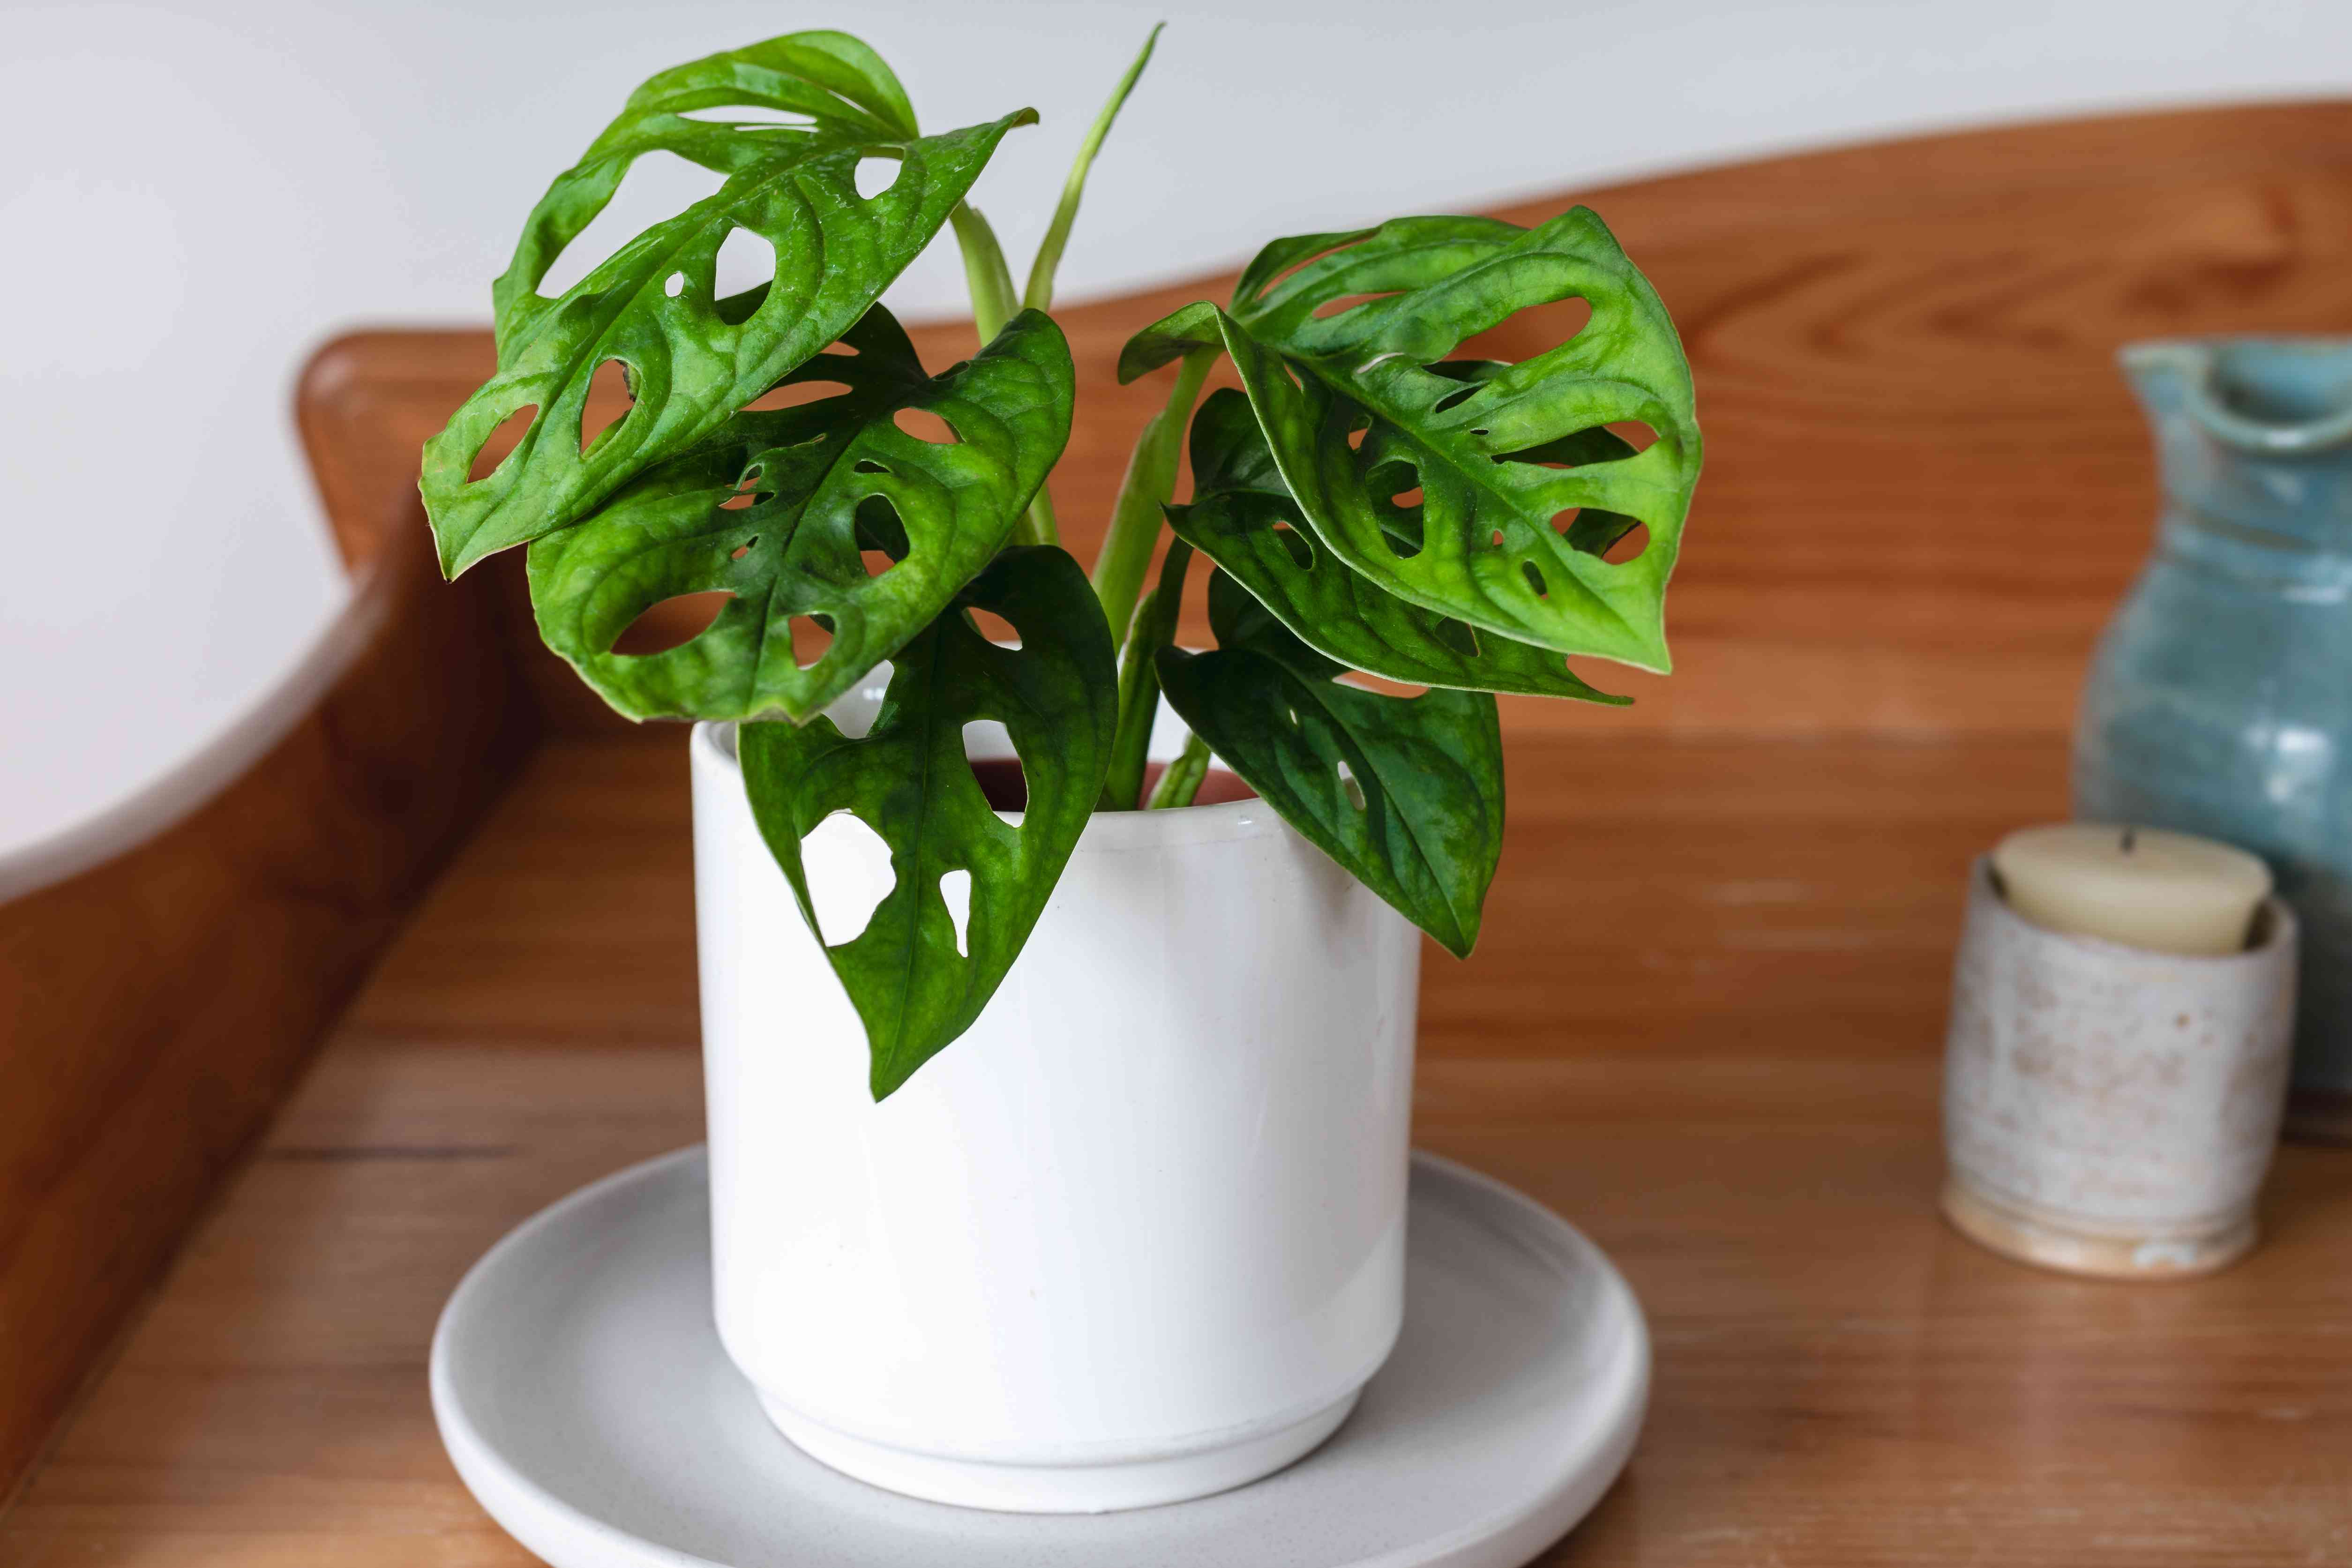
Choosing the Right Method of Propagation
When it comes to propagating your Swiss Cheese Plant (Monstera adansonii), there are several methods you can choose from. Each method has its own advantages and considerations, so it’s important to choose the one that works best for you and your plant. Here are three common methods of propagation:
- Water Propagation: This method involves placing the stem cuttings in a container with water, allowing the roots to develop before transplanting the cutting into soil. It’s a popular method because it allows you to monitor root growth and is relatively low maintenance. However, keep in mind that the root system may be sensitive and require careful handling during transplantation.
- Soil Propagation: This method involves directly planting the stem cuttings in well-draining soil. It allows for faster root development and is an ideal choice if you want to skip the step of transferring the cutting to soil later on. Ensure that the soil is moist but not waterlogged to encourage root growth. Plus, make sure to provide adequate humidity around the cutting to prevent excessive moisture loss.
- Air Layering: This method is ideal for older, mature Swiss Cheese Plants with thick stems. It involves creating a small cut or wound on the stem, applying rooting hormone, wrapping the area with moist sphagnum moss, and covering it with plastic to maintain humidity. This process encourages the stem to develop roots before it is cut and transplanted into its own pot. Air layering requires patience and careful monitoring, but it can be highly effective for plants that are harder to propagate through other methods.
When choosing the method of propagation for your Swiss Cheese Plant, consider factors such as your level of expertise, the time you can dedicate to the process, and the resources you have available. Assess your plant’s specific needs, including its age, health, and size, to determine the most suitable method. Regardless of the method you choose, it’s important to provide your propagated plant with the right care and attention to ensure its successful growth and development.
Gathering the Necessary Materials
Before you begin the propagation process, it’s essential to gather all the necessary materials to ensure a successful outcome. Having the right tools and supplies at hand will make the process easier and more efficient. Here are some key items you’ll need:
- Pruning Shears: A sharp pair of pruning shears will help you make clean cuts on the stem of your Swiss Cheese Plant. Make sure to clean and sterilize the shears before using them to prevent the spread of diseases or pests.
- Rooting Hormone: Rooting hormone is a powder or liquid that contains plant growth hormones to stimulate root development. It can be beneficial for promoting successful root growth, especially when using the water or soil propagation methods. Choose a rooting hormone specifically designed for houseplants.
- Containers: Depending on the propagation method you choose, you may need containers to hold water or soil. For water propagation, you can use a glass jar or a plastic container with enough room for the stem cutting and water. For soil propagation, small pots or seedling trays with good drainage are suitable choices.
- Potting Soil: If you opt for soil propagation, choose a well-draining potting mix that retains some moisture. You can either purchase a commercial potting mix or prepare your own by combining equal parts peat moss, perlite, and vermiculite.
- Moisture-retaining Material: Air layering method requires the use of moisture-retaining materials such as sphagnum moss or coir fiber. These materials help keep the wound area moist and promote root development. Ensure that the material is clean and free from pests or diseases.
- Clean Water: If you plan to propagate your Swiss Cheese Plant using the water method, make sure to have clean and chlorine-free water on hand. You can use filtered or distilled water to prevent any chemical residues from hindering root growth.
Having these materials ready and easily accessible will save you time and prevent any delays or interruptions during the propagation process. Before you start, double-check that all your tools and supplies are clean, in good condition, and well-suited for the propagation method you have chosen. With the right materials at your disposal, you’ll be well-prepared to take the next steps in propagating your Swiss Cheese Plant.
Taking Cuttings from the Mother Plant
When propagating your Swiss Cheese Plant, taking cuttings from a healthy and mature mother plant is the first step. Here’s a step-by-step guide on how to take cuttings:
- Select the Right Stem: Look for a healthy stem on the mother plant that has at least one or two nodes. Nodes are the points on the stem where leaves emerge.
- Prepare the Pruning Shears: Clean and sterilize your pruning shears to prevent the transmission of diseases. You can sterilize them by wiping the blades with rubbing alcohol or a disinfectant solution.
- Cut the Stem: Using the sterilized pruning shears, make a clean cut just below a node on the chosen stem. The cutting should be around 4-6 inches long. Ensure that the cut is straight and smooth to facilitate healthy root development.
- Remove Excess Leaves: Trim away any excess leaves from the lower portion of the cutting. Leave a few leaves at the top to aid photosynthesis and provide energy during the rooting process.
- Optional: Apply Rooting Hormone: If you have rooting hormone available, you can dip the cut end of the stem into the hormone powder or liquid. This can enhance the chances of successful root development.
- Prepare for Planting: If you plan to propagate the cutting in water, place it in a clean glass jar or container filled with water, ensuring that the bottom is submerged. If you’re using the soil propagation method, prepare the potting soil or seedling tray for planting.
Remember to choose a stem that is healthy, well-established, and free from any signs of disease or pest infestation. Taking cuttings from a healthy mother plant increases the chances of successful propagation and ensures that your new plant starts off on the right foot.
Preparing the Cutting for Propagation
After you have taken the cuttings from the mother plant, it’s important to properly prepare them for propagation. Taking the time and care to prepare the cuttings will promote successful root development and increase the chances of a thriving new plant. Here are the steps to prepare the cutting:
- Trim the Cutting: Inspect the cutting and trim the bottom end if necessary. Ideally, the bottom should have a clean, straight cut just below a node. This ensures that the cutting has a fresh surface area for the roots to emerge.
- Remove Excess Leaves: Strip off any excess leaves from the lower portion of the cutting. Leave a few leaves at the top to allow for photosynthesis and energy production. Removing excessive foliage helps redirect the plant’s energy towards root development.
- Optional: Apply Rooting Hormone: If you have rooting hormone available, you can apply it to the cut end of the stem to encourage root growth. Dip the end of the cutting into the rooting hormone powder or liquid, ensuring it is thoroughly coated.
- Allow the Cutting to Callus: Place the prepared cutting in a warm and dry location for a couple of days to allow the cut end to form a callus. This callus acts as a protective layer and helps prevent diseases from entering through the fresh cut.
- Monitor the Cutting: During the callusing period, keep an eye on the cutting to ensure it remains healthy and free from any signs of rot or disease. If you notice any issues, adjust the conditions accordingly or consider taking another cutting from the mother plant.
- Prepare the Propagation Set-Up: While the cutting is callusing, prepare the necessary set-up depending on the chosen method of propagation. If you are using water propagation, fill a glass jar or container with clean, chlorine-free water. For soil propagation, prepare a well-draining potting mix or seedling tray.
Properly preparing the cutting is crucial for promoting successful root development and overall propagation success. By following these steps, you are giving your cutting the best possible start for root growth, ensuring a healthy and thriving plant in the future.
Planting the Cutting in Soil
Once your Swiss Cheese Plant cutting has established a callus and is ready for planting, it’s time to transfer it into soil. Planting the cutting in soil provides a stable medium for root development and sets the stage for the growth of a new plant. Follow these steps to plant your cutting:
- Prepare the Pot or Seedling Tray: Choose a clean pot or seedling tray with drainage holes to prevent waterlogging. Fill it with well-draining potting soil, leaving enough space for the cutting to be inserted.
- Create a Hole: Use your finger or a pencil to create a hole in the soil where you will place the cutting. Make sure the hole is deep enough to accommodate the lower portion of the cutting. The node where the leaves emerge should be above the soil surface.
- Insert the Cutting: Gently insert the bottom end of the cutting into the prepared hole, ensuring that it is securely placed in the soil. Lightly press the soil around the base of the cutting to provide stability.
- Water the Soil: After planting the cutting, water the soil thoroughly but gently. Ensure that the soil is evenly moist but not overly saturated. Avoid overwatering, as it can lead to root rot and other issues.
- Place in Optimal Conditions: Find a suitable location for your newly planted cutting. Swiss Cheese Plants prefer bright, indirect light, so place the pot or tray in a spot with ample sunlight. Maintain a warm and humid environment to promote root growth.
- Monitor and Maintain: Regularly check the moisture level of the soil and water when it feels slightly dry. Avoid letting the soil completely dry out or become too waterlogged. Also, keep an eye out for any signs of pests or diseases and take appropriate action if necessary.
By planting the cutting in soil and providing the right care, you are giving it the optimal conditions for root development and growth. Keep a consistent watering schedule, provide adequate light, and maintain optimal humidity to support the cutting’s successful transition into a healthy and thriving Swiss Cheese Plant.
Caring for the Propagated Plant
After successfully planting your Swiss Cheese Plant cutting and witnessing the growth of new roots and leaves, it’s vital to provide proper care to ensure its continued health and development. Here’s how you can care for your propagated plant:
- Watering: Swiss Cheese Plants prefer evenly moist soil. Check the moisture level regularly and water when the top inch of soil feels dry. Be mindful not to overwater, as excessive moisture can lead to root rot. Adjust the watering frequency based on the plant’s needs and the environmental conditions.
- Lighting: Place your propagated plant in a bright location with indirect sunlight. Avoid exposing it to direct, intense sunlight, as it can scorch the leaves. If necessary, provide some shade during the hottest part of the day to prevent leaf damage. Adequate light is crucial for healthy growth and vibrant foliage.
- Temperature and Humidity:The ideal temperature range for Swiss Cheese Plants is between 65-85°F (18-29°C). Maintain a moderate to high humidity level, which can be achieved by placing a tray with water near the plant or using a humidifier. Regularly misting the leaves can also help increase humidity.
- Fertilizing: Feed your propagated plant with a balanced, water-soluble fertilizer formulated for houseplants. Follow the manufacturer’s instructions for the recommended dosage and frequency. Typically, fertilizing every 2-4 weeks during the growing season (spring and summer) will provide sufficient nutrients for healthy growth.
- Pruning: Regular pruning is essential to maintain the desired shape of your Swiss Cheese Plant. Remove any yellow or damaged leaves, as well as any excessive growth that may affect the plant’s appearance or health. Prune back leggy stems to encourage bushier growth.
- Pest Control: Keep a close eye on your propagated plant for any signs of pests such as spider mites, mealybugs, or scale insects. If you notice any infestation, promptly treat the plant with an appropriate organic or chemical pesticide, following the instructions carefully.
By providing proper care in terms of watering, lighting, temperature, humidity, fertilizing, pruning, and pest control, you will create a favorable environment for your propagated Swiss Cheese Plant to thrive. Regular monitoring and adjustments based on the plant’s needs will help ensure its continued health and beauty.
Troubleshooting Common Problems
While caring for your propagated Swiss Cheese Plant, you may encounter some common problems. Understanding these issues and knowing how to troubleshoot them can help ensure the health and vitality of your plant. Here are a few common problems and their solutions:
- Yellowing Leaves: Yellow leaves can be a sign of overwatering, poor drainage, or nutrient deficiency. Check the moisture level of the soil and adjust your watering accordingly. Ensure that your pot has proper drainage to prevent waterlogged roots. If the issue persists, consider fertilizing your plant with a balanced houseplant fertilizer to address any nutrient deficiencies.
- Brown Leaf Tips: Brown leaf tips can indicate low humidity levels or excessive fertilizer use. Increase humidity around the plant by misting its leaves, placing a tray of water nearby, or using a humidifier. If you have been using too much fertilizer, reduce the frequency or concentration of applications to avoid burning the roots.
- Stunted Growth: Stunted growth can be due to insufficient light or improper watering. Ensure that your Swiss Cheese Plant is receiving enough bright indirect light. Adjust watering to keep the soil evenly moist but not waterlogged. Consider repotting your plant if it has become rootbound. Additionally, check for pests such as root rot or aphids that may be hindering growth.
- Wilting Leaves: Wilting can be a sign of underwatering or overwatering. Check the soil moisture level and adjust watering accordingly. If the soil is too dry, water more frequently, and if it is overly saturated, allow the soil to dry out before watering again. Ensure proper drainage in your pot to prevent water accumulation.
- Pest Infestation: Common pests that can affect Swiss Cheese Plants include spider mites, mealybugs, and scale insects. If you notice small webs, white cottony clusters, or small bumps on the leaves and stems, take immediate action. Isolate the affected plant, remove the pests manually if possible, and treat with an appropriate pesticide following the instructions carefully.
By identifying and addressing these common problems promptly, you can maintain a healthy and thriving Swiss Cheese Plant. Regular observation and appropriate care will help prevent and mitigate these issues, ensuring the continued beauty and vitality of your propagated plant.
Transplanting the Propagated Plant
As your propagated Swiss Cheese Plant continues to grow and develop, you may find that it has outgrown its current pot or seedling tray. Transplanting the propagated plant into a larger container will provide it with more space for root expansion and support its overall health and vitality. Here’s how you can transplant your propagated plant:
- Choose the Right Pot: Select a pot that is slightly larger than the current one but not excessively spacious. Ensure the new pot has drainage holes to prevent waterlogging and promote root health.
- Prepare the New Pot: Fill the new pot with well-draining potting soil, leaving enough space for the root ball of the propagated plant. Gently tamp down the soil to remove any pockets of air and provide stability for the plant.
- Water the Plant: Water the plant thoroughly a few hours before transplanting. This will help moisten the soil and make it easier to remove the plant from its current container.
- Carefully Remove the Plant: Place your hand over the top of the current container, with the stem between your fingers, and invert it. Gently tap the bottom of the container to loosen the root ball. Carefully slide the plant out, taking care not to damage the roots.
- Position the Plant: Place the propagated plant in the center of the new pot, ensuring that the base of the stem is level with or slightly above the rim of the pot. Adjust the soil level if needed.
- Fill in with Soil: Fill in the empty spaces around the root ball with fresh potting soil. Gently firm the soil with your fingertips to eliminate air pockets but avoid compacting it too tightly, as that can impede root growth.
- Water and Adjust: After transplanting, thoroughly water the plant to help settle the soil and provide hydration. Monitor the plant closely in the days following the transplant, ensuring it is receiving the right amount of water and adjusting care as needed.
Transplanting your propagated Swiss Cheese Plant into a larger pot allows the roots to spread out and promotes healthy growth. Be gentle during the transplant process to avoid damaging the roots. With proper care and adjustment, your propagated plant will continue to thrive as it settles into its new home.
Enjoying the Growth and Beauty of Your Swiss Cheese Plant
After successfully propagating and caring for your Swiss Cheese Plant, watching it grow and thrive is a rewarding experience. Here are some tips on how to continue enjoying the growth and beauty of your plant:
- Provide Adequate Space: As your Swiss Cheese Plant grows, ensure that it has enough space to spread out. This tropical plant can develop large, fenestrated leaves, so make sure to give it ample room to display its unique foliage.
- Encourage Bushier Growth: To promote a bushier and more compact plant, consider periodically pinching or pruning the tips of the stems. This will encourage branching and result in a fuller appearance.
- Support for Climbing Varieties: If you have a climbing variety of Swiss Cheese Plant, provide it with a moss pole or trellis for support. This will allow it to grow vertically and showcase its characteristic aerial roots.
- Regular Cleaning: Dust can accumulate on the large, intricate leaves of the Swiss Cheese Plant. Wipe the leaves gently with a damp cloth or use a gentle spray of water to keep them clean and free from dust. This not only enhances the plant’s appearance but also improves its overall health by allowing better light absorption.
- Rotate for Balanced Growth: Turn your Swiss Cheese Plant periodically to ensure even exposure to sunlight. This will promote uniform growth and prevent the plant from leaning towards one side.
- Stay Mindful of Pests: Monitor your plant for any signs of pests, such as spider mites or mealybugs. Early detection and prompt treatment will minimize any damage and help protect the health of your plant. Regularly inspect the leaves, stems, and soil for any signs of infestation.
- Share the Joy: If you have been successful in propagating your Swiss Cheese Plant, consider sharing cuttings or baby plants with friends and family. This not only spreads the joy of owning this beautiful plant but also helps to propagate and preserve its genetic diversity.
By following these tips, you can enjoy the growth and beauty of your Swiss Cheese Plant for years to come. Appreciate its unique foliage, provide the necessary care, and take the time to admire the intricate patterns that make this plant so captivating. With dedication and attention, your Swiss Cheese Plant will continue to be a source of joy and beauty in your home.