
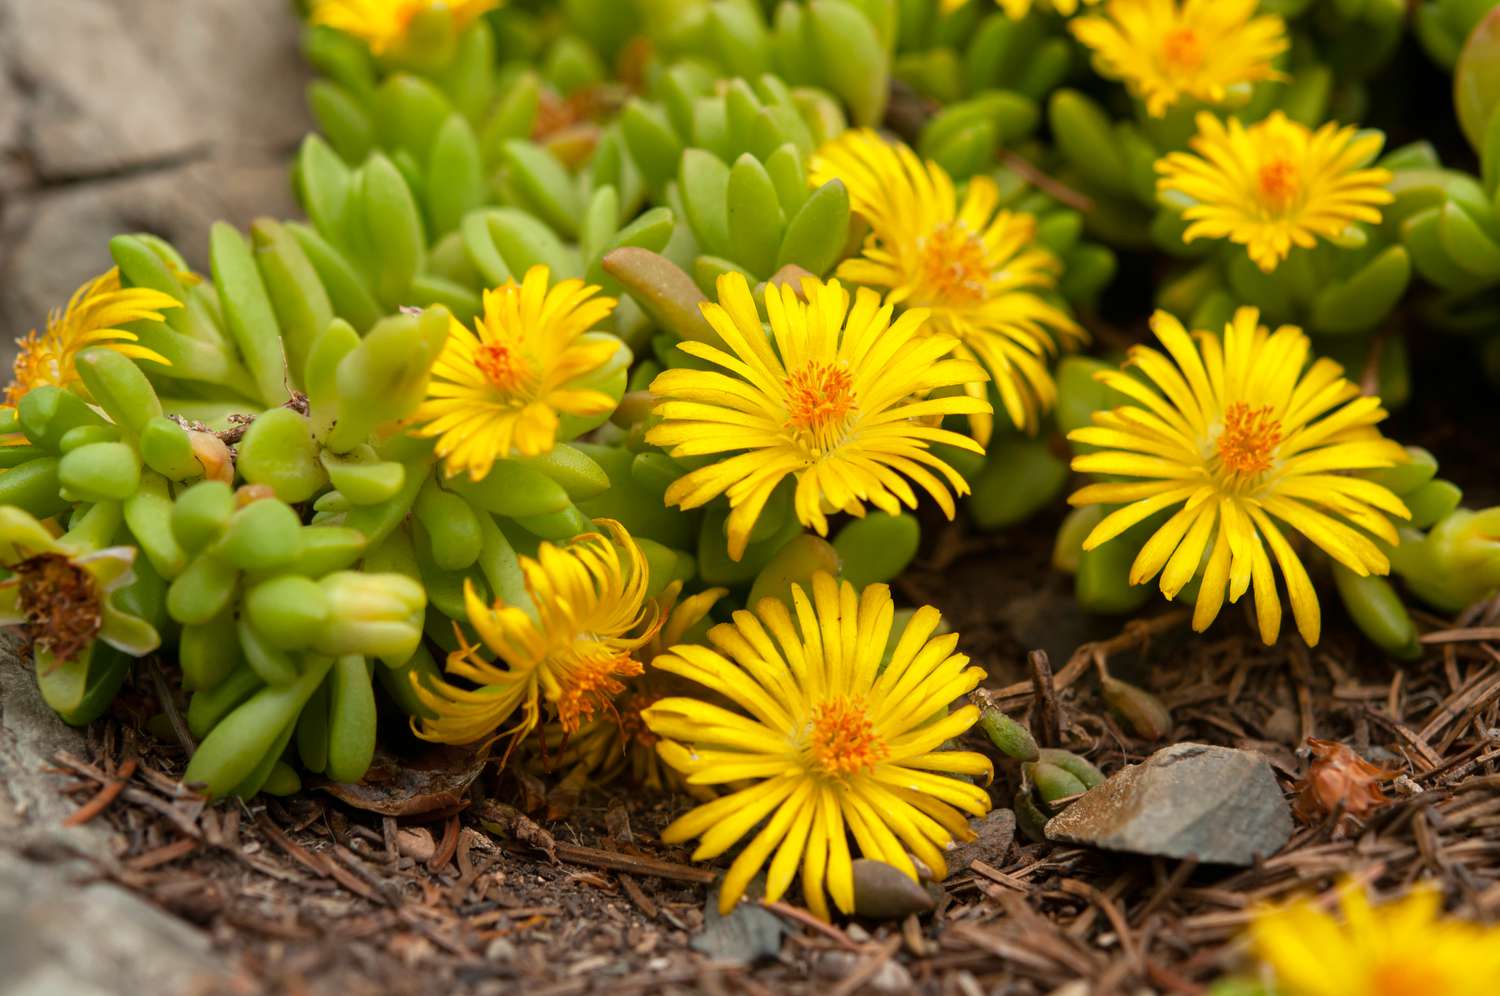
Selecting the Right Time and Place to Propagate Ice Plant
When it comes to propagating ice plants, timing and location are crucial factors that can greatly influence the success of your efforts. By carefully choosing the right time and place, you can ensure optimal conditions for the propagation process and increase your chances of success. Here are some important considerations to keep in mind:
1. Season: It is best to propagate ice plants during the spring or early summer months. This is when the plants are actively growing and have the highest chance of root development. Avoid propagating during extreme weather conditions such as freezing winters or scorching summers.
2. Temperature and Light: Ice plants thrive in full sun and warm temperatures, so select a location that provides at least 6 to 8 hours of direct sunlight per day. Avoid areas with excessive shade or areas that receive intense afternoon sun, as this can stress the plants.
3. Soil Conditions: Ice plants prefer well-draining soil with a slightly acidic to neutral pH. Before propagating, ensure that the soil is loose, fertile, and free from any previous plant debris or weeds. If the soil is heavy clay or compacted, consider amending it with organic matter to improve drainage.
4. Water Availability: Ice plants are drought-tolerant once established, but during the propagation stage, they require consistent moisture. Choose a location where water is easily accessible so that you can provide regular watering as needed.
5. Protection from Pests and Diseases: Select a location that is relatively pest-free and provides good air circulation. Avoid areas prone to pests or diseases that could hinder the healthy growth of your propagated ice plants.
By taking into account these factors and selecting the right time and place for propagating your ice plants, you are laying a strong foundation for success. Next, gather the necessary supplies to support the propagation process.
Gathering the Necessary Supplies
Before you begin the process of propagating ice plants, it’s essential to gather all the necessary supplies to ensure a smooth and successful propagation. Having the right tools and materials on hand will make the process easier and more efficient. Here are some essential supplies to gather:
1. Pruning Shears: You’ll need a pair of sharp pruning shears to take cuttings from the ice plant. Ensure they are clean and sterilized to prevent the spread of diseases.
2. Rooting Hormone: Rooting hormone can stimulate root development and increase the chances of successful propagation. Choose a powdered or liquid rooting hormone suitable for succulent plants.
3. Pot or Container: Select a small container with drainage holes to plant the ice plant cuttings. It should be suitable for succulent plants and have enough space to accommodate the rooting medium.
4. Rooting Medium: Prepare a well-draining rooting medium for the ice plant cuttings. A mixture of perlite and peat moss or a succulent-specific potting mix will work well. Avoid using heavy, moisture-retentive soils.
5. Watering Can or Spray Bottle: You’ll need a watering can or spray bottle to provide moisture to the propagated cuttings. It’s important to keep the soil slightly moist during the rooting process.
6. Clear Plastic Bag or Dome: A clear plastic bag or dome can create a mini greenhouse effect, maintaining humidity around the cuttings and promoting root development. This helps create an ideal environment for successful propagation.
7. Labels: It’s helpful to label the containers or pots with the date and plant variety. This will help you keep track of your propagating efforts and monitor the progress of the ice plant cuttings.
8. Clean, Sterile Tools: Ensure that all your tools, including pruning shears and containers, are clean and sterilized. This helps prevent the spread of diseases and ensures a healthy start for your propagated ice plants.
By gathering these necessary supplies, you’ll be well-prepared to begin the propagation process. In the next section, we’ll discuss how to prepare the soil for successful ice plant propagation.
Preparing the Soil for Propagation
Preparing the soil properly is a crucial step in the ice plant propagation process. By providing the right soil conditions, you’ll create an ideal environment for the cuttings to develop healthy roots and thrive. Here’s how to prepare the soil for successful ice plant propagation:
1. Clear the Area: Start by clearing the area where you plan to propagate the ice plant. Remove any weeds, rocks, or debris that may obstruct the growth of the cuttings.
2. Loosen the Soil: Use a garden fork or a trowel to loosen the soil in the propagation area. This will help improve drainage and create a loose, friable surface for the cuttings to take root.
3. Amend the Soil: If the soil is heavy clay or lacks nutrients, amend it by incorporating organic matter like compost or well-rotted manure. This will improve the soil structure and provide essential nutrients for the growing ice plant cuttings.
4. Ensure Good Drainage: Ice plants prefer well-draining soil, so ensure that the propagation area has proper drainage. If the soil tends to be heavy or retain water, consider adding sand or perlite to improve drainage.
5. Check the pH Level: Ice plants prefer slightly acidic to neutral soil pH. Test the soil’s pH level using a soil testing kit and make adjustments if necessary. Add lime for excessively acidic soil or sulfur for excessively alkaline soil to bring the pH to the desired range.
6. Remove Excess Vegetation: Remove any nearby vegetation that may shade the ice plant cuttings or compete for nutrients. This will give the propagating plants ample access to sunlight and resources.
7. Water the Soil: Before planting the ice plant cuttings, water the soil lightly to ensure it is slightly moist but not waterlogged. This will provide a good start for the cuttings while maintaining the proper moisture level in the soil.
By taking the time to properly prepare the soil, you’re setting the stage for successful ice plant propagation. Next, we’ll discuss how to take cuttings from the ice plant to propagate new plants.
Taking Cuttings from the Ice Plant
One of the most common methods of propagating ice plants is through stem cuttings. By taking cuttings from a healthy and established ice plant, you can create new plants that will exhibit the same desirable characteristics. Here’s how to take cuttings from the ice plant:
1. Choose Healthy Stems: Select healthy, non-flowering stems from the ice plant for propagation. Look for stems that are about 4 to 6 inches long and free from any signs of disease or damage. The stems should be firm and green in color.
2. Make Clean Cuts: Using sharp and sterilized pruning shears, make clean, angled cuts just below a node. The node is where leaves or buds emerge from the stem. Aim for at least two to three leaves per cutting.
3. Remove Lower Leaves: Strip off the lower leaves from the bottom half of the cutting. This will create a bare stem that can be easily inserted into the rooting medium without the risk of rotting leaves.
4. Optional: Dip in Rooting Hormone: If desired, you can dip the bottom end of the cutting in a powdered or liquid rooting hormone. This can help stimulate root growth and increase the success rate of the propagation. Gently tap off any excess hormone before planting.
5. Plant the Cuttings: Fill a small container or pot with a well-draining rooting medium, such as perlite and peat moss or a succulent-specific potting mix. Insert the cuttings into the medium, making sure at least half of the cutting is buried. Lightly press the medium around the base of the cutting for stability.
6. Mist or Water: After planting the cuttings, mist the leaves with water or lightly water the soil to settle it around the cuttings. Avoid overwatering, as excess moisture can lead to rotting. Place the container in a warm and bright location, but out of direct sunlight.
7. Provide Humidity: To create a humid environment for the cuttings, you can cover the container with a clear plastic bag or place a clear dome over it. This will help retain moisture and promote root development. Ventilate the container periodically to prevent excessive condensation.
By following these steps, you’ll be well on your way to propagating new ice plants from stem cuttings. In the next section, we’ll discuss the use of rooting hormone in more detail and its benefits for successful propagation.
Treating the Cuttings with Rooting Hormone
Using rooting hormone can significantly enhance the success rate of propagating ice plants from cuttings. Rooting hormone contains growth-inducing substances that stimulate root development, increasing the chances of successful propagation. Here’s how to treat the cuttings with rooting hormone:
1. Choose a Rooting Hormone: Select a rooting hormone suitable for succulent plants or general use. You can find powdered or liquid forms of rooting hormone at your local garden center or online. Follow the instructions on the packaging for proper usage.
2. Prepare the Cuttings: After taking the cuttings from the ice plant, ensure the ends are clean and free from excess moisture. Trim any damaged or jagged edges to create a smooth cut surface for optimal hormone absorption.
3. Dip the Cut Ends: If using a powdered rooting hormone, dip the cut end of each ice plant cutting into the hormone, ensuring it is thoroughly coated. Gently tap off any excess hormone to avoid overdosing.
4. Tap off Excess Hormone: If using a liquid rooting hormone, carefully pour a small amount into a separate container. Dip the cut end of each cutting into the liquid hormone for a few seconds, allowing it to be absorbed. Ensure the hormone is not diluted or contaminated with any plant debris.
5. Plant the Treated Cuttings: After treating the cuttings with rooting hormone, plant them in the prepared rooting medium. Make sure to insert the treated end into the medium, ensuring good contact between the hormone and the growing medium.
6. Dispose of Excess Hormone: Any excess rooting hormone should be disposed of properly according to the manufacturer’s instructions. Avoid pouring it down the drain or in areas with sensitive plants or water sources.
7. Avoid Overdosing: It’s important to use rooting hormone as directed and avoid overdosing. Using too much hormone can have negative effects on the cuttings and may inhibit root development. Follow the recommended dosage and application techniques provided by the manufacturer.
By treating the ice plant cuttings with rooting hormone, you’re providing them with an extra boost for successful root development. In the next section, we’ll discuss how to properly plant the treated cuttings and provide the ideal growing conditions for their propagation.
Planting the Ice Plant Cuttings
After treating the ice plant cuttings with rooting hormone, the next step is to carefully plant them in the prepared rooting medium. By providing the right planting conditions, you will create an environment that promotes successful root establishment and growth. Here’s how to plant the ice plant cuttings:
1. Prepare the Container: Choose a small container or pot with drainage holes. Fill it with a well-draining rooting medium such as perlite and peat moss or a succulent-specific potting mix. Ensure the medium is slightly moist but not waterlogged.
2. Create Holes for Planting: Use your finger or a pencil to create holes in the rooting medium. Make the holes deep enough to allow for at least half of the cutting to be buried, while leaving a few leaves above the surface.
3. Gently Insert the Cuttings: Take each treated ice plant cutting and carefully place it into the prepared holes. Hold the cutting by its leaves or upper portion, avoiding contact with the treated ends. Gently press the medium around the base of the cutting to provide stability.
4. Maintain Proper Spacing: Ensure there is enough spacing between the cuttings to allow air circulation and prevent overcrowding. This will reduce the risk of disease and promote healthier growth.
5. Water Lightly: After planting the cuttings, give them a light watering to settle the medium around the roots. Be cautious not to overwater, as excessive moisture can lead to rotting. Maintain a slightly moist, but not soggy, environment throughout the propagation process.
6. Optional: Cover for Humidity: If desired, you can cover the container with a clear plastic bag or place a clear dome over it. This will help create a humid microclimate around the cuttings, promoting root development. Ventilate the cover periodically to prevent excessive condensation.
7. Place in a Suitable Location: Position the planted cuttings in a warm and bright location, preferably with indirect sunlight. Avoid placing them in direct sunlight, as this may cause excessive heat stress. Maintain a temperature range of around 65-75°F (18-24°C) for optimal growth.
By following these steps, you will give the ice plant cuttings the best chance to establish roots and flourish. In the next section, we’ll discuss the essential growing conditions and care for the propagated ice plant cuttings.
Providing the Optimal Growing Conditions for Ice Plant Cuttings
Creating the right growing conditions is crucial for the successful development of ice plant cuttings. By providing optimal conditions, you can ensure healthy growth and increase the chances of the cuttings establishing strong roots. Here are some key factors to consider when it comes to the growing conditions for ice plant cuttings:
1. Light: Ice plants thrive in full sun to partial shade. Place the propagated cuttings in a location that receives at least 6 to 8 hours of direct sunlight daily. However, be cautious of intense midday sun during hot summer months, as it can cause stress to the young plants.
2. Temperature: Ice plants prefer warm temperatures between 65-85°F (18-29°C). Avoid exposing the cuttings to extreme cold or hot temperatures, as it can negatively affect their growth. If necessary, provide shade or move the cuttings indoors during temperature extremes.
3. Watering: While ice plants are drought-tolerant, the propagated cuttings require consistent moisture during the initial growth phase. Water them when the top inch of the soil feels dry, ensuring that the soil is evenly moist but not waterlogged. Avoid overwatering, as it can lead to root rot.
4. Humidity: Ice plants are capable of adapting to a range of humidity levels. However, maintaining a moderate level of humidity, especially during hot and dry periods, can promote healthier growth. Misting the leaves or placing a tray of water near the cuttings can help increase humidity.
5. Soil Drainage: Good soil drainage is crucial to prevent waterlogging and root rot. Ensure the rooting medium or soil mixture used in the container has excellent drainage capabilities. Avoid using heavy clay soils or containers without drainage holes.
6. Fertilization: Ice plants are generally low-maintenance and do not require frequent fertilization. However, you can apply a diluted, balanced liquid fertilizer once every two to three months during the active growing season to provide necessary nutrients for healthy growth.
7. Pest and Disease Control: Monitor the propagated ice plant cuttings for any signs of pests or diseases. Common issues include aphids, mealybugs, or fungal diseases. If detected, take appropriate measures to control the pests or diseases, such as using organic insecticides or adjusting growing conditions.
By providing the optimal growing conditions for the ice plant cuttings, you are creating an environment that supports their healthy development and growth. In the next section, we’ll discuss the essential care needed to ensure successful ice plant propagation.
Taking Care of the Ice Plant Propagation
To ensure the success of your ice plant propagation, proper care is essential. By providing the necessary attention and maintenance, you can help the propagated cuttings establish strong roots and thrive. Here are some key care tips for ice plant propagation:
1. Watering: Regular watering is crucial during the initial stages of propagation. Keep the soil consistently moist but not soaked. Water when the top inch of the soil feels dry and avoid overwatering, as it can lead to root rot. Adjust the watering frequency as the cuttings establish roots and the soil moisture needs change.
2. Pruning: As the ice plant cuttings grow, you may need to prune and remove any dead or decaying leaves. This helps maintain the plant’s vitality and prevents the spread of diseases. Use sterile pruning shears to avoid cross-contamination and make clean cuts just above a node.
3. Fertilization: Ice plants are relatively low-maintenance and do not require frequent fertilization. However, you can apply a diluted, balanced liquid fertilizer once every two to three months during the growing season to provide necessary nutrients. Be careful not to over-fertilize, as it can lead to excessive foliage growth and reduce flowering.
4. Weed Control: Regularly inspect the propagated ice plant cuttings for any weeds that may emerge. Remove any competing weeds promptly to prevent them from stealing nutrients and space from the growing ice plants. Be careful when weeding to avoid damaging the delicate roots or disturbing the cuttings.
5. Protection from Extreme Weather: Ice plants are generally hardy, but extreme weather conditions can stress or damage the young plants. During periods of intense heat, provide shade or move the containers to a cooler location. Similarly, during frost or freezing temperatures, provide protection by covering the plants with a frost cloth or bringing them indoors.
6. Monitor for Pests and Diseases: Keep a close eye on the propagated ice plants for any signs of pests or diseases. Common issues include aphids, mealybugs, or fungal diseases. If detected, take appropriate measures to control the pests or diseases. Consider using organic insecticides or natural remedies and adjust the growing conditions to prevent further infestation.
7. Observing Growth and Progress: Regularly observe and monitor the growth and progress of the propagated ice plant cuttings. Look for signs of new leaf growth, increased stem thickness, and root development. This will help you determine if the propagation process is successful and allow you to make any necessary adjustments to care techniques if needed.
By following these care tips, you are providing the proper attention and maintenance needed for successful ice plant propagation. In the next section, we’ll discuss the process of transplanting the ice plant cuttings into the garden for permanent growth.
Transplanting the Ice Plant Cuttings into the Garden
Once the ice plant cuttings have established strong roots and shown significant growth, it’s time to transplant them into the garden for permanent growth. Transplanting the propagated cuttings will allow them to flourish and become established in their new environment. Here are the steps to follow when transplanting ice plant cuttings:
1. Choose the Right Location: Select a suitable location in your garden that provides full sun or partial shade. Ensure the soil is well-draining and free from any competition from weeds or other plants. Consider spacing requirements and eventual growth size when choosing the planting area.
2. Prepare the Planting Holes: Dig holes in the garden that are slightly wider and deeper than the root ball of the propagated ice plant cuttings. Space the holes according to the recommended plant spacing for the specific ice plant variety you are transplanting.
3. Water the Transplants: Before removing the ice plant cuttings from their containers, thoroughly water the containers to moisten the root ball and make it easier to remove the plants without causing stress. This will help minimize transplant shock.
4. Remove the Cuttings from Containers: Gently tap the sides of the containers to loosen the root ball, then carefully remove the ice plant cuttings from their containers, ensuring the root system remains intact. Handle the plants by the root ball to avoid damaging any newly formed roots or delicate foliage.
5. Place the Cuttings in the Holes: Insert the ice plant cuttings into the prepared holes, ensuring that the top of the root ball is level with or slightly above the soil surface. Backfill the holes with soil gently, firming it around the root ball to provide stability.
6. Water and Mulch: After transplanting, thoroughly water the newly planted ice plant cuttings to settle the soil around the roots. Apply a layer of organic mulch around the plants to help conserve moisture, suppress weed growth, and regulate soil temperature.
7. Monitor and Maintain: Regularly monitor the transplanted ice plant cuttings for the first few weeks after transplanting. Ensure they receive adequate water, especially during dry periods, and check for any signs of stress or disease. Make any necessary adjustments to watering or maintenance practices as needed.
By carefully transplanting the ice plant cuttings into the garden and providing the necessary care and maintenance, you are allowing them to establish and thrive in their permanent growing location. In the next section, we’ll discuss some common problems that you may encounter during the ice plant propagation process.
Troubleshooting Common Problems with Ice Plant Propagation
While ice plant propagation can be a rewarding process, it’s not uncommon to encounter a few challenges along the way. Understanding and addressing common problems that may arise during the propagation process is key to ensuring the success of your efforts. Here are some common problems you may encounter with ice plant propagation and how to troubleshoot them:
1. Root Rot: Excessive moisture or poor drainage can lead to root rot, which is characterized by discolored, mushy roots. To prevent root rot, ensure that your rooting medium or garden soil has good drainage. Avoid overwatering the cuttings and consider adjusting the watering frequency to suit the plant’s needs.
2. Fungal Diseases: Ice plants can be susceptible to fungal diseases such as powdery mildew or leaf spot. To prevent fungal diseases, avoid overhead watering, which can promote moisture buildup on the leaves. Provide adequate spacing between the plants to promote air circulation. If necessary, treat the affected plants with appropriate fungicides.
3. Pests: Common pests that may affect ice plants include aphids, mealybugs, and snails. Monitor the plants regularly for signs of infestation, such as distorted growth or chewed leaves. Use organic insecticides or natural pest control methods to manage the pests, such as neem oil or introducing beneficial insects like ladybugs.
4. Lack of Root Development: If the ice plant cuttings fail to develop roots or show signs of stunted growth, it may indicate a problem with the moisture balance or the rooting hormone treatment. Ensure that the cuttings are receiving adequate moisture without being waterlogged. If needed, revisit the rooting hormone application process or consider using a different brand or type of hormone.
5. Insufficient Light: Inadequate light can result in weak and leggy growth or poor root development. Ensure that the propagated cuttings receive at least 6 to 8 hours of direct sunlight or provide supplemental grow lights if necessary, especially in areas with limited natural light.
6. Transplant Shock: When moving the ice plant cuttings into the garden, they may experience transplant shock, resulting in wilting or temporary stunted growth. Ensure that the plants are watered and protected from extreme weather conditions during the early stages of transplant. Provide shade or cover in cases of excessive heat or frost.
7. Nutrient Deficiencies: If the ice plant cuttings display signs of yellowing leaves or slow growth, it may indicate nutrient deficiencies. Apply a balanced fertilizer suitable for succulent plants or provide organic compost to replenish the soil’s nutrients. Ensure that you follow the recommended dosage and application frequency for the specific ice plant variety.
By recognizing and addressing these common problems, you can overcome challenges and ensure the success of your ice plant propagation. Remember to observe the plants regularly, make necessary adjustments, and seek further guidance if needed. With patience and care, you’ll be rewarded with healthy and thriving ice plants in your garden.