
Choosing the Right Sedum Varieties
When it comes to selecting the right sedum varieties for your garden, there are several factors to consider. From sun exposure to soil conditions, different sedums thrive in different environments. Here are some tips to help you choose the perfect sedum varieties for your garden:
- Sun exposure: Sedums are known for their ability to tolerate a wide range of sunlight conditions. Some varieties, like Sedum spurium (dragonsblood sedum), can thrive in full sun, while others, such as Sedum morganianum (burro’s tail sedum), prefer partial shade. Assess the sun exposure in your garden and choose sedum varieties accordingly.
- Height and spread: Sedums come in various sizes, from low-growing groundcovers to taller plants. Determine the available space in your garden and choose sedum varieties that won’t overpower neighboring plants or overcrowd the area.
- Flower color: Sedums produce vibrant blooms in a range of colors, including shades of pink, red, yellow, and white. Consider the color scheme of your garden and select sedum varieties that will complement or contrast with other flowers.
- Season of interest: Some sedum varieties exhibit beautiful foliage year-round, while others shine with their blooms during specific seasons. Decide whether you want sedums that provide visual interest throughout the year or those that make a bold statement during a particular season.
- Deer and rabbit resistance: If you live in an area with frequent visits from deer or rabbits, look for sedum varieties that are known to be resistant to these pests. This way, you can enjoy your sedums without worrying about them becoming a tasty snack for wildlife.
With these considerations in mind, you can choose sedum varieties that are well-suited to your garden’s specific conditions and personal preferences. Remember to research each variety’s specific care requirements to ensure they will thrive in your garden. Now let’s move on to the next section to learn more about site selection and preparation for planting sedum.
Site Selection and Preparation
Choosing the right site and preparing it properly are essential for successful sedum plantings. Here are some guidelines to help you ensure optimal conditions for your sedums:
- Sunlight: Most sedum varieties thrive in full sun to partial shade, so select a location that receives at least six hours of direct sunlight per day. Avoid planting sedums in areas with heavy shade, as this can lead to leggy growth and reduced flowering.
- Soil drainage: Sedums prefer well-draining soil to prevent waterlogged roots. If your soil tends to retain water or is heavy clay, consider improving the drainage by adding organic matter such as compost or sand.
- Soil fertility: Sedums are adaptable and can grow in a wide range of soil types. However, they generally prefer slightly acidic to neutral soil with moderate fertility. Conduct a soil test to assess the pH and nutrient levels, and amend the soil as necessary to ensure optimal conditions.
- Site preparation: Prepare the planting site by removing any existing weeds or vegetation. Loosen the soil using a garden fork or tiller to improve aeration and root penetration. Remove any rocks or debris that may impede the growth of the sedums.
- Spacing: Consider the mature size of the sedum varieties you’re planting and provide enough space between them to allow for their growth. Proper spacing ensures adequate air circulation and helps prevent overcrowding, which can lead to disease and pest issues.
- Water source: Ensure that the planting site has access to a water source for irrigation purposes. While sedums are drought-tolerant once established, they still require regular watering during the initial establishment period.
By selecting a suitable site and preparing it properly, you provide the foundation for healthy and thriving sedums. Now that your site is ready, it’s time to prepare the soil and make any necessary amendments before planting your sedums. Let’s dive into the next section to learn more about soil preparation and amendments.
Soil Preparation and Amendments
Proper soil preparation is crucial for the success of your sedum plantings. Sedums prefer well-draining soil with moderate fertility. Here are some steps to prepare your soil and make necessary amendments:
- Soil testing: Before making any amendments, conduct a soil test to determine the pH level and nutrient content of your soil. This will help you identify any deficiencies or imbalances that need to be addressed.
- pH adjustment: Most sedums prefer slightly acidic to neutral soil, with a pH range of 6.0 to 7.0. If your soil is too acidic or alkaline, adjust the pH by adding soil amendments. Lime can be used to raise the pH, while sulfur or peat moss can lower it.
- Organic matter: Improve the soil’s texture and fertility by incorporating organic matter such as compost, well-rotted manure, or leaf mold. Organic matter helps retain moisture, enhances nutrient availability, and promotes beneficial microbial activity.
- Drainage improvement: If your soil has poor drainage, you can amend it by adding coarse sand, perlite, or vermiculite. These amendments help improve aeration and prevent waterlogging, which can lead to root rot.
- Nutrient supplementation: If the soil test indicates nutrient deficiencies, you can supplement the soil with organic or slow-release fertilizers. Use fertilizers specifically formulated for flowering plants, and follow the recommended application rates.
- Mulching: After planting your sedums, apply a layer of organic mulch around the base of the plants. Mulch helps conserve soil moisture, suppress weed growth, and insulate the roots during extreme temperatures.
Remember to thoroughly mix any amendments into the soil to ensure they are evenly distributed. Allow the amended soil to settle for a few weeks before planting your sedums to give the amendments time to integrate and harmonize with the existing soil.
By properly preparing your soil and making necessary amendments, you provide the ideal growing conditions for your sedums. Now that your soil is ready, let’s move on to the next section to learn about different methods of propagating sedum.
Propagating Sedum
There are several methods of propagating sedums, including cuttings, division, and seeds. Propagating your sedum plants allows you to expand your garden or share them with fellow gardening enthusiasts. Let’s explore these propagation methods:
- Planting Sedum from Cuttings: This method involves taking stem cuttings from mature sedum plants and rooting them in a suitable growing medium. Select healthy, non-flowering stems and make a clean cut just below a leaf node. Remove the lower leaves and dip the cut end into a rooting hormone powder. Plant the cutting in a container filled with well-draining soil and keep it moist until roots form.
- Planting Sedum from Division: Division is the process of separating a mature sedum plant into smaller sections. This is typically done in spring or early fall when the plant is not actively growing. Carefully dig up the sedum clump, taking care not to damage the roots. Gently separate the clump into smaller sections, ensuring each division has a healthy amount of roots and foliage. Replant the divisions in well-prepared soil and water thoroughly.
- Planting Sedum from Seeds: Growing sedums from seeds can be a rewarding but time-consuming process. Collect mature seed heads from your existing sedum plants and allow them to dry. Sow the seeds in a container filled with well-draining soil, lightly covering them with a thin layer of soil. Keep the soil consistently moist until germination occurs, which typically takes several weeks. Transplant the seedlings into individual pots or the garden once they are large enough to handle.
Each propagation method has its advantages and considerations. Cuttings and division allow you to quickly produce new sedum plants that are genetically identical to the parent plant. Seeds, on the other hand, may yield new and unique sedum varieties, but they require more patience and care.
When propagating sedums, it’s important to provide the appropriate growing conditions, such as well-draining soil, adequate sunlight, and regular watering. With proper care and attention, your propagated sedums will thrive and contribute to the beauty of your garden.
Now that you know how to propagate sedums, let’s move on to the next section to learn more about establishing sedum plantings.
Planting Sedum from Cuttings
Planting sedum from cuttings is a popular and effective method of propagating these versatile plants. It allows you to create new sedum plants that are genetically identical to the parent plant. Here are the steps to successfully plant sedum from cuttings:
- Selecting and Preparing the Cuttings: Choose healthy, non-flowering stems from an established sedum plant. Using sharp and clean garden shears, make a clean cut just below a leaf node on the selected stem. Remove the lower leaves, leaving a few upper leaves intact.
- Applying Rooting Hormone (Optional): To promote root development, some gardeners prefer to dip the cut end of the sedum cutting in a rooting hormone powder. This optional step can increase the chances of successful rooting, especially with more difficult-to-root sedum varieties.
- Preparing the Growing Medium: Fill a container with well-draining soil or a mixture of potting soil and perlite. Make sure the container has drainage holes to prevent waterlogged roots. Moisten the soil slightly, ensuring it is not too wet or dry.
- Planting the Cuttings: Insert the cut end of the sedum cutting into the prepared soil, gently pressing it down to ensure good soil-to-stem contact. Position the cutting at a depth that allows the remaining leaves to be above the soil surface. Space the cuttings adequately to allow air circulation and prevent overcrowding.
- Providing Optimal Growing Conditions: Place the container in a location that receives bright, indirect sunlight. Sedums prefer warm temperatures, ideally around 70-75°F (21-24°C). Water the cuttings regularly to keep the soil slightly moist but not overly saturated. Avoid overwatering, as excessive moisture can lead to rotting.
- Root Development: With proper care and patience, the sedum cuttings will develop roots in a few weeks to a few months, depending on the variety and growing conditions. You can gently tug on the cutting after a few weeks to check for resistance, indicating root growth.
- Transitioning to the Garden: Once the sedum cuttings have well-established roots, they can be transplanted into the garden. Choose a sunny location with well-draining soil and follow proper spacing guidelines for the specific sedum variety.
By following these steps, you can successfully plant sedum from cuttings and expand your sedum collection or share them with fellow gardeners. Remember to provide adequate care, including regular watering and appropriate sunlight, to ensure the healthy growth of your newly planted sedum cuttings.
Now that you know how to plant sedum from cuttings, let’s move on to the next section to explore another propagation method: planting sedum from division.
Planting Sedum from Division
Planting sedum from division is a straightforward and effective method of propagating these resilient plants. It involves separating a mature sedum plant into smaller sections, each with its own set of roots and foliage. Here’s how you can successfully plant sedum from division:
- Timing: Spring or early fall is the best time to divide sedum plants when they are not actively growing. Choose a cool and cloudy day to minimize stress on the plant.
- Digging up the Plant: Carefully dig around the root zone of the sedum plant, keeping a wide berth to avoid damaging the roots. Gently lift the plant from the ground, ensuring the entire root ball is intact. If the sedum plant is too large, you can use a spade or garden fork to divide it while it’s still in the ground.
- Separating the Divisions: Once the sedum plant is removed, gently shake off any excess soil to reveal the clump’s natural divisions. Using clean garden shears or a sharp knife, divide the clump into smaller sections, ensuring each division has a sufficient amount of roots and foliage.
- Prepping the Planting Site: Prepare the planting site by removing any weeds or debris. Loosen the soil and amend it with compost or organic matter to improve drainage and fertility. Ensure the soil is well-draining, as sedums prefer soil that doesn’t retain excessive moisture.
- Planting the Divisions: Dig a hole for each division, making sure the hole is wide and deep enough to accommodate the roots. Place the division in the hole and backfill with soil, gently firming it around the roots. Water the newly planted divisions thoroughly to settle the soil and provide hydration.
- Caring for the Divisions: Keep the divisions consistently moist during the first few weeks to help them establish. Afterward, water them as needed, allowing the soil to dry slightly between waterings. Sedums are drought-tolerant and prefer to be slightly on the drier side.
- Monitoring Growth: Over time, the divisions will grow and fill out, becoming mature sedum plants. Monitor their growth and adjust watering and care practices accordingly. Additionally, apply a thin layer of mulch around the plants to help retain moisture and suppress weed growth.
By following these steps, you can easily propagate sedum plants through division and create new and thriving additions to your garden. With proper care and attention, the divided sedums will establish themselves and contribute to the beauty of your landscape.
Now that you know how to plant sedum from division, let’s move on to the next section to explore another propagation method: planting sedum from seeds.
Planting Sedum from Seeds
Planting sedum from seeds is a rewarding but time-consuming method of propagating these beautiful plants. It allows you to grow new sedum varieties and enjoy the unique qualities they bring to your garden. Here are the steps to successfully plant sedum from seeds:
- Seed Collection: Collect mature seed heads from your existing sedum plants. Wait until the seed heads have dried and turned brown. Gently crush the seed heads to release the tiny seeds.
- Seed Stratification (Optional): Some sedum seeds may benefit from a period of stratification to break dormancy and improve germination. This involves placing the seeds in a sealed plastic bag with a moistened paper towel and refrigerating them for a few weeks.
- Preparing the Planting Medium: Fill a seed tray or pots with a well-draining potting mix. Moisten the soil lightly so that it is damp but not overly saturated.
- Sowing the Seeds: Sprinkle the sedum seeds evenly on the soil surface. Press them lightly into the soil or cover them with a thin layer of vermiculite or fine sand. Avoid burying the seeds too deeply, as they require light to germinate.
- Providing Optimal Growing Conditions: Place the seed tray or pots in a sunny location or under grow lights. Sedums require bright, indirect sunlight for successful germination. Maintain a consistent temperature between 65-75°F (18-24°C).
- Watering and Care: Keep the soil consistently moist but not waterlogged. Mist the seeds regularly to provide moisture and avoid disturbing them. It may take several weeks for the seeds to germinate, so be patient and maintain a consistent watering routine.
- Transplanting the Seedlings: Once the sedum seedlings have grown a few sets of true leaves and are large enough to handle, transplant them into individual pots or into the garden. Choose a sunny location with well-draining soil and follow the recommended spacing guidelines for the specific sedum variety.
As the sedum seedlings grow, continue to provide them with proper care, including regular watering and appropriate sunlight. Thin out the seedlings if they become overcrowded, allowing the stronger ones to thrive.
It’s important to note that sedums grown from seeds may exhibit slight variations from the parent plant, offering an opportunity to discover unique characteristics and varieties within the sedum family.
By following these steps and providing the necessary care, you can successfully plant sedum from seeds and experience the joy of growing these beautiful plants from the start of their life cycle.
Now that you know how to plant sedum from seeds, let’s move on to the next section to explore establishing sedum plantings.
Establishing Sedum Plantings
The establishment phase is crucial for the success of your sedum plantings. During this period, the sedums develop robust root systems and acclimate to their new environment. Here are some guidelines to help you establish your sedum plantings effectively:
- Watering: Proper watering is essential during the establishment phase. Water the sedums regularly, ensuring that the soil is consistently moist but not saturated. Be mindful not to overwater, as excess moisture can lead to root rot. As the sedums become established, they will develop better drought tolerance.
- Mulching: Apply a layer of organic mulch, such as wood chips or shredded bark, around the base of the sedums. Mulch helps conserve soil moisture, suppress weed growth, and regulate soil temperature. Leave a small gap between the mulch and the sedum stems to prevent moisture-related issues, such as crown rot.
- Monitor for Pest and Disease: Keep a close eye on your sedum plantings for any signs of pest infestation or disease. Common pests that may affect sedums include aphids, mealybugs, and slugs. Treat any issues promptly to prevent them from spreading and damaging the sedums.
- Fertilizing: Established sedums do not typically require heavy fertilization. However, if you notice signs of nutrient deficiency, you can apply a balanced, slow-release fertilizer following the manufacturer’s instructions. Avoid over-fertilizing, as this can lead to excessive vegetative growth and reduced flowering.
- Dividing Overgrown Plants: As the sedums continue to grow and mature, some varieties may become overcrowded or develop a leggy appearance. To rejuvenate the plants and maintain their vigor, divide overgrown sedums every few years. Follow the steps for dividing sedums mentioned earlier to propagate the plants and create new plantings.
- Regular Maintenance: Maintaining your sedum plantings involves keeping them tidy and removing any spent flower stalks or dead foliage. This helps promote airflow, prevent disease, and allows for better visual appeal. Additionally, remove any weeds that may compete for nutrients and water.
By following these guidelines, your sedum plantings will establish themselves and continue to thrive in your garden. Remember to provide proper care, including appropriate watering, occasional fertilization, and vigilant pest and disease management.
Now that your sedum plantings are established, let’s move on to the next section to explore watering and maintenance practices to keep your sedums healthy and vibrant.
Watering and Maintenance
Proper watering and maintenance are essential for the health and longevity of your sedum plants. Sedums are drought-tolerant and low-maintenance, but they still require attention to ensure optimal growth and appearance. Here are some guidelines for watering and maintaining your sedums:
- Watering: While sedums are drought-tolerant, it’s important to provide sufficient water during dry spells, especially for newly planted sedums. Water deeply but infrequently, allowing the soil to dry out slightly between waterings. Avoid overwatering, as soggy soil can lead to root rot.
- Mulching: Apply a layer of organic mulch around the base of the sedums to help retain soil moisture, suppress weed growth, and regulate soil temperature. Maintain a gap between the mulch and the sedum stems to prevent moisture-related issues.
- Deadheading: Remove spent flower stalks to encourage further blooming and maintain a neat appearance. Deadheading redirects energy to the growth of new foliage and promotes a longer flowering period.
- Pruning: Trim back any leggy or overgrown sedum stems to maintain the plant’s shape and encourage bushier growth. Pruning can be done in early spring before new growth begins or after flowering. Avoid pruning too heavily, as sedums store nutrients in their stems and excessive pruning may weaken the plant.
- Fertilizing: Sedums generally do not require heavy fertilizer application. However, if you notice signs of nutrient deficiency or want to promote more vigorous growth, you can apply a balanced, slow-release fertilizer in early spring. Follow the manufacturer’s instructions for the appropriate amount and timing.
- Seasonal Care: Different sedum varieties have specific care needs during different seasons. In spring, remove any winter debris and apply a layer of compost or organic matter around the base of the plants. During hot summers, provide extra water during prolonged dry spells. In fall, avoid excessive pruning to allow the stems to provide winter interest. In winter, protect exposed sedums from heavy snow or ice by gently brushing off any accumulation.
- Weed Management: Regularly remove any weeds that may compete with sedums for nutrients and water. Hand-pull weeds carefully to avoid damaging sedum roots. Applying a layer of mulch can help suppress weed growth and make maintenance easier.
- Monitoring Pests and Diseases: Keep an eye out for common pests, such as aphids and mealybugs, as well as signs of diseases like powdery mildew. Promptly treat any issues with appropriate organic or chemical treatments to prevent them from spreading and damaging the sedums.
By following these watering and maintenance guidelines, you can ensure that your sedum plants remain healthy, vibrant, and visually appealing throughout the growing season. Regular observation and care will help you catch and address any issues early, ensuring the long-term success of your sedum plantings.
Now that you know how to properly water and maintain your sedums, let’s explore the best companion plants for sedums in the next section.
Pest and Disease Protection
While sedums are generally resilient and resistant to pests and diseases, it’s important to be vigilant and take proactive measures to protect your plants. Here are some common pests and diseases that can affect sedums, as well as preventive measures and treatments:
- Aphids: These small, sap-sucking insects can cluster on the leaves and stems of sedums, causing stunted growth and distorted foliage. Use a strong jet of water to dislodge aphids or apply insecticidal soap or neem oil according to the product instructions.
- Mealybugs: Mealybugs often infest sedums, appearing as small, white, fuzzy insects. They feed on the sap of the sedums, causing yellowing leaves and stunted growth. Remove mealybugs by gently wiping them off with a cotton swab dipped in rubbing alcohol or apply insecticidal soap or neem oil.
- Slugs and Snails: These slimy pests can feed on sedum leaves, leaving behind irregular holes and damage. Use physical barriers like copper tape or diatomaceous earth around sedum plantings to deter slugs and snails. You can also handpick them or use organic slug control methods.
- Powdery Mildew: Powdery mildew is a fungal disease that appears as a white, powdery coating on the leaves of sedums. Improve air circulation around the plants by spacing them adequately and avoiding overcrowding. Water the sedums at the base, rather than overhead, to minimize moisture on the leaves. Fungicidal sprays may be necessary in severe cases.
- Crown Rot: Crown rot is a fungal disease that affects the base of sedum plants, leading to wilting, rotting, and eventual death of the plant. Ensure proper soil drainage and avoid overwatering to prevent the development of crown rot. Remove and destroy infected plants to prevent the spread of the disease.
To minimize the risk of pest and disease problems, it’s important to maintain proper plant hygiene, including removing any plant debris, fallen leaves, or dead foliage. Regularly inspect your sedums for signs of pests or diseases, and promptly address any issues that arise. Additionally, selecting healthy and disease-resistant sedum varieties can go a long way in preventing problems.
Remember to always follow the instructions on any pest control products and consider using organic and environmentally-friendly methods whenever possible.
By implementing these pest and disease protection measures, you can enjoy healthy and beautiful sedum plants in your garden.
Now that you know how to protect your sedums from pests and diseases, let’s explore the best companion plants for sedums in the next section.
Best Companion Plants for Sedum
Sedums are versatile plants that can thrive in various garden settings. To create a visually stunning and ecologically balanced garden, consider pairing sedums with suitable companion plants. Here are some fantastic companion plants that complement and enhance the beauty of sedums:
- Grasses: Ornamental grasses such as feather reed grass (Calamagrostis acutiflora) or blue fescue (Festuca glauca) provide contrasting textures and add movement to the landscape when planted alongside sedums.
- Lavender: The aromatic blooms and silvery foliage of lavender (Lavandula spp.) create a beautiful contrast with the vibrant colors of sedums. Both plants thrive in sunny, well-drained locations.
- Echinacea: The bold and colorful flowers of echinacea (Echinacea purpurea) complement the blooms of sedums and attract pollinators to the garden. Choose varieties with similar light and soil requirements to ensure compatibility.
- Salvia: With their spiky flowers and aromatic foliage, salvias (Salvia spp.) make excellent companions for sedums. Look for species or cultivars that share similar sun and soil preferences.
- Rudbeckia: The vibrant yellow and orange blooms of rudbeckia (Rudbeckia spp.) create a lovely contrast when planted alongside sedums. Both plants are easy to grow and attract beneficial insects to the garden.
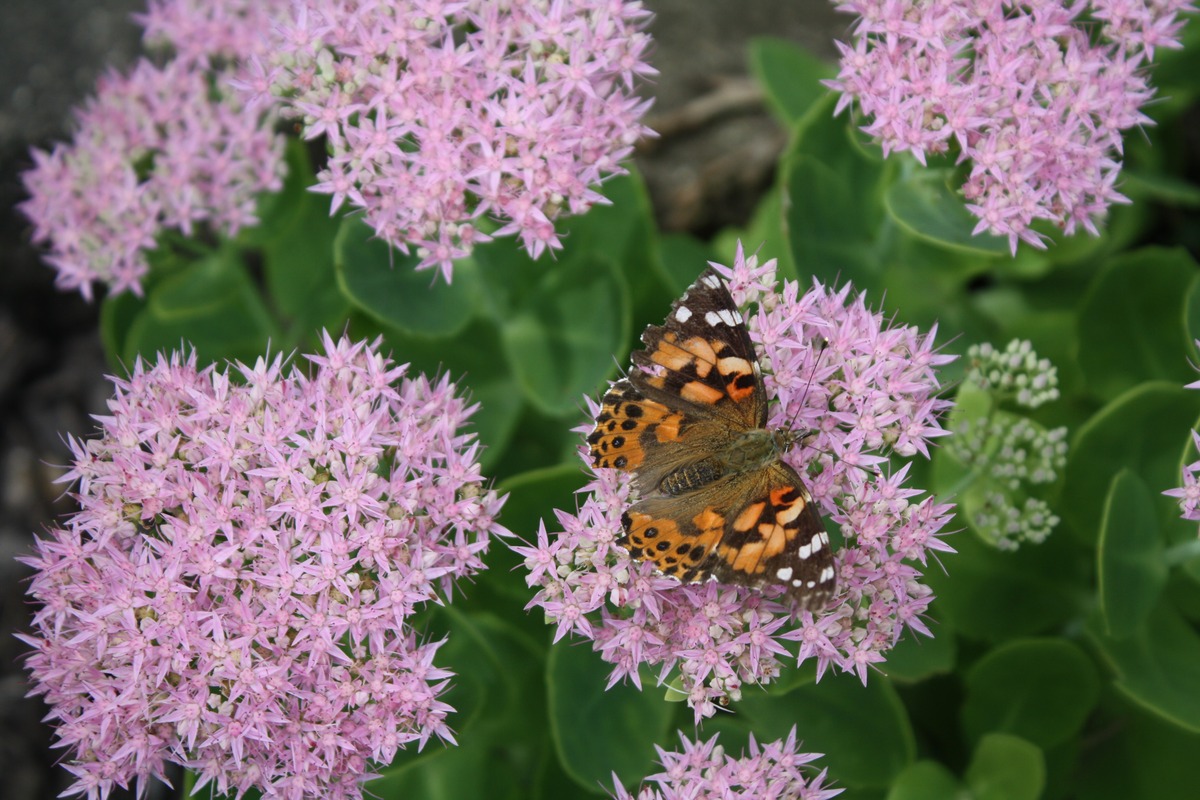
- Ornamental Alliums: The spherical blooms of ornamental alliums (Allium spp.) provide a striking visual contrast when planted among low-growing sedums. Their tall stems add vertical interest to the garden.
- Stonecrop: Pairing different sedum varieties together creates a stunning display of various colors, textures, and heights. Choose sedum varieties with similar cultivation requirements for a cohesive and harmonious planting.
- Succulents: Combining sedums with other succulent plants, such as hens and chicks (Sempervivum spp.) or echeverias (Echeveria spp.), creates an eye-catching succulent garden with complementary shapes and forms.
When selecting companion plants for sedums, consider their sun and soil requirements, as well as their growth habits. Opt for plants that thrive in similar conditions to ensure a successful and aesthetically pleasing combination.
Companion planting with sedums not only enhances the visual appeal of your garden but also promotes biodiversity and attracts beneficial insects such as bees and butterflies. It creates a dynamic and balanced ecosystem that contributes to the overall health and vibrancy of your outdoor space.
Now that you have some ideas for companion plants, let’s explore popular sedum varieties to consider in the next section.
Popular Sedum Varieties to Consider
Sedums, with their diverse forms and colors, are beloved plants in gardens and landscapes. Whether you’re looking for groundcovers, low-growing varieties, or taller architectural specimens, here are some popular sedum varieties to consider for your garden:
- Sedum ‘Autumn Joy’ (Hylotelephium spectabile ‘Autumn Joy’): This classic sedum features clusters of pink flowers that age to a deep russet color, providing a beautiful display in late summer and fall. ‘Autumn Joy’ grows up to 2 feet tall and thrives in full sun.
- Sedum spurium (Dragonsblood Sedum): This low-growing sedum forms dense mats of succulent foliage and produces bright red flowers in summer. It is a tough and versatile groundcover that thrives in hot, dry conditions.
- Sedum kamtschaticum (Orange Stonecrop): This sedum variety features fleshy green leaves and clusters of bright yellow flowers in summer. It forms a neat, spreading mound and tolerates a wide range of soil conditions.
- Sedum sieboldii (October Daphne): With its blue-green foliage and pink star-shaped flowers, this sedum adds a touch of elegance to any garden. It forms beautiful rosettes and has a trailing habit, making it ideal for rock gardens and containers.
- Sedum ‘Angelina’ (Stonecrop): This low-growing sedum variety is known for its vibrant chartreuse foliage that turns orange-red in cooler temperatures. ‘Angelina’ is a versatile sedum that works well as a groundcover, in rock gardens, or cascading over walls and containers.
- Sedum telephium ‘Purple Emperor’ (Stonecrop): This sedum variety features deep purple foliage that provides a striking contrast against its clusters of pink flowers. It grows up to 18 inches tall and adds a touch of drama to the garden.
- Sedum spectabile ‘Brilliant’ (Brilliant Stonecrop): With its vibrant, fuchsia-pink flower heads and gray-green foliage, this sedum variety adds a pop of color to late summer and fall gardens. It grows up to 2 feet tall and is a favorite of pollinators.
- Sedum rupestre ‘Angelina’ (Angelina Stonecrop): This sedum variety is prized for its bright yellow foliage and dense, spreading habit. It is a drought-tolerant groundcover that adds cheerful color to rock gardens and slopes.
- Sedum telephium ‘Matrona’ (Stonecrop): This tall sedum variety features reddish-purple stems, gray-green leaves, and clusters of pink flowers. It reaches a height of 2 to 3 feet and provides a vertical element in borders and garden beds.
- Sedum makinoi ‘Ogon’ (Japanese Stonecrop): This sedum variety has glossy, golden-yellow foliage that brightens up shady areas. It forms a dense mat and can be grown in rock gardens, containers, or as a groundcover under trees.
These popular sedum varieties offer a range of colors, textures, and heights to suit different garden styles and preferences. Whether you’re looking for drought-tolerant groundcovers, showy flowering sedums, or architectural focal points, there’s a sedum variety to meet your needs.
When selecting sedums, consider their growth habits, sunlight requirements, and soil preferences to ensure they thrive in your specific garden conditions.
Now that you have some sedum varieties to consider, let’s learn about sedum care by season in the next section.
Sedum Care by Season
Sedums are resilient and low-maintenance plants that offer year-round interest in the garden. To ensure the health and vitality of your sedums, it’s important to provide appropriate care and maintenance throughout the seasons. Here are some key care tips for each season:
- Spring: As new growth emerges, remove any winter debris or dead foliage around the sedums. Apply a layer of compost or organic matter around the plants to improve soil fertility. Check for any signs of pest or disease issues and take appropriate action if necessary.
- Summer: Ensure your sedums receive adequate water during hot and dry periods. Although sedums are drought-tolerant, they will benefit from regular watering during extended periods of extreme heat. Monitor for pests and diseases and promptly address any issues that arise. Deadhead spent flower stalks to encourage continuous blooming and maintain a tidy appearance.
- Fall: In late summer or early fall, some sedum varieties, such as Sedum spectabile, begin to bloom. Enjoy the vibrant displays of colors and provide support to taller sedums to prevent flopping. Avoid excessive pruning during this time, as the dried flower heads can provide winter interest and seeds for wildlife.
- Winter: Sedums are generally hardy and can withstand cold temperatures. However, in regions with severe winters, provide some protection for the sedums by applying a layer of mulch or straw around the base of the plants. This helps insulate the roots and prevent winter damage caused by freezing and thawing cycles. Brush off any heavy snow or ice buildup to prevent stems from becoming weighed down and breaking.
Throughout the year, it’s beneficial to periodically assess the size and growth of your sedum plants. If needed, divide overgrown sedums in spring or fall to rejuvenate them and promote healthier growth. Always ensure proper spacing between sedums to allow for good air circulation and reduce the risk of disease.
Remember to monitor your sedums for signs of pests, such as aphids or mealybugs, as well as common diseases like powdery mildew. Early detection and appropriate treatment are key to maintaining the health and beauty of your sedums.
By providing season-specific care and being attentive to the needs of your sedums, you can enjoy their beauty and resilience throughout the year.
Now that you know how to care for your sedums by season, let’s explore growing sedums in containers in the next section.
Sedum in Containers
Sedums are excellent plants for container gardening, thanks to their adaptability, low maintenance needs, and availability in various sizes and colors. Whether you have a small balcony, patio, or rooftop garden, here are some tips for successfully growing sedums in containers:
- Container Selection: Choose containers with good drainage to prevent waterlogged roots. Terracotta pots, wooden boxes, or plastic containers with drainage holes are all suitable options. Ensure that the container is large enough to accommodate the sedum’s root system and allow for growth.
- Soil Mix: Use a well-draining soil mix specifically formulated for container gardening. A mix containing equal parts peat moss, perlite, and potting soil works well for sedums. Avoid heavy or compacted soil that can lead to root rot.
- Sunlight: Sedums thrive in full sun, so choose a location for your container that receives at least six hours of direct sunlight per day. If you have limited sun exposure, select sedum varieties that tolerate partial shade.
- Watering: Container-grown sedums require regular watering, especially during hot and dry periods. Water deeply when the top inch of soil feels dry, ensuring that excess water drains out of the container. Avoid overwatering, as sedums are susceptible to root rot in soggy conditions.
- Fertilization: Sedums in containers benefit from occasional fertilization to maintain healthy growth. Apply a balanced liquid or slow-release fertilizer according to the manufacturer’s instructions. Avoid over-fertilizing, as this can lead to excessive vegetative growth and reduced flowering.
- Winter Protection: In regions with harsh winters, container-grown sedums may need some protection. Move the containers to a sheltered location or group them together to provide some insulation. Mulch around the base of the sedums with straw or leaves to protect the roots from freezing temperatures.
- Container Design: Get creative with container design by combining different sedum varieties, as well as companion plants such as ornamental grasses, trailing vines, or colorful annuals. Consider the growth habits and heights of the sedum varieties to ensure a visually appealing and harmonious composition.
- Pruning: Trim back any leggy or overgrown sedum stems to maintain the plant’s shape and encourage bushier growth. Pruning can be done in early spring or after flowering. Save the trimmings to propagate new sedum plants through cuttings.
- Containers for Small Spaces: If you have limited space, opt for smaller sedum varieties or those with cascading/trailing habits. Hanging baskets or vertical gardening systems can be used to maximize space and bring the beauty of sedums to small areas.
Growing sedums in containers allows you to create versatile and portable displays of these beautiful plants, adding color and texture to any outdoor space. The container environment also provides an opportunity to control the growing conditions and easily care for your sedums.
Now that you have the knowledge to grow sedums in containers, let’s move on to exploring sedum as a groundcover in the next section.
Sedum for Groundcover
Sedums are excellent choices for groundcover due to their low-growing and spreading habits, ability to tolerate tough conditions, and attractive foliage and flowers. Whether you have a large garden or a small area that needs some greenery, here are some reasons why sedums make great groundcovers:
- Drought Tolerance: Sedums are known for their remarkable drought tolerance, making them perfect for areas where water may be limited. Once established, sedums can survive extended periods of dry weather without the need for regular watering.
- Low Maintenance: Sedum groundcovers are low maintenance plants that require little attention. They are typically pest and disease resistant, eliminating the need for frequent monitoring or chemical treatments. Sedums also have a strong root system that helps control erosion and suppresses weed growth.
- Year-Round Interest: With a wide variety of sedum species and cultivars available, groundcover sedums offer year-round interest. They produce colorful flowers in summer and fall, while their attractive succulent foliage provides visual appeal throughout the year.
- Adaptability: Sedums are adaptable plants that thrive in a range of soil types, including poor or rocky soils. They can also tolerate varying light conditions, from full sun to partial shade, making them versatile options for different areas of the garden.
- Ground Stabilization: The mat-forming habit of sedum groundcovers helps stabilize the soil and prevent erosion on slopes or banks. Their extensive root systems help retain soil moisture and protect against runoff during heavy rain events.
- Wildlife Attraction: Sedum groundcovers attract beneficial insects such as bees and butterflies, adding to the ecological value of your garden. The flowers provide nectar and pollen sources, supporting pollinator populations and promoting biodiversity.
- Design Flexibility: Sedums offer a range of colors, sizes, and textures, allowing for creative and diverse groundcover designs. You can mix different sedum varieties to create stunning tapestries of foliage and flowers or combine them with other low-growing plants for added visual interest.
When selecting sedums for groundcover, consider the specific growth habits and cultural requirements of each variety. Some popular sedum species for groundcover include Sedum spurium (Dragonsblood Sedum), Sedum album (White Stonecrop), and Sedum kamtschaticum (Orange Stonecrop).
Planting groundcover sedums is relatively straightforward. Prepare the planting area by removing weeds and loosening the soil. Space the sedums according to their mature spread, allowing room for them to fill in over time. Water the sedums thoroughly after planting and water as needed during the establishment phase.
With their beauty, resilience, and ease of care, sedums are an excellent choice for groundcover. They provide functional and aesthetic benefits to the garden while requiring minimal maintenance.
Now that you know the benefits of sedums as groundcovers, let’s explore the various uses of sedums in the garden in the next section.