
Preparing the Oven for Cleaning
Before you begin the self-cleaning process for your Whirlpool oven, it’s important to properly prepare it to ensure effective and safe cleaning. Follow these steps to get your oven ready:
- Remove any. food debris: Start by removing any loose food debris or spills from the oven. Use a damp cloth or sponge to wipe away dirt and grease on the oven walls, floor, and racks.
- Take out the oven racks: Most Whirlpool ovens require you to remove the oven racks before starting the self-clean cycle. Take them out and set them aside. You can clean them separately or during the cleaning process, depending on the model of your oven.
- Check for any removable parts: Some Whirlpool ovens have removable parts, such as temperature probes or broiler pans. Consult your oven’s user manual to see if there are any parts that should be removed before cleaning.
- Protect sensitive components: If your oven has sensitive electronic components or a digital display, consider covering them with aluminum foil or using a protective cover to prevent any potential damage during the high heat of the self-clean cycle. Be sure to follow the manufacturer’s guidelines to avoid any risk.
- Ventilate the kitchen: The self-cleaning process can generate heat and produce a strong odor. To prevent your kitchen from becoming too hot or filling up with smoke, open windows or turn on exhaust fans for proper ventilation. This will help remove any fumes or odors.
By taking the time to properly prepare your Whirlpool oven for the self-cleaning cycle, you’ll ensure a thorough and effective cleaning process while minimizing the risk of any damage. Once you’ve completed these steps, you’re ready to move on to setting the self-clean mode and starting the cleaning cycle.
Setting the Self-Clean Mode
To begin the self-cleaning process for your Whirlpool oven, follow these steps to set the self-clean mode:
- Ensure the oven is empty: Make sure there are no food items or utensils left inside the oven. Remove any oven racks or accessories that may be present.
- Close the oven door: Shut the oven door securely. The self-cleaning cycle cannot be initiated if the door is not properly closed.
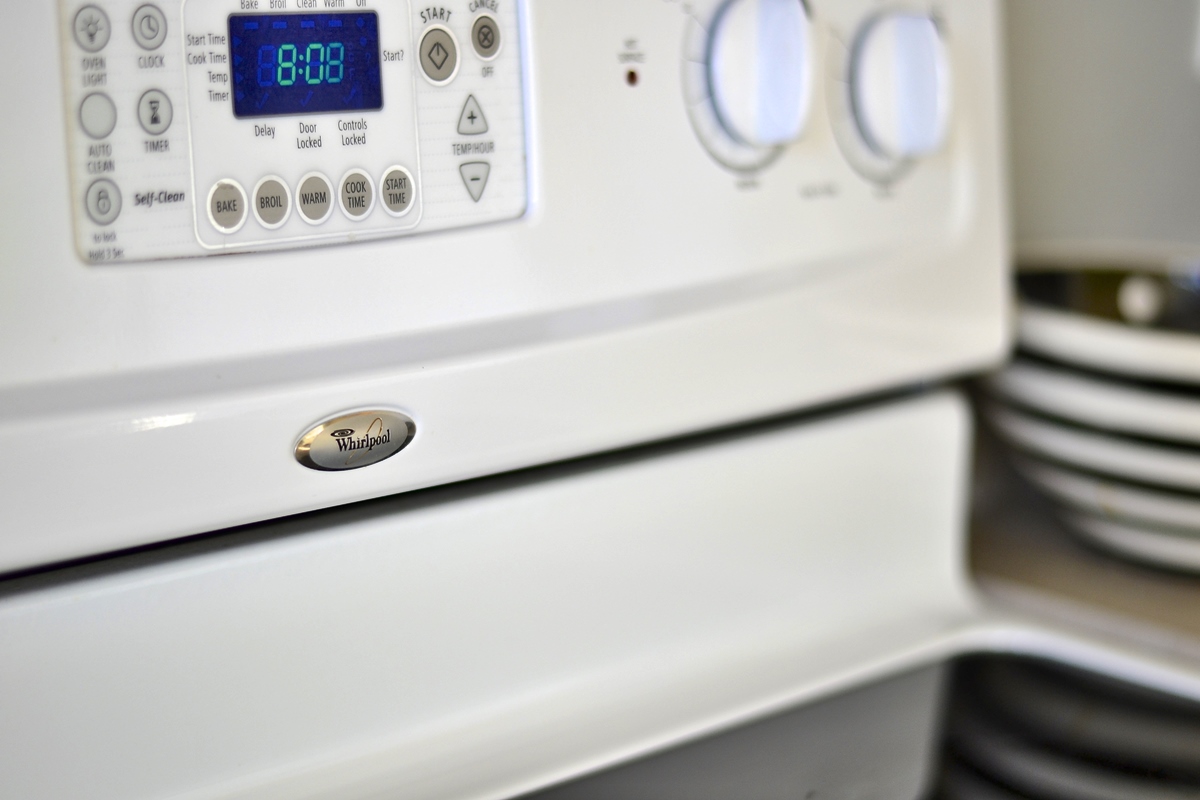
- Locate the self-clean button: Look for the self-clean button or option on the control panel of your Whirlpool oven. It is usually labeled as “Self-Clean” or represented by an icon of a lock or flame.
- Select the self-clean option: Press the self-clean button to activate the self-cleaning mode. If your oven has a digital display, you may need to navigate through the menu to find the self-clean option.
- Set the cleaning duration: Use the oven’s control panel or knobs to adjust the cleaning duration. Most Whirlpool ovens offer standard cleaning cycles that range from 2 to 4 hours. Select the desired cleaning time based on the level of dirt and grease buildup in your oven.
- Adjust the cleaning temperature: Some Whirlpool ovens allow you to adjust the cleaning temperature. The default temperature is typically set to around 500°F (260°C), but you can lower or increase it based on your needs. Consult your oven’s user manual for specific instructions on adjusting the cleaning temperature, if applicable.
Once you have set the self-clean mode, your Whirlpool oven will begin the cleaning process. It’s important to note that once the self-clean cycle is started, the oven door will lock automatically, and you will not be able to open it until the cleaning cycle is completed and the oven has cooled down. This ensures safety during the high-temperature cleaning process.
Now that you’ve successfully set the self-clean mode, it’s time to adjust the cleaning time and temperature to suit your requirements.
Adjusting the Cleaning Time and Temperature
Whirlpool ovens offer flexibility in adjusting the cleaning time and temperature for the self-clean cycle. Follow these steps to customize the cleaning settings:
- Determine the cleaning duration: Assess the level of dirt and grease buildup in your oven to estimate the appropriate cleaning time. Whirlpool ovens typically provide preset cleaning durations ranging from 2 to 4 hours. Select a duration that suits the condition of your oven. Keep in mind that longer cleaning times may be necessary for heavily soiled ovens.
- Access the cleaning duration setting: Locate the control panel or knobs on your Whirlpool oven that allow you to adjust the cleaning time. This may be labeled as “Cleaning Time” or “Duration”. Refer to your oven’s user manual for specific instructions on how to access and modify the cleaning duration setting.
- Adjust the cleaning time: Use the controls provided to increase or decrease the cleaning time as needed. Each adjustment typically increases or decreases the cleaning time by a few minutes. Pay attention to the displayed time on the control panel or refer to the user manual for precise instructions on how to modify the cleaning time.
- Consider the cleaning temperature: In addition to the cleaning time, some Whirlpool ovens allow you to adjust the cleaning temperature. While the default temperature is usually set at around 500°F (260°C), you may have the option to decrease or increase it. Check your oven’s user manual for information on adjusting the cleaning temperature, if available.
- Keep safety in mind: While it may be tempting to shorten the cleaning time to save energy, ensure that you allow enough time for the self-clean cycle to effectively remove all dirt and residue. Additionally, avoid setting the cleaning temperature too high, as it can cause excessive smoke or even damage the oven.
By adjusting the cleaning time and temperature, you can customize the self-clean cycle to address the specific cleaning needs of your Whirlpool oven. Take into consideration the level of dirt and grease, as well as any specific guidelines provided by the manufacturer, for optimal results.
Cleaning the Oven Racks
When conducting a self-clean cycle on your Whirlpool oven, you can also take the opportunity to clean the oven racks. Follow these steps to effectively clean your oven racks:
- Remove the racks: Before starting the self-clean cycle, take out the oven racks from your Whirlpool oven. Carefully inspect them for any stubborn food debris or grease.
- Scrub with a sponge or brush: Fill your sink or a large basin with warm water and dish detergent. Place the oven racks in the soapy water and allow them to soak for a few minutes. Then, using a sponge or a non-abrasive brush, scrub the racks to remove any remaining dirt or grease.
- Rinse thoroughly: After scrubbing, rinse the racks with clean water to remove the soap residue. Make sure to remove all traces of detergent to prevent it from transferring onto your food during future use.
- Dry the racks: Once the oven racks are thoroughly rinsed, dry them completely using a clean towel or allow them to air dry. Ensure that the racks are completely dry before placing them back into the oven.
- Consider using a cleaning solution: For stubborn stains and baked-on grease, you may opt to use a commercial oven rack cleaner or a homemade cleaning solution. Follow the instructions provided with the cleaner or mix a solution of baking soda and water to create a paste. Apply the cleaner to the racks, let it sit for a while, and then scrub them before rinsing and drying.
Properly cleaning the oven racks in your Whirlpool oven ensures that they are free from dirt, grease, and food residue. This not only helps maintain the cleanliness of your oven, but also prevents any unwanted odors or flavors from tainting your dishes during future use. By incorporating the cleaning of the oven racks into your self-clean cycle routine, you can keep your oven in top condition.
Removing Loose Debris Before Cleaning
Removing loose debris from your Whirlpool oven before initiating the self-cleaning process is an essential step to ensure optimal cleaning results. Here’s how to remove loose debris effectively:
- Allow the oven to cool down: Before cleaning, make sure your oven has cooled down completely. This will prevent any burns or injuries during the debris removal process.
- Put on protective gloves: To protect your hands from any sharp objects or potentially harmful debris, wear a pair of gloves before you begin cleaning.
- Use a brush or vacuum: Start by using a soft-bristle brush or a handheld vacuum to gently remove loose debris from the oven walls, floor, and the door. This includes crumbs, food particles, and any other loose matter that may have accumulated.
- Pay attention to the burner and heating elements: Carefully inspect the burner and heating elements in your Whirlpool oven. Use a brush or a vacuum attachment specifically designed for delicate surfaces to remove any debris without causing damage.
- Check the crevices and corners: Debris tends to accumulate in the crevices and corners of the oven. Use a small, soft-bristle brush or a cotton swab dipped in warm water to reach these areas and gently remove any remaining dirt or residue.
- Dispose of the debris: As you clean, collect the loosened debris in a dustpan or a vacuum cleaner’s bin. Dispose of it properly to avoid any further mess.
By removing loose debris from your Whirlpool oven before starting the self-cleaning cycle, you ensure that the oven can effectively clean stubborn stains, grease, and other residue. It also helps to minimize any potential for unpleasant odors during the cleaning process. Taking the time to remove loose debris is a crucial step in preparing your oven for a thorough and successful cleaning cycle.
Starting the Cleaning Cycle
Once you have prepared your Whirlpool oven for self-cleaning, it’s time to start the cleaning cycle. Follow these steps to initiate the cleaning process:
- Close the oven door: Ensure that the oven door is securely closed. The self-cleaning cycle cannot commence unless the door is properly shut.
- Locate the self-clean button: Look for the self-clean button on the control panel of your Whirlpool oven. It is usually labeled as “Self-Clean” or represented by an icon such as a lock or flame.
- Activate the self-clean mode: Press the self-clean button or select the self-clean option on the control panel to activate the cleaning cycle. If your oven has a digital display, navigate through the menu to find the self-clean mode.
- Adjust the cleaning duration: Use the oven’s control panel or knobs to adjust the cleaning duration. Most Whirlpool ovens offer standard cleaning cycles that range from 2 to 4 hours. Select the desired cleaning time based on the level of dirt and grease buildup in your oven.
- Start the cleaning cycle: Once you have adjusted the cleaning duration, press the start button or follow the prompts on the display to initiate the cleaning cycle. The oven door will lock automatically, and the cleaning process will begin.
- Monitor the progress: While the oven is self-cleaning, it’s important to monitor the progress periodically. Depending on the model, your oven may display a countdown timer or an indicator light to show the remaining cleaning time.
During the cleaning cycle, your Whirlpool oven will heat up to a high temperature to burn off any food residue, grease, and stains. It is normal to see smoke or emit an odor during this process. Adequate ventilation, such as opening windows or using exhaust fans, will help to dissipate any fumes and prevent excessive heat buildup in your kitchen.
Remember that once the self-cleaning cycle has started, the oven door will remain locked until the process is complete and the oven has cooled down. This safety feature ensures that you or others cannot accidentally open the oven door and risk exposure to the high temperatures inside. Wait for the oven to cool down and for the “oven door unlocked” message to be displayed before accessing the cleaned oven.
Monitoring the Cleaning Process
While your Whirlpool oven is undergoing the self-cleaning cycle, it’s important to monitor the process to ensure everything is progressing as expected. Here are some important points to keep in mind:
- Check for smoke or odors: It is normal for your oven to produce smoke and emit an odor during the self-cleaning process. However, excessive smoke or strong, unpleasant odors may indicate a problem. If you notice anything unusual or concerning, consider stopping the cleaning cycle and contacting Whirlpool customer support for assistance.
- Ensure proper ventilation: Adequate ventilation is essential during self-cleaning to prevent the buildup of heat and fumes in your kitchen. Open windows or turn on exhaust fans to help dissipate any smoke or odors and maintain a comfortable environment.
- Monitor the timer or indicator: Most Whirlpool ovens feature a built-in timer or indicator light that displays the remaining cleaning time. Regularly check this to keep track of how much time is left in the cleaning cycle.
- Do not interrupt the process: It is essential not to open the oven door or interrupt the self-cleaning process once it has begun. Doing so can affect the cleaning effectiveness and potentially expose you to high temperatures.
- Keep a safe distance: To avoid burns, keep a safe distance from the oven while it is self-cleaning. The exterior surfaces can become extremely hot during the cycle.
Monitoring the self-cleaning process ensures that everything is functioning properly and that there are no issues that require attention. If you encounter any unexpected problems or concerns, it is always advisable to refer to the user manual or contact Whirlpool customer support for assistance. Once the cleaning process is complete, you can move on to cooling down the oven and preparing for the next steps in the cleaning routine.
Cooling Down the Oven
After completion of the self-cleaning cycle, it is important to allow your Whirlpool oven to cool down before accessing it. Follow these steps to safely cool down the oven:
- Observe the display: Check the digital display on your Whirlpool oven to see if there is an indicator showing that the oven is still hot. Some models have a specific message, such as “Cooling” or “Hot”, indicating that the oven is in the cooldown phase.
- Wait for the oven to cool: Avoid opening the oven door or attempting to touch any internal surfaces until the oven has completely cooled down. This process typically takes a couple of hours, but the exact duration may vary depending on the model and the intensity of the cleaning cycle.
- Avoid touching hot surfaces: During the cooldown period, the external surfaces of the oven, including the door and control panel, may still be hot. Exercise caution and avoid touching these areas to prevent burns or injuries.
- Do not force open the door: Resist the temptation to force open the oven door while it is still locked. The door lock mechanism is designed to keep the door securely closed until the oven has cooled down to a safe temperature. Allow it to unlock automatically once the oven is at a suitable temperature.
Properly allowing your Whirlpool oven to cool down not only ensures your safety but also allows the internal components to return to their normal operating temperatures. This gradual cooldown helps in preventing any potential damage to the oven as well.
Once the oven has cooled down completely, you can safely open the oven door and begin the next steps of the cleaning process, such as cleaning the interior and exterior surfaces of the oven.
Cleaning the Interior of the Oven
Now that your Whirlpool oven has completed the self-cleaning cycle and cooled down, it’s time to tackle the task of cleaning the interior. Follow these steps for effective cleaning:
- Remove remaining debris: Use a soft-bristle brush or a damp cloth to remove any leftover residue or ash that may have accumulated on the oven walls, floor, and ceiling during the self-clean cycle. Be gentle to avoid scratching the surfaces.
- Prepare a cleaning solution: Create a gentle cleaning solution by mixing warm water with a mild dish detergent or a specialized oven cleaner. Follow the instructions on the cleaner to ensure the proper dilution ratio.
- Apply the cleaning solution: Dip a sponge or a cloth into the cleaning solution and apply it to the interior surfaces of the oven. Thoroughly clean the walls, floor, and ceiling, paying extra attention to any stubborn stains or grease spots.
- Scrub away stains: For stubborn stains or residue, use a non-abrasive scrub brush or a nylon scrub pad to gently scrub the affected areas. Avoid using harsh or abrasive cleaners that can damage the oven’s surfaces.
- Rinse with clean water: After cleaning, wipe down the interior of the oven with a clean, damp cloth to remove any leftover cleaning solution. Make sure to rinse it thoroughly to avoid any residues that may affect the taste or smell of your future dishes.
- Dry the interior: Use a dry cloth or allow the oven to air dry to ensure that all moisture is removed from the interior surfaces.
Regularly cleaning the interior of your Whirlpool oven not only helps maintain its appearance but also ensures that it operates optimally and provides the best cooking results. It is important to follow the manufacturer’s instructions and recommendations for cleaning products and methods to avoid damaging the oven’s surfaces.
With the interior of your oven now clean, you can move on to addressing the cleaning of the oven window to restore its clarity and remove any residue that may have accumulated during the self-cleaning process.
Cleaning the Oven Window
The oven window is an essential part of your Whirlpool oven that allows you to monitor the progress of your cooking. To ensure a clear view and maintain its functionality, it’s important to clean the oven window properly. Here’s how:
- Allow the oven to cool: Ensure that the oven has completely cooled down before attempting to clean the window. This will prevent any burns or injuries.
- Mix a cleaning solution: Create a solution by mixing warm water with a gentle dish detergent or a specialized oven glass cleaner. This solution will effectively remove any grease or residue from the oven window.
- Apply the cleaning solution: Dip a soft, non-abrasive cloth or sponge into the cleaning solution and gently wipe the window glass. Pay close attention to any visible stains or spots on the glass.
- Focusing on stubborn stains: For stubborn stains or dried-on residue, you may need to use a non-abrasive scrub brush or a nylon scrub pad. Wet the surface of the window and apply a small amount of the cleaning solution. Gently scrub the stained areas in a circular motion until the stains are removed.
- Rinse and dry: After cleaning, use a clean cloth or sponge to rinse the window with clean water. Make sure to remove any leftover cleaning solution residue. Finally, dry the window with a lint-free cloth or allow it to air dry.
Regularly cleaning the oven window not only ensures a clear view but also prevents the buildup of greasy residue that can affect the quality of your cooking and the accuracy of your temperature readings. It’s important to use gentle cleaning agents and avoid abrasive materials that can scratch or damage the glass surface.
With the oven window now clean and clear, you can move on to addressing the exterior surfaces of your Whirlpool oven to maintain its overall cleanliness and appearance.
Cleaning the Exterior of the Oven
The exterior surfaces of your Whirlpool oven can accumulate dirt, grease, and fingerprints over time. Cleaning the exterior will not only enhance its appearance but also ensure the longevity and efficiency of the oven. Follow these steps to effectively clean the exterior of your oven:
- Unplug the oven: Before cleaning the exterior surfaces, unplug the oven from the electrical outlet to ensure your safety.
- Prepare a cleaning solution: Create a cleaning solution by mixing warm water with a gentle dish detergent or a multi-purpose cleaner. Avoid using abrasive cleaners, as they can damage the oven’s surfaces.
- Wipe down the surfaces: Dip a soft cloth or sponge into the cleaning solution and gently wipe down the exterior surfaces of the oven. Pay attention to areas prone to grease or dirt buildup, such as the control panel, door handle, and knobs.
- Address stubborn stains: For stubborn stains or sticky residue, use a non-abrasive scrub brush or a soft toothbrush dipped in the cleaning solution. Gently scrub the affected areas until the stains are removed.
- Rinse with clean water: After cleaning, dampen a clean cloth or sponge with fresh water and wipe down the surfaces to remove any cleaning solution residue.
- Dry the exterior: Use a dry, lint-free cloth or towel to thoroughly dry the exterior surfaces of the oven. This will prevent water spots and streaks from forming.
- Pay attention to the control panel: When cleaning the control panel, avoid excessive moisture or getting water inside the buttons or electronic components. Instead, use a slightly damp cloth to gently wipe down the control panel without applying excessive pressure.
Regularly cleaning the exterior surfaces of your Whirlpool oven helps maintain its overall cleanliness, prevents the buildup of grime, and keeps it looking its best. It is recommended to clean the exterior of the oven as part of your routine kitchen maintenance.
With the exterior of your oven now clean and refreshed, you can enjoy cooking without any distractions caused by dirt or residue. Regular cleaning not only enhances the appearance of your oven but also contributes to a sanitary and enjoyable cooking experience.