
Selecting the Right Seed Potatoes
When it comes to planting potatoes, selecting the right seed potatoes is crucial for a successful harvest. But with so many varieties available, how do you choose the best ones for your garden? Here are some key factors to consider:
- Variety: There are countless potato varieties, each with its own unique characteristics. Some are better suited for baking, while others are ideal for boiling or frying. Consider your culinary preferences and the intended use of the potatoes to select the appropriate variety.
- Growing Season: Potatoes can be categorized into early, mid, or late-season varieties. Early-season potatoes mature quickly, while late-season ones take longer. Choose a variety that aligns with your local climate and the length of your growing season.
- Disease Resistance: Some potato varieties have built-in resistance to common diseases, such as late blight or potato scab. Research the disease resistance of different varieties and choose those that are less susceptible to prevalent diseases in your area.
- Yield: Consider the yield potential of the potato variety. Some varieties produce large yields, which can be beneficial if you have limited space or are planning to grow potatoes for storage.
- Availability: Check with local nurseries or garden centers to see which seed potato varieties are available. Some regional or heirloom varieties may be harder to find, while others are more readily accessible. It’s always best to choose varieties that are suitable for your specific location and growing conditions.
By considering these factors and selecting the right seed potatoes, you lay the foundation for a successful potato-growing experience. Take your time to research and understand the characteristics of different varieties before making your final selection. The right choice will ensure a bountiful harvest and delicious homegrown potatoes for your enjoyment.
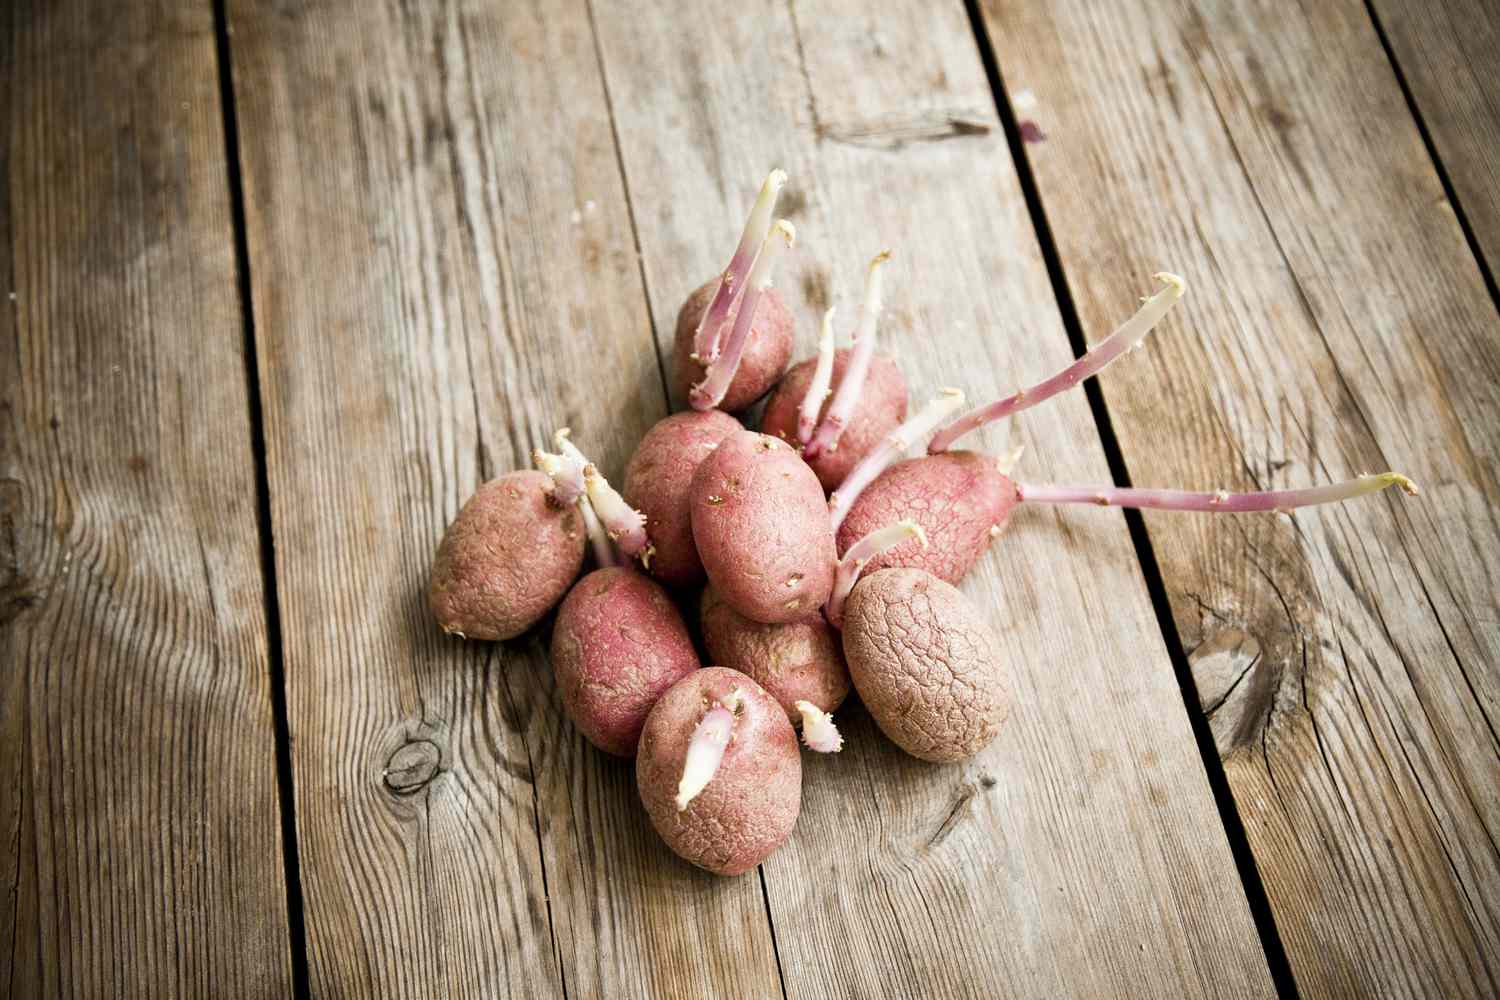
Preparing the Seed Potatoes
Before planting your seed potatoes, it is important to take the time to properly prepare them. This preparation process helps to ensure healthy growth and maximizes the chances of a successful harvest. Follow these steps to prepare your seed potatoes:
- Evaluate the Potatoes: Examine the seed potatoes for any signs of damage or disease. Discard any potatoes that have soft spots, mold, or are shriveled. Only use healthy and firm potatoes for planting.
- Chitting: Chitting is the process of allowing the seed potatoes to sprout before planting. Place your seed potatoes in a cool, well-lit area with the eyes facing upwards. This allows them to develop small shoots, which will promote faster and more uniform growth once planted.
- Size and Cutting: If your seed potatoes are on the larger side, you can cut them into smaller pieces. Each piece should have at least one well-developed eye. Allow the cut pieces to dry for a few days before planting to minimize the risk of rotting.
- Treatment for Disease Prevention: To prevent diseases, you can treat your seed potatoes with a fungicide that is specifically formulated for potato planting. This helps protect against common diseases like late blight and helps to ensure healthy growth.
- Pre-Planting Soak: A pre-planting soak can help stimulate growth and improve water absorption. Soak the seed potatoes in water for about 24 hours before planting. This provides them with the necessary moisture to kick-start the growth process.
By taking the time to properly prepare your seed potatoes, you set the stage for healthy growth and a higher chance of a bountiful harvest. Ensure that you handle the seed potatoes with care, following the recommended steps for cutting, treating, and soaking. This attention to detail will pay off in the long run, leading to strong and productive potato plants in your garden.
Choosing the Ideal Location
Choosing the right location for planting your potatoes is essential for their growth and overall success. Here are some key factors to consider when selecting the ideal location:
- Sunlight: Potatoes thrive in full sunlight, so choose a spot in your garden that receives at least 6-8 hours of direct sunlight per day. Adequate sunlight ensures proper photosynthesis, leading to healthy growth and higher yields.
- Soil Drainage: Potatoes prefer well-draining soil to prevent waterlogging and the development of rot or disease. Avoid areas with heavy clay soil that retains water. Instead, select a location with loamy or sandy soil that allows for proper drainage.
- Soil pH: Potatoes thrive in slightly acidic to neutral soil, with a pH range of 5.0-7.0. Test the pH of your soil and make amendments if needed to bring it within the optimal range. This ensures proper nutrient uptake and healthy plant development.
- Wind Exposure: Consider the wind exposure in your chosen location. Strong, persistent winds can damage potato plants and dry out the soil quickly. If your garden is prone to high winds, consider planting your potatoes near a windbreak, such as a fence or row of shrubs.
- Proximity to Water Source: Potatoes need regular watering, especially during dry periods. Choose a location that is easily accessible to water, whether it’s a natural water source or a nearby hose connection. This ensures that your potatoes receive adequate moisture throughout the growing season.
By carefully considering the sunlight, soil drainage, pH levels, wind exposure, and proximity to a water source, you can choose an ideal location for planting your potatoes. This thoughtful selection will provide the optimal growing conditions for your potatoes, leading to healthy plants and a successful harvest.
Preparing the Soil
Preparing the soil is a critical step in the potato planting process as it provides the foundation for strong root growth and healthy potato plants. Follow these steps to prepare the soil before planting:
- Clear the Area: Begin by clearing the planting area of any weeds, rocks, or debris. Remove any large clumps of soil to create a smooth and even surface.
- Loosen the Soil: Using a garden fork or tiller, loosen the soil to a depth of 8-10 inches. This improves aeration and allows the potato roots to penetrate the soil more easily.
- Amend the Soil: Test the soil to determine its nutrient content and pH level. Based on the results, amend the soil if necessary. Add organic matter such as compost, well-rotted manure, or leaf mold to improve soil fertility and structure.
- Fertilize: Prior to planting, apply an organic, balanced fertilizer to provide essential nutrients for the growing potatoes. Follow the recommended application rates on the fertilizer packaging to avoid over-fertilization.
- Work the Amendments: Incorporate the amendments and fertilizer into the soil thoroughly. Use a garden rake or hoe to mix them evenly, ensuring that they are well-distributed throughout the planting area.
- Level the Surface: Smooth out the soil surface with a rake, creating a level bed for planting. This helps with even moisture distribution and provides a consistent environment for the potato tubers to grow.
By properly preparing the soil, you provide an optimal environment for your potatoes to thrive. The combination of loosening the soil, adding amendments, and incorporating fertilizer helps to ensure that the soil is fertile, well-draining, and nutrient-rich. Take the time to prepare the soil thoroughly, and your potatoes will thank you with vigorous growth and a bountiful harvest.
Digging Trenches or Holes
When it comes to planting potatoes, one of the primary methods is digging trenches or holes to create the optimal environment for planting. Here’s how to dig trenches or holes for planting your potatoes:
- Trench or Hole Depth: Dig trenches or holes with a depth of around 4-6 inches. This provides enough room for the potato tubers to grow and allows for proper soil coverage.
- Trench or Hole Width: The width of the trench or hole will depend on the number of potato tubers you plan to plant. Ensure that the spacing between each potato is around 10-12 inches to allow for adequate growth and airflow.
- Trench or Hole Length: The length of the trench or hole will depend on the number of potatoes you intend to plant. Plan the length accordingly, leaving enough space between each trench or hole to provide easy access for watering, fertilizing, and hilling.
- Trench or Hole Orientation: Orient the trenches or holes in an east-west direction to maximize sunlight exposure throughout the day. This ensures even distribution of sunlight to all parts of the growing potato plants.
- #Preparing Trench or Hole: Break up the soil at the bottom of the trench or hole to allow for easy root penetration. Remove any large clumps, rocks, or debris that may obstruct the growth of the potato tubers.
By following these guidelines and carefully digging trenches or holes for your potatoes, you create the ideal environment for planting. The depth, width, length, orientation, and preparation of the trenches or holes are crucial in providing sufficient space, sunlight, and nutrients for the developing potatoes. Take your time to dig them properly, and you’ll be rewarded with healthy potato plants and a successful harvest.
Placing the Potato Eyes
Now that you have prepared the trenches or holes, it’s time to place the potato eyes into the soil. The potato eyes are small indentations on the surface of the potato tuber from which new shoots will sprout. Follow these steps to properly place the potato eyes:
- Place the Seed Potatoes: Gently place the seed potatoes into the trenches or holes with the eyes facing upwards. Ensure that each seed potato is adequately spaced, with about 10-12 inches between each one. This spacing allows the plants to grow without crowding and promotes better airflow and sunlight exposure.
- Planting Depth: Cover the seed potatoes with about 2-3 inches of soil. The planting depth is crucial, as it allows the potato roots and shoots to develop properly. Avoid planting them too shallow, as this can lead to sunburning of the tubers.
- Spacing: If you are planting multiple rows of potatoes, space the rows about 2-3 feet apart. This provides enough room for hilling and proper maintenance of the potato plants throughout the growing season.
- Backfill and Firm the Soil: Gently backfill the trenches or holes with soil, making sure to cover the seed potatoes thoroughly. Firm the soil around the potatoes to eliminate any air pockets that could potentially hinder root growth.
- Watering: After planting, give the newly placed seed potatoes a thorough watering. This helps to settle the soil and initiates the hydration process for the potatoes to start rooting and sprouting.
By following these steps, you ensure that the potato eyes are properly placed in the soil, allowing for optimal growth and development. Remember to handle the seed potatoes with care and take your time when planting them. This attention to detail will set the stage for healthy plants and a bountiful potato harvest in the future.
Covering the Potato Eyes
After placing the potato eyes in the soil, it is important to cover them properly. This step protects the potato tubers from exposure to sunlight and provides the ideal growing conditions. Follow these guidelines to ensure proper covering of the potato eyes:
- Add a Layer of Soil: Begin by gently adding a layer of soil over the planted seed potatoes. Cover them with about 2-3 inches of loose soil. This layer serves as a protective barrier and helps to prevent sunlight from reaching the developing potatoes, which can cause them to turn green and become toxic.
- Gradual Hilling: As the potato plants grow, you will need to continue covering the emerging shoots and developing tubers with additional layers of soil. This process is known as hilling. Gradually add soil to the trenches or around the plants as they reach a height of about 6-8 inches. Continue hilling until the soil level is about 4-6 inches above the original ground level.
- Maintain Loose Soil: Ensure that the soil used for covering remains loose and well-draining. Avoid compacting the soil as you continue to hill. Loose soil provides the potato roots with the necessary space to grow and expand, facilitating better nutrient uptake and reducing the risk of rot.
- Monitor for Emergence: Keep a close eye on the potato plants as they emerge and continue to grow. As new shoots emerge from the covered eyes, gently add more soil to cover them. This process encourages the plant to produce additional tubers along the stem and increases the overall potato yield.
- Watering: Water the covered potato eyes gently and consistently to keep the soil moist but not saturated. Regular watering promotes healthy growth and helps the tubers develop properly.
By following these steps and properly covering the potato eyes with soil, you create an optimum environment for potato growth. The gradual hilling process not only protects the developing potatoes from sunlight exposure but also promotes additional tuber formation. Remember to monitor the emergence of the shoots and provide adequate moisture as you continue with the hilling process. With proper covering, your potato plants will thrive and reward you with a bountiful harvest.
Watering and Fertilizing
Watering and fertilizing play crucial roles in the successful growth of potato plants. Proper hydration and nutrient supply are essential for healthy development and high-quality potato yields. Follow these guidelines for effective watering and fertilizing:
- Watering: Potatoes require consistent and adequate moisture throughout their growth cycle. Water the plants deeply and evenly, ensuring that the soil remains consistently moist but not overly saturated. Aim for about 1-2 inches of water per week, either through rainfall or irrigation. Monitor the soil moisture regularly and increase watering during dry periods.
- Timing of Watering: Water the potato plants in the morning or early evening to reduce evaporation and allow the foliage to dry before nightfall. Avoid watering during the hottest part of the day, as excessive moisture on the leaves can lead to fungal diseases.
- Fertilizing: Prior to planting, incorporate a balanced, slow-release fertilizer into the soil according to the package instructions. This provides essential nutrients for the initial growth of the potato plants. Additionally, you can side-dress the plants with nitrogen-rich fertilizer when they reach about 6-8 inches in height. Side-dressing involves applying fertilizer alongside the rows or around the base of the plants.
- Organic Alternatives: If you prefer organic methods, consider using compost or well-rotted manure as a natural fertilizer. These organic materials provide a slow-release source of nutrients and help improve soil structure and fertility.
- Monitoring Nutrient Needs: Keep a close eye on the foliage of the potato plants for any signs of nutrient deficiencies, such as yellowing leaves. If deficiencies are observed, supplement with additional organic or synthetic fertilizers rich in the deficient nutrient. Follow recommended application rates and methods.
By ensuring proper watering and fertilization, you provide the necessary resources for robust growth and productive potato plants. Consistent watering schedules and well-balanced nutrient supply contribute to healthier foliage, more substantial tuber development, and an overall higher yield. Regularly monitor moisture levels, adjust watering as needed, and monitor plant health to achieve optimal results.
Mulching the Potato Bed
Mulching the potato bed is a beneficial practice that helps to improve soil moisture retention, suppress weeds, and regulate soil temperature. Applying a layer of mulch around the potato plants provides numerous advantages for healthy potato growth. Here’s how to effectively mulch your potato bed:
- Timing: Mulch the potato bed after the plants have emerged and reached a height of around 4-6 inches. This allows the plants to establish themselves before the mulch layer is applied.
- Choose the Right Mulching Material: Select a suitable organic mulching material such as straw, grass clippings, or compost. Avoid using materials that may contain weed seeds or are excessively woody, as they may compete for nutrients or take longer to break down.
- Apply an Even Layer: Spread a layer of mulch that is about 3-4 inches thick around the base of the potato plants. Ensure the mulch covers the soil surface but doesn’t touch the stems directly, as this can lead to moisture retention and potential rotting.
- Leave Room Around Stems: Create a small space around the potato stems to allow for airflow and prevent moisture buildup. This helps to minimize the risk of fungal diseases and rotting.
- Mulch Maintenance: Monitor the mulch layer throughout the growing season to ensure it remains intact and effective. Replenish the mulch as needed to maintain the desired thickness and cover any bare soil spots.
- Benefits of Mulching: Mulching the potato bed provides multiple benefits including weed suppression, moisture conservation, and temperature regulation. By suppressing weeds, mulch helps to reduce competition for nutrients and preserves soil moisture, reducing the need for excessive watering. Additionally, the mulch layer acts as insulation, protecting the potatoes from extreme temperature fluctuations.
By mulching your potato bed, you create a favorable environment for healthy potato growth and development. The mulch layer helps to minimize weed growth, conserve soil moisture, and regulate soil temperature. Additionally, it aids in maintaining a cleaner and more manageable potato bed. Apply and maintain the mulch layer properly to maximize the benefits and promote a successful potato harvest.
Hilling up the Potatoes
Hilling up, also known as earthing up, is a vital technique for growing potatoes. It involves gradually adding soil around the base of the plants as they grow, which has several benefits for the overall health and productivity of the crop. Follow these steps to effectively hill up your potatoes:
- Timing: Start hilling up the potato plants when the stems have grown to a height of about 6-8 inches. This is typically a few weeks after planting, once the plants have established themselves.
- Loosen the soil: Before hilling, carefully loosen the soil around the base of the plants using a garden fork or hand cultivator. This helps prevent damage to the roots when adding more soil.
- Add soil: Gently add soil around the base of the plants, creating a mound or ridge that covers the lower portion of the stems. Aim for a thickness of about 4-6 inches of soil, leaving the upper leaves and foliage exposed.
- Repeat the process: As the plants continue to grow, repeat the hilling process every few weeks to provide a sufficient amount of soil to cover the tubers. This helps protect the developing potatoes from exposure to sunlight, preventing them from turning green and becoming toxic.
- Keep foliage above the soil: Ensure that the upper foliage remains above the soil level at all times. This helps with proper photosynthesis and prevents the stems from rotting due to excessive soil moisture.
- Maintain loose soil: After each hilling, gently firm the soil around the plants to provide stability, but avoid packing it too tightly. Loose soil allows for proper aeration, root penetration, and prevents waterlogging.
Hilling up the potatoes offers several advantages. It promotes better tuber development by providing more space for the potatoes to grow and reduces the chance of greening. The increased soil depth also helps to maintain a more consistent soil temperature, prevents weed growth, and improves drainage. By regularly hilling up your potatoes, you ensure healthier plants, increased yields, and a successful harvest.
Monitoring and Controlling Pests and Diseases
As with any crop, potatoes are susceptible to various pests and diseases that can hinder their growth and yield. Regular monitoring and proactive measures are essential to keep these issues under control. Here are some steps to effectively monitor and control pests and diseases in your potato plants:
- Regular Inspection: Conduct regular inspections of your potato plants, checking for any signs of pests or diseases. Look for common potato pests such as Colorado potato beetles, aphids, or potato tuberworms. Additionally, be on the lookout for disease symptoms such as leaf spots, wilting, or discoloration.
- Early Intervention: If you detect any pests or diseases, take immediate action to prevent them from spreading and causing further damage. Remove and destroy any infected plants or heavily infested leaves to prevent the issue from spreading to healthy plants.
- Natural Remedies: Consider using natural pest control methods such as introducing beneficial insects or using organic insecticides like neem oil to control pest populations. These methods are less harmful to the environment and can effectively reduce pest numbers.
- Cultural Practices: Implement cultural practices that discourage pests and diseases. Practice crop rotation, avoid planting potatoes near other susceptible crops, and remove any plant debris or weeds that may harbor pests or diseases.
- Protective Measures: Use physical barriers such as row covers or nets to prevent pests from accessing your potato plants. These barriers can help deter insects and protect the plants from damage.
- Monitoring soil moisture: Proper irrigation practices help maintain a healthy balance of soil moisture. Avoid overwatering, as excessive moisture can lead to fungal diseases. Similarly, make sure not to let the soil dry out completely, as it can stress the plants and make them more vulnerable to pests and diseases.
- Educate Yourself: Learn about common potato pests and diseases prevalent in your area and their life cycles. This knowledge will help you identify and address issues in a timely manner.
- Chemical Control: If pest or disease problems persist despite your best efforts, seek advice from local gardening experts or agricultural extension services. They can recommend appropriate chemical control methods or pesticides approved for use on potatoes.
By actively monitoring your potato plants and taking appropriate measures to control pests and diseases, you can protect the health and vitality of your crop. Utilize a combination of preventive measures, natural remedies, and targeted interventions to create a balanced and eco-friendly approach to pest and disease management. With careful monitoring, you can keep your potato plants healthy and ensure a successful harvest.
Harvesting the Potatoes
After months of diligent care and patience, it’s time to reap the rewards of your efforts by harvesting your potatoes. Harvesting at the right time ensures that you get the best quality and flavor from your potatoes. Here’s how to harvest your potatoes:
- Timing: Potatoes are typically ready for harvest when the foliage begins to turn yellow and die back. This usually occurs around 2-3 weeks after the plants have finished flowering.
- Prepare the Soil: Before harvesting, gently loosen the soil around the base of the plants using a garden fork or shovel. This makes it easier to lift the potatoes without damaging them.
- Hand Harvesting: Carefully dig around the base of the potato plants to expose the tubers. Using your hands, gently lift the potatoes from the soil. Avoid stabbing or piercing the potatoes to reduce the risk of damage or rot.
- Inspect and Sort: As you harvest, inspect each potato for any signs of damage, disease, or pest infestation. Separate any damaged or diseased potatoes from the healthy ones.
- Curing: After harvesting, allow the potatoes to cure or dry for a few hours in a cool, dry, and well-ventilated area. This helps to toughen the skin, enhances their storage life, and improves their flavor.
- Storage: Store the harvested potatoes in a cool, dark, and well-ventilated place. Avoid exposing them to direct sunlight as it can cause greening and the production of solanine, a toxic compound. Place them in mesh or burlap bags, wooden crates, or well-ventilated containers to allow for air circulation.
- Enjoy the Fruits of Your Labor: Once properly stored, you can enjoy your homegrown potatoes in various delicious recipes. Whether you choose to bake, roast, boil, or mash them, the fruits of your labor will reward you with incredible flavor and satisfaction.
By harvesting your potatoes at the right time and with care, you ensure that you get the maximum yield of high-quality, delicious tubers. Take the time to gently remove the potatoes from the soil and sort them to maintain their condition. Proper storage will allow you to enjoy your homegrown potatoes for weeks or even months after harvesting. Sit back and savor the taste of your hard work while planning for the next season’s potato-growing adventure.