
Why Planting Depth Matters for Potatoes
When it comes to planting potatoes, the depth at which you plant the tubers plays a crucial role in the success of your crop. The planting depth affects the growth and development of the potato plants, the health of the tubers, and ultimately, the yield of your harvest. Understanding why planting depth matters and following the proper guidelines can significantly increase your chances of a bountiful potato harvest.
One of the main reasons why planting depth is important for potatoes is because the tubers need to be protected from exposure to light. When potatoes are exposed to light, they undergo a process called greening, where the skin turns green due to the production of a toxic compound called solanine. Green potatoes are not only unappetizing but can also be harmful if consumed in large quantities. Planting the tubers at the correct depth ensures that they are adequately covered with soil, reducing the risk of greening and preserving the quality of your potatoes.
Additionally, planting potatoes at the right depth allows for proper root development and anchoring of the plants. Planting too shallow can lead to weak root systems, making the plants more susceptible to wind damage and difficulty in absorbing nutrients and water from the soil. On the other hand, planting too deep can restrict the growth of the stems and prevent them from properly emerging through the soil’s surface. Finding the perfect balance in planting depth promotes healthy plant growth and provides the best conditions for tuber formation.
Another reason why planting depth matters is related to temperature regulation. The soil acts as a natural insulator, protecting the potatoes from extreme temperature fluctuations. Planting the tubers at the appropriate depth helps to ensure that they are shielded from extreme heat or cold, providing a stable environment for their growth. This can result in stronger and healthier plants that are better able to withstand adverse weather conditions.
Furthermore, the proper planting depth allows for efficient water and nutrient uptake by the potato plants. The roots of the potato plants are responsible for absorbing water and essential nutrients from the soil. By planting the tubers at the correct depth, you ensure that the roots are in close proximity to these vital resources, maximizing their uptake. This can contribute to improved plant health, vigor, and ultimately, a higher yield of quality potatoes.
General Guidelines for Planting Potatoes
When it comes to planting potatoes, following some general guidelines can help ensure successful growth and increase your chances of a plentiful harvest. Here are some key principles to keep in mind:
1. Choose the right time: Potatoes are typically planted in the early spring, after the danger of frost has passed. The soil should be workable and temperatures should be consistently above freezing.
2. Prepare the soil: Potatoes thrive in well-draining soil that is rich in organic matter. It’s a good idea to prepare the planting area by loosening the soil and incorporating compost or well-rotted manure to improve its fertility and structure.
3. Select healthy seed potatoes: Seed potatoes are the tubers used for planting. Choose certified disease-free seed potatoes from a reliable source. Look for firm, smooth-skinned tubers without any signs of damage or disease.
4. Cut and cure the seed potatoes: If your seed potatoes are large, you can cut them into smaller pieces, ensuring that each piece has at least one “eye” or bud. Allow the cut surfaces to dry and form a protective callus for a day or two before planting.
5. Space and depth: Plant the seed potatoes about 12 to 15 inches apart, with the “eyes” facing upwards. The general rule of thumb is to plant them at a depth of 4 to 6 inches. However, the precise planting depth may vary depending on various factors discussed later in this article.
6. Hill up the soil: As the potato plants grow, you can gradually mound soil around the stems to create a hill or ridge. This helps to protect the developing tubers from exposure to light and encourages additional tuber formation along the buried stem.
7. Water and fertilize: Provide regular watering to keep the soil evenly moist, but not waterlogged. Avoid overwatering, as it can lead to rotting. Apply a balanced fertilizer, high in potassium, to promote healthy tuber development.
8. Monitor for pests and diseases: Keep an eye out for common potato pests, such as Colorado potato beetles or aphids, and take appropriate measures to control them. Regularly inspect the plants for signs of diseases like late blight or early blight, and promptly treat them if necessary.
9. Maintain weed control: Weeds can compete with potato plants for nutrients and water. Regularly remove weeds by hand or use mulch to suppress their growth and keep the planting area weed-free.
By following these general guidelines, you can set a solid foundation for your potato plants and help them thrive throughout the growing season. However, it’s important to consider specific factors that may influence the ideal planting depth for your particular potato variety and conditions, as discussed in the next section.
Factors to Consider When Deciding Planting Depth
Although the general guideline for planting depth for potatoes is 4 to 6 inches, several factors can influence the ideal depth for your specific situation. It’s essential to take these factors into consideration to optimize the growth and yield of your potato crop. Here are some key factors to keep in mind when deciding on the planting depth:
1. Potato variety: Different potato varieties have varying growth characteristics, especially when it comes to stem and root development. Some varieties tend to produce more shallow-rooted plants, while others may have deeper or more extensive root systems. Consider the specific needs of your chosen potato variety to determine the optimal planting depth.
2. Soil type and structure: The soil type and structure can impact drainage and aeration, which in turn affects root development. Clay soils tend to be more compacted, while sandy soils are typically looser. For heavy clay soils, planting the potatoes slightly shallower may help prevent waterlogging. In loose sandy soils, planting slightly deeper can provide better anchorage and stability for the plants.
3. Climate and weather conditions: The local climate and weather conditions play a significant role in determining the planting depth. In regions with hot summers, planting potatoes slightly deeper can help protect them from heat stress. Conversely, in colder regions, planting shallower can allow for quicker warming of the soil and promote earlier growth. Consider the average temperatures and weather patterns in your area to make an informed decision.
4. Moisture levels: The moisture levels of the soil are crucial for potato growth. Planting too shallow in dry conditions can expose the tubers to dehydration and hinder their development. On the other hand, planting too deep in excessively wet conditions can lead to waterlogged soil, which is detrimental to the plants. Assess the moisture levels of your soil and adjust the planting depth accordingly.
5. Pest and disease management: Certain pests and diseases, such as wireworms or soil-borne diseases, may be more prevalent at specific planting depths. Consider any historical issues or local pest and disease pressures when deciding on the planting depth. Adjusting the depth can help mitigate the risks associated with these pests and diseases.
6. Previous crop rotation: If you have recently grown a different crop in the same area, it’s important to consider the residual effects it may have on the soil. Some crops, such as legumes, can enrich the soil with nitrogen. In this case, planting the potatoes slightly shallower may allow the tubers to access the nutrient-rich topsoil.
By evaluating these factors and adjusting the planting depth accordingly, you can optimize the growing conditions for your potato plants, leading to healthier plants and a more abundant harvest. Experimentation and observation will also help you fine-tune the planting depth for future seasons based on the performance of your potato crop.
Recommended Planting Depth for Different Types of Potatoes
While the general guideline for planting depth for potatoes is 4 to 6 inches, there are variations for different types of potatoes. Different potato varieties have unique characteristics, including growth habits, tuber formation, and root development. Understanding these variations will help you determine the recommended planting depth for each type of potato. Here are some common types of potatoes and their corresponding planting depths:
1. Russet Potatoes: Russet potatoes, known for their large size and starchy texture, typically require a deeper planting depth. Plant them around 6 to 8 inches deep to accommodate their extensive root systems and promote proper tuber development.
2. Red Potatoes: Red potatoes, including varieties like Red Bliss or Pontiac, are typically planted at a slightly shallower depth than russet potatoes. A planting depth of 4 to 6 inches is generally recommended for these varieties. This depth allows for adequate root development without inhibiting stem emergence.
3. Yukon Gold Potatoes: Yukon Gold potatoes are versatile and have a creamy texture. For this type, a planting depth of 4 to 6 inches is also suitable. This depth strikes a balance between ensuring proper root growth and allowing sufficient stem emergence.
4. Fingerling Potatoes: Fingerling potatoes, known for their slender and elongated tubers, can be planted slightly shallower than other varieties. A planting depth of 3 to 5 inches is generally recommended for fingerling potatoes, allowing for adequate root development while promoting tuber formation.
5. New Potatoes: New potatoes, often harvested when young and tender, can be planted at a relatively shallower depth. Plant them around 2 to 4 inches deep to promote early emergence and ease of harvest.
6. Specialty Potatoes: Some potato varieties are considered specialty potatoes, such as blue potatoes or purple potatoes. These types are typically planted at a similar depth to their respective categories. Blue potatoes and purple potatoes, for example, can be planted at a depth of 4 to 6 inches, following the recommendation for their respective category.
It’s important to note that these are general recommendations and may vary based on the specific variety and local growing conditions. Some potato growers also prefer to adjust the planting depth based on their personal experience and observations. Monitoring the growth and development of your potato plants and making adjustments as needed can help you find the ideal planting depth for different types of potatoes in your specific gardening environment.
How to Determine the Correct Planting Depth for Your Potatoes
While there are general guidelines for planting depth, it’s important to consider your specific growing conditions and potato variety to determine the correct planting depth. Here are some steps to help you determine the ideal planting depth for your potatoes:
1. Research potato variety: Start by learning about the specific potato variety you plan to grow. Each variety has unique characteristics, including growth habits, root systems, and ideal planting depths. Researching and understanding these characteristics will help you make informed decisions.
2. Consider local conditions: Take into account the climate, soil type, and regional weather patterns. Certain areas may have specific challenges or advantages that can influence the planting depth. For example, if you live in a hot region, planting slightly deeper may help protect the tubers from heat stress.
3. Soil assessment: Evaluate the texture, drainage, and moisture levels of your soil. Different soil types have different water-holding capacities and drainage rates. Adjust the planting depth based on the soil’s ability to retain moisture and avoid waterlogging.
4. Observe neighboring crops: If there are other crops grown nearby, consider their root systems and planting depths. This can give you an idea of how different plants adapt to the local conditions and influence your decision on the potato planting depth.
5. Consult local experts: Seek advice from local agricultural extension offices, gardening clubs, or experienced growers in your area. They can provide valuable insights into planting depths that work well in your specific region and share their experiences with different potato varieties.
6. Conduct trial plantings: If you’re unsure about the best planting depth, try planting a few test potatoes at varying depths. Monitor their growth and observe which planting depth produces the healthiest plants and most abundant tubers. This hands-on approach allows you to assess the impact of different planting depths in your particular garden environment.
7. Keep records: Maintain a gardening journal to track the performance of different planting depths over time. Note the planting depth used, weather conditions, yield, and overall health of the plants. This record-keeping will help you make more informed decisions in future growing seasons.
Remember, determining the correct planting depth for your potatoes may require some experimentation and adjustment. Each growing season presents opportunities to learn and refine your approach. By considering the potato variety, local conditions, and conducting trial plantings, you can determine the ideal planting depth that will result in healthy, vigorous plants and a bountiful harvest.
Steps to Planting Potatoes at the Proper Depth
Planting potatoes at the proper depth is essential for their healthy growth and successful yield. Follow these steps to ensure you plant your potatoes at the correct depth:
1. Prepare the soil: Start by preparing the planting area. Remove any weeds or debris and loosen the soil to allow for better root penetration. Incorporate organic matter, such as compost or well-rotted manure, to improve soil fertility and structure.
2. Mark the rows: Use a garden stake or string to mark the rows where you will be planting the potatoes. Leave enough space between the rows to facilitate watering, weeding, and harvesting.
3. Dig the planting trenches: With a garden hoe or shovel, dig trenches along the marked rows. The trenches should be deep enough to accommodate the desired planting depth for your specific potato variety, typically around 4 to 6 inches.
4. Add fertilizer: Before placing the seed potatoes in the trenches, you can add a balanced fertilizer or a high-potassium fertilizer to provide essential nutrients for plant growth and tuber development. Follow the recommended dosage and mix the fertilizer into the bottom of the trench.
5. Place the seed potatoes: Carefully place the seed potatoes in the trenches, with the “eyes” facing upwards. Space the potatoes around 12 to 15 inches apart to allow for proper root and foliage development.
6. Cover with soil: Gently cover the seed potatoes with soil, ensuring that they are completely buried. Use a rake or your hands to level the soil, ensuring there are no large air pockets around the potatoes. The soil covering should be sufficient to protect the tubers from exposure to light.
7. Hill up the soil: As the potato plants grow, gradually mound soil around the stems to create hills or ridges. This helps to protect the developing tubers from exposure to light and stimulates additional tuber formation along the buried stems. Repeat this hill-up process every few weeks as the plants continue to grow.
8. Water thoroughly: After planting, water the soil thoroughly to ensure good moisture penetration. This initial watering helps settle the soil and encourages the tubers to establish roots. In the following weeks, provide regular watering to keep the soil evenly moist but avoid overwatering, as it can cause rotting.
9. Mulch the rows: Apply a layer of organic mulch, such as straw or hay, around the potato plants. Mulching helps to conserve moisture, suppress weeds, and maintain consistent soil temperatures. It can also protect the tubers from sunlight, preventing them from turning green.
By following these steps, you can ensure that your potatoes are planted at the proper depth, providing them with the optimal conditions for growth, root development, and tuber formation. Remember to monitor the plants as they grow and adjust the planting depth if necessary based on your specific growing conditions and the performance of the potato crop.
Common Mistakes to Avoid when Planting Potatoes
Planting potatoes may seem straightforward, but there are common mistakes that can negatively impact the growth and yield of your potato crop. By avoiding these mistakes, you can increase your chances of a successful harvest. Here are some common mistakes to watch out for when planting potatoes:
1. Planting old or damaged seed potatoes: Using old or damaged seed potatoes can result in poor germination and weak plant growth. Always choose certified disease-free seed potatoes that are firm, smooth, and free from any signs of rot or damage.
2. Planting too early or too late: Planting potatoes too early in cool soil or too late in the season can lead to poor growth and low yields. Wait until the soil has warmed up to around 50°F (10°C) for optimal germination and vigorous growth.
3. Planting in compacted or poorly drained soil: Potatoes thrive in loose, well-draining soil. Planting in compacted soil can hinder root growth and lead to stunted plants. Make sure the soil is properly prepared and amend it with organic matter to improve drainage and aeration.
4. Planting too shallow or too deep: Planting potatoes too shallow can expose the tubers to light, leading to greening and increased solanine production. Planting too deep can impede stem emergence and limit vigorous growth. Aim for the recommended planting depth for your specific potato variety.
5. Overcrowding the plants: Planting potatoes too closely together can result in competition for nutrients, water, and sunlight. This can stunt growth and reduce the size and yield of the tubers. Maintain proper spacing between the plants to allow for ample growth and development.
6. Neglecting proper watering: Inconsistent watering can lead to irregular tuber development and crop stress. Potatoes require consistent moisture, especially as the tubers begin to develop. Water the plants deeply and regularly, ensuring that the soil remains evenly moist but not waterlogged.
7. Failing to control pests and diseases: Neglecting proper pest and disease management can lead to significant yield losses. Common potato pests, such as Colorado potato beetles or aphids, can quickly multiply and damage the plants. Regularly monitor the plants for signs of pests or diseases and take appropriate measures to control them.
8. Harvesting too early or too late: Harvesting potatoes at the wrong time can result in underdeveloped or overripe tubers. Dig the potatoes when the foliage has started to die back and the skin is firm. Avoid leaving the potatoes in the ground for too long, as they may become susceptible to rot or pests.
9. Poor crop rotation: Planting potatoes in the same location year after year can lead to the buildup of pests, diseases, and nutrient deficiencies. Implement a proper crop rotation plan to minimize these issues and maintain soil health.
By avoiding these common mistakes, you can set your potato crop up for success. Take the time to properly prepare the soil, choose high-quality seed potatoes, follow the recommended planting depth and spacing, provide consistent care and management, and harvest at the appropriate time. These practices will increase the likelihood of a healthy, productive potato harvest.
Tips for Successful Potato Planting Depth
Achieving the correct planting depth for potatoes is crucial for a successful harvest. To ensure optimal growth and maximize yields, consider these tips for successful potato planting depth:
1. Follow variety-specific guidelines: Different potato varieties have varying growth habits and root systems. Research the specific requirements for the variety you are planting, including the recommended planting depth. Adhering to these guidelines will give your potatoes the best chance for successful growth.
2. Take into account soil moisture levels: Plant potatoes when the soil is moist but not waterlogged. Dry soil can inhibit germination, while excessively wet soil can promote rotting. Test the soil moisture by squeezing it in your hand. Ideally, the soil should hold together without being overly compacted or dripping with water.
3. Consider local climate and weather patterns: Adapt the planting depth based on your regional climate and weather conditions. If you experience hot summers, consider planting slightly deeper to protect the tubers from heat stress. In cooler regions, plant shallower to allow for quicker warming of the soil and encourage early growth.
4. Monitor soil temperature: Potatoes prefer to be planted in soil that has reached a consistent temperature of at least 50°F (10°C). Use a soil thermometer to determine the temperature at a depth of 4 to 6 inches. Planting potatoes in soil that is too cold can lead to slow germination and poor growth.
5. Gradually hill up the soil: As the potato plants grow, gradually mound soil around the stems to create hills or ridges. This provides additional soil depth for tuber development and protects them from exposure to light. Continue this hilling process every few weeks until the plants reach maturity.
6. Monitor plant emergence: Keep a close eye on the emerging potato plants. If the stems seem to be struggling to push through the soil, it may indicate that the planting depth is too deep. Adjust the depth for subsequent plantings or gently loosen the soil around the emerging plants to aid their growth.
7. Mulch to maintain consistent soil moisture: Apply a layer of organic mulch such as straw or hay around the potato plants. Mulching helps to conserve moisture, reduce weed growth, and regulate soil temperature. This can contribute to more uniform tuber development and overall plant health.
8. Regularly monitor and adjust as needed: Observe how the potato plants are growing throughout the season. If you notice weak or stunted growth, it may indicate a problem with the planting depth. Make adjustments for subsequent plantings, taking note of the conditions that yield the best results.
9. Keep records for future reference: Maintain a gardening journal to record important information such as planting dates, depths, and observations. This will serve as a valuable resource for future potato plantings, allowing you to learn from previous experiences and optimize your planting depth strategies.
By following these tips, you can increase your chances of successful potato planting depth and maximize the growth and yield of your potato crop. Remember to adapt the depth based on variety, soil moisture, local climate, and observations of plant performance. With proper planting depth, you set the stage for healthy and productive potato plants.
Monitoring and Adjusting Planting Depth as Potatoes Grow
Once you have planted your potatoes at the proper depth, it’s important to monitor their growth and make adjustments as needed. Monitoring the plants allows you to assess their progress and ensure they are receiving optimal conditions for tuber development. Here are some key aspects to consider when monitoring and adjusting the planting depth as your potatoes grow:
1. Assess stem emergence: As the potato plants grow, keep an eye on the emergence of the stems from the soil. If the stems are struggling to emerge or appear weak, it may indicate that the planting depth is too deep. Adjust the depth for subsequent plantings or gently loosen the soil around the emerging stems to enable their growth.
2. Observe foliage development: Take note of the foliage development of your potato plants. If you notice that the foliage is shorter or appears stunted compared to previous crops, it may indicate an issue with the planting depth. In such cases, consider planting the next batch of potatoes slightly shallower to promote healthier growth.
3. Monitor tuber formation: Keep an eye on the development of the tubers as the plants continue to grow. If you find that the tubers are forming close to the soil surface and becoming exposed to light, it may indicate that the planting depth was too shallow. To prevent greening and protect the tubers, gently mound additional soil around the base of the plants.
4. Adjust planting depth for subsequent plantings: Based on your observations of the current crop, make adjustments to the planting depth for future plantings. If you found that the potatoes were planted too deep and had difficulty emerging or developing properly, plant the next batch slightly shallower. Similarly, if you noticed exposed tubers, plant slightly deeper to ensure adequate coverage.
5. Consider environmental conditions: Take into account any environmental factors that may influence your decision to adjust the planting depth. If you experience a hot and dry spell, it may be beneficial to plant slightly deeper to protect the tubers from heat stress and conserve soil moisture. Alternatively, during exceptionally wet periods, planting slightly shallower can help prevent waterlogging and improve overall plant health.
6. Keep records for future reference: Maintain a gardening journal to record your observations, adjustments, and the resulting outcomes. By documenting your experiences, you can refer back to them in future growing seasons. This will help you refine your planting techniques and achieve the optimal planting depth for your potatoes.
7. Seek advice from local experts: Local agricultural extension offices or experienced growers in your area can provide valuable insights and advice on monitoring and adjusting planting depth. They may have specific recommendations based on the soil type, climate, and prevalent potato diseases or pests in your region.
By closely monitoring the growth of your potato plants and making necessary adjustments to the planting depth, you can optimize their development and maximize tuber yield. Remember to consider stem emergence, foliage development, tuber formation, environmental conditions, and seek advice when needed. With attentive monitoring and timely adjustments, you can set the stage for a successful potato harvest.
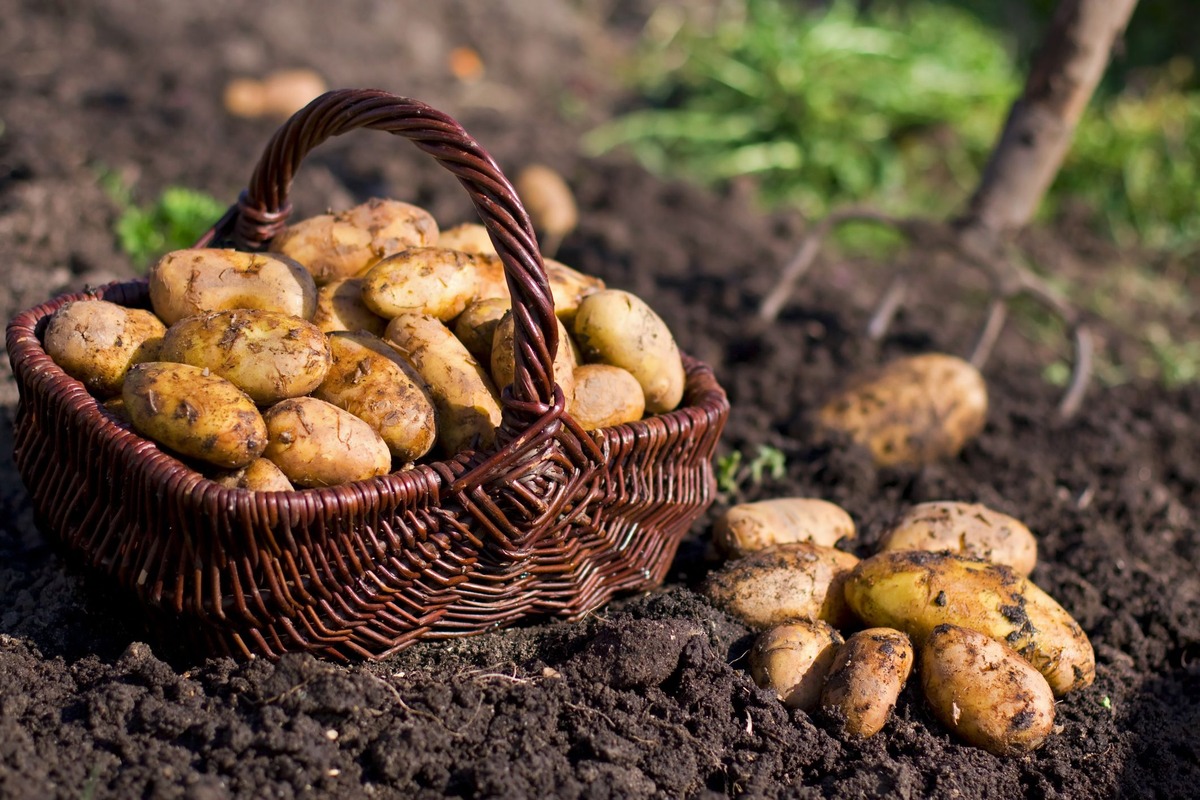
Harvesting Potatoes: Factors to Consider
When it comes to harvesting potatoes, timing is crucial to ensure maximum yield and quality. Harvesting too early can result in underdeveloped tubers, while harvesting too late can lead to overripe or damaged potatoes. Consider the following factors when determining the ideal time to harvest your potatoes:
1. Foliage condition: The condition of the foliage can be a good indicator of when to harvest. As the potatoes approach maturity, the foliage of the plants will start to yellow and die back. Wait until at least 50% of the foliage has turned yellow and withered before beginning the harvest process.
2. Skin and tuber maturity: Potatoes are typically ready for harvest when the skins are sufficiently set or firm. Gently rub your thumb against the skin, and if it doesn’t easily flake off, the potato is likely mature. Additionally, mature potatoes will have reached their full size, which varies depending on the variety.
3. Consider the potato variety: Different potato varieties have varying maturation times. Some early-maturing varieties can be harvested as early as 70-90 days after planting, while main crop varieties may require 90-120 days or longer. Refer to the seed packet or consult reliable sources to determine the expected maturity period for your specific variety.
4. Soil moisture: Harvesting potatoes when the soil is slightly moist can make the digging process easier and help avoid damage to the tubers. Dry soil can cause increased breakage, while overly wet soil can lead to muddy conditions and difficulty in retrieving the potatoes without causing unnecessary damage.
5. Storage considerations: Consider your storage plans for the potatoes. If you intend to consume them relatively soon, you can harvest them when they are fully mature. However, if you plan to store them for an extended period, it’s advisable to allow the potatoes to undergo a process known as “curing.” Curing involves letting the harvested potatoes sit in a cool, dry, and well-ventilated area for about two weeks. This process allows the skins to toughen and heal, extending their storage life.
6. Weather conditions: Monitor the weather forecast and consider any impending unfavorable conditions such as heavy rain, extreme heat, or frost. Harvesting before adverse weather can help prevent potential damage to the potatoes and preserve their quality.
7. Sampling method: If you’re uncertain about the readiness of the entire crop, you can gently dig around the edges of the potato hills and carefully sample a few tubers. Assess their size, skin firmness, and overall maturity. If they meet your desired criteria, it’s an indication that the rest of the crop is likely ready for harvest as well.
8. Harvesting technique: To harvest potatoes, use a garden fork or shovel to carefully dig alongside the potato hills. Gently lift the soil to reveal the tubers. Avoid stabbing or piercing the potatoes during this process to minimize damage. Shake off excess soil and handle the tubers with care to prevent bruises or cuts.
By considering these factors and using proper harvesting techniques, you can ensure the best yield and quality for your potatoes. Remember to pay attention to foliage condition, skin and tuber maturity, potato variety, soil moisture, storage plans, weather conditions, and sample test the tubers if needed. With proper timing and care, you’ll be able to enjoy the delicious rewards of your potato harvest.