
Choosing the Right Pot
When it comes to planting potatoes in pots, choosing the right pot is crucial for the success of your potato plants. Here are some factors to consider when selecting a pot:
- Size: Opt for a pot that is at least 12 inches deep and wide. This will provide enough space for the potato plant’s roots to grow and develop.
- Material: Clay or terracotta pots are excellent choices for growing potatoes. These materials provide good airflow and drainage, which is essential for preventing waterlogged soil.
- Drainage: Ensure that the pot has drainage holes at the bottom to allow excess water to escape. If the pot doesn’t have holes, consider drilling them yourself.
- Location: Select a location that receives at least six hours of direct sunlight each day. Potatoes thrive in sunny areas, so choose a spot that offers ample sunlight.
Additionally, keep in mind that some pots come with saucers to collect excess water. While these can be convenient, it’s best to empty the saucer after watering to prevent the roots from sitting in standing water, which can lead to root rot.
Another important consideration is the number of potatoes you plan to grow. Larger pots can accommodate more plants, enabling you to have a higher yield. However, smaller pots work well if you have limited space or want to experiment with potato varieties.
By choosing the right pot, you’ll set the stage for healthy growth and bountiful potato harvests. Keep these factors in mind when shopping for your potato planting pots, and you’ll be on your way to a successful potato growing journey!
Selecting the Right Potting Mix
When it comes to planting potatoes in a pot, selecting the right potting mix is essential for providing the best growing conditions for your plants. Here are some tips on choosing the right potting mix:
- Well-Draining: Look for a potting mix that has good drainage properties. The mix should not retain too much moisture, as this can cause the potatoes to rot. A mix that contains perlite or vermiculite can help improve drainage.
- Nutrient-Rich: Potatoes are heavy feeders, so you’ll want a potting mix that is rich in nutrients. Look for mixes that contain organic matter or compost, as these will provide a good source of nutrients for the plants.
- pH Level: The ideal pH range for growing potatoes is between 5.0 and 6.5. Check the pH level of the potting mix before purchasing or amend it if necessary. You can use products like lime or sulfur to adjust the pH level.
- Texture: A loose and friable potting mix is ideal for potatoes. It should not be too compacted, as this can restrict root growth. Mixes that contain peat moss or coconut coir can help improve the texture of the mix.
- Pre-Mixed or Homemade: You can either purchase a pre-mixed potting mix specifically formulated for vegetables or make your own mix. If making your own, combine equal parts of peat moss, compost, and perlite or vermiculite for a nutrient-rich and well-draining mix.
It’s important to note that garden soil is not suitable for growing potatoes in pots. It can be heavy, compacted, and may contain pests or diseases that could harm your plants. Opt for a high-quality potting mix to provide the best growing environment for your potatoes.
By selecting the right potting mix, you’ll be providing your potato plants with the necessary nutrients, drainage, and pH levels for healthy growth. Take your time to choose a quality mix, and your plants will reward you with a bountiful harvest of delicious homegrown potatoes!
Preparing the Potato
Before planting your potatoes in a pot, it’s important to properly prepare the potatoes for optimal growth. Here are the steps to follow when preparing the potatoes:
- Selecting Seed Potatoes: Choose seed potatoes specifically meant for planting, as they have been treated to prevent disease and ensure successful growth. Look for certified disease-free seed potatoes from a reputable supplier.
- Chitting the Potatoes: Chitting is the process of allowing the potatoes to sprout before planting. Place the potatoes in a cool, well-lit area, such as a windowsill, with the eyes facing upwards. This will encourage the development of strong sprouts.
- Cutting Larger Potatoes: If your seed potatoes are large, you can cut them into smaller pieces, each containing at least one or two eyes. Allow the cut potatoes to dry for a day or two, which helps prevent rotting.
- Treating Cut Surfaces: To protect the cut surfaces of the potatoes from disease, you can dust them with some powdered sulfur or cinnamon. This will help promote healing and ward off potential infections.
By properly preparing your potatoes before planting, you’ll be giving them the best chance for healthy growth and a successful harvest. Remember to handle the potatoes with care to avoid damaging the sprouts or the tubers.
It’s important to note that not all potato varieties require chitting or cutting. Some smaller or early-maturing varieties can be planted whole, without any pre-treatment. Check the instructions for your specific potato variety to determine the recommended preparation methods.
Take the time to prepare your potatoes properly, and you’ll be on your way to planting strong and vigorous potato plants in your pot!
Planting the Potato
Now that you have prepared your potatoes, it’s time to plant them in the pot. Follow these steps to ensure successful planting:
- Fill the Pot: Fill the pot with the selected potting mix, leaving a few inches of space below the rim to allow for watering. The loose and well-draining mix will provide a comfortable environment for the potatoes to grow.
- Make Furrows: Create furrows in the potting mix, around 4 to 6 inches deep. Space the furrows around 12 inches apart to allow room for the growing plants.
- Place the Potatoes: Gently place the prepared potatoes into the furrows with the sprouts facing upwards. Space them around 8 to 10 inches apart to ensure proper growth and airflow between the plants.
- Cover with Soil: Carefully cover the potatoes with a layer of potting mix, making sure to completely bury them. The layer should be around 2 to 3 inches thick.
- Water Thoroughly: After planting, water the potting mix thoroughly to provide moisture to the seeds. Ensure that the water reaches the bottom of the pot and saturates the soil evenly.
It’s important to note that the potatoes should be planted with the sprouts facing upwards to allow them to emerge easily from the soil. Incorrect orientation can result in difficulty for the shoots to break through the surface.
Once the potatoes are planted, place the pot in a sunny location and maintain regular watering to keep the soil moist but not waterlogged. Avoid overwatering, as this can lead to rotting. As the plants grow, gently mound more soil around the stems to encourage the development of additional tubers.
By following these planting steps, you’ll be on your way to growing healthy and productive potato plants in your pot. Enjoy the process of watching them grow and anticipate the satisfying harvest to come!
Watering and Fertilizing
Proper watering and fertilizing techniques are key to nourishing your potato plants and ensuring their healthy growth. Here’s what you need to know:
Watering:
Potatoes require consistent moisture, but it’s important not to overwater them. Here are some tips for watering your potato plants:
- Regular Watering: Keep the soil consistently moist throughout the growing season, especially during hot and dry periods. Aim to water your plants about 1-2 inches per week.
- Avoid Waterlogging: Prevent waterlogging by ensuring that the pot has proper drainage. Excessive moisture can lead to rotting and disease. If the pot is retaining too much water, consider adjusting your watering frequency.
- Consistent Moisture: Aim to maintain a balance of moisture in the soil. Too much fluctuation can cause issues like splitting tubers. Mulching around the plants can help retain moisture and regulate temperature.
Fertilizing:
Providing adequate nutrients is important for the health and productivity of your potato plants. Here are some tips for fertilizing your potatoes:
- Slow-Release Fertilizer: Incorporate a slow-release balanced fertilizer into the potting mix when planting. This will ensure a steady supply of nutrients throughout the growing season.
- Top-Dressing Fertilizer: As the plants grow, you can also apply additional fertilizer by top-dressing. Use a balanced fertilizer and follow the manufacturer’s instructions for application rates and frequency.
- Organic Options: If you prefer organic gardening, you can use well-rotted compost or organic fertilizers to provide the necessary nutrients. These can be applied during planting or as a top dressing.
Remember to follow the instructions on the fertilizer product packaging and avoid over-fertilizing, as it can lead to excessive foliage growth at the expense of tuber development.
Regular monitoring of soil moisture and plant health will help you determine if adjustments need to be made in watering and fertilization. By providing proper care, you’ll support the growth of healthy potato plants and increase your chances of a plentiful harvest!
Caring for the Growing Potato Plant
After planting, it’s important to provide ongoing care for your growing potato plants. By following these care guidelines, you’ll ensure healthy growth and optimize the chances of a successful harvest:
- Sunlight: Ensure that your potato plants receive at least six hours of direct sunlight each day. Place the pot in a sunny location or use reflective materials to maximize sunlight exposure.
- Temperature: Potatoes thrive in cool to mild temperatures, ideally between 60°F to 70°F (15°C to 21°C). Protect your plants from extreme heat by providing shade or moving them to a cooler spot if needed.
- Support: As your potato plant grows, it may need support to prevent the plant from falling over. Use stakes or a small trellis system to prop up the stems, especially once the plant starts producing flowers.
- Weeding: Regularly inspect and remove any weeds that may compete with the potato plant for nutrients and water. Be careful not to disturb the shallow roots of the potato plants while weeding.
- Pest and Disease Control: Monitor your plants for any signs of pests or diseases, such as potato beetles, aphids, or fungal infections. Use organic pest control methods or consult a local gardening expert for appropriate solutions.
- Hilling: As the potato plants grow, periodically mound soil up around the stems. This encourages additional tuber development and protects any exposed tubers from sunlight, preventing greening.
- Pruning: Remove any yellow or damaged leaves from the plants. This helps maintain plant health and prevents the spread of diseases. However, avoid excessive pruning, as the leaves are essential for photosynthesis.
- Monitoring and Adjustments: Regularly observe the overall health and growth of your plants. Make adjustments to watering, fertilizing, and other care practices as needed based on the specific needs of your potatoes.
Caring for your growing potato plants requires attentiveness and proactive maintenance. By providing proper care, you’ll help your plants thrive and produce a rewarding harvest of delicious homegrown potatoes!
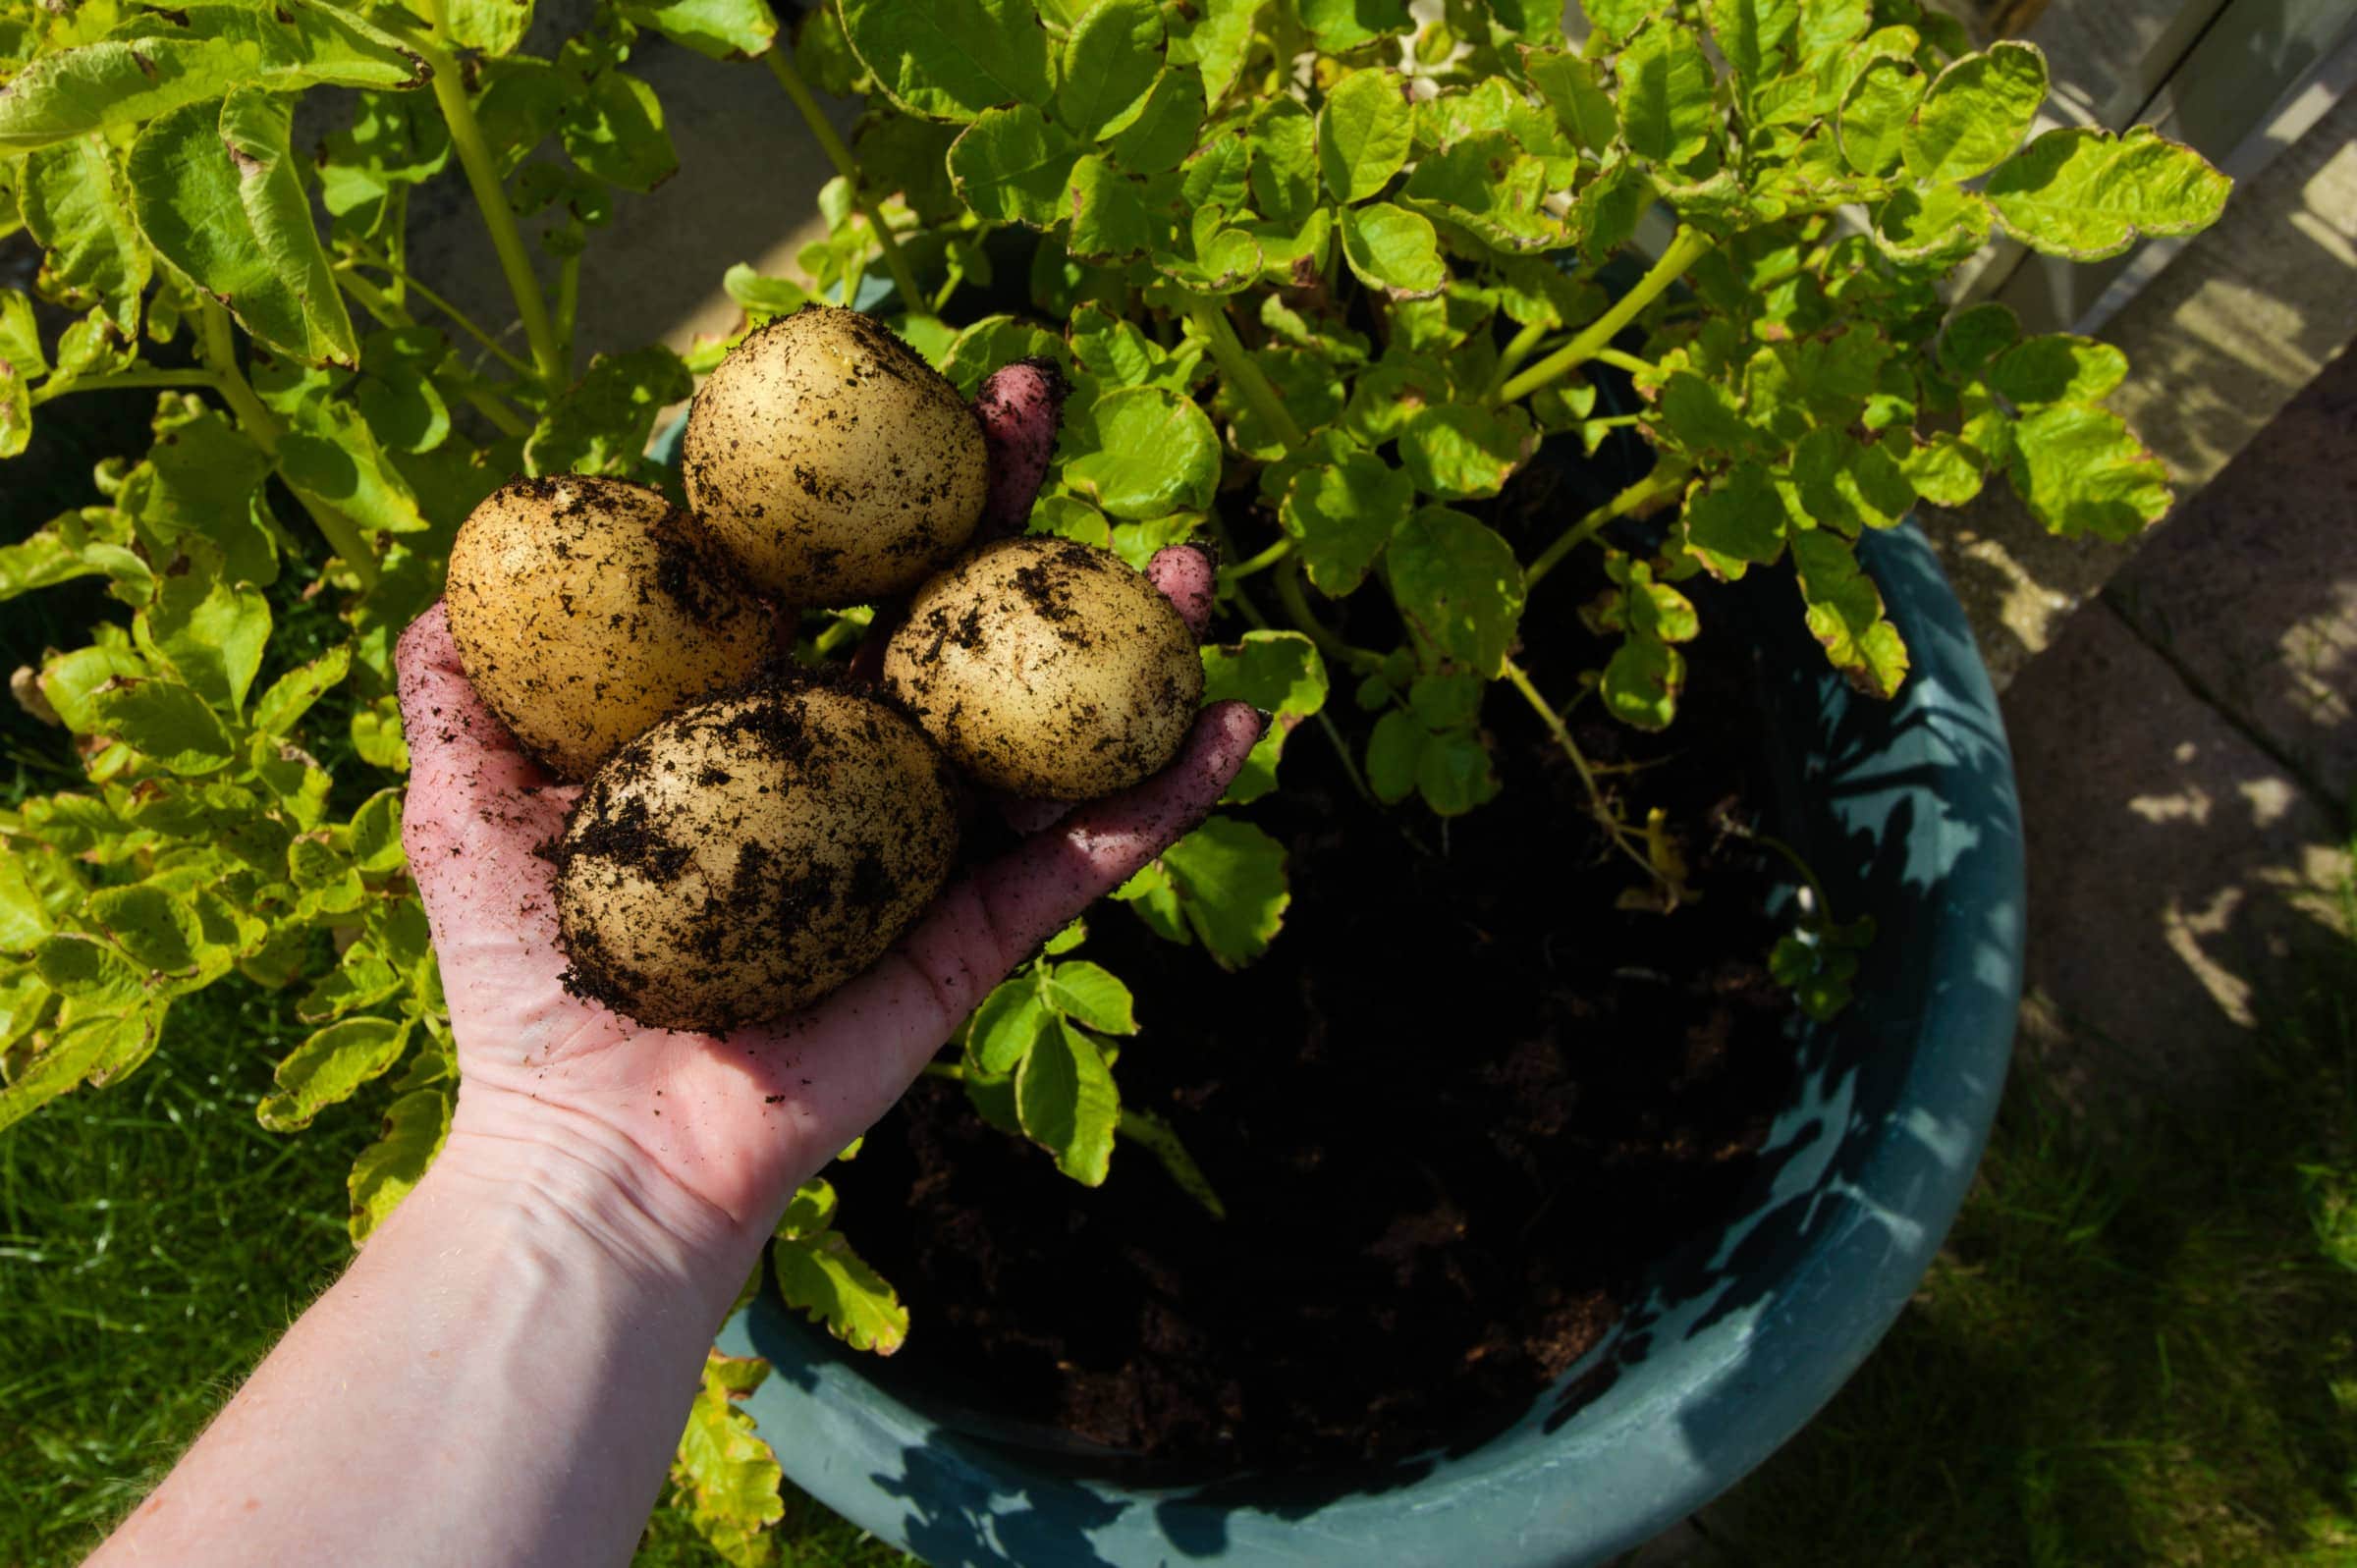
Harvesting the Potatoes
When it’s time to harvest your potatoes, there’s a great sense of excitement and anticipation. Here are the steps to follow for a successful potato harvest:
- Timing: Potatoes are typically ready for harvest when the plants have flowered and the foliage has started to yellow and die back. You can check for maturity by gently digging around the base of the plant to feel for the size and firmness of the tubers.
- Loosening the Soil: Before digging up the potatoes, gently loosen the soil around the plant using a garden fork or trowel. This will help prevent damage to the tubers during the harvesting process.
- Removing Tubers: Carefully remove the tubers from the soil, taking care not to bruise or damage them. Gently lift the potatoes by hand or use a garden fork to lift them out of the soil.
- Drying and Curing: After harvesting, place the potatoes in a cool, dry, and well-ventilated area to dry and cure. This process allows the skin to toughen, promoting better storage and reducing the risk of rot.
- Sorting and Storage: Once the potatoes are dry, sort them by size and quality. Discard any damaged or diseased tubers. Choose a cool, dark, and well-ventilated storage location, such as a root cellar or a cool basement, for storing your potatoes.
It’s important to note that “new potatoes” can be harvested earlier in the season when they are still small and tender. These can be enjoyed immediately rather than stored for an extended period.
Remember that potatoes are highly versatile and can be enjoyed in a variety of dishes. From roasted potatoes to mashed potatoes and everything in between, the options are endless when it comes to exploring the culinary possibilities of your freshly harvested potatoes!
Harvesting your own potatoes is a rewarding experience that allows you to savor the taste of homegrown goodness. Enjoy the fruits of your labor and celebrate a successful potato harvest!
Troubleshooting Common Issues
While growing potatoes in pots can be a rewarding experience, it’s not without its challenges. Here are some common issues that may arise and tips for troubleshooting them:
- Potato Pests: Common pests that can affect potato plants include potato beetles, aphids, and nematodes. Monitor your plants regularly and take appropriate measures to control pests, such as using organic insecticides or introducing beneficial insects.
- Disease: Potato plants can be susceptible to diseases like blight, scab, and rot. To prevent these issues, practice crop rotation, provide adequate airflow and drainage, and avoid overhead watering. If diseases occur, remove and destroy infected plants to prevent the spread.
- Potato Greening: Exposure to sunlight can cause potatoes to develop a green color. To avoid this, ensure that the tubers are covered with soil or straw as they grow. Green potatoes contain a toxic compound called solanine and should not be consumed.
- Poor Yield: If your potato plants aren’t producing a satisfactory yield, it could be due to insufficient nutrients, improper watering, or overcrowding. Adjust your fertilization, watering, and spacing practices for optimal growth and better tuber production.
- Yellowing Leaves: Yellowing leaves can be a sign of nutrient deficiencies, overwatering, or disease. Ensure that your plants are receiving adequate nutrients and water, and take necessary actions to address any underlying issues.
- Stunted Growth: If your potato plants appear stunted or have limited growth, it could indicate poor soil quality, insufficient sunlight, or overcrowding. Provide nutrient-rich soil, adequate sunlight, and ample space for the plants to reach their full potential.
It’s important to remember that prevention is key in troubleshooting common issues with your potato plants. Maintain good plant hygiene, provide proper care, and continuously monitor the health and growth of your plants. Early intervention and prompt action will help you address any potential issues and increase your chances of a successful potato harvest.
If you encounter persistent or severe problems with your potato plants, consult a local gardening expert or agricultural extension service for specific guidance or remedies that are most suited to your region.
Enjoying Your Homegrown Potatoes
After all the hard work and anticipation, it’s time to enjoy the fruits of your labor – your homegrown potatoes! Here’s how to make the most of your harvest:
- Cooking Options: Potatoes are incredibly versatile and can be incorporated into a wide variety of dishes. From comforting mashed potatoes to crispy roasted potatoes, explore different recipes and cooking methods to suit your taste.
- Fresh Flavor: Homegrown potatoes offer a fresher taste compared to store-bought varieties. Enjoy the earthy, rich flavor and savor the difference that comes from growing your own produce.
- Storage: Store your harvested potatoes properly to prolong their freshness. Keep them in a cool, dark, and well-ventilated area, such as a root cellar or a cool basement, away from direct light and extreme temperatures.
- Sharing the Bounty: If you have a bountiful harvest, consider sharing your homegrown potatoes with friends, family, or neighbors. The joy of sharing your homegrown produce can bring smiles to the faces of those around you.
- Continued Learning: Growing potatoes in pots is just the beginning of your gardening journey. Continue to expand your knowledge and skills by experimenting with different potato varieties, trying new planting techniques, and exploring other vegetables and herbs to grow.
- Preserving: If you have an abundance of potatoes, you can also explore preservation methods such as canning, freezing, or dehydrating to enjoy your harvest throughout the year.
- Reflection and Planning: Take the time to reflect on your potato-growing experience. Consider what went well and what you could improve upon for future harvests. Use this knowledge to plan for next season’s gardening adventures.
Remember, the joy of growing your own potatoes goes beyond the act of growing itself. It entails the satisfaction of nurturing a plant, the connection with nature, and the reward of enjoying the delicious flavors of your homegrown produce.
So gather your harvested potatoes, explore new recipes, and savor the taste of your hard work and dedication. Enjoy the journey of growing your own potatoes and the incredible flavors they bring to your table!