
Factors to Consider Before Planting Turnips
Before you start planting turnips, there are several important factors to consider to ensure a successful harvest. Taking the time to assess these factors will help you make informed decisions about when and how to plant your turnips.
1. Climate and Growing Season: Turnips thrive in cool weather, so it’s important to know the growing season in your area. They typically prefer temperatures between 50 and 75 degrees Fahrenheit. If you live in a region with warm summers, consider planting turnips in early spring or late summer to take advantage of cooler temperatures.
2. Soil Quality: Turnips prefer well-drained soil with a pH range of 6.0 to 7.5. Conduct a soil test to determine its nutrient content and make any necessary adjustments. If the soil is heavy or compacted, amend it with organic matter, such as compost, to improve drainage and fertility.
3. Sunlight Requirements: Turnips need at least six hours of direct sunlight per day to grow properly. Choose an area in your garden that receives ample sunlight and avoid planting them in shaded or crowded spots.
4. Garden Space: Consider the amount of space available for growing turnips. These vegetables need enough room to develop their roots, so ensure sufficient spacing between plants. Typically, they should be planted about two to four inches apart, allowing them to reach their full size without overcrowding.
5. Companion Plants: Some plants benefit from being planted together, while others may compete for nutrients or attract the same pests. Consider companion planting with turnips to enhance growth and protect against pests. Good companions for turnips include peas, radishes, and lettuce.
6. Time and Effort: Growing turnips requires regular care and attention. Make sure you have the time and resources to dedicate to their maintenance, including watering, weeding, and pest control. If you have a busy schedule, opt for a variety that requires less maintenance.
7. Harvesting Time: Determine when you want to harvest your turnips. Some prefer harvesting them when they are small and tender, while others prefer to wait until they reach a larger size. Select a variety that aligns with your desired harvest time and plan the planting accordingly.
By considering these factors before planting turnips, you can ensure the best possible growing conditions and increase your chances of a bountiful harvest. Take the time to assess your climate, soil quality, sunlight availability, garden space, companion plants, time commitment, and harvest preferences. With careful planning and preparation, you’ll be on your way to enjoying delicious turnips straight from your garden!
Best Time of Year to Plant Turnips
Choosing the right time to plant turnips is crucial for their successful growth and development. While turnips are a cool-season crop, the exact planting time can vary depending on your location and climate. Here are some guidelines to help you determine the best time to plant turnips.
1. Spring Planting: In regions with mild winters and early springs, you can start planting turnips as early as March or April. This allows the turnip seeds to germinate in cool soil and establish healthy root systems before the hot summer temperatures arrive.
2. Late Summer Planting: If you live in an area with hot summers, you can opt for a late summer planting. Start sowing turnip seeds in late July or early August, when temperatures begin to cool down. This allows the turnips to take advantage of the cooler weather in the fall, resulting in sweeter and more flavorful roots.
3. Fall Planting: For regions with mild climates and long growing seasons, fall is an ideal time to plant turnips. Planting in September or early October ensures that the turnips have ample time to grow and mature before winter sets in. In such regions, turnips can even be overwintered, providing a source of fresh vegetables during the colder months.
4. Winter Planting: In areas with mild winters, you have the option to plant turnips during the winter months. This is especially suitable for gardeners who enjoy year-round gardening. Plant turnips in late fall or early winter, ensuring they have enough time to establish before the cold weather arrives. Winter turnips can be harvested during mild spells or early spring.
When determining the best time to plant turnips, consider the average frost dates for your region and the specific variety of turnip you are planting. Some turnip varieties are more tolerant of cold temperatures and can withstand light frost, while others are more susceptible to cold damage.
Remember to check the seed packets or consult with local gardening resources for recommended planting dates specific to your area. By planting turnips at the optimal time, you can maximize their growth potential and enjoy an abundant harvest of crisp and flavorful roots.
Different Varieties of Turnips
Turnips come in a variety of shapes, sizes, and colors, each offering its own unique flavor and characteristics. Whether you prefer mild and sweet turnips or those with a peppery bite, there is a turnip variety to suit every palate. Here are some popular varieties of turnips that you can consider planting in your garden:
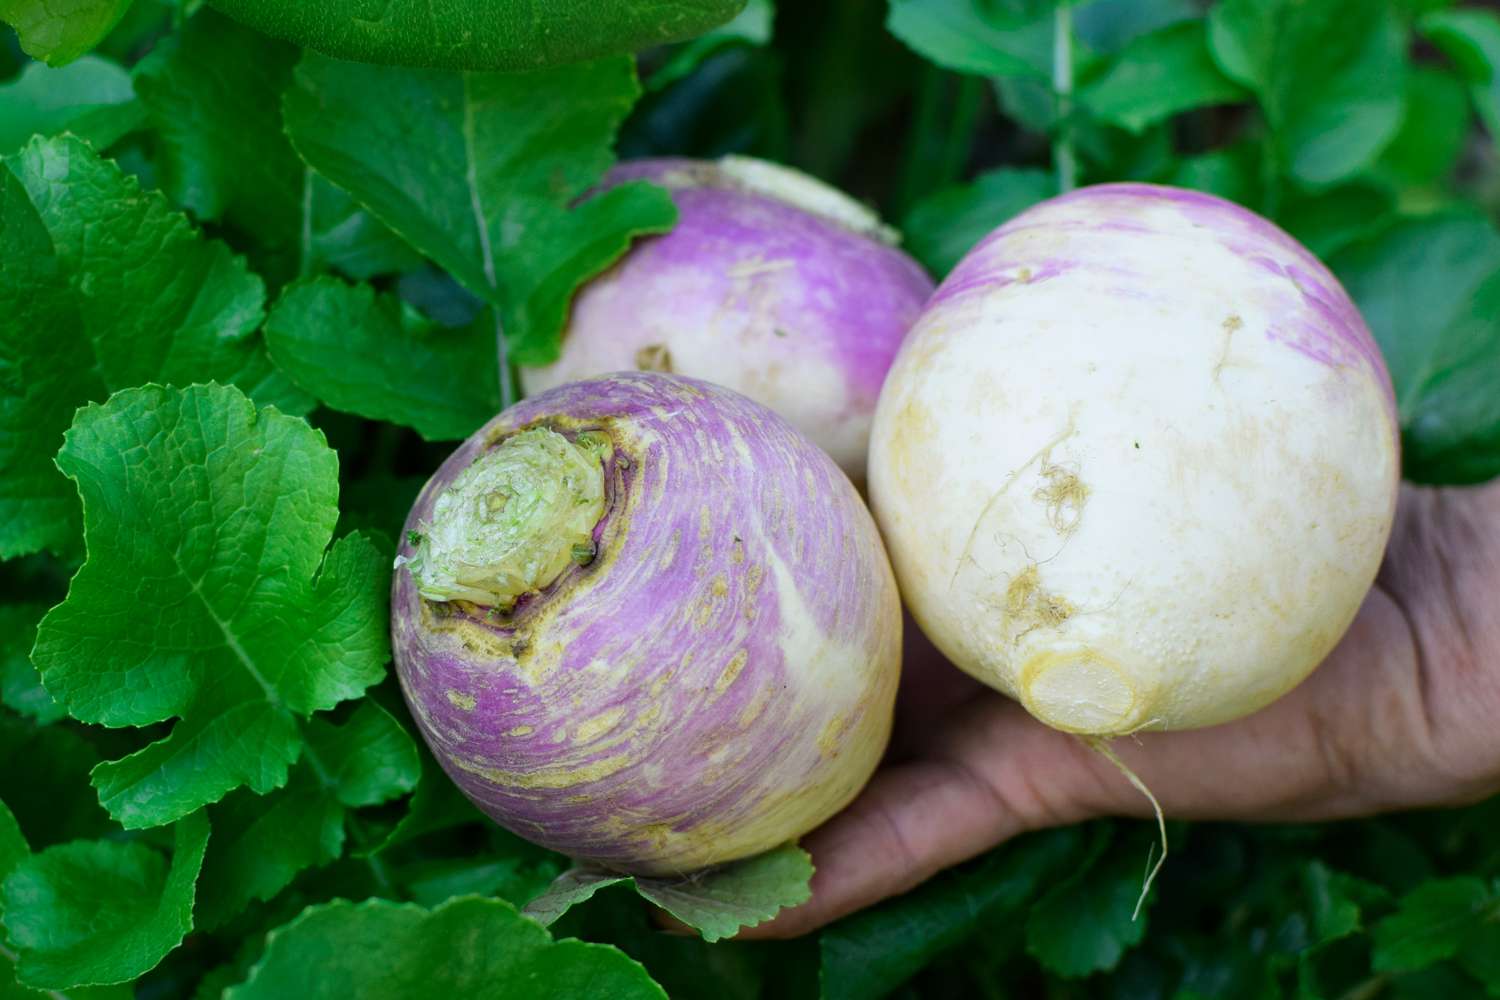
1. Purple Top White Globe: This is the most common and widely grown turnip variety. It has a round shape with a purple-colored top and a white base. The flesh is crisp, sweet, and mildly peppery in flavor. Purple Top White Globe turnips are versatile and can be enjoyed raw, steamed, boiled, or roasted.
2. Tokyo Cross: Tokyo Cross turnips are known for their rapid growth and round, smooth roots. These turnips have a white coloration and a subtle, delicate flavor. They are excellent for fresh eating and are often used in salads or lightly cooked in stir-fries.
3. Golden Ball: As the name suggests, Golden Ball turnips have a beautiful golden hue and a round shape. They have a sweet, mild flavor and a crisp texture. Golden Ball turnips are delightful when cooked, offering a buttery taste that complements a wide range of dishes.
4. Scarlet Queen: Scarlet Queen turnips are known for their vibrant reddish-purple skin and white flesh. With a slightly spicy and peppery flavor, they are perfect for adding a zing to salads and stir-fries. These turnips also have tender greens that can be used in cooking or enjoyed as an addition to salads.
5. Hakurei: Hakurei turnips, also known as salad turnips or white salad turnips, have a small, smooth, and round shape. They have crisp, juicy flesh with a mild, sweet flavor and an almost fruity taste. Hakurei turnips are delicious when eaten raw, making them a popular choice for salads and snacking.
When selecting turnip varieties, consider your taste preferences and intended culinary uses. Some turnips are best suited for raw consumption, while others excel when cooked. Additionally, the size and shape of the turnip roots can vary, so choose based on your desired presentation and storage capabilities.
Remember to read the seed packets or consult with local nurseries for specific details on each variety, including their maturity dates and any unique growing requirements. Experimenting with different turnip varieties can add excitement and diversity to your culinary adventures.
How to Prepare Soil for Turnip Planting
Proper soil preparation is essential for successful turnip growth and a bountiful harvest. By taking the time to prepare the soil before planting, you can create an ideal environment for turnips to thrive. Here are the steps to prepare your soil for turnip planting:
1. Clear the Area: Begin by clearing the planting area of any weeds, rocks, or debris. Remove any existing vegetation to prevent competition for nutrients and water. It’s important to start with a clean and weed-free space.
2. Test the Soil: Perform a soil test to determine its nutrient levels and pH. Turnips prefer a pH range of 6.0 to 7.5. Based on the test results, you may need to amend the soil to optimize its fertility and pH balance. Add lime if the soil is too acidic or sulfur if it’s too alkaline.
3. Add Organic Matter: Incorporate well-rotted organic matter, such as compost or aged manure, into the soil. This helps improve its structure, drainage, and nutrient content. Spread a layer of organic matter over the planting area and work it into the top 6 to 8 inches of soil with a garden fork or tiller.
4. Break up Clumps: Break up any large clumps of soil and remove any rocks, sticks, or roots you encounter during the process. This will create a uniform and smooth planting bed for the turnips.
5. Level the Soil: Use a garden rake to level the soil surface, ensuring there are no high or low spots. A level soil surface promotes even water distribution and minimizes issues with waterlogged or dry areas.
6. Apply Fertilizer: If your soil test indicates a nutrient deficiency, apply a balanced fertilizer, such as a 10-10-10 or 15-15-15 formula, according to the package instructions. This will provide the necessary nutrients for healthy turnip growth.
7. Irrigate the Soil: Before planting, water the prepared soil to ensure it is moist but not waterlogged. This will create a favorable environment for seed germination and root development. Avoid overwatering, as excessive moisture can lead to rot or disease.
By following these steps to prepare the soil, you will create an optimal growing environment for your turnips. The soil will be well-drained, fertile, and balanced in terms of pH and nutrients. This will set the stage for healthy plant growth, robust root development, and a successful turnip harvest.
Steps to Planting Turnips
Planting turnips is a straightforward process that can be easily accomplished by following a few simple steps. Whether you’re a seasoned gardener or a beginner, here are the steps to plant turnips and ensure a successful growing season.
1. Choose the Right Time: Determine the best time to plant based on your local climate and the specific turnip variety. Turnips are cool-season crops, so they thrive in temperatures between 50 and 75 degrees Fahrenheit. Plant them in early spring or late summer for optimal results.
2. Prepare the Soil: Before planting, prepare the soil by clearing the area of weeds, rocks, and debris. Conduct a soil test to assess its nutrient content and pH levels. Amend the soil with compost or well-rotted organic matter to improve its structure and fertility.
3. Sow the Seeds: Plant the turnip seeds directly into the prepared soil. Sow the seeds at a depth of about ¼ to ½ inch, spacing them about two to four inches apart. If planting in rows, space the rows about 12 to 18 inches apart. Gently cover the seeds with soil and lightly tamp it down.
4. Water the Seeds: After planting, water the soil thoroughly but gently. Moisture is key for seed germination, so ensure the soil is consistently moist, but not waterlogged, during the germination period. Use a fine mist or sprinkler attachment to avoid disturbing the newly planted seeds.
5. Thin the Seedlings: Once the seedlings emerge and reach a height of about two inches, thin them to provide adequate spacing. Thin turnip seedlings to a spacing of about six to eight inches apart. This will allow the remaining plants to develop larger roots and prevent overcrowding.
6. Provide Proper Care: Maintain consistent moisture in the soil throughout the growing season. Water the turnips regularly, especially during dry periods. Apply a layer of organic mulch around the plants to help conserve moisture and suppress weed growth. Monitor the plants for pests and diseases, and take appropriate action if necessary.
7. Harvest the Turnips: The time to harvest turnips depends on the desired size and maturity of the roots. Baby turnips can be harvested when they reach about 1-2 inches in diameter, while larger varieties can be left in the ground to grow to a desired size. Carefully dig up the turnips using a garden fork, taking care not to damage the roots.
By following these steps, you can successfully plant turnips and enjoy a bountiful harvest of this nutritious and versatile vegetable. Remember to provide proper care, including regular watering, weeding, and monitoring for pests and diseases. With a little patience and attention, you’ll soon be harvesting delicious turnips from your own garden.
Watering and Care for Turnips
Proper watering and care are crucial for ensuring healthy growth and a plentiful harvest of turnips. By providing the right amount of water and implementing essential care practices, you can maximize the growth potential of your turnip plants. Here are some guidelines for watering and caring for turnips:
1. Soil Moisture: Turnips require consistent soil moisture to grow properly. Aim to keep the soil consistently moist, but avoid overwatering, as excessive moisture can lead to root rot. Use your finger to check the soil moisture levels regularly and adjust watering accordingly. It’s important to strike a balance between keeping the soil moist and preventing it from becoming waterlogged.
2. Watering Frequency: During the early stages of growth, when the turnip seeds are germinating and seedlings are establishing, watering should be frequent to ensure even moisture. As the plants grow, reduce the frequency of watering but increase the volume of water applied each time. Aim to water deeply, allowing the water to penetrate the soil to a depth of at least six inches.
3. Morning Watering: Watering turnips in the morning is recommended, as it allows the foliage time to dry before evening. Moist foliage during the night can promote the growth of fungal diseases. Watering in the morning also ensures that the plants have sufficient moisture to withstand the heat of the day.
4. Mulching: Applying a layer of organic mulch around the turnip plants can help conserve soil moisture, suppress weed growth, and maintain a more consistent soil temperature. Straw, shredded leaves, or grass clippings make excellent mulch options. Spread a layer of mulch around the plants, taking care not to cover the plant stems or crowns.
5. Weeding: Keep the turnip bed free from weeds to minimize competition for water and nutrients. Regularly remove weeds by hand or use a hoe for larger areas. Be careful not to disturb the shallow turnip roots while weeding.
6. Fertilization: Turnips are generally moderate feeders and can benefit from light fertilizer applications. Incorporate a balanced slow-release fertilizer into the soil prior to planting or apply a liquid fertilizer once the plants are established. Follow the fertilizer package instructions for proper application rates and timing.
7. Pests and Diseases: Monitor the turnip plants for common pests, such as aphids, flea beetles, and cabbage worms. If pest infestations occur, consider using organic pest control methods, such as insecticidal soap or neem oil. In terms of diseases, be vigilant for signs of fungal diseases like powdery mildew or damping off. Remove any infected plants promptly and practice crop rotation to minimize the risk of disease recurrence.
By following these watering and care practices, you can ensure that your turnip plants receive the necessary moisture and attention to thrive. Regular watering, mulching, weeding, fertilizing, and pest/disease monitoring are key to promoting healthy growth and a productive turnip harvest.
Common Pests and Diseases for Turnips
While turnips are generally resilient and easy to grow, they can still be susceptible to certain pests and diseases. Being aware of these common issues can help you identify and address them early, ensuring the health and productivity of your turnip plants. Here are some common pests and diseases that can affect turnips:
1. Aphids: Aphids are small, soft-bodied insects that can cluster on the underside of turnip leaves and suck sap from the plant. They can cause stunted growth and curling of leaves. To control aphids, you can spray the affected plants with a strong stream of water or use insecticidal soap or neem oil as organic remedies.
2. Flea Beetles: These tiny, hopping beetles feed on turnip leaves, creating small holes and giving plants a pitted appearance. Floating row covers can be used as a preventive measure to exclude flea beetles from reaching the plants. If infestation occurs, insecticidal sprays or organic pyrethrin-based products can be effective solutions.
3. Cabbage Worms: The larvae of cabbage butterflies, cabbage worms can chew holes in turnip leaves. Handpicking and disposing of the worms is a straightforward method of control. Bacillus thuringiensis (Bt) is a microbial insecticide that specifically targets and kills cabbage worm larvae.
4. Clubroot: Clubroot is a soil-borne disease caused by a fungus that leads to the development of swollen, deformed roots. Affected plants may exhibit stunted growth and yellowing leaves. Avoiding planting turnips in infected soil and ensuring proper drainage can help prevent clubroot. Crop rotation and treating the soil with lime or sulfur can also be beneficial.
5. Powdery Mildew: Powdery mildew is a fungal disease that appears as a white, powdery growth on the leaves, stems, and flowers of turnip plants. It thrives in humid conditions. To prevent powdery mildew, ensure proper air circulation by spacing plants adequately. If necessary, apply fungicides labeled for powdery mildews.
6. Damping Off: Damping off is a disease caused by several fungi that attack young seedlings, causing them to collapse and die. To prevent damping off, ensure proper drainage and avoid overwatering. Starting seeds in sterile potting mix and using clean containers can also help reduce the risk.
7. Root Maggots: Root maggots are the larvae of flies that feed on turnip roots, causing tunneling and damage. Row covers placed over plants can prevent the flies from laying eggs. If infestation occurs, removing affected plants and using insecticidal treatments can help manage the problem.
Regular inspection and monitoring of your turnip plants are crucial in identifying and addressing pests and diseases early. Implementing preventive measures, practicing good garden hygiene, and using organic pest control methods when necessary can help maintain healthy turnip plants and maximize your harvest.
Tips for Harvesting Turnips
Harvesting turnips at the right time ensures that you enjoy the best flavor, texture, and nutritional value from your crop. Knowing when and how to harvest turnips is essential for a successful yield. Here are some valuable tips to guide you through the harvesting process:
1. Check Maturity: Turnips can be harvested at different stages of maturity, depending on your preference. For tender and mild-flavored baby turnips, harvest when they are about 1-2 inches in diameter. For larger turnips, wait until they reach their desired size, usually around 3-4 inches in diameter.
2. Monitor Root Development: Pay attention to the size and shape of the turnip roots. They should have a smooth, firm texture and a consistent color. Avoid harvesting turnips with rough or cracked skin, as they may indicate overmaturity or poor quality.
3. Harvesting Timeframe: The ideal time to harvest turnips is when the weather is dry and the soil is not overly wet. Wet conditions can make the soil clump around the roots, making it challenging to extract them cleanly. Wait for a sunny day or allow the soil to dry slightly before harvesting.
4. Loosen the Soil: Gently loosen the soil around the base of the turnip plants using a garden fork or trowel. Take care not to damage the roots while doing so. Loosening the soil makes it easier to lift the turnips without breaking them.
5. Pull or Dig: Depending on the size of the turnips and the condition of the soil, you can either pull them out by hand or use a garden fork to dig them up. Grasp the turnip near the base, close to the soil line, and apply gentle upward pressure while pulling. For stubborn roots, use a garden fork to lift and loosen the soil around them.
6. Trim the Tops: After harvesting, trim off the leafy tops of the turnips, leaving about an inch of stem attached to the roots. Removing the tops minimizes moisture loss and helps preserve the root’s freshness. You can save the greens for cooking or compost them.
7. Proper Storage: For short-term storage, rinse off any excess soil from the roots and store them in a cool, dark, and well-ventilated space. Place the turnips in airtight bags or containers lined with damp paper towels to maintain their crispness. For longer-term storage, consider storing the turnips in a root cellar or a refrigerator crisper drawer.
Keep in mind that turnips are best when consumed shortly after harvest for optimal freshness and flavor. Harvesting your turnips at the right time and handling them with care will ensure a rewarding and delicious harvest from your garden.
Ideas for Cooking and Using Turnips
Turnips are versatile and nutritious vegetables that can be enjoyed in a variety of delicious dishes. Whether you prefer them roasted, boiled, mashed, or incorporated into stews and soups, turnips can add a delightful flavor and texture to your culinary creations. Here are some ideas for cooking and using turnips:
1. Roasted Turnips: Toss turnip wedges or cubes with olive oil, salt, and your choice of seasonings, such as garlic, thyme, or rosemary. Roast them in the oven at 400°F (200°C) until they are tender and slightly caramelized. This brings out their inherent sweetness and creates a delicious side dish or addition to salads.
2. Mashed Turnips: Boil peeled and chopped turnips until soft, then mash them with butter, salt, and pepper. For extra creaminess, mix them with mashed potatoes or cauliflower. Mashed turnips make a tasty and healthier alternative to traditional mashed potatoes.
3. Turnip Fries: Cut turnips into thin strips resembling French fries. Toss them with olive oil, salt, pepper, and any desired spices, such as paprika or cumin. Bake or air fry them until they are golden and crispy. Turnip fries are a nutritious and flavorful snack or side dish.
4. Turnip and Potato Gratin: Layer thinly sliced turnips and potatoes in a baking dish with a creamy sauce made of milk, cheese, and seasonings. Bake until the vegetables are tender and the top is golden and bubbly. Turnip and potato gratin is a comforting and satisfying dish perfect for special occasions.
5. Turnip Greens Stir-Fry: Don’t let the vibrant greens go to waste! Sauté the turnip greens in olive oil with garlic, red pepper flakes, and a splash of soy sauce or vinegar. Cook until wilted and serve as a nutritious side dish or as a bed for seared meats or tofu.
6. Turnip Soup: Simmer chopped turnips with onions, carrots, and vegetable or chicken broth until tender. Puree the mixture until smooth and creamy, and season with herbs such as thyme or parsley. Enjoy a comforting and nourishing bowl of turnip soup, perfect for chilly days.
7. Pickled Turnips: Slice turnips into thin rounds or matchsticks and pickle them in a mixture of vinegar, sugar, salt, and spices like cloves or peppercorns. Allow the turnips to marinate for a few days to develop their tangy and crunchy flavor. Enjoy pickled turnips as a topping for sandwiches, salads, or mezze platters.
These are just a few ideas to inspire you to get creative with turnips in your kitchen. Explore recipes, experiment with different seasonings, and enjoy the versatility and delightful taste of turnips in your meals.