
Choosing the Right Frames
When it comes to creating a picture frame wall, one of the most important aspects to consider is the choice of frames. The frames you select will not only showcase your cherished photographs or artworks but also contribute to the overall aesthetic of the space. Here are some factors to keep in mind when choosing the right frames for your picture frame wall:
- Material: Frames come in various materials, such as wood, metal, and plastic. Consider the style of your room and select frames that complement the existing decor. For a more traditional or rustic look, opt for wooden frames, while metal frames can add a modern touch.
- Color and Finish: The color and finish of the frames can have a significant impact on the visual appeal of your picture frame wall. Choose a color that complements the colors in your photographs or artworks. Consider whether you want a matte or glossy finish, depending on the ambiance you want to create.
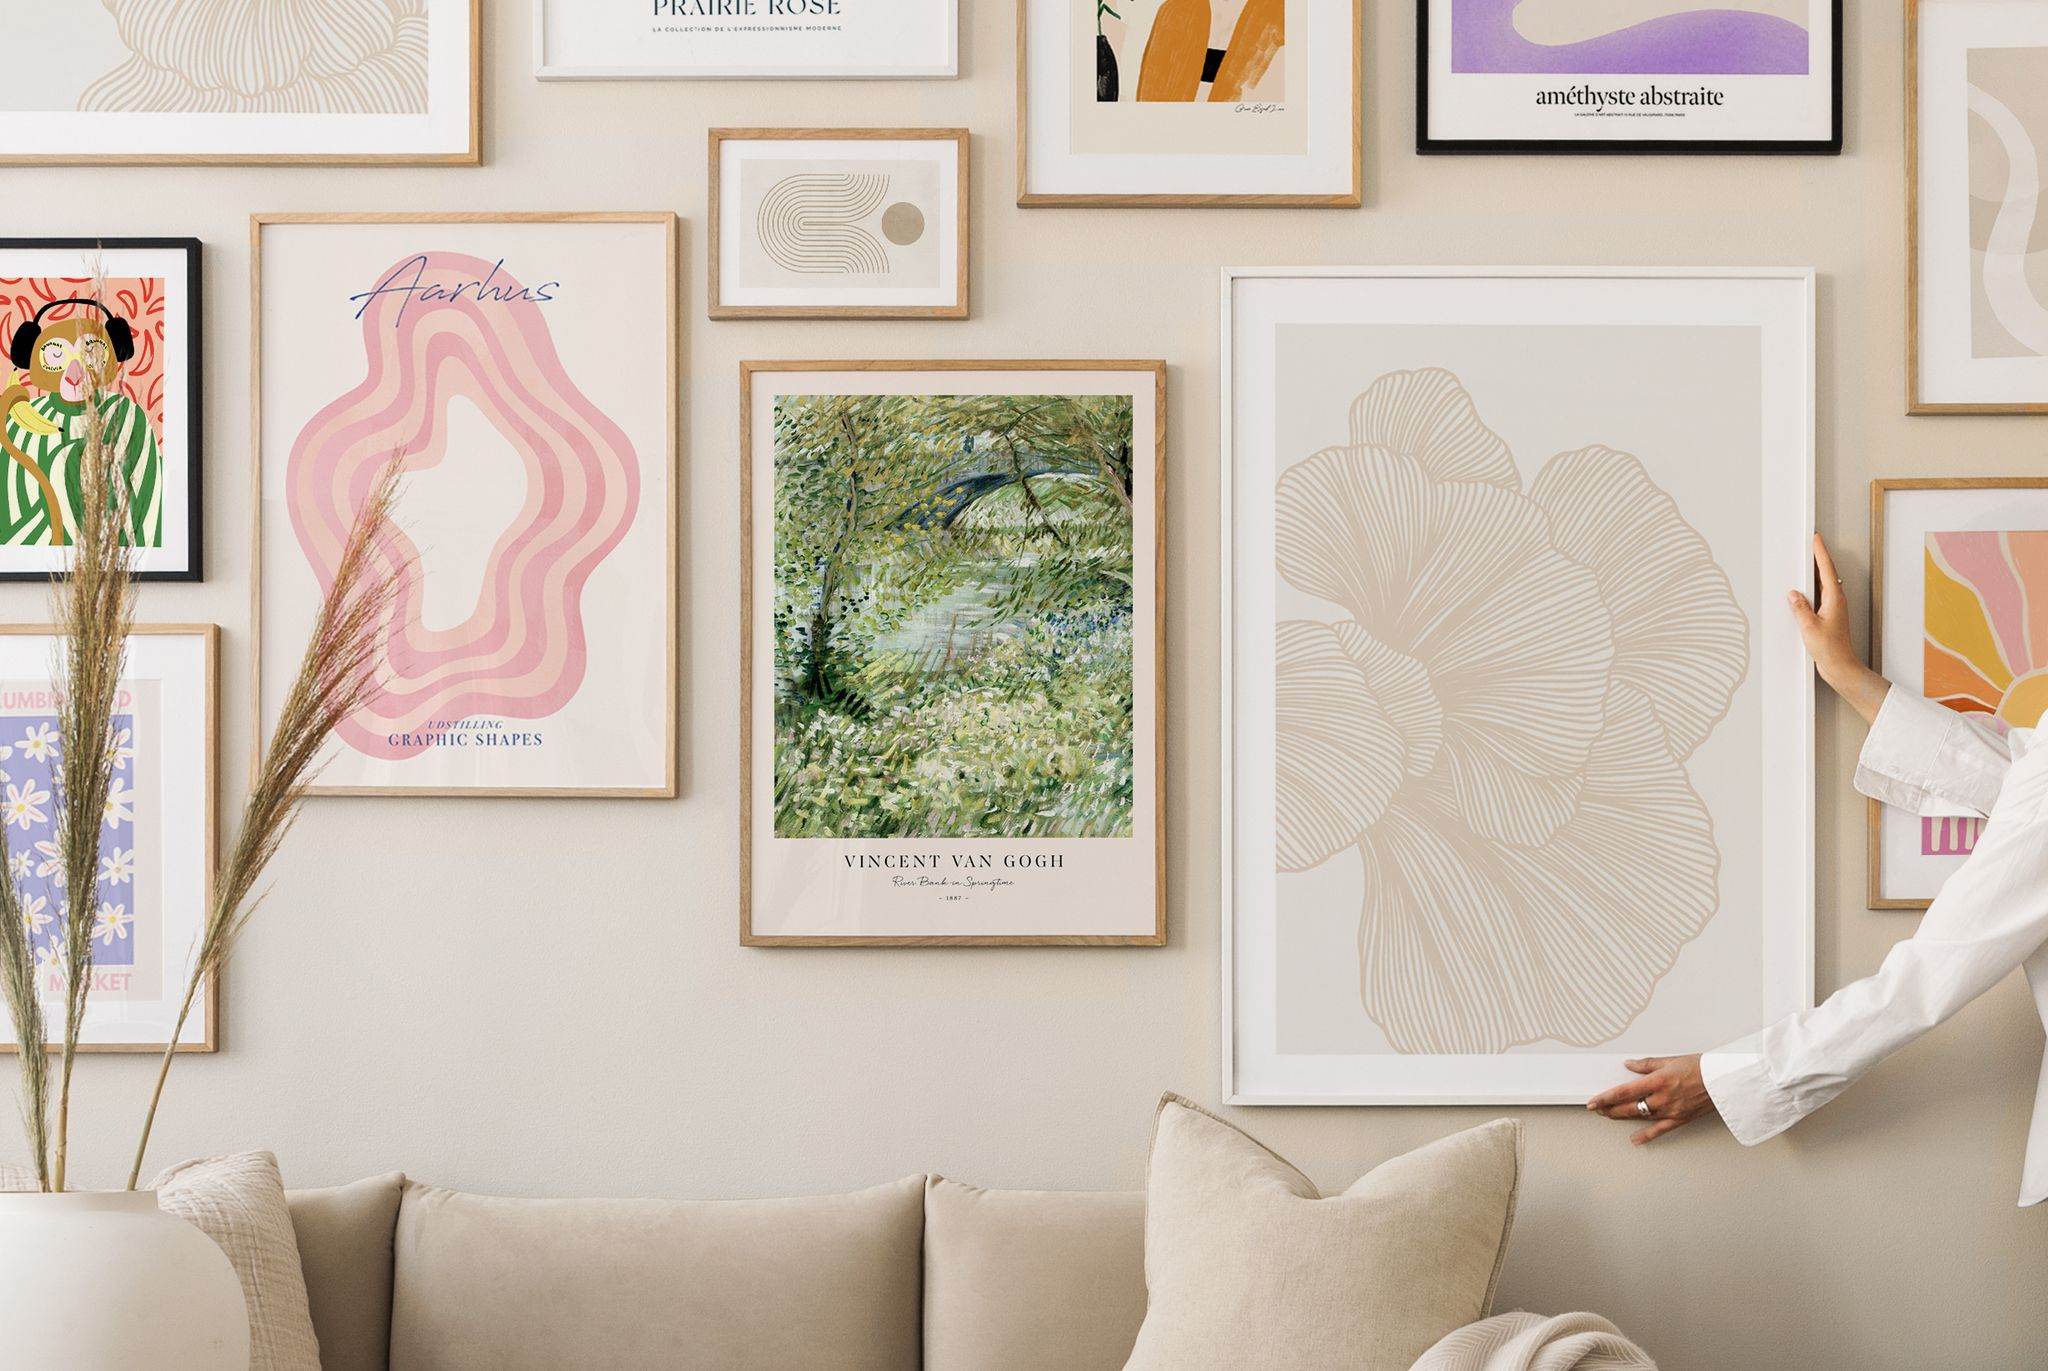
- Size and Shape: The size and shape of the frames will play a crucial role in determining the overall composition of your picture frame wall. Mix and match different sizes and shapes to create visual interest and balance. Consider using larger frames for focal points and smaller frames for supporting images.
- Frame Thickness: The thickness of the frames can also impact the overall look. Thin frames can provide a sleek and minimalist feel, while thicker frames can create a more substantial presence on the wall.
- Consistency: It’s important to maintain a sense of consistency in your picture frame wall. Consider using frames of a similar style, color, or finish to create a cohesive look. This will ensure that your wall appears well-curated and harmonious.
Remember, the frames you choose should reflect your personal style and complement the artwork or photographs they will be displaying. Take the time to explore different options and consider creating a mockup of your picture frame wall before making any final decisions. By choosing the right frames, you can create a visually stunning and meaningful display that will be a focal point in any room.
Sizing and Placement
Once you have chosen the right frames for your picture frame wall, the next step is to determine the sizing and placement of each frame. This step is crucial in ensuring that your gallery wall looks visually pleasing and well-balanced. Here are some tips to help you get started:
- Measure and Plan: Before hanging any frames, it’s important to measure the wall space and plan out the arrangement. Consider the overall dimensions of the wall and the desired layout. Will you be creating a symmetrical arrangement or a more eclectic mix? Take measurements to determine the spacing between each frame and mark the positions on the wall with painter’s tape or sticky notes.
- Consider the Room: Take into account the size and style of the room when determining the size and placement of your frames. For larger rooms, you may want to opt for larger frames to create a statement piece. In smaller rooms, smaller frames can create a sense of intimacy and prevent the wall from feeling overwhelming.
- Vary Frame Sizes: Mixing different frame sizes adds visual interest and creates a dynamic display. Play around with different sizes and shapes to find the right balance. Start with a focal point, such as a larger frame or a standout photograph, and work outward from there.
- Consider the Content: Think about the content you will be displaying in each frame. Consider the subject matter, colors, and overall style. Arrange frames in a way that complements the content and creates a cohesive narrative or theme.
- Leave Enough Space: Aim for a proper amount of space between each frame. Too much space may make the arrangement look sparse, while too little space can make it feel cluttered. Use your measurements and instincts to find the right balance.
- Vertical or Horizontal: Consider the orientation of the frames to enhance the visual impact. Vertical arrangements can create a sense of height and elegance, while horizontal arrangements can bring a sense of width and fluidity.
Remember, there is no one-size-fits-all approach when it comes to sizing and placement. Experiment with different arrangements and step back to evaluate how they look from various angles. Don’t be afraid to make adjustments until you achieve a layout that is visually appealing and harmonious with the overall space. With careful planning and consideration, you can create a picture frame wall that is both captivating and personal.
Arranging the Frames
Once you have determined the sizing and placement of your frames for the picture frame wall, it’s time to arrange them in a way that creates a visually pleasing and well-balanced display. This step requires careful consideration and attention to detail. Here are some tips to help you arrange the frames effectively:
- Start with a Focal Point: Begin by selecting a focal point for your gallery wall. This can be a larger frame, a striking photograph, or a piece of artwork that you want to draw attention to. Place this focal point at eye level, ideally around the center of your arrangement, to create a visually appealing starting point.
- Create Balance: Achieving balance in your frame arrangement is key to creating a cohesive and aesthetically pleasing display. Balance can be achieved through symmetry, asymmetry, or a combination of both. Experiment with different arrangements until you find the right balance that fits your vision.
- Consider Visual Flow: Think about the flow of the arrangement and how your eye will move from one frame to another. Avoid clustering frames of the same size or shape in one area. Instead, aim for a natural flow that guides the viewer’s eye across the entire display.
- Play with Patterns and Shapes: Mix and match different frame sizes, shapes, and orientations to add visual interest and depth to the arrangement. Consider creating patterns or alternating between horizontal and vertical frames to create a dynamic and engaging display.
- Use Templates: To help with arranging the frames, create templates out of paper or cardboard in the exact sizes and shapes of the frames. Experiment with different layouts by taping the templates onto the wall. This allows you to visualize the arrangement before committing to hanging the frames.
- Step Back and Evaluate: As you arrange the frames, step back frequently to evaluate the overall composition. Look for any gaps or areas that feel overcrowded. Make adjustments as needed to maintain a visually balanced and harmonious display.
Remember, arranging the frames is a creative process that allows you to showcase your individual style and personality. Experiment with different layouts and don’t be afraid to take risks. Trust your instincts and make adjustments until you achieve a visual arrangement that you love.
Preparing the Wall
Before hanging the frames on your picture frame wall, it’s essential to ensure that the wall is properly prepared. This will help ensure that your frames are secure and that your display remains intact. Here are some steps to follow when preparing the wall for your picture frame wall:
- Clean the Wall: Start by cleaning the wall surface thoroughly. Remove any dust, dirt, or debris to create a clean and smooth surface for your frames to adhere to. Use a damp cloth or sponge and mild detergent to gently wipe down the wall.
- Repair Any Damage: Take the time to repair any holes, cracks, or imperfections in the wall. Use spackling paste to fill in any small holes and allow it to dry. Sand down the patched areas until they are smooth, and then apply a coat of paint to match the surrounding wall color if necessary.
- Prime the Wall (if needed): If you are hanging frames on a newly painted wall or a wall with a different finish, consider priming the wall before hanging your frames. This will help ensure optimal adhesion and prevent any damage to the wall surface.
- Decide on Hanging Method: Determine how you will hang your frames on the wall. Options include using picture hooks, adhesive hooks, or nails. Consider the weight of the frames and choose a hanging method that provides adequate support.
- Measure and Mark: Use a pencil or painter’s tape to mark the positions of each frame on the wall. Take measurements to ensure that the frames are evenly spaced and aligned according to your desired arrangement.
- Consider Wall Anchors: If you are hanging heavier frames or if your walls are made of drywall or plaster, consider using wall anchors for added stability. Wall anchors provide extra support and help prevent the frames from falling or causing damage.
By properly preparing the wall, you can ensure the longevity and stability of your picture frame wall. Taking the time to clean, repair, and prime the wall will create an optimal surface for hanging your frames. Additionally, carefully measuring and marking the positions of your frames will help you achieve a precise and visually pleasing arrangement.
Hanging the Frames
Once you have prepared the wall for your picture frame wall, it’s time to start hanging the frames. This step requires precision and attention to detail to ensure that the frames are securely mounted and level. Here are some steps to follow when hanging your frames:
- Gather Your Tools: Before you begin, gather all the necessary tools, including a hammer, nails, picture hooks, adhesive hooks, a measuring tape, a level, and a pencil. Having these tools on hand will make the hanging process much smoother.
- Start with the Focal Point: Begin by hanging the focal point frame or the largest frame in your arrangement. Use a level to ensure that it is straight and centered. Mark the top of the frame with a pencil to indicate where the nail or hook should be placed.
- Measure and Align: Use a measuring tape to determine the distance between each frame and ensure that they are evenly spaced. Use the level to check that each frame is hanging straight and aligned with the others.
- Choose the Hanging Method: Depending on the weight and type of frame, choose the appropriate hanging method. For lighter frames, adhesive hooks or small nails may be sufficient. For heavier frames, use picture hooks or wall anchors for added stability.
- Hang the Frames: Carefully place the nail or hook at the marked spot and gently tap it into the wall using a hammer. Make sure it is secure and properly aligned. Hang the frame on the nail or hook, and adjust as needed to ensure that it is level.
- Double-Check: After hanging each frame, step back and double-check that it is straight and aligned with the others. Use the level to make any necessary adjustments.
- Continue Hanging: Repeat the process for each frame in your arrangement, working from the center outward. Take your time to ensure that each frame is hung securely and level.
Remember, taking the time to carefully hang each frame will result in a visually pleasing and professional-looking picture frame wall. Use your measuring tape, level, and pencil to ensure proper alignment and spacing. By following these steps, you can create a beautifully displayed and securely mounted picture frame wall.
Securing the Frames
After you have successfully hung the frames on your picture frame wall, it’s important to take the necessary steps to ensure that they are securely in place. This will help prevent any accidental shifting or falling of the frames. Here are some tips to help you secure your frames effectively:
- Check Stability: Assess the stability of each frame after hanging it. Gently shake the frame or apply light pressure to see if it feels secure. If you notice any wobbling or movement, reinforce the frame’s stability.
- Use Adhesive Strips: For lightweight frames or frames that are not very wide, consider using adhesive strips to provide extra security. Adhesive strips provide a strong hold and are easy to use. Follow the manufacturer’s instructions for applying the strips to the back of the frame.
- Secure with Wire: If your frames have wire on the back for hanging, make sure the wire is tightly secured to the hooks or nails. Ensure that the wire is properly tightened and not loose. This will help to keep the frame stable and prevent it from tilting or falling.
- Use Frame Securing Hardware: Some frames come with additional hardware, such as corner brackets or braces, for added stability. Use these hardware pieces as instructed by the manufacturer to secure the frame to the wall, providing additional support.
- Consider Frame Pads: If your frames have sharp or rough edges, it may be beneficial to add frame pads or felt bumpers to the back corners. This will not only help prevent scratches on the wall but also provide a buffer and prevent the frame from shifting.
- Regularly Check and Adjust: Maintain the stability of your picture frame wall by regularly checking the frames for any loosening or shifting. As time goes on, frames may need slight adjustments or re-securing. Make it a habit to periodically inspect and tighten any loose frames.
By taking the necessary steps to secure your frames, you can ensure that your picture frame wall remains stable and intact. Use adhesive strips, wires, frame securing hardware, and frame pads as needed to enhance the stability and safety of your frames. Regularly check and maintain the frames to prevent any accidents and enjoy your beautifully displayed pictures or artwork for years to come.
Adding Finishing Touches
Once your frames are securely in place, it’s time to add those final touches that will truly elevate your picture frame wall. These finishing touches will tie everything together and enhance the overall look and feel of your display. Here are some ideas to consider:
- Decorative Accents: Add decorative accents to complement the frames and enhance the visual appeal. This could include items like small sculptures, figurines, or vases of flowers. These accents can bring additional texture, color, and interest to your picture frame wall.
- Layering and Overlapping: Consider layering frames or overlapping them slightly to create depth and add visual interest. This technique can make your display appear more dynamic and three-dimensional.
- Include Personal Mementos: Integrate personal mementos, such as ticket stubs, postcards, or handwritten notes, into your picture frame wall. These personal touches can make the display even more meaningful and tell a unique story.
- Illumination: Consider adding lighting to highlight specific frames or create a warm ambiance. Use wall-mounted picture lights or LED strip lights behind the frames to add a dramatic effect and draw attention to your favorite pieces.
- Add a Gallery Shelf: Install a gallery shelf underneath or above your picture frame wall to create a designated space for additional decor items. Display small plants, books, or other decorative objects along with your frames to further enhance the overall look.
- Experiment with Gallery Wall Themes: Explore different gallery wall themes to bring cohesion to your display. This could include arranging frames by color, subject matter, or a specific theme that resonates with you. Get creative and express your personal style.
- Keep it Balanced: Step back and assess the overall balance of your picture frame wall. Make any necessary adjustments to ensure that the frames, accents, and other elements are evenly distributed and harmoniously arranged.
Remember, adding the finishing touches is all about making your picture frame wall reflect your unique personality and style. These little details will make your display stand out and create a captivating focal point in the room. Be creative, experiment with different elements, and have fun as you put the final touches on your picture frame wall.