
Choosing the Right Rug Pad
When it comes to keeping your rug in place, choosing the right rug pad is essential. A rug pad not only adds cushion and comfort underfoot, but it also helps prevent slipping and sliding. Here are some factors to consider when selecting a rug pad:
1. Thickness: The thickness of the rug pad depends on the type of flooring you have. For a hard surface like wood or tile, a thinner pad that provides grip and prevents damage is ideal. For carpeted areas, a thicker pad with more cushioning is recommended.
2. Material: Rug pads are available in various materials such as rubber, felt, or synthetic fibers. Rubber pads are great for preventing slipping, while felt pads offer additional cushioning. Synthetic fiber pads are a budget-friendly option and work well on both hard floors and carpet.
3. Size: Ensure that the rug pad is slightly smaller than your rug to avoid overlap. This will prevent the edges of the pad from being visible and creating a tripping hazard.
4. Floor Protection: If you want to protect your floors from scratches or damage, choose a rug pad with a non-slip and non-staining surface. Look for pads that are specifically designed to be safe for all types of flooring.
5. Easy Maintenance: Opt for a rug pad that is easy to clean and maintain. Some rug pads can be machine-washed, while others require spot cleaning. Choosing a pad that suits your cleaning preferences will make it easier to keep your rug pad clean and free from dirt and debris.
By choosing the right rug pad for your specific needs, you can ensure that your rug stays securely in place and adds comfort to your space. Remember to measure your rug and determine the ideal thickness, material, and size of the pad before making a purchase.
Anchoring with Furniture
If you’re looking for a simple and cost-effective way to keep your rug in place, anchoring it with furniture is a great option. Here’s how you can do it:
1. Position the furniture: Start by positioning your furniture on top of the rug. This will create natural weight that helps anchor the rug and prevent it from sliding. Choose larger and heavier furniture pieces for better stability.
2. Distribute the weight: Make sure to distribute the weight of the furniture evenly across the rug. This will create more resistance against movement. If you have a large rug, consider using multiple furniture pieces to provide even support.
3. Secure the furniture: For added stability, you can use furniture pads or grippers under the legs of the furniture. These pads offer grip and prevent the furniture from shifting, which in turn keeps the rug in place. You can find these pads at hardware stores or online.
4. Rotate the furniture: Occasionally rotating the furniture can help prevent the rug from wearing out unevenly. This will also prevent the rug from developing permanent indentations from the weight of the furniture.
5. Consider using furniture coasters: If you have furniture with wheels or casters, consider using furniture coasters under them. These coasters can help distribute the weight evenly and reduce the risk of rug movement.
Remember, anchoring your rug with furniture is an effective way to keep it in place, but it may not work well for all types of rugs or furniture. It’s best to test it out and see if it provides the desired stability. If you notice any movement, consider using additional methods in conjunction with furniture anchoring to ensure your rug stays securely in place.
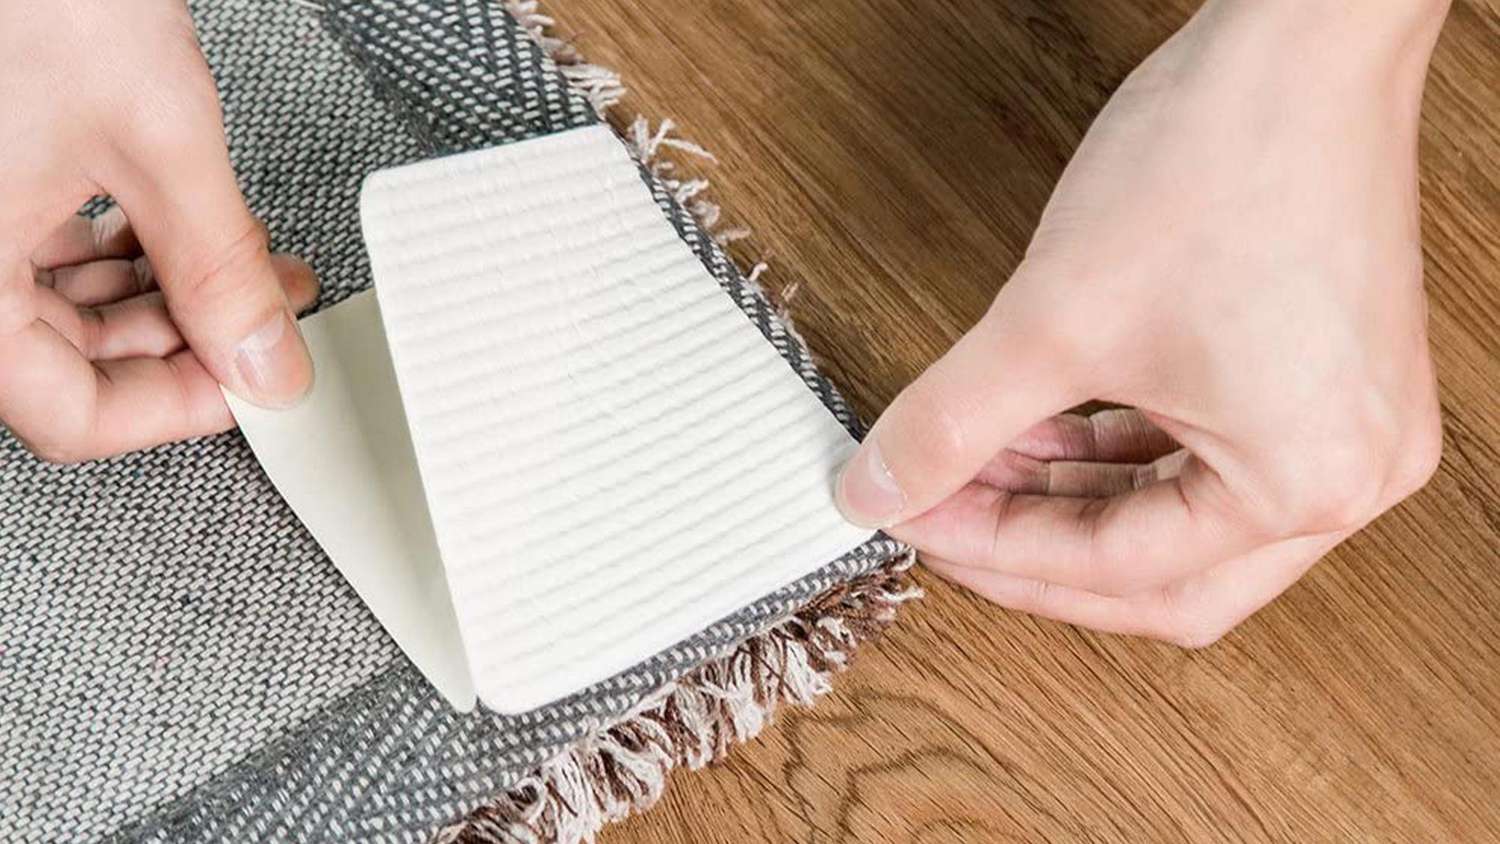
Using Double-Sided Tape
If you’re looking for a non-invasive solution to keep your rug in place, using double-sided tape can be a simple and effective option. Here’s how you can use double-sided tape to anchor your rug:
1. Clean the floor: Before applying the tape, make sure the floor surface is clean and free from any dust or debris. Use a broom or vacuum cleaner to remove any loose dirt or particles.
2. Cut the tape: Measure the length of the sides of your rug and cut the double-sided tape accordingly. Make sure to leave a few inches of tape on each end for easy removal later.
3. Apply the tape: Lift one corner of the rug and place the double-sided tape along the edge. Press it firmly onto the floor, ensuring it sticks well. Repeat this step for each side of the rug, placing the tape at regular intervals.
4. Secure the rug: Carefully place the rug back onto the floor, ensuring that it aligns properly with the edges. Press down firmly on the taped areas to secure the rug in place.
5. Removal: If you need to reposition or remove the rug in the future, gently lift it from the corners and peel off the double-sided tape. Use a residue remover if any adhesive residue remains on the floor.
Double-sided tape is a temporary solution that works well for lightweight rugs or carpets. Keep in mind that it may not provide enough grip for heavier or larger rugs. Additionally, double-sided tape should not be used on delicate or valuable rugs, as it may cause damage to the fibers.
Overall, using double-sided tape is a convenient and low-cost method to keep your rug in place. Just make sure to choose a high-quality tape that is specifically designed for flooring and can be easily removed without leaving residue behind.
Using Carpet Tape
If you’re looking for a stronger and more long-lasting solution to keep your rug in place, carpet tape is a great option. Here’s how you can use carpet tape to securely anchor your rug:
1. Prepare the area: Start by ensuring that both the floor and the backside of your rug are clean and free from dust or debris. Use a broom or vacuum cleaner to remove any loose particles.
2. Cut the tape: Measure the length of each side of your rug and cut the carpet tape accordingly. Opt for a width that is suitable for your rug and provides adequate adhesion.
3. Apply the tape: Lift one corner of the rug and place the carpet tape along the edge. Press it firmly onto the floor, making sure it adheres well. Repeat this step for each side of the rug, placing the tape at regular intervals.
4. Secure the rug: Carefully place the rug back onto the floor, aligning it properly with the edges. Press down firmly on the taped areas to ensure a strong bond between the rug and the floor.
5. Removal: If you need to reposition or remove the rug in the future, gently lift it from the corners and peel off the carpet tape. Use a residue remover or a warm, soapy solution to clean any adhesive residue left on the floor.
Carpet tape is a durable and reliable solution that provides excellent adhesion, making it ideal for heavy rugs or high-traffic areas. It is important to note that carpet tape may not be suitable for all types of flooring, especially delicate surfaces, as it may cause damage when removed. It’s recommended to test a small, inconspicuous area before applying carpet tape to the entire rug.
Overall, using carpet tape is a strong and effective method to keep your rug in place long-term. It provides a secure bond between the rug and the floor, minimizing any movement or slipping.
Using Velcro
Using Velcro is a versatile and customizable solution to keep your rug in place. Velcro consists of two components: a hook side and a loop side that adhere to each other when pressed together. Here’s how you can use Velcro to anchor your rug:
1. Measure and cut: Start by measuring the length of each side of your rug and cut Velcro strips accordingly. Opt for adhesive-backed Velcro strips for easy application.
2. Attach the hook side: Peel off the backing of the adhesive strip on the hook side of the Velcro. Apply it directly onto the corners and edges of your rug. Press down firmly to ensure it adheres securely.
3. Attach the loop side: Peel off the backing of the adhesive strip on the loop side of the Velcro. Carefully align it with the hook side attached to your rug. Press down firmly to create a strong bond between the two sides.
4. Place the rug: Carefully place the rug onto the floor, aligning it properly with the desired position. The hook and loop sides of the Velcro will interlock, keeping the rug securely in place.
5. Removal and maintenance: When it’s time to remove or clean the rug, gently lift it from the corners to detach the Velcro. Clean any adhesive residue left on the rug or the floor using a residue remover or warm, soapy water.
Using Velcro is a great option for rugs that need frequent repositioning or for those with irregular shapes. It provides a strong and adjustable bond, allowing you to easily move or adjust the rug as needed. Velcro also works well on various flooring types, including both hard surfaces and carpet.
Overall, using Velcro offers a customizable and secure method to keep your rug in place. It is particularly useful for rugs in high-traffic areas or spaces where movement is common.
Applying Non-Slip Rug Grippers
If you’re looking for a simple and non-permanent solution to keep your rug in place, non-slip rug grippers are an excellent option. These grippers are typically made of rubber or silicone and work by providing traction between the rug and the floor. Here’s how you can apply non-slip rug grippers:
1. Prepare the area: Start by ensuring that both the floor and the backside of your rug are clean and free from any dust or debris. Use a broom or vacuum cleaner to remove any loose particles that could interfere with the gripper’s adhesion.
2. Cut the gripper: Measure the length of each side of your rug and cut the non-slip rug gripper accordingly. The gripper should be slightly smaller than the rug to prevent it from being visible when the rug is in place.
3. Position the gripper: Place the rug gripper on the floor, ensuring that it is centered beneath the rug. If the gripper has a sticky backing, peel off the protective film to expose the adhesive surface.
4. Press firmly: Once the gripper is positioned, press down firmly to create a strong bond between the gripper and the floor. Make sure to smooth out any wrinkles or air bubbles that may form during this process.
5. Place the rug: Carefully place the rug back onto the gripper, aligning it properly with the edges. The grip provided by the rug gripper will help keep the rug securely in place, preventing any slipping or sliding.
6. Adjust if necessary: If you notice any movement or misalignment after placing the rug, gently lift and readjust the rug to ensure a snug fit on the gripper.
Non-slip rug grippers are a great option for various types of flooring, including hardwood, tile, and laminate. They provide a secure grip without leaving any residue or damage to the floor. Additionally, non-slip rug grippers are easily removable and reusable, making them a convenient solution for those who frequently rearrange their rugs or move to a new space.
Overall, applying non-slip rug grippers is an effective and hassle-free method to keep your rug in place. They provide stability and prevent slipping, ensuring a safe and secure environment in your home.
Sewing a Non-Slip Backing
If you’re up for a DIY project and prefer a more permanent solution to keep your rug in place, sewing a non-slip backing can be a great option. This method involves attaching a non-slip fabric or rug pad to the backside of your rug to provide traction and prevent sliding. Here’s how you can sew a non-slip backing:
1. Gather the materials: You’ll need a non-slip fabric or rug pad, a sewing machine, thread, and scissors. Non-slip fabrics are available at most craft or fabric stores, or you can repurpose a non-slip rug pad.
2. Cut the fabric or pad: Measure the dimensions of your rug and cut the non-slip fabric or pad to match the size. Ensure that the fabric or pad is slightly smaller than the rug for a neater finish.
3. Position the backing: Place the non-slip fabric or pad onto the backside of the rug, aligning it properly with the edges. Smooth out any wrinkles or folds to ensure a flat and even surface.
4. Secure with pins: Use straight pins to secure the non-slip fabric or pad in place. Insert the pins along the edges and throughout the middle to prevent any shifting during the sewing process.
5. Sew the backing: Set up your sewing machine with a thread color that matches the backing or the rug. Sew along the edges of the non-slip fabric or pad, stitching it directly onto the rug. You can use a straight stitch or zigzag stitch for added reinforcement.
6. Trim any excess: Once you have finished sewing the backing, carefully trim any excess fabric or pad that extends beyond the edges of the rug. This will give your rug a clean and polished look.
Sewing a non-slip backing provides a secure and long-lasting solution to keep your rug in place. The non-slip fabric or rug pad creates friction between the rug and the floor, preventing any shifting or sliding. This method is particularly useful for larger rugs or those placed in high-traffic areas.
Keep in mind that sewing a non-slip backing is a permanent alteration to your rug, so it’s important to choose this method if you’re confident in your sewing skills and don’t plan on moving or changing the rug frequently.
With a little time and effort, sewing a non-slip backing can transform your rug into a stable and secure addition to your space.
Using Rubber Shelf Liner
If you’re looking for an affordable and readily available solution to keep your rug from slipping, using rubber shelf liner is a practical option. Rubber shelf liner is a versatile material that provides grip and prevents movement. Here’s how you can use it to keep your rug in place:
1. Select the liner: Choose a rubber shelf liner that is sturdy and has a textured surface to provide maximum grip. You can find rubber shelf liner at most home improvement stores or online.
2. Clean the floor: Ensure that the floor surface is clean and free from dust or debris. Use a broom or vacuum cleaner to remove any loose particles that could affect the liner’s performance.
3. Cut the liner: Measure the dimensions of your rug and cut the rubber shelf liner to match the size. Make sure that the liner is slightly smaller than the rug to ensure it remains hidden beneath the edges.
4. Place the liner: Lay the rubber shelf liner flat on the floor where you plan to place your rug. Ensure that it is centered and evenly positioned beneath the rug.
5. Position the rug: Carefully place the rug on top of the rubber shelf liner, aligning the edges properly. Apply gentle pressure to press the rug down onto the liner to secure it in place.
6. Adjust if necessary: If you notice any areas where the rug is still slipping or sliding, lift the edges of the rug and readjust the position of the rubber shelf liner to provide better grip.
Using rubber shelf liner is a cost-effective and easy-to-implement method to keep your rug in place. The textured surface of the liner creates friction between the rug and the floor, preventing any undesirable movement. This method is particularly useful for rugs on hard floors such as hardwood or tile.
Furthermore, rubber shelf liner is versatile and can be easily trimmed to fit rugs of various sizes and shapes. Its non-slip properties also work well in high-traffic areas or locations prone to frequent movement.
Using rubber shelf liner as a non-slip rug solution offers an affordable and effective way to keep your rug securely in place, providing peace of mind and safety in your living space.
Using Rug Corner Grippers
If you want a quick and hassle-free way to keep your rug corners firmly in place, rug corner grippers are an excellent solution. These grippers are specifically designed to anchor the corners of your rug, preventing them from curling or shifting. Here’s how you can use rug corner grippers to secure your rug:
1. Clean the floor: Before applying the grippers, ensure that the floor surface is clean and free from any dust or debris. Use a broom or vacuum cleaner to remove any loose particles that could affect the adhesion of the grippers.
2. Position the grippers: Place one rug corner gripper underneath each corner of the rug. The grippers typically have an adhesive backing that keeps them securely in place.
3. Peel off the backing: Peel off the protective backing from the adhesive side of the rug corner gripper. Make sure to align it properly with the corner of the rug.
4. Press down firmly: Press down firmly on the rug corner gripper to ensure maximum adhesion. Smooth out any wrinkles or air bubbles to create a secure bond between the gripper and the rug.
5. Repeat for all corners: Repeat the process for each corner of the rug, making sure to position the grippers evenly for balanced support.
6. Adjust if necessary: If you find that the rug corners are still prone to curling or shifting, reposition the grippers or add additional ones along the edges of the rug for enhanced stability.
Rug corner grippers are a convenient solution that prevents rug corners from turning up or becoming an obstacle. They are particularly useful for rugs placed in high-traffic areas or areas where tripping hazards should be avoided.
Additionally, rug corner grippers are easily removable without damaging the rug or the floor. This makes them an ideal option for temporary rug placements or situations where you may need to frequently move or rearrange your rug.
Overall, using rug corner grippers is a simple and effective way to keep your rug corners secure and prevent any unwanted movement. They provide an extra layer of stability for your rug, ensuring a neat and safe environment in your home.
Using Adhesive Strips
If you’re looking for an easy and versatile solution to keep your rug in place, adhesive strips are a simple and effective option. These strips have adhesive on both sides, allowing you to secure your rug to the floor without the need for any additional hardware. Here’s how you can use adhesive strips to anchor your rug:
1. Clean the floor: Before applying the adhesive strips, ensure that the floor surface is clean and free from any dust or debris. Use a broom or vacuum cleaner to remove any loose particles that could affect the adhesion of the strips.
2. Measure and cut the strips: Measure the dimensions of each side of your rug and cut the adhesive strips accordingly. Opt for strips that are slightly shorter than the length of each side to ensure they remain hidden beneath the edges.
3. Position the strips: Lift one edge of the rug and place the adhesive strip along the edge. Ensure that it is centered and aligned with the edges of the rug. Repeat this step for each side of the rug, placing the strips at regular intervals.
4. Press down firmly: Press down firmly on the adhesive strips to ensure a strong bond between the rug and the floor. Smooth out any wrinkles or air bubbles that may appear during this process.
5. Secure the rug: Carefully place the rug back onto the floor, aligning it properly with the edges. Press down firmly on the areas with the adhesive strips to secure the rug in place.
6. Removal and maintenance: If you need to reposition or remove the rug in the future, gently lift it from the corners and peel off the adhesive strips. Use a residue remover or warm, soapy water to clean any adhesive residue left on the floor.
Using adhesive strips is a versatile and non-permanent method to keep your rug in place. They work well on various types of flooring, including hardwood, tile, laminate, or even carpet to rug applications.
Moreover, adhesive strips are easily adjustable, allowing you to reposition or remove the rug as needed. This makes them a practical option for those who frequently rearrange their space or move to a new location.
Overall, using adhesive strips provides a simple and efficient way to anchor your rug, ensuring it stays securely in place without causing any damage to the floor. They offer convenience and versatility, making them a popular choice for rug placement.
Applying Rug Anchors
When it comes to keeping your rug in place, rug anchors are a reliable and sturdy solution. Rug anchors are typically made of metal or plastic and work by attaching to the corners of your rug and securing them to the floor. Here’s how you can apply rug anchors to keep your rug firmly in place:
1. Prepare the corners: Begin by lifting each corner of your rug. Ensure that the corners are free from any dust or debris, as a clean surface will provide better adhesion for the anchors.
2. Position the anchors: Place one rug anchor on each corner of the rug. The anchor should be placed on the underside of the rug, with the flat surface touching the floor and the teeth facing upwards.
3. Press down firmly: With the rug anchor positioned correctly, press down firmly to secure the teeth into the rug. Make sure the anchor is securely fastened to prevent any movement or slippage.
4. Repeat for all corners: Repeat the process for each corner of the rug, ensuring that the anchors are evenly placed and provide balanced support.
5. Test for stability: After applying the rug anchors, test the stability of the rug by attempting to pull or move it. The anchors should hold the corners firmly in place without any noticeable shifting or sliding.
6. Removal: To remove the rug anchors, simply lift the corners of the rug and detach them from the anchors. If any adhesive residue is left on the rug or floor, you can use a residue remover or warm, soapy water to clean it.
Rug anchors are a durable and long-lasting solution that works well for larger rugs or those placed in high-traffic areas. They provide stability by preventing corners from curling or sliding, ensuring a safe and secure rug placement.
It’s important to note that when using rug anchors, they may leave small holes in the corners of your rug. However, these holes are generally discreet and can easily be hidden when the rug is in use.
Overall, applying rug anchors offers a dependable and effective method to keep your rug securely in place. They provide peace of mind, knowing that your rug will stay put even in areas with constant foot traffic.
Applying Hook-and-Loop Strips
Using hook-and-loop strips is a versatile and adjustable solution to keep your rug in place. Hook-and-loop strips consist of two components: the hook side and the loop side, which interlock when pressed together. Here’s how you can apply hook-and-loop strips to anchor your rug:
1. Prepare the area: Start by ensuring that both the floor and the backside of your rug are clean and free from any dust or debris. Use a broom or vacuum cleaner to remove any loose particles.
2. Cut the strips: Measure the length of each side of your rug and cut the hook-and-loop strips accordingly. Opt for adhesive-backed strips for easy application.
3. Position the strips: Place the loop side of the hook-and-loop strip along the edges of the rug. Ensure it is centered and properly aligned with the corners and sides.
4. Attach the hook side: Peel off the backing of the adhesive strip on the hook side of the hook-and-loop strip. Carefully align it with the loop side attached to your rug. Press down firmly to create a strong bond between the two sides.
5. Secure the rug: Carefully place the rug back onto the floor, aligning it properly with the edges. Press down firmly on the areas with the hook-and-loop strips to secure the rug in place.
6. Adjust if necessary: If you need to reposition or remove the rug in the future, gently lift it from the corners and detach the hook-and-loop strips. Adjust the strips or add additional ones as needed to ensure a snug fit.
Using hook-and-loop strips offers a customizable and reusable method to keep your rug in place. They provide a strong bond between the rug and the floor, preventing slipping or sliding. Additionally, the adjustable nature of hook-and-loop strips allows you to easily move or resize your rug as desired.
Hook-and-loop strips work well on various types of flooring, including hardwood, tile, laminate, or even carpet. They are also suitable for rugs of different sizes and shapes, making them a versatile option.
Overall, applying hook-and-loop strips is a practical and effective way to keep your rug securely in place. They offer convenience, adjustability, and reliability to ensure your rug stays in position, adding warmth and style to your living space.