
Inspect and Evaluate the Damage
When you notice a sagging shelf in your home, it’s essential to inspect and evaluate the damage before taking any action. By thoroughly assessing the situation, you can determine the cause of the sagging and plan the appropriate fix.
Start by removing any items from the shelf to get a clear view of the damage. Carefully examine the shelf for any visible cracks, splits, or weakened areas. Pay close attention to the mounting brackets or support structures to ensure they are intact and not contributing to the sagging.
If the damage is minimal and confined to a specific area, you may be able to repair the shelf without needing to replace it entirely. However, if the damage is severe or widespread, it may be necessary to consider replacing the shelf entirely to avoid any future issues.
Additionally, evaluate the weight and distribution of items on the shelf. Overloading the shelf with heavy or bulky items can lead to sagging over time. Consider redistributing the weight or using additional support to prevent further damage.
During the inspection, take note of any other surrounding factors that may be contributing to the sagging. For example, uneven walls or incorrect installation could be causing the shelf to sag. Addressing these underlying issues is crucial to ensure a long-lasting solution.
By thoroughly inspecting and evaluating the damage, you can gain a clear understanding of the situation and proceed with the necessary steps to fix the sagging shelf.
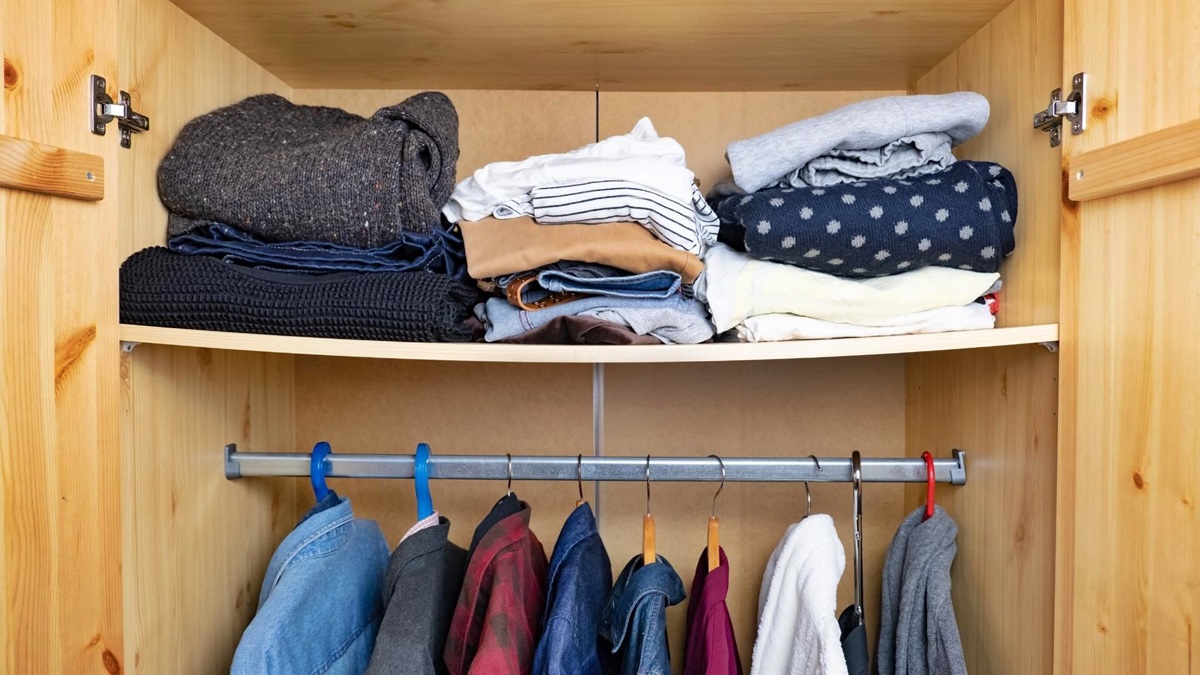
Remove Items from the Shelf
Before you begin fixing a sagging shelf, it’s important to remove all items from the shelf to ensure your safety and prevent any further damage. This step allows you to have a clear workspace and better access to the shelf during the repair process.
Start by carefully removing all items from the sagging shelf. Take care to handle delicate or fragile items with caution, and consider using padding or protective wrap for extra safety. Place the items in a safe and temporary location, away from the repair area.
Removing the items not only makes it easier to work on the shelf, but it also alleviates any additional weight that could contribute to further sagging or damage. By evenly distributing the weight of the items, you can avoid putting unnecessary strain on the shelf and ensure a more effective repair.
Take this opportunity to declutter and organize the items as well. Discard any broken or unnecessary items, and group similar items together to make it easier to place them back on the shelf once the repair is complete. A clutter-free shelf not only looks neater but also reduces the risk of future sagging.
During this process, you may also want to take the opportunity to clean the empty shelf. Wipe away any dust or debris, and consider using a mild cleaning solution to remove any stubborn stains. A clean surface provides a fresh start for the repair and enhances the overall appearance of the shelf.
Once the shelf is empty, set aside the items in a safe location until the repair is finished. Be sure to keep them away from any potential hazards or obstructions. Taking the time to remove and store the items properly ensures that they remain undamaged throughout the repair process and can be easily placed back on the shelf once it is secure.
Remember, safety should always come first when working on any DIY project. By removing all items from the sagging shelf, you create a safe and organized workspace, allowing you to focus on fixing the problem effectively.
Remove the Shelf from the Wall
Once you have removed all items from the sagging shelf, the next step in fixing it is to remove the shelf from the wall. This will allow you to have better access and work on the necessary repairs without any hindrance.
Start by locating the mounting brackets or supports that are securing the shelf to the wall. Depending on the type of installation, these could be screws, bolts, or other fasteners. Use a screwdriver or appropriate tool to unscrew or remove the fasteners one by one.
Take care not to rush and to keep track of the fasteners as you remove them. Placing them in a small container or labeled bag will ensure that they don’t get lost and can be easily retrieved when it’s time to reinstall the shelf.
If the shelf is particularly large or heavy, it may require an extra pair of hands to safely lift it from the wall. Collaborate with a friend or family member to ensure proper support and minimize the risk of injury.
As you remove the shelf, be mindful of any electrical outlets or wiring that may be present behind it. Take necessary precautions to avoid damaging any electrical components and ensure your safety throughout the process. If needed, turn off the power to the area before proceeding.
Once the shelf is completely detached from the wall, set it aside in a safe and stable location. Protect it from any potential damage or accidents by placing it on a soft surface or covering it with a cloth or sheet. Keeping the shelf in a secure area will prevent any further damage and make it easier to focus on the repair.
With the shelf safely removed from the wall, you are now ready to move on to the next step: identifying the cause of the sagging and determining the appropriate fix to restore the shelf to its original condition.
Identify the Cause of Sagging
Before proceeding with the repair of a sagging shelf, it is crucial to identify the underlying cause of the sagging. Understanding why the shelf is sagging will help you apply the most appropriate solution to fix and prevent it from happening again in the future.
Start by examining the shelf and the surrounding area. Look for any visible signs of damage or wear on the shelf itself, such as cracks, splits, or weakened areas. Check the mounting brackets or support structures for any signs of looseness or damage.
If the shelf is made of wood, it may be vulnerable to warping or bowing due to humidity or moisture exposure. Excessive weight or incorrect weight distribution, especially on a weak section of the shelf, can also cause sagging over time. Consider these factors as potential causes.
Additionally, evaluate the quality of the mounting brackets or support structures. They should be sturdy, secure, and properly installed to adequately support the weight of the shelf and its contents. A loose or damaged bracket can contribute to the sagging of the shelf.
Consider the location of the shelf as well. If it is positioned in an area prone to vibrations or movements, such as near a door or in a high-traffic area, it may experience more stress and structural strain, leading to sagging.
If the shelf was previously installed, assess the installation technique. It’s possible that the shelf was not properly secured to the wall or that insufficient support was used during the initial installation, resulting in the sagging issue.
By diligently identifying the cause of the sagging, you can develop an effective plan to address and rectify the issue. This will ensure that your repaired shelf not only looks aesthetically pleasing but also provides a sturdy and reliable storage solution for your items.
Reinforce the Shelf with Additional Brackets or Support
Once you have identified the cause of the sagging in your shelf, it’s time to reinforce it with additional brackets or support to provide the necessary strength and stability. This step is crucial to ensure that the repaired shelf can bear the weight of your items without sagging again.
First, determine the appropriate type and number of brackets needed to reinforce the shelf. Consider the material of the shelf and the weight it will need to support. Choose brackets that are sturdy, durable, and designed to handle the anticipated load.
Take precise measurements to determine the ideal placement of the new brackets. This will ensure that they provide adequate support and align with the existing mounting holes or structures on the shelf and wall. Use a level to ensure that the brackets are installed correctly and will maintain the shelf’s horizontal position.
Before attaching the new brackets, you may need to create pilot holes on the shelf and wall to facilitate the installation process. Double-check the alignment of the brackets with the mounting holes and make any necessary adjustments to ensure a secure fit.
Once the brackets are in position, secure them tightly to the shelf and the wall using appropriate screws or fasteners. Ensure that they are properly aligned and tightly attached to provide maximum support. Consider using additional reinforcement methods like adhesive or epoxy for added stability.
For shelves made of weaker materials like particleboard or laminate, you may need to install support beams or brackets on the underside of the shelf to distribute the weight more evenly. These supports will help alleviate any stress on the shelf and prevent future sagging.
After reinforcing the shelf with additional brackets or support, it is advisable to test its strength and stability before putting any items back on it. Apply gentle pressure at various points on the shelf to ensure that it remains level and secure.
By reinforcing the shelf with additional brackets or support, you provide the necessary strength and stability to prevent sagging. This step is essential for ensuring that your repaired shelf can safely and confidently hold your items without any future concerns.
Repair or Replace the Damaged Shelf
After inspecting and reinforcing the sagging shelf, the next step is to determine if it requires repair or replacement. Depending on the extent of the damage and the overall condition of the shelf, you can make an informed decision to ensure a long-lasting solution.
If the damage is minor and localized, you may be able to repair the shelf instead of replacing it. For wooden shelves, fill any cracks or splits with wood filler, following the manufacturer’s instructions. Sand down the repaired area and apply a matching paint or finish to restore its appearance.
Similarly, for shelves made of other materials like plastic or metal, use appropriate repair techniques such as glue, epoxy, or welding to mend any damaged sections. Smooth out any rough edges and repaint or re-coat the repaired areas as needed.
However, if the damage is extensive or affects the structural integrity of the shelf, replacing it may be a more suitable option. An irreparably damaged shelf can compromise the overall functionality and safety of the storage space, making it necessary to invest in a new one.
When replacing the damaged shelf, consider choosing a more durable and sturdy material that will withstand the intended use and weight requirements. Opt for high-quality materials like solid wood or metal to ensure a long-lasting solution.
Additionally, take this opportunity to reassess your storage needs and make any necessary adjustments. Consider the dimensions, design, and capacity of the replacement shelf to ensure it meets your specific requirements and fits seamlessly into the space.
If you choose to replace the shelf, properly dispose of the old one in an environmentally responsible manner. Recycle or repurpose it if possible, or consult local guidelines for disposing of large items appropriately.
Whether you decide to repair or replace the damaged shelf, ensure that the final result is sturdy, safe, and visually appealing. Remember to follow the manufacturer’s instructions for repair materials or seek professional assistance if needed.
By carefully considering the extent of the damage and making an informed decision to repair or replace the shelf, you can restore the functionality and aesthetic appeal of your storage space.
Reinstall the Shelf Securely
With the repaired or replaced shelf ready, the next step is to reinstall it securely to ensure it remains stable and functional. Proper installation is crucial to prevent any future sagging or damage, providing a reliable storage solution for your items.
Start by carefully positioning the shelf against the wall in the desired location. Use a level to ensure that it is perfectly horizontal. Adjust as needed until you achieve the desired placement.
If the shelf has mounting holes or brackets, align them with the corresponding holes or brackets on the wall. If it doesn’t have pre-existing mounting points, mark the locations where you want to attach the brackets or supports.
Using a drill and appropriate screws or fasteners, secure the brackets or supports to the wall. Make sure they are tightly attached and provide adequate support for the weight of the shelf and its contents.
If the shelf requires multiple brackets or supports, install them evenly spaced along the length of the shelf. This will help distribute the weight more evenly and prevent any stress points that can cause sagging or instability.
Once the brackets or supports are securely attached to the wall, carefully lift the shelf and align it with the mounting points. Gently place the shelf on top of the supports or slide it onto the brackets, ensuring a snug fit.
Double-check the levelness of the shelf while it is in position. Adjust if necessary to guarantee a perfectly horizontal orientation. This will not only enhance the shelf’s appearance but also provide proper weight distribution for a structurally stable installation.
After confirming the levelness, secure the shelf to the brackets or supports. Use the appropriate screws or fasteners to firmly attach the shelf. Make sure the screws are tightened but be careful not to over-tighten, as this could damage the shelf or the mounting points.
Once the shelf is securely installed, give it a gentle test by applying light pressure to different areas. Ensure that it remains stable and doesn’t wobble or sag. If any issues are noticed, re-check the mounting points and make any necessary adjustments.
Take this opportunity to inspect the entire installation and make sure all visible screws or fasteners are tightened. If needed, cover the mounting points with decorative caps or touch up any visible screw heads to enhance the shelf’s appearance.
By reinstalling the shelf securely, you can enjoy a stable and reliable storage solution. It is essential to give importance to proper installation to prevent any future sagging or instability, ultimately ensuring the longevity of your repaired or replaced shelf.
Organize and Place Items Back on the Shelf
With the sagging shelf securely fixed and installed, it’s time to organize and place the items back on the shelf. A well-organized shelf not only maximizes storage space but also ensures easy access to your belongings.
Start by categorizing your items and grouping similar items together. This approach allows for a more systematic organization and makes it easier to locate specific items when needed. For example, group books together, arrange photo frames in a designated area, and keep decorative items in a separate section.
Consider using storage bins or baskets to further organize smaller items or groupings. These containers help prevent clutter and keep items neatly contained. Label the bins or use clear ones for easy identification of their contents.
When placing items on the shelf, distribute the weight evenly. Avoid overloading one section of the shelf to prevent future sagging or strain on the structure. Spread heavier items across the shelf and place lighter items on top.
Take advantage of vertical space by utilizing risers or stacking items when possible. This allows for efficient use of the shelf’s height and helps prevent items from sliding or falling. Stack books, use dividers for paperwork, or use shelf organizers to create additional tiers.
Maintain a visually appealing arrangement by arranging items in an aesthetically pleasing manner. Consider arranging items in a symmetrical or balanced way, varying heights and sizes, and using decorative items as accents to add interest.
Keep items that are frequently used within easy reach. Place them in a convenient location on the shelf to avoid the need for constant rearrangement or reaching for items that are tucked away at the back.
Regularly reassess and declutter the shelf to maintain its organization. Remove any items that are no longer needed or have become damaged. This will keep the shelf tidy and create space for new items that you may acquire in the future.
Consider using additional storage solutions, such as hooks or magnetic strips, to optimize the shelf’s functionality. Utilize wall space adjacent to the shelf for hanging items or attaching magnetic holders for smaller essentials like keys or utensils.
Finally, regularly dust and clean the shelf and its contents to keep them in optimal condition. Wipe the surface of the shelf, remove dust from items, and ensure that everything remains clean and well-maintained.
By organizing and placing items back on the fixed shelf, you create a functional and visually pleasing storage solution. Enjoy the benefits of a well-organized space where your belongings are easily accessible and beautifully displayed.