
Tools and Materials Needed
Before diving into the process of fixing a floating shelf, it’s important to ensure you have the necessary tools and materials at hand. Here is a comprehensive list to help you get started:
- Measuring tape
- Pencil or marker
- Stud finder
- Electric drill
- Drill bits
- Wall anchors (if required)
- Screwdriver
- Screws
- Level
- Floating shelf brackets
- Floating shelf board
- Wall anchors (if required)
- Wall anchors (if required)
- Dividends
- Wall anchors (if required)
Having these tools and materials on hand will ensure a smooth and efficient process when fixing your floating shelf. Make sure to gather them all before you begin, so you don’t have to pause in the middle of the project.
Step 1: Assess the Wall
Before you start fixing your floating shelf, it’s essential to assess the condition of the wall where you plan to mount it. Here are a few key considerations to keep in mind:
Firstly, check the wall for any existing damage or cracks. If you notice any significant issues, such as large cracks or crumbling plaster, it’s important to address and repair them before proceeding with the installation. This will ensure a stable and secure foundation for your floating shelf.
Secondly, evaluate the wall material. Floating shelves can be mounted on various types of walls, including drywall, plaster, or masonry. Each wall material may require specific tools or techniques for installation. For example, drywall may require the use of wall anchors to provide additional support. Understanding the composition of your wall will help you choose the appropriate mounting method.
Next, consider the weight-bearing capacity of the wall. Floating shelves can hold a significant amount of weight, but it’s crucial to ensure that the wall can support the load. If you plan to display heavy items on the shelf, it’s advisable to mount it on studs for maximum stability. Studs are vertical wooden or metal beams behind the wall surface that provide strong support. Use a stud finder to locate these studs.
Lastly, take into account the overall aesthetics and functionality of the wall. Consider the placement of electrical outlets, light switches, or other fixtures that may obstruct the installation or use of the floating shelf. You want to ensure that the shelf is positioned in a visually pleasing and practical location.
Assessing the condition, material, weight capacity, and overall suitability of the wall is an essential first step in fixing a floating shelf. By thoroughly evaluating these factors, you can proceed with confidence, knowing that your shelf will be securely and appropriately mounted.
Step 2: Determine the Shelf Placement
Once you have assessed the condition of the wall, the next step is to determine the ideal placement for your floating shelf. Consider the following factors to ensure the shelf is positioned appropriately:
Start by deciding the height at which you want to install the shelf. Take into account both the aesthetics and functionality of the space. For instance, if you plan to display decorative items, you may want the shelf to be at eye level. If it’s intended for functional purposes like holding books or kitchen supplies, a lower height might be more practical. Use a measuring tape and a pencil or marker to mark the desired height on the wall.
Consider the surrounding furniture or objects that may affect the placement. Take note of any potential obstructions such as light fixtures, windows, or doors. Ensure that the shelf does not hamper the functionality or visual appeal of these elements.
If you are planning to install multiple floating shelves, it’s important to determine the spacing between them. This will depend on the items you intend to place on the shelves. Allow enough space between each shelf to accommodate the objects comfortably without looking overcrowded.
Take into consideration any specific measurements or dimensions of the items you plan to display on the shelf. This will help you determine the appropriate length and depth of the shelf itself. You want to ensure that the shelf can accommodate the objects without overhanging or being too small.
Once you have considered these factors, step back and visually assess the wall to get a sense of how the shelf will fit into the overall space. Adjust the positioning as needed until you are satisfied with the planned placement.
Determining the shelf placement is a crucial step in the process of fixing a floating shelf. By carefully considering the height, obstructions, spacing, and dimensions, you can ensure that the shelf will be positioned in the most suitable and visually appealing location.
Step 3: Locate and Mark Studs
Locating and marking the studs is an important step to ensure the stability and proper installation of your floating shelf. Here’s how you can find and mark the studs:
Start by using a stud finder, which is a handheld device designed to detect the presence of studs behind the wall. Slide the stud finder along the wall in a horizontal motion. The device will indicate when it detects a stud by beeping, flashing lights, or a visual display. Follow the instructions provided with your specific stud finder for the most accurate results.
Once you locate a stud, mark its position on the wall. You can use a pencil, marker, or masking tape to make the mark. Repeat this process to locate and mark additional studs along the desired area where the shelf will be mounted.
In some cases, studs may be spaced apart at irregular distances. Use the measuring tape to determine the spacing between the marked studs. This will help you position your brackets evenly along the wall.
If you are unable to locate studs using a stud finder, an alternative option is to use traditional methods. One common technique is tapping on the wall and listening for a solid sound, which indicates the presence of a stud. You can also try using a small nail or awl to gently puncture the wall until you hit a solid obstruction, indicating the location of a stud.
Remember to mark the edges of each stud, as it will help you determine the precise location when installing the brackets for your floating shelf.
Locating and marking the studs is a crucial step to ensure the stability and proper installation of your floating shelf. By accurately identifying the studs, you can securely anchor the brackets to the wall and enjoy a sturdy and reliable shelf.
Step 4: Drill Pilot Holes
Drilling pilot holes is an important step in the installation process of your floating shelf. These small holes will help guide the screws into the wall and prevent any splitting or cracking. Here’s how to drill pilot holes:
Start by selecting a drill bit that matches the size of the screws you will be using. The drill bit should be slightly smaller in diameter than the screws. This ensures a snug fit and prevents the wall from being damaged.
Position the drill bit in your electric drill and tighten it securely. Double-check that the drill is set to rotate in a forward direction.
Hold the drill perpendicular to the wall at the locations where you marked the studs. Align the drill bit with the marked areas and apply gentle pressure to the drill.
Slowly and steadily, drill into the wall at each marked location. Apply consistent pressure, but avoid exerting too much force, as it may damage the wall surface. Drill to a depth that is slightly shorter than the length of the screws.
Once the pilot holes are drilled, remove the drill and brush away any dust or debris from the holes. This will ensure a clean and smooth surface for inserting the screws.
Before proceeding to the next step, check that the pilot holes are aligned properly and positioned at the correct locations on the wall. Double-check the depth as well to ensure it accommodates the length of the screws.
By drilling pilot holes, you are taking a precautionary measure to prevent damage to the wall and ensure a secure installation. This step will make it easier to insert the screws without any potential issues.
Step 5: Install Wall Anchors (if necessary)
Installing wall anchors may be necessary, especially if you are mounting your floating shelf onto drywall or any other surface that may not have sufficient strength to support the weight. Wall anchors provide additional support and help secure the shelf brackets. Here’s how to install wall anchors:
Start by selecting the appropriate type of wall anchor for your specific wall and shelf brackets. Common types include plastic expansion anchors and toggle bolts. Refer to the instructions provided with the wall anchors to ensure correct installation.
Hold the wall anchor against the wall at the marked location where the bracket will be positioned. Align it vertically and use a pencil or marker to mark the spot for the anchor screw.
If using plastic expansion anchors, insert the anchor into the wall at the marked spot. Apply gentle pressure to push it into the wall until the anchor is flush with the surface. If using toggle bolts, drill a hole slightly larger than the diameter of the toggle bolt. Insert the toggle bolt into the hole and tighten it until secure.
Repeat this process for each marked location where a wall anchor is needed.
Once all the wall anchors are installed, double-check that they are securely in place and properly aligned with the marked locations. Ensure there is no movement or looseness in the anchors.
Installing wall anchors provides additional support and stability for your floating shelf. By properly securing the brackets with wall anchors, you can have confidence in the strength and durability of the installation.
Step 6: Mount the Shelf Brackets
Mounting the shelf brackets is a crucial step in fixing your floating shelf. The brackets provide support and stability to ensure that the shelf stays securely in place. Here’s how you can mount the shelf brackets:
Place the first shelf bracket against the wall, aligning it with the marked stud or wall anchor location. Ensure that it is level both horizontally and vertically. Use a pencil or marker to mark the screw holes on the wall through the bracket holes.
Using the pilot holes you drilled earlier, insert the screws through the bracket holes and into the pilot holes. If using wall anchors, make sure to insert the screws through the bracket holes and into the anchors.
Tighten the screws using a screwdriver or drill, but be careful not to overtighten, as this can damage the wall or strip the screw holes. Ensure that the bracket is securely attached to the wall.
Repeat this process for the remaining brackets, ensuring that they are positioned at the marked stud or wall anchor locations and are level.
Once all the shelf brackets are mounted, double-check their alignment and stability. Make any necessary adjustments or tightening to ensure that they are firmly secured to the wall.
Mounting the shelf brackets is a critical step in the installation process of your floating shelf. Properly securing the brackets will provide the necessary support and stability for your shelf.
Step 7: Attach the Floating Shelf
Attaching the floating shelf is the exciting moment when your vision starts to come to life. Follow these steps to securely attach the shelf onto the mounted brackets:
Hold the floating shelf above the mounted brackets, aligning them with the pre-drilled holes or slots on the underside of the shelf.
Slide the shelf onto the brackets, making sure that they fit into the holes or slots properly. Gently push the shelf down until it rests firmly on the brackets.
Check that the shelf is level both horizontally and vertically. Use a level to make any necessary adjustments. This step is crucial to ensure the shelf sits evenly and doesn’t tilt or lean.
If the shelf has screws or locking mechanisms to secure it to the brackets, insert them into the corresponding holes or slots. Follow the manufacturer’s instructions to properly fasten the shelf.
Apply downward pressure on the shelf to ensure a snug fit and secure attachment to the brackets. Check again that the shelf is level and stable.
If the shelf is designed to be adjustable or removable, ensure that it moves freely without wobbling or coming loose. Make any additional adjustments if needed.
Step back and admire your newly attached floating shelf. Take a moment to ensure it is visually appealing and enhances the overall aesthetics of the space.
Attaching the floating shelf is the final step before enjoying its functionality and decorative appeal. With proper attachment and alignment, the shelf will be securely in place and ready to showcase your favorite items.
Step 8: Check for Level
Checking for level is a crucial step to ensure that your floating shelf is perfectly straight and aligned. A level shelf not only enhances the aesthetics but also ensures stability. Here’s how to check for level:
Place a level on top of the floating shelf, positioning it horizontally. Check the bubble inside the level to determine if the shelf is straight. If the bubble is centered between the two lines, it indicates that the shelf is level. If not, adjustments will be needed.
If the shelf is not level, use a screwdriver or drill to loosen the screws attaching the shelf to the brackets. Gently lift or lower one side of the shelf until the bubble in the level becomes centered. Make small adjustments until the shelf is perfectly level.
Once you have made the necessary adjustments, retighten the screws to secure the shelf in the level position. Double-check the levelness by placing the level on the shelf again to ensure it remains perfectly straight.
Continue to check for level along the entire length of the shelf, especially when installing longer shelves with multiple brackets. If needed, make additional adjustments to ensure uniform levelness across the entire shelf.
Checking for level is an important step to ensure the stability and visual appeal of your floating shelf. A perfectly level shelf will not only provide a secure base for your items but will also enhance the overall aesthetics of the space.
Step 9: Secure the Shelf
Securing the shelf is essential to ensure that it remains in place and doesn’t shift or come loose over time. Follow these steps to properly secure your floating shelf:
Inspect the underside of the shelf to identify any pre-drilled holes or slots for securing screws or locking mechanisms.
If your shelf has pre-drilled holes, insert screws through these holes and into the brackets. Use a screwdriver or drill to tighten the screws, but be cautious not to overtighten and risk damaging the shelf or brackets.
If your shelf has slots instead of pre-drilled holes, position the brackets within the slots and insert screws into the brackets. Tighten the screws just enough to secure the brackets within the slots, allowing some movement for possible adjustments.
Ensure that the screws are tightened securely, but avoid excessive force that could damage the shelf or brackets. The goal is to have a secure fit without compromising the integrity of the shelf.
If your shelf has a locking mechanism, follow the manufacturer’s instructions to engage the mechanism and securely lock the shelf onto the brackets.
Gently test the stability of the shelf by applying slight pressure and ensuring it doesn’t wobble or move. The shelf should remain securely in place and able to support the weight of the items you plan to display.
If you notice any instability or movement, double-check the tightness of the screws or locking mechanism. Make any necessary adjustments to ensure a secure and stable shelf.
By properly securing the shelf, you can have peace of mind knowing that it will remain in place and provide a sturdy platform for your items.
Step 10: Final Touches and Tips
After successfully fixing your floating shelf, there are a few final touches and tips to consider to ensure its longevity and aesthetic appeal. Here’s what you can do:
Clean the surface of the shelf and remove any dust or debris that may have accumulated during the installation process. Use a soft cloth or duster to gently wipe the surface.
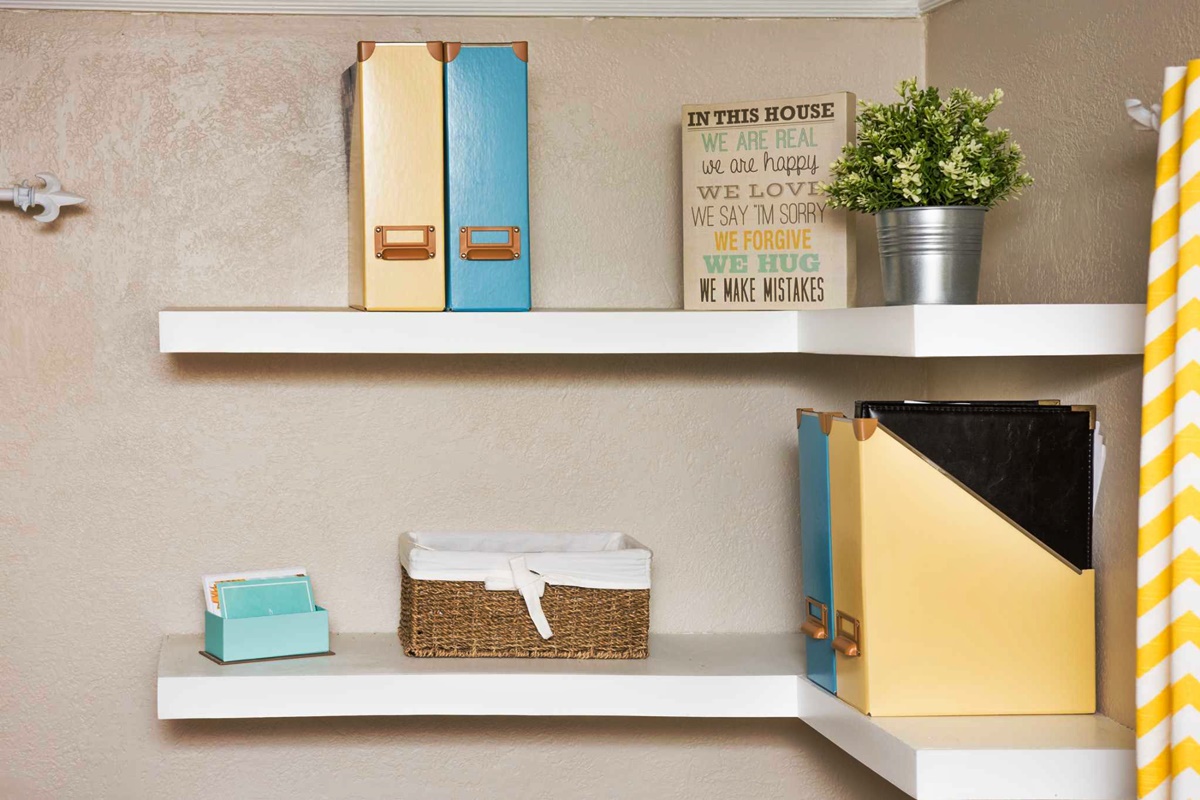
Consider adding decorative elements or organizing your items on the shelf to enhance its visual appeal. Arrange items in a balanced and aesthetically pleasing manner. You can also incorporate plants, books, or other decor to personalize the shelf.
Take regular maintenance steps to ensure the shelf remains in good condition. Dust the shelf regularly and avoid placing excessively heavy items that may exceed the weight-bearing capacity. Check the stability periodically and tighten screws if necessary. Proper care will extend the shelf’s lifespan.
For added stability, you can use glue or adhesive along the brackets and shelf contact points. This will provide extra support and prevent the shelf from shifting over time. However, exercise caution as this may make removal or rearrangement more challenging in the future.
If desired, you can paint or stain the shelf to match your existing decor. Ensure the paint or stain is suitable for the shelf material, and follow the manufacturer’s instructions for application.
Consider installing additional shelves or creating a gallery wall with multiple floating shelves. This can add visual interest and functionality to your space, allowing for more storage or display options.
Remember to maintain a balanced weight distribution on the shelf, especially if you are displaying heavy items. Distribute the weight evenly across the shelf to prevent sagging or damage.
Lastly, always refer to the manufacturer’s instructions and recommendations for your specific floating shelf model. They may provide additional tips and guidelines tailored to the product.
By giving attention to these final touches and following these tips, you can ensure that your floating shelf remains visually appealing, sturdy, and functional for years to come.