
Choosing the Right Type of Shelf
When it comes to installing a shelf over your washer and dryer, selecting the right type of shelf is essential. The perfect shelf will not only provide functionality and convenience but also add a touch of style to your laundry area. Here are some factors to consider when choosing the right shelf for your needs.
1. Size and Dimensions: Measure the available space above your washer and dryer to determine the size and dimensions of the shelf. Consider the width, depth, and height of the space to ensure a proper fit. Remember to leave enough clearance for any controls or knobs that may protrude from the machines.
2. Material: The material of the shelf is another crucial factor to consider. Common options include wood, wire, glass, or metal. Each material has its own unique aesthetic and durability. Consider the existing decor in your laundry area and choose a material that complements it.
3. Load Capacity: Determine the weight capacity that the shelf needs to support. If you plan to store heavy items such as laundry detergent bottles or baskets, opt for a shelf with a higher load capacity. Ensure that the shelf and its brackets can adequately support the weight to avoid any accidents or damage.
4. Style: Take into account the overall style and design of your laundry area. Choose a shelf that matches the existing decor or adds a contrasting element to create visual interest. Consider factors such as color, texture, and design details to enhance the overall aesthetic of your laundry space.
5. Adjustable vs. Fixed: Decide whether you prefer an adjustable or fixed shelf. Adjustable shelves allow you to modify the height or layout as needed, giving you more flexibility in organizing your laundry supplies. Fixed shelves, on the other hand, offer stability and are ideal for items that you don’t need to reposition frequently.
6. Budget: Set a budget for your shelf installation project. Determine how much you are willing to spend on both the shelf and any additional accessories or tools required for installation. Consider the quality and longevity of the shelf to make a wise investment.
By considering these factors, you can choose the perfect shelf that not only fits your space but also meets your functional and aesthetic requirements. Take your time to research different options and explore various styles to find the ideal shelf for your laundry area.
Measuring the Space Above the Washer and Dryer
Before installing a shelf over your washer and dryer, it is essential to accurately measure the available space. Proper measurement ensures that the shelf will fit perfectly and allows for smooth installation. Here are the steps to measure the space above your washer and dryer:
1. Height: Measure the height from the floor to the ceiling or any existing cabinets or shelving above the appliances. This measurement will help you determine the maximum height of the shelf you can install without obstructing your movement or hitting your head.
2. Width: Measure the width of the space above the washer and dryer. Take note of any obstructions such as electrical outlets or pipes that may affect the width available for the shelf.
3. Depth: Measure the depth from the wall to the front of the washer and dryer units. This measurement will determine how deep the shelf can be without interfering with the operation of the appliances.
4. Clearance: Consider the necessary clearance between the appliances and the shelf. Leave enough space to access and operate the machines comfortably. Ensure that the shelf does not obstruct the opening or closing of any control panels or doors.
5. Adjustments: If you have adjustable shelves or brackets, take note of the adjustability range. This will allow you to customize the positioning of the shelf according to your specific needs and preferences.
Make sure to write down the measurements accurately and keep them handy for reference during the installation process. It’s also a good idea to double-check the measurements before purchasing or cutting any materials for your shelf. Remember, precision is key to a successful shelf installation.
By taking the time to measure the space properly, you can ensure that the shelf fits perfectly and enhances the functionality of your laundry area. This step helps you avoid any mishaps or surprises during installation and ensures a seamless and professional-looking result.
Gathering the Necessary Tools and Materials
Before you begin installing a shelf over your washer and dryer, it’s important to have all the necessary tools and materials ready. Being prepared will make the installation process smoother and more efficient. Here’s a list of the tools and materials you’ll need:
1. Shelf: Select the right type of shelf that suits your needs and fits the available space above your washer and dryer. Consider the size, material, and load capacity mentioned in the previous section.
2. Shelf Brackets: Choose sturdy and appropriately sized brackets that can support the weight of the shelf and the items you plan to store on it. Consider the style and design of the brackets to complement your overall aesthetic preference.
3. Screws and Anchors: Depending on the type of wall you have, you’ll need screws and anchors that are appropriate for mounting the brackets securely. Ensure that the screws are long enough to anchor the brackets firmly to the wall.
4. Drill: A power drill with the appropriate drill bits will be necessary for drilling pilot holes for the screws and anchors. Make sure your drill is charged and in good working condition before you start the installation process.
5. Level: Use a level to ensure that the shelf is installed in a straight and level position. This will prevent any items on the shelf from tilting or falling off.
6. Measuring Tape: A measuring tape will be essential for measuring the space above the washer and dryer accurately, as mentioned in the previous section. It will also come in handy for marking the position of the brackets on the wall.
7. Pencil or Marker: Use a pencil or marker to mark the placement of the brackets on the wall. This will serve as a guide during the installation process.
8. Safety Gear: Don’t forget to prioritize your safety by wearing appropriate protective gear, such as safety goggles and work gloves, to protect your eyes and hands during the installation process.
9. Additional Decorative Items: If desired, gather any additional decorative items such as paint or wallpaper to enhance the appearance of the wall behind the shelf.
Having all the necessary tools and materials ready before you start the installation will save you time and ensure a smooth process. Double-check your list to make sure you have everything you need, and if necessary, make a trip to the hardware store to gather any missing items. By being well-prepared, you’ll be on your way to successfully installing a shelf over your washer and dryer.
Finding the Studs in the Wall for Secure Mounting
When installing a shelf over your washer and dryer, it’s crucial to mount it securely to the wall. To achieve this, you need to find the studs, which are the vertical framing members behind the wallboard. Mounting the shelf directly into the studs will provide the necessary strength and stability. Here’s how you can locate the studs:
1. Use a Stud Finder: A stud finder is a handheld tool that uses sensors to detect changes in density behind the wallboard. Start by placing the stud finder against the wall and moving it horizontally. The tool will indicate when it detects the edge of a stud. Mark the location of the stud with a pencil or masking tape.
2. Observe Wall Outlets, Switches, and Trim: In some cases, outlets and switches are mounted directly onto a stud. Locate an outlet or switch and observe the distance between it and the edge of the wall. Typically, studs are spaced at regular intervals, usually 16 or 24 inches apart. Use this information to estimate the position of neighboring studs.
3. Knock on the Wall: Give the wall a gentle knock with your knuckles. You’ll notice that the sound will change when you’re tapping on a stud. Compare the sound in different areas of the wall and listen for a solid, hollow sound that indicates the presence of a stud.
4. Look for Nail Pops or Wall Imperfections: Nail pops or visible imperfections in the wall’s surface can indicate the presence of a stud. These imperfections may occur due to the movement of the stud or fasteners over time. Check for any irregularities and mark the stud locations accordingly.
5. Measure from Corners: Studs are typically placed near the corners of walls. Using a measuring tape, measure and mark the distance from the corner to estimate the location of the studs.
It’s important to note that stud finders are not foolproof, and there may be variations in the construction of your walls. Therefore, it’s a good practice to use multiple methods to confirm the presence and position of studs.
Once you have located the studs, mark their positions on the wall using a pencil or masking tape. These markings will serve as your guide for mounting the shelf brackets securely onto the studs. Remember, mounting a shelf directly into the studs will provide maximum strength and prevent the shelf from becoming loose or unstable over time.
Installing the Shelf Brackets
After finding the studs in the wall, the next step in installing a shelf over your washer and dryer is to mount the shelf brackets. The brackets will provide the support for your shelf. Here’s how you can install the shelf brackets:
1. Positioning: Place one bracket against the wall at the desired height and mark the screw holes using a pencil or marker. Use a level to ensure that the bracket is straight. Repeat this process for the second bracket, making sure it aligns with the first bracket.
2. Pre-Drilling: Use a drill with a bit slightly smaller than the diameter of the screws to pre-drill pilot holes at the marked locations. This will prevent the wall from splitting and make it easier to insert the screws.
3. Mounting: Fasten the brackets to the wall using screws. Start by inserting the screws into the pilot holes and gradually tighten them until the brackets are securely attached to the wall. Be careful not to overtighten, as it can damage the bracket or wall.
4. Level Check: After mounting the brackets, use a level to double-check their alignment. Make any necessary adjustments to ensure that both brackets are level and parallel to each other. This step is crucial for the shelf to sit evenly.
5. Weight Distribution: Test the stability of the brackets by applying gentle pressure or by placing a small weight on them. Ensure that they can support the weight without wobbling or shifting. If there is any instability, reinforce the brackets or adjust their position as needed.
By following these steps, you can properly install the shelf brackets for your washer and dryer shelf. Remember to use the appropriate screws and be cautious during the installation process to avoid any damage to the wall or brackets. Once the brackets are securely mounted, you can proceed to the next step of attaching the shelf board to the brackets.
Attaching the Shelf Board to the Brackets
Now that you have installed the shelf brackets securely, it’s time to attach the shelf board to complete the installation of your shelf over the washer and dryer. Here’s how you can go about attaching the shelf board:
1. Positioning: Place the shelf board on top of the brackets, ensuring that it is centered and aligned properly. Make any adjustments to ensure an even overhang on all sides of the bracket.
2. Marking the Brackets: Use a pencil or marker to mark the screw hole locations on the underside of the shelf board, corresponding to the positions of the brackets. This will serve as a guide for drilling pilot holes later.
3. Pre-Drilling: Remove the shelf board and pre-drill pilot holes on the marked locations using a drill bit slightly smaller than the screw size. Pre-drilling will prevent the wood from splitting when securing the screws.
4. Securing the Shelf Board: Place the shelf board back on top of the brackets and align the pre-drilled holes with the mounting holes on the brackets. Insert screws into the pilot holes and secure them using a screwdriver or drill. Start with one screw on each bracket and then gradually tighten the remaining screws, ensuring that the shelf board is securely attached to the brackets.
5. Level Check: Use a level to ensure that the shelf board is horizontal and level. Make any necessary adjustments by loosening the screws slightly, leveling the shelf board, and then retightening the screws.
6. Weight Distribution: Test the stability of the shelf board by applying gentle pressure or placing some weight on it. Ensure that it is level and can support the intended items without sagging or wobbling. If there are any concerns, reinforce the brackets or adjust the positioning of the shelf board as needed.
By following these steps, you can successfully attach the shelf board to the brackets, completing the installation of your shelf over the washer and dryer. Double-check the stability and levelness of the shelf board before proceeding to the next step of adding additional support for heavy items or organizing and decorating the shelf space.
Adding Additional Support for Heavy Items
If you plan to store heavy items on your shelf over the washer and dryer, it is important to consider adding additional support to ensure the stability and safety of the shelf. Here are some options for providing extra reinforcement for heavy items:
1. Brackets with Higher Load Capacity: Consider replacing your existing shelf brackets with ones that have a higher load capacity. Heavy-duty brackets are designed to hold heavier items and provide increased support. Make sure to choose brackets that are compatible with your existing shelf board and properly secure them to the wall.
2. Use L-brackets: L-brackets are metal brackets that can provide extra reinforcement at the corners of the shelf. They can be installed underneath the shelf board and attached to the brackets or directly to the wall. This added support can help distribute the weight of heavy items more evenly and prevent sagging or bending.
3. Install a Center Support Bracket: For longer shelves, consider installing a center support bracket to provide additional support in the middle. This can help distribute the weight more evenly and prevent any sagging in the shelf. Measure the midpoint of the shelf, install the center bracket on the wall or underside of the shelf board, and secure it firmly.
4. Reinforce with Wall Anchors: If you’re unable to find studs in the vicinity of the shelf, or if the studs are not spaced conveniently for additional support, consider using wall anchors. Wall anchors can provide stability by creating a secure fastening point in drywall or other wall materials. Make sure to choose anchors that are appropriate for the weight and construction of your shelf.
5. Use Supportive Crosspieces: Another option to reinforce the shelf is to add supportive crosspieces underneath the shelf board. These can be installed perpendicular to the brackets or attached directly to the wall. Crosspieces distribute the weight over a larger area and provide additional strength and stability.
By implementing one or more of these methods, you can ensure that your shelf can comfortably and securely support heavy items without compromising its stability. Remember to consider the load capacity of your chosen support options and follow the manufacturer’s guidelines for installation to maintain the integrity of the shelf.
Decorating and Organizing the Shelf Space
Once you have installed a shelf over your washer and dryer, it’s time to make the most of the space by decorating and organizing it. Here are some tips to help you create a functional and visually appealing shelf space:
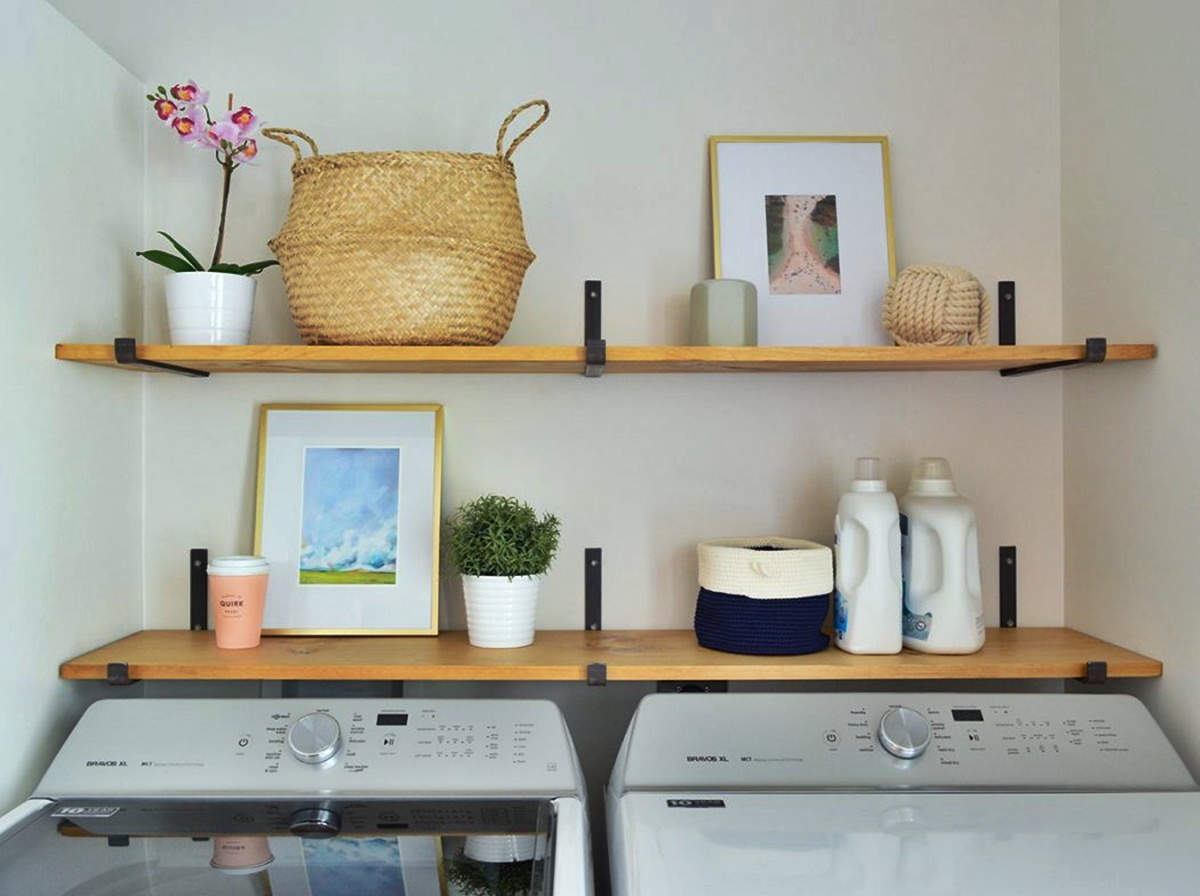
1. Choose Decorative Storage Containers: Opt for stylish and practical storage containers that suit the overall aesthetic of your laundry area. Consider baskets, bins, or decorative boxes to keep smaller items organized and add a touch of visual interest to the shelf. Labels on the containers can help you quickly identify their contents.
2. Group Items by Category: Organize your laundry supplies by grouping similar items together. Keep detergent bottles, fabric softeners, and stain removers in one section, while sorting cleaning tools, dryer sheets, and lint rollers in another. This categorization makes it easier to find what you need and keeps the shelf tidy.
3. Utilize Vertical Space: Make the most of the vertical space on the shelf by using stackable storage solutions or utilizing the full height of the shelf. This will maximize storage capacity and make it easier to access items. Consider adding shelf dividers or using tension rods to create compartments and separate different items.
4. Add Decorative Accents: Personalize the shelf space by adding decorative accents such as small potted plants, framed artwork, or decorative figurines. These elements can bring life and personality to the shelf while creating a visually pleasing atmosphere in your laundry area.
5. Incorporate Practical Accessories: Include practical accessories that enhance the functionality of the shelf space. Install hooks on the underside of the shelf to hang items such as drying racks, lint brushes, or laundry bags. This allows for easy access and keeps frequently used items within reach.
6. Ensure Accessibility and Safety: Arrange items on the shelf based on how frequently you use them, with regularly used items within easy reach. Store heavier items on the lower shelves and lighter ones on higher shelves to ensure stability and prevent any accidents.
7. Regular Maintenance: Regularly declutter and tidy the shelf space to maintain its organization and appearance. Dispose of empty containers, replace expired products, and invest in storage solutions that suit your changing needs over time.
By applying these tips, you can create a well-organized and visually appealing shelf space over your washer and dryer. A combination of practical storage solutions, decorative accents, and systematic organization will make doing laundry a more enjoyable experience while keeping the area neat and functional.
Maintaining the Shelf Over Time
Once you have installed a shelf over your washer and dryer, it’s important to maintain it properly to ensure its longevity and functionality. Here are some maintenance tips to keep your shelf in good condition:
1. Regular Cleaning: Dust and debris can accumulate on the shelf over time, so make it a habit to clean it regularly. Wipe down the surface with a damp cloth or use a gentle cleaning solution suitable for the material of your shelf. Avoid using abrasive cleaners that could damage the shelf.
2. Check for Loose Fasteners: Periodically inspect the shelf brackets and screws to ensure they are still securely fastened. Over time, vibrations or movements from the washer and dryer can cause screws to loosen. Use a screwdriver or drill to tighten any loose screws as needed.
3. Evaluate Weight Capacity: As your storage needs may change, periodically assess the weight capacity of your shelf. Be mindful not to overload the shelf with heavy items beyond its recommended capacity. Redistribution of items or adding additional support may be necessary if you find the shelf starting to sag or feel unstable.
4. Address Water or Moisture Issues: If your washer or dryer generates excess moisture or if water from leaks comes into contact with the shelf, take immediate action to address the issue. Water damage can weaken the shelf’s structure and compromise its stability. Ensure the appliances are in good working condition and fix any leaks promptly.
5. Rearrange and Declutter: From time to time, reorganize the items on your shelf to keep things tidy and efficient. Remove any unnecessary or expired items, and rearrange the remaining items to optimize the available space. This will make it easier to access what you need and maintain a clutter-free shelf.
6. Protect Against Sunlight: If your shelf is located in an area exposed to direct sunlight, consider using window coverings or protective coatings to prevent the sunlight from fading or damaging the shelf. UV rays can cause discoloration and deterioration of certain materials over time.
7. Monitor for Wear and Tear: Regularly inspect the condition of the shelf, including the shelf board, brackets, and any additional support or decorative elements. Look for signs of wear, damage, or instability. Address any issues promptly to prevent further damage or safety hazards.
By following these maintenance tips, you can ensure that your shelf remains in good condition, providing a reliable and organized storage solution above your washer and dryer. Regular cleaning, periodic inspections, and timely repairs or adjustments will contribute to the longevity and functionality of your shelf.