
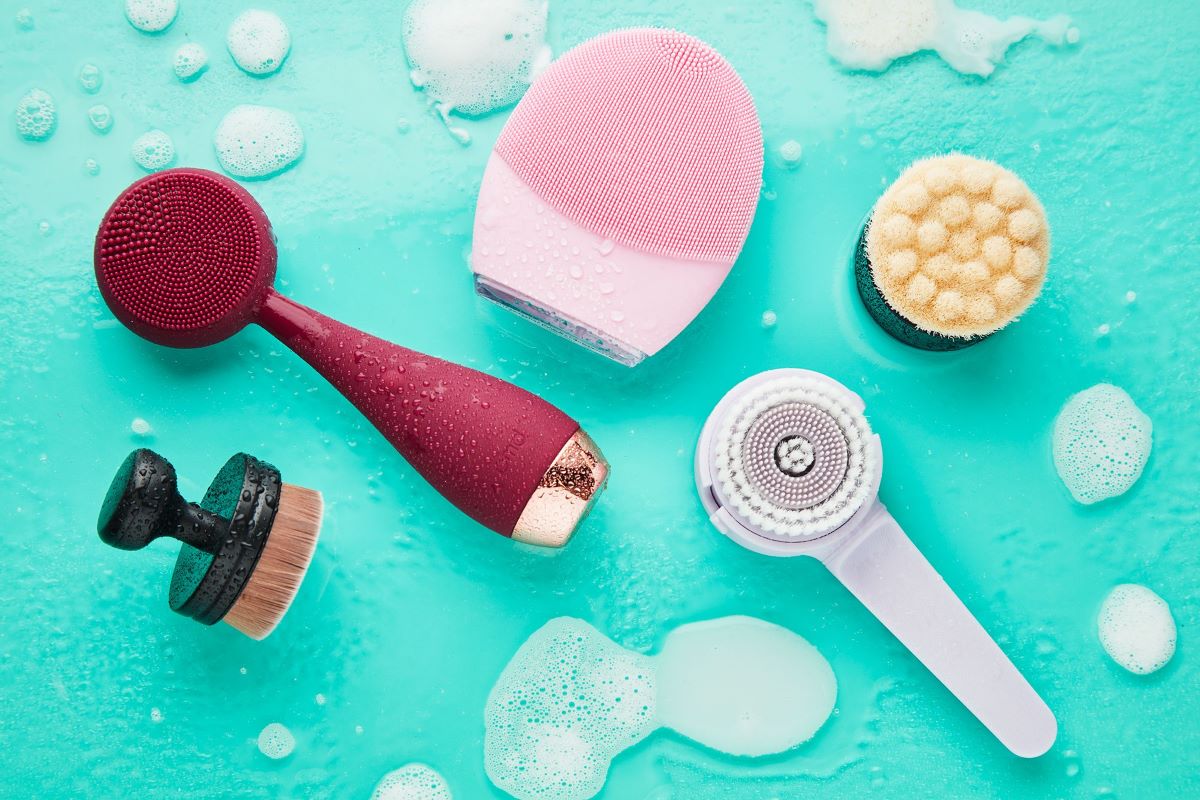
Why Cleaning Your Face Brush is Important
Keeping your face brush clean is an essential part of maintaining healthy and clear skin. When you use a face brush, it collects a significant amount of dirt, oil, makeup, and dead skin cells from your face. If you don’t clean your brush regularly, these impurities can accumulate and get transferred back onto your skin, leading to clogged pores, breakouts, and a dull complexion.
Regularly cleaning your face brush helps to prevent the buildup of bacteria, fungi, and other microorganisms that can thrive in damp and dirty bristles. These organisms can cause infections and skin irritations, particularly if you have sensitive or acne-prone skin.
Another reason why cleaning your face brush is important is to maintain the effectiveness of the bristles. Over time, product buildup can make the bristles less effective in exfoliating and cleansing your skin. By regularly cleaning your brush, you can ensure that it continues to work efficiently, providing you with maximum exfoliation and a thorough cleanse.
Additionally, by keeping your face brush clean, you prolong its lifespan. A clean brush is less likely to develop a foul odor, and the bristles will remain soft and intact for longer. This means that you won’t have to replace your brush as frequently, saving you money in the long run.
Lastly, cleaning your face brush is an important part of maintaining good overall hygiene. Just as you clean your makeup brushes and applicators to prevent the spread of bacteria, you should extend the same hygiene practices to your face brush. By keeping it clean, you reduce the risk of introducing harmful bacteria to your skin, promoting a healthier complexion.
What You’ll Need
Before you start cleaning your face brush, gather the following items:
- A gentle facial cleanser or brush cleaning solution
- A small bowl or sink with warm water
- A clean towel or paper towels
- A brush cleaning pad or mat (optional)
- Antibacterial soap (for the brush handle, if necessary)
It’s important to choose a gentle cleanser or a specific brush cleaning solution that is suitable for your face brush. Avoid using harsh soaps or cleansers that may damage the bristles or irritate your skin. Look for products that are specifically formulated for cleaning makeup brushes or face brushes.
You can use a small bowl or sink filled with warm water to clean your brush. Make sure the water is not too hot, as it may damage the bristles. If you prefer a more organized cleaning process, you can invest in a brush cleaning pad or mat. These usually have textured surfaces that help to remove dirt and buildup from the bristles more effectively.
Having a clean towel or paper towels nearby will be handy for drying the brush after cleaning. Make sure the towel or paper towels are clean to avoid transferring any additional dirt or bacteria onto the freshly cleaned brush.
Depending on the type of handle your face brush has, you may also need some antibacterial soap to clean the handle. This is particularly important if the handle is made of plastic or other non-porous materials that can harbor bacteria. Use a mild antibacterial soap and rinse it thoroughly to ensure that no residue remains on the handle.
Step 1: Removing Excess Makeup
Before you begin cleaning your face brush, it’s important to remove any excess makeup from the bristles. This step ensures that the cleaning process is more effective and prevents the buildup of old makeup on the brush.
Here’s how to remove excess makeup from your face brush:
- Gently tap the brush against a clean tissue or the edge of a sink to dislodge any loose makeup particles. This helps to remove any surface-level debris.
- If there is stubborn makeup residue on the bristles, you can use a small amount of micellar water or makeup remover on a clean cotton pad. Gently swipe the bristles across the pad to remove the remaining makeup.
- Continue this process until you no longer see any makeup transferring onto the cotton pad. This indicates that the excess makeup has been successfully removed.
It’s essential not to submerge the brush in water or use excessive force during this step. Doing so can cause the bristles to become misshapen or loosen from the brush head.
Once you have removed the excess makeup, you’re ready to move on to the next step: wetting the bristles.
Step 2: Wetting the Bristles
After removing the excess makeup, it’s time to wet the bristles of your face brush before applying a cleanser. This step helps to loosen any remaining debris, making it easier to clean the brush thoroughly.
Follow these steps to wet the bristles of your face brush:
- Hold the brush under lukewarm running water, making sure to position it with the bristles facing downwards. Avoid getting water on the handle to prevent any damage.
- Gently swirl the brush around in the running water, allowing the water to flow through the bristles. This helps to dislodge any trapped dirt or makeup.
- Continue rinsing the brush until the water runs clear and all visible residue has been removed. This ensures that the bristles are clean and ready for the next step.
It’s important not to use hot water, as it can damage the bristles and weaken the glue that holds them in place. Lukewarm water is sufficient for cleaning the brush effectively without causing any harm.
Once the bristles are thoroughly wet, you’re ready to proceed to the next step: applying a cleanser to the brush.
Step 3: Applying Cleanser
Now that the bristles of your face brush are wet, it’s time to apply a suitable cleanser to effectively deep clean the brush. Using a cleanser helps to remove any remaining dirt, oil, and bacteria from the bristles, ensuring a thorough cleanse.
Follow these steps to apply a cleanser to your face brush:
- Squeeze a small amount of your chosen facial cleanser onto the bristles of the brush. The amount of cleanser needed will depend on the size of your brush and the recommended usage of the cleanser.
- Gently massage the cleanser into the bristles using your fingers. Make sure to cover all the bristles, working the cleanser in thoroughly.
- Avoid applying excessive pressure, as this can damage the bristles. Instead, use gentle circular motions to distribute the cleanser evenly.
If you do not have a specific brush cleanser, you can also use a mild liquid soap or a gentle shampoo as an alternative.
Ensure that the cleanser reaches the base of the bristles, where dirt and bacteria tend to accumulate the most. Pay close attention to the bristle tips as well, as they come into direct contact with your face and need to be cleaned thoroughly.
Once the bristles are well coated with the cleanser, it’s time to move on to the next step: cleaning the bristles of the face brush.
Step 4: Cleaning the Bristles
With the cleanser applied to the bristles of your face brush, it’s time to thoroughly clean the bristles to remove any dirt, oil, and residue. This step ensures that your face brush is clean and ready for use.
Follow these steps to clean the bristles of your face brush:
- Gently swirl the brush in the palm of your hand or on a brush cleaning pad/mat. Use circular motions to work the cleanser into a lather and effectively clean the bristles.
- Pay attention to each individual bristle, ensuring that the lather reaches the base and the tips of the bristles.
- If using a brush cleaning pad/mat, move the brush back and forth in different patterns to effectively remove any stubborn residue.
- Continue swirling and cleaning the bristles for about a minute or until you feel that the bristles are clean and free from any residue.
It’s important to be gentle while cleaning the bristles to avoid damaging them. Avoid using excessive force or scrubbing vigorously, as this can cause the bristles to become misshapen or dislodge from the brush head.
Once you are satisfied that the bristles are clean, you can move on to the next step: rinsing the brush to remove the cleanser.
Step 5: Rinsing the Brush
After cleaning the bristles of your face brush, it’s important to rinse off the cleanser thoroughly. Rinsing removes any residue and ensures that the brush is free from any cleaning product.
Follow these steps to properly rinse the bristles of your face brush:
- Hold the brush under lukewarm running water, with the bristles facing downwards.
- Gently swirl the brush around in the running water, ensuring that all the remaining cleanser is washed away.
- Continue rinsing until the water runs clear and there are no traces of cleanser left on the brush.
It’s important to avoid getting water on the handle of the brush, as this can damage it over time. Focus on rinsing the bristles thoroughly while keeping the handle dry.
Make sure to rinse the bristles from all angles, ensuring that every part of the bristles comes into contact with the water. This helps to remove any remaining residue or dirt that may be trapped deeper within the bristles.
Once the bristles are completely rinsed and free from any cleansing product, gently shake off any excess water. It’s now time to move on to the next step: drying the face brush.
Step 6: Drying the Brush
Properly drying your face brush is crucial to prevent the growth of bacteria and maintain its overall hygiene. After rinsing off the cleanser, it’s important to ensure that the bristles are completely dry before storing or using the brush again.
Follow these steps to effectively dry your face brush:
- Gently squeeze out any excess water from the bristles of the brush using your fingers. Be careful not to pull or twist the bristles, as this can damage them.
- Take a clean towel or paper towels and blot the bristles gently to remove additional moisture. Avoid rubbing or pressing too hard, as this can cause the bristles to become misshapen.
- Reshape the bristles by gently running your fingers through them to align them in their natural position. This helps to maintain the shape and structure of the brush.
- Place the brush on a clean and dry towel or lay it flat on a countertop. Make sure that the bristles are not touching any surfaces to allow for proper air circulation.
- Allow the brush to air dry completely. Depending on the thickness and density of the bristles, it may take several hours or overnight for the brush to dry thoroughly.
Avoid using heat sources such as hair dryers or placing the brush in direct sunlight to speed up the drying process. Excessive heat can damage the bristles and degrade the quality of the brush over time.
Once the brush is completely dry, you can proceed to the next step: cleaning the handle, if necessary.
Step 7: Cleaning the Handle
In addition to cleaning the bristles, it’s important to clean the handle of your face brush to maintain overall cleanliness and hygiene. The handle can come into contact with dirt, oil, and bacteria, so regular cleaning is important.
Follow these steps to clean the handle of your face brush:
- Dampen a clean cloth or sponge with warm water.
- Add a small amount of antibacterial soap to the cloth or sponge and gently rub the handle of the brush.
- Focusing on any areas that are visibly dirty or stained, scrub the handle in a circular motion to remove any residue.
- Rinse the cloth or sponge thoroughly to remove any soap residue.
- Wipe down the handle of the brush with the clean, damp cloth or sponge to remove any remaining soap.
- If the handle is made of a non-porous material, you can also use a disinfecting wipe or a cotton pad soaked in rubbing alcohol to sanitize the handle.
- Ensure that the handle is completely dry before storing or using the brush again.
Regularly cleaning the handle of your face brush helps to remove any dirt, oil, or bacteria that may have accumulated on its surface. This promotes better overall hygiene and prevents the transfer of any harmful bacteria to your skin during each use.
Once the handle is clean and dry, you can move on to the final step: storing your clean face brush.
Step 8: Storing Your Clean Face Brush
Properly storing your clean face brush is essential to keep it protected and maintain its cleanliness until the next use. By following the appropriate storage practices, you can prolong the life of your brush and ensure that it remains hygienic.
Here are some steps to effectively store your clean face brush:
- Make sure the brush is completely dry before storing it. Damp bristles can create a breeding ground for bacteria.
- Choose a well-ventilated area or a brush holder that allows air to circulate freely around the bristles. This helps to prevent the growth of mold or bacteria.
- Avoid storing the brush in a damp or humid environment, such as a bathroom. Excessive moisture can damage the bristles and encourage bacterial growth.
- If your brush came with a protective cap or cover, use it to keep the bristles clean and protected. This is especially useful when traveling with your brush.
- Keep your brush away from direct sunlight to prevent any fading or damage to the bristles.
- Avoid storing the brush with other makeup products, as the bristles can pick up color or debris from other items.
- Regularly inspect the brush for any signs of wear or damage. If you notice any loose bristles or a change in the overall quality of the brush, consider replacing it.
By following these storage practices, you can ensure that your face brush maintains its cleanliness and integrity, allowing it to continue providing you with effective skincare results.
Now that you have successfully completed all the steps, you can enjoy using your clean face brush for your skincare routine.
How Often Should You Clean Your Face Brush?
The frequency at which you should clean your face brush depends on various factors, including your skin type, how often you use the brush, and the type of products you use with it. However, as a general guideline, it is recommended to clean your face brush at least once a week.
If you have oily or acne-prone skin, or if you use your face brush daily, you may want to consider cleaning it more frequently, such as every 2-3 days. This helps to prevent the buildup of excess oil, dirt, and bacteria on the brush, which can contribute to breakouts and skin irritations.
Similarly, if you use your face brush for applying liquid or cream products, it’s important to clean it after each use to prevent product buildup and contamination. This is especially true for brushes used with foundation or other complexion products, as they can trap bacteria and lead to skin issues if not properly cleaned.
On the other hand, if you have dry or sensitive skin and only use your face brush occasionally, you may be able to clean it less frequently, such as every 2-3 weeks. However, it’s important to monitor the cleanliness of the brush and ensure that it remains free from any residue or bacteria.
Ultimately, the key is to pay attention to the condition of your face brush and clean it as needed. If you notice a buildup of dirt, oil, or makeup residue, it’s time to give it a thorough cleaning. Trust your instincts and common sense to determine when your brush requires cleaning.
In addition to regular cleaning, consider replacing your face brush every 3-6 months, or sooner if the bristles become frayed or distorted. Over time, the bristles can become less effective at exfoliating and cleansing, and may even harbor more bacteria despite regular cleaning.
By cleaning your face brush regularly and replacing it when necessary, you can ensure that it remains a valuable tool in your skincare routine, helping to maintain healthy and clear skin.