
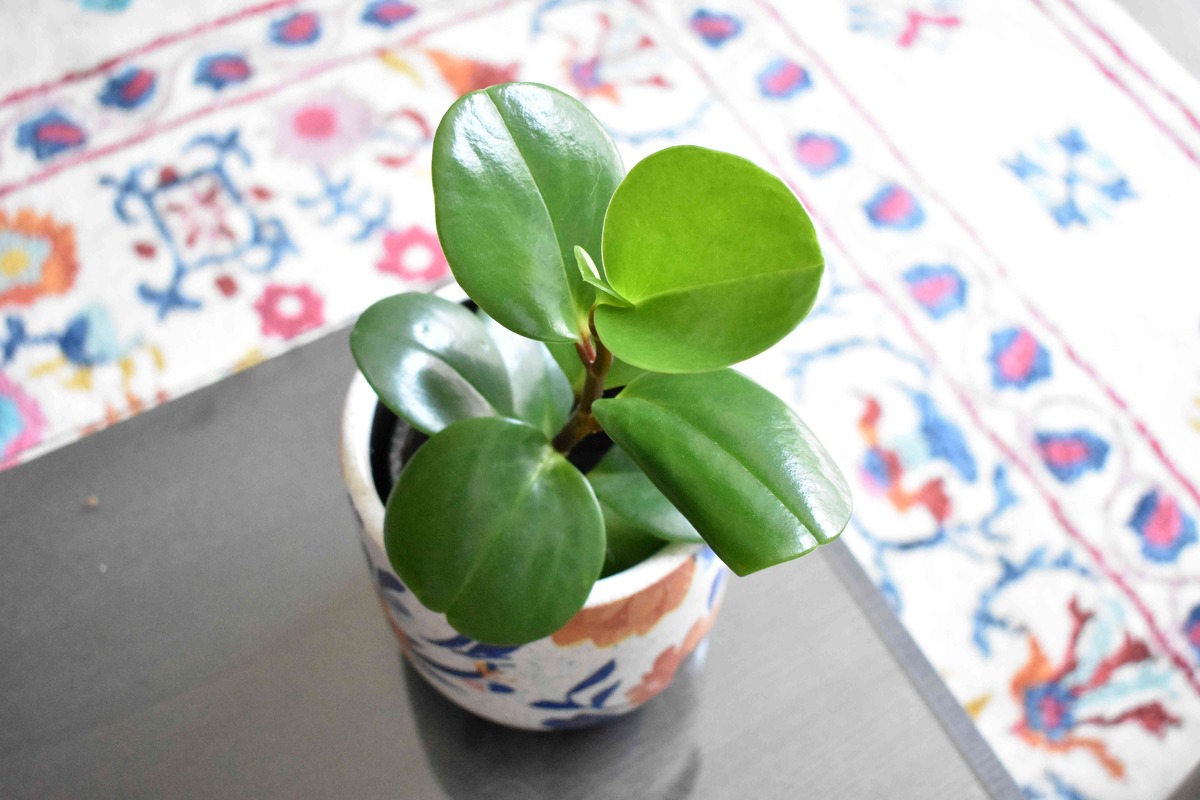
Choosing the right spot for your rubber plant
Your rubber plant’s location plays a crucial role in its overall health and growth. Selecting the right spot will ensure that your plant thrives and adds beauty to your indoor space. Here are some factors to consider when choosing the perfect spot for your rubber plant:
1. Bright, indirect light: Rubber plants thrive in bright, indirect light. Place your plant near a north or east-facing window where it can receive gentle, indirect sunlight. Avoid placing it in direct sunlight, as this can scorch the leaves.
2. Distance from windows: While rubber plants love light, it’s important to keep them a few feet away from windows. The glass can intensify the sunlight and cause damage to the leaves.
3. Adequate space: Rubber plants can grow tall and wide, so ensure that you have enough space for their growth. Choose a spot where they will have enough room to spread out without being overcrowded.
4. Warm temperature: Rubber plants prefer temperatures between 60-80°F (15-26°C). Avoid placing them in areas with temperature fluctuations or drafts, as this can cause stress to the plant.
5. Humidity: Rubber plants enjoy moderate humidity. If the air in your home is dry, you may need to increase humidity levels by placing a humidifier nearby or misting the leaves regularly.
6. Away from cold drafts: Rubber plants are sensitive to cold drafts, so keep them away from doors, windows, and air conditioning vents.
By choosing the right spot for your rubber plant, you are setting the foundation for its growth and vitality. Take into consideration these factors to create an ideal environment that will help your rubber plant flourish.
Providing the right amount of light
Proper lighting is essential for the well-being of your rubber plant. Providing the right amount of light will ensure that your plant develops vibrant foliage and grows well. Here are some guidelines to help you provide optimal light conditions for your rubber plant:
1. Bright, indirect light: Rubber plants thrive in bright, indirect light. Place your plant near a north or east-facing window where it can receive gentle, indirect sunlight. This will provide the plant with the necessary light without exposing it to direct sunlight, which can scorch the leaves.
2. Avoid direct sunlight: While your rubber plant needs bright light, direct sunlight can be harmful. If you notice that the leaves are turning yellow or brown, it may be a sign of sunburn. To prevent this, use sheer curtains or blinds to filter the sunlight or place your plant slightly away from the window.
3. Adjust placement: As the seasons change, the angle and intensity of sunlight can vary. Monitor the light conditions and adjust the placement of your rubber plant accordingly. During the summer months, you may need to move the plant away from the window to avoid excessive heat and intense sunlight.
4. Consider artificial lighting: If you don’t have access to natural light or your home has low light conditions, you can supplement the light with artificial lighting. Choose a fluorescent or LED grow light and position it above your rubber plant, giving it 12-16 hours of light each day. Ensure that the light is not too close to the leaves to avoid burning.
5. Rotate your plant: To ensure even growth and prevent one side of the plant from leaning towards the light source, rotate your rubber plant every few weeks. This will promote balanced growth and keep your plant looking its best.
By providing the right amount of light, you are giving your rubber plant the energy it needs to flourish. Remember to observe the plant’s response to light and make adjustments as needed. With the proper lighting, your rubber plant will thrive and become a stunning addition to your indoor garden.
Understanding the optimal temperature and humidity levels
Creating the right environment with optimal temperature and humidity levels is crucial for the health and well-being of your rubber plant. Understanding the temperature and humidity requirements will ensure that your plant thrives and remains resilient. Here’s what you need to know:
1. Temperature: Rubber plants prefer temperatures ranging between 60-80°F (15-26°C). They can tolerate slightly cooler temperatures during the winter months but may suffer if exposed to extreme cold or frost. Avoid placing your rubber plant near drafts or in locations with fluctuating temperatures, as this can cause stress to the plant.
2. Humidity: Rubber plants thrive in moderate humidity levels. Ideally, the humidity should be between 40-60%. If the air in your home is dry, especially during the winter months, you can increase humidity by placing a humidifier near your rubber plant. Alternatively, you can mist the leaves regularly. This will help mimic the plant’s natural tropical environment and prevent the leaves from drying out.
3. Grouping plants: If you have multiple indoor plants, you can cluster them together to increase humidity levels around them. As plants transpire, they release moisture into the air, creating a microclimate with higher humidity. Grouping your rubber plant with other houseplants can be beneficial, especially if you have difficulty maintaining higher humidity levels on your own.
4. Avoid overwatering: While moisture is important for your rubber plant, excessive watering can lead to issues such as root rot. Maintain a balanced watering routine and ensure proper drainage to prevent water from sitting in the pot. This will help maintain healthy roots and overall plant health.
5. Monitor and adjust: It’s important to monitor the temperature and humidity levels in the area where your rubber plant is located. Use a thermometer and hygrometer to keep track of the conditions. If you notice that the temperature or humidity is consistently outside of the plant’s preferred range, consider adjusting the location of the plant or implementing measures to regulate the environment.
By understanding and providing the optimal temperature and humidity conditions for your rubber plant, you are creating a nurturing environment for its growth and development. Regular monitoring and adjustments will ensure the plant remains happy and healthy for years to come.
Watering your rubber plant correctly
Proper watering is essential for the health and vitality of your rubber plant. Finding the right balance will help prevent issues like root rot or dehydration. Here are some guidelines to help you water your rubber plant correctly:
1. Check the moisture level: Before watering, check the moisture level of the soil by inserting your finger about an inch deep. If the soil feels dry, it’s time to water. However, if it still feels slightly damp, hold off on watering for a few more days.
2. Water thoroughly: When it’s time to water, make sure to thoroughly moisten the entire root ball. Water the plant until you see it trickling out of the drainage holes at the bottom of the pot. This ensures that the water reaches all the roots effectively.
3. Drain excess water: After watering, make sure to discard any excess water that collects in the saucer or tray beneath the pot. Standing water can lead to root rot and other fungal diseases. Empty the saucer or tray to prevent water from being reabsorbed by the roots.
4. Adjust watering frequency: The watering frequency depends on various factors like the size of the pot, humidity levels, and temperature. As a general rule, water your rubber plant every 7-10 days, but adjust accordingly based on the moisture level of the soil. Avoid overwatering, as this can lead to root rot.
5. Monitor humidity: Rubber plants enjoy moderate humidity levels. If the air in your home is dry, consider placing a humidifier near your plant or misting the leaves regularly. This helps prevent the leaves from drying out and promotes overall plant health.
6. Observe leaf drooping: When your rubber plant’s leaves are excessively drooping, it may indicate that the plant needs water. However, if the leaves are still firm and upright, hold off on watering to prevent overhydration.
7. Seasonal adjustments: During the dormant winter months, your rubber plant may require less water due to slower growth. Conversely, during the warmer, active growing season, it may require more frequent watering. Monitor the plant’s needs and adjust accordingly.
By watering your rubber plant correctly, you are promoting healthy root growth and overall plant well-being. Remember to monitor the moisture level of the soil and adjust the watering frequency as needed. With proper care, your rubber plant will thrive and bring beauty to your indoor space.
Fertilizing your rubber plant for growth and health
Fertilizing your rubber plant is crucial for providing it with the nutrients it needs for optimal growth and overall plant health. Here are some guidelines to help you fertilize your rubber plant effectively:
1. Choose the right fertilizer: Look for a balanced, water-soluble fertilizer designed for houseplants. A general-purpose fertilizer with equal parts nitrogen, phosphorus, and potassium (NPK) is suitable for rubber plants. Alternatively, you can use a slow-release granular fertilizer specifically formulated for indoor plants.
2. Follow the recommended dosage: Read the instructions on the fertilizer package and follow the recommended dosage. Over-fertilizing can burn the roots, so it is important to use the correct amount. Generally, a monthly application during the growing season (spring and summer) is sufficient for rubber plants.
3. Dilute the fertilizer: If using a water-soluble fertilizer, dilute it according to the instructions on the package. Avoid applying concentrated fertilizer directly to the soil, as this can cause fertilizer burn. Diluting the fertilizer ensures that the nutrients are evenly distributed and absorbed by the plant.
4. Apply fertilizer to damp soil: Before applying the fertilizer, water your rubber plant thoroughly. Applying fertilizer to damp soil helps prevent root damage and allows the nutrients to be absorbed more effectively.
5. Avoid fertilizing during dormancy: During the winter months, your rubber plant enters a dormant phase, and its growth slows down. It is best to avoid fertilizing during this time. Resume fertilizing in early spring when the plant begins to show signs of active growth.
6. Up the frequency for fast-growing plants: If your rubber plant is growing rapidly and producing new leaves, you may increase the frequency of fertilization to every two weeks during the growing season. This helps meet the increased nutrient demands of the plant.
7. Assess plant response: Monitor your rubber plant’s response to fertilization. If the leaves start to yellow or curl, it could be a sign of over-fertilization. In this case, reduce the frequency or concentration of the fertilizer.
8. Maintain a balanced approach: Fertilizing is important, but it should not replace other essential aspects of plant care, such as proper watering and light. Maintain a balanced approach and ensure that your rubber plant receives adequate water, light, and nutrients for overall health and growth.
By fertilizing your rubber plant following these guidelines, you are providing the necessary nutrients for its growth and vitality. Remember to follow the recommended dosage, assess the plant’s response, and maintain a balanced approach for the best results. With proper care, your rubber plant will thrive and add beauty to your indoor space.
Pruning and shaping your rubber plant
Pruning and shaping your rubber plant is an important aspect of its care routine. Regular pruning helps maintain the plant’s shape, promotes healthy growth, and removes any damaged or diseased parts. Here’s a guide to pruning and shaping your rubber plant:
1. Prune for maintenance: Regularly inspect your rubber plant for any yellowed or brown leaves, as well as any dead or dying foliage. Use sharp, clean pruning shears to remove these damaged leaves and stems. This promotes overall plant health and prevents the spread of diseases.
2. Shape for aesthetics: If you wish to shape your rubber plant for aesthetic purposes, start by identifying the areas you want to trim. You can trim the top to control the plant’s height or prune the sides to create a more bushy appearance. Take your time and make small, controlled cuts to achieve the desired shape.
3. Consider the “one-third” rule: When pruning your rubber plant for shaping, follow the “one-third” rule. Avoid removing more than one-third of the plant at a time. This ensures that the plant doesn’t experience excessive stress and allows it to recover effectively.
4. Clean your tools: Before pruning, make sure your pruning shears or scissors are clean and disinfected. This helps prevent the spread of diseases or infections. Wipe the blades with rubbing alcohol or a solution of 1 part bleach to 9 parts water and allow them to dry before using.
5. Create a bushier plant: If you want your rubber plant to have a fuller, bushier appearance, consider pinching or cutting back the new growth tips. This encourages side branching and helps create a denser foliage arrangement.
6. Watch for sap: Rubber plants produce a milky white sap that can be irritating to the skin. When pruning or shaping your plant, be cautious and avoid contact with the sap. If sap does get on your skin, wash it off with mild soap and water.
7. Prune in stages: If your rubber plant needs significant pruning, it’s best to do it in stages. Instead of trimming everything at once, prune a few branches or stems at a time, allowing the plant to recover between pruning sessions. This minimizes the risk of shock and gives the plant time to adjust to the changes.
By regularly pruning and shaping your rubber plant, you can ensure its health, control its size, and create an aesthetically pleasing appearance. Remember to prune selectively, disinfect your tools, and be mindful of the sap. With proper pruning care, your rubber plant will continue to thrive and enhance your indoor space.
Potting and repotting your rubber plant
Potting and repotting your rubber plant are important tasks that contribute to its overall health and growth. Being aware of when and how to pot or repot your plant ensures that it has enough space for root development and receives the necessary nutrients. Here’s a guide to potting and repotting your rubber plant:
1. Choosing the right pot: Select a pot with drainage holes to prevent waterlogging. Plastic or ceramic pots work well for rubber plants as they retain moisture better than clay pots. Choose a pot that is one size larger than the current pot to allow room for growth.
2. Potting a new rubber plant: If you have recently purchased a rubber plant, it may need to be repotted. Carefully remove the plant from its nursery container and place it into the new pot. Fill in the gaps with a well-draining potting mix, making sure the soil is firmly packed around the roots.
3. Repotting an established rubber plant: As your rubber plant grows, you may need to repot it every 1-2 years. Signs it may be time to repot include roots coming out of the drainage holes, slow growth, or the plant becoming top-heavy. Gently remove the plant from its current pot, tease out the roots, and place it into a larger pot, following the same potting process mentioned above.
4. Soil and potting mix: Use a well-draining soil mix for your rubber plant. A mix of peat moss, perlite, and coarse sand or vermiculite works well. Avoid using heavy garden soil as it retains too much moisture, which can lead to root rot. You can also add some organic matter like compost to enrich the soil.
5. Watering after potting: After potting or repotting, thoroughly water the rubber plant to settle the soil and ensure the roots have good contact with the new potting mix. Be cautious not to overwater immediately after potting, as the plant may need time to adjust to its new environment.
6. Location after repotting: After repotting, place your rubber plant in a location with bright, indirect light. Avoid direct sunlight for a few days as the plant may be more sensitive after being repotted. Gradually introduce it to brighter light over time.
7. Monitor post-repotting: Watch for signs of stress such as drooping leaves or wilting. Give the plant some time to adjust to its new pot and continue regular care to support its recovery.
By understanding how to pot and repot your rubber plant, you provide it with the space it needs for healthy root growth and development. Remember to choose the right pot and potting mix, water after potting, and monitor the plant’s response. With proper potting care, your rubber plant will continue to thrive and add beauty to your indoor space.
Dealing with common pest problems
Like any houseplant, rubber plants can sometimes encounter pest infestations. The presence of pests can compromise the health and appearance of your plant. By promptly identifying and treating common pest problems, you can protect your rubber plant and promote its well-being. Here are some common pests and methods for dealing with them:
1. Spider mites: These tiny pests are often found on the underside of leaves and cause webbing, yellowing leaves, and stunted growth. To control spider mites, regularly inspect your plant for signs of infestation. Use a steady stream of water to wash them away. For severe infestations, apply an insecticidal soap or neem oil following the product instructions.
2. Mealybugs: Mealybugs are small, soft-bodied insects that feed on plant sap. They leave behind a white, cottony residue and cause wilting and yellowing of leaves. Remove mealybugs by dabbing them with a cotton swab dipped in rubbing alcohol or by spraying them with a mixture of water and mild dish soap. Repeat treatments as necessary.
3. Scale insects: Scale insects appear as small bumps on the plant’s stems and leaves. They feed on plant sap and secrete a protective shell. Gently scrape off the scales with a soft brush or cotton swab dipped in rubbing alcohol or soapy water. Monitor the plant for any signs of recurring infestation.
4. Aphids: Aphids are small, pear-shaped insects that cluster on new growth and leaves. They suck the sap from the plant, causing distorted leaves and a sticky residue. Blast them off the plant with a strong stream of water or use insecticidal soap or neem oil to control their population.
5. Fungus gnats: Fungus gnats are small, dark-colored flying insects that hover around the soil and lay eggs in damp conditions. Allow the soil to dry out between waterings, as this helps control their population. You can also use sticky traps to catch adult gnats and prevent them from laying eggs.
6. Preventative measures: To minimize the risk of pest infestations, practice good plant care. Regularly inspect your rubber plant for any signs of pests, keep the plant and its surroundings clean, and avoid overwatering or allowing water to accumulate in the saucer. Healthy, well-maintained plants are less susceptible to pests.
7. Isolate infested plants: If one of your rubber plants becomes infested, it’s important to isolate it from other plants to prevent the infestation from spreading. This allows you to focus on treating and controlling the problem without affecting other plants.
By actively monitoring your rubber plant for common pest problems and taking appropriate measures to control them, you can ensure the continued health and vitality of your plant. Regularly inspect your plants, spot-treat infestations promptly, and maintain good plant care practices to prevent future pest issues. With proper pest management, your rubber plant will thrive and bring beauty to your indoor space.
Troubleshooting yellow leaves on your rubber plant
Yellow leaves on your rubber plant can be a cause for concern, as they may indicate an underlying issue that needs to be addressed. Understanding the potential causes and troubleshooting techniques can help you identify and resolve the problem. Here are some common reasons for yellow leaves on a rubber plant:
1. Overwatering: One of the most common causes of yellow leaves is overwatering. Rubber plants can be sensitive to excessive moisture, leading to root rot. If the soil feels consistently wet and the leaves are yellowing and drooping, it’s a sign of overwatering. Adjust your watering schedule and ensure proper drainage to prevent waterlogged soil.
2. Underwatering: Conversely, underwatering can also cause leaves to turn yellow. If the soil feels dry and the leaves appear wilting or crispy, it’s likely that your rubber plant is not receiving enough water. Increase your watering frequency while ensuring proper drainage to keep the soil evenly moist.
3. Lack of light: Insufficient light can result in slower growth and yellowing leaves. Rubber plants require bright, indirect light to thrive. If the plant is not getting enough light, try moving it closer to a window or supplementing with artificial grow lights.
4. Nutrient deficiency: A lack of essential nutrients can cause the leaves to turn yellow. Rubber plants generally require a balanced fertilizer with equal parts nitrogen, phosphorus, and potassium (NPK). Check the plant’s feeding schedule and ensure you are providing adequate nutrients for healthy growth.
5. Temperature stress: Extreme temperature fluctuations or exposure to cold drafts can contribute to yellowing leaves. Rubber plants prefer temperatures between 60-80°F (15-26°C). Avoid placing the plant near air conditioning vents, doors, or windows where it can be exposed to cold drafts.
6. Pest infestation: Certain pests, like spider mites or mealybugs, can cause yellowing of leaves. Inspect your plant for any signs of infestation, such as webbing or sticky residue. Treat the plant with appropriate insecticidal soap or neem oil to control pests and prevent further damage.
7. Natural leaf shedding: It’s also important to remember that some yellowing and leaf dropping is a natural part of the plant’s life cycle. Older leaves naturally yellow and eventually fall off. However, if the yellowing is excessive and affecting multiple leaves, it’s likely not just natural shedding.
By troubleshooting and addressing the specific cause of yellow leaves on your rubber plant, you can restore its health and vibrancy. Adjust your watering routine, ensure proper lighting and temperature conditions, provide essential nutrients, and address any pest issues. With the right care, your rubber plant will regain its lush, green foliage.
Propagating your rubber plant
Propagating your rubber plant allows you to create new plants from existing ones, expanding your indoor garden and sharing the beauty of these lush plants. There are a few methods you can use to propagate your rubber plant, each with its own advantages. Here are some popular propagation techniques:
1. Stem cuttings: Stem cuttings are the most common way to propagate rubber plants. Choose a healthy, mature stem and make a clean cut just below a node, using sharp, sterile pruning shears. Remove the lower leaves, leaving a few at the top. Dip the cut end in rooting hormone to encourage root growth. Place the cutting in a container with moist, well-draining potting mix and cover it with a plastic bag to create a mini greenhouse. Keep the soil consistently moist and provide bright, indirect light. Roots should start to develop in a few weeks, and once they are well established, you can transfer the cutting to its own pot.
2. Air layering: Air layering is a method where you create a new plant while it is still attached to the mother plant. Select a healthy stem and make a small cut or scrape off a section of the outer bark. Apply rooting hormone to the exposed area. Wrap the wounded section with damp sphagnum moss and secure it with plastic wrap. Keep the moss moist and wait for roots to form. Once roots are visible through the moss, carefully cut below the air layer and pot it up as a new plant.
3. Water propagation: Water propagation is a simple method that involves placing a rubber plant cutting in a container of water. Select a healthy stem cutting and remove the lower leaves. Place the cutting in a jar or glass filled with water, making sure that the nodes are submerged. Place the container in a bright location, away from direct sunlight. Change the water every few days to prevent rot. After a few weeks, you should see roots forming. Once the roots are a few inches long, transfer the cutting to a pot with well-draining soil.
4. Division: Another method to propagate your rubber plant is through division. Carefully remove the plant from its pot and separate the root system into two or more sections, ensuring that each section has roots and stems. Pot each section in its own container, using well-draining soil. Water thoroughly and provide the same care as you would for a mature rubber plant.
5. Leaf propagation: While less common, rubber plants can also be propagated from individual leaves. Select a healthy leaf and cut it into sections, ensuring that each section has a vein. Place the leaf sections in a container with moist, well-draining soil or sphagnum moss. Keep the soil or moss consistently moist and provide high humidity by covering the container with a plastic bag or using a propagation dome. Roots and new plantlets should emerge from the leaf sections in a few weeks.
Experiment with different propagation methods to see which one works best for you. Remember to provide proper care, including adequate light, moisture, and temperature, to help the new plants thrive. With successful propagation, you can expand your collection of rubber plants and enjoy the satisfaction of growing new plants from existing ones.