
Signs that Your Rubber Plant Needs to be Repotted
Your rubber plant is a hardy and resilient houseplant, but there comes a time when it will outgrow its current pot and require repotting. Here are some signs to look out for that indicate your rubber plant needs a new home:
- Roots outgrowing the pot: Take a look at the drainage holes at the bottom of the pot. If you see roots poking out or circling around, it’s a clear indication that the plant has outgrown its current container.
- Stunted growth: If you notice that your rubber plant’s growth has slowed down or it’s not producing new leaves as frequently as before, it may be a sign that the root system is becoming cramped.
- Poor drainage: Over time, the soil in your rubber plant’s pot can become compacted, preventing proper drainage. If you observe excess water pooling on the surface or the soil remains soggy even days after watering, it’s time to repot.
- Yellowing or wilting leaves: When the roots of a rubber plant become overcrowded, they struggle to absorb water and nutrients effectively. This leads to yellowing and wilting leaves, indicating that it’s time for a larger pot.
- Root bound plant: Gently remove your rubber plant from its current pot, and if you see a dense mass of roots tightly coiled around each other, the plant is root-bound. Repotting is necessary to give the roots more space to grow.
Ultimately, it’s vital to pay attention to the overall health and appearance of your rubber plant. If you notice any combination of these signs, it’s time to give your plant a bigger and better home.
Choosing the Right Time to Repot Your Rubber Plant
Repotting your rubber plant at the appropriate time is essential for its continued health and growth. Here are some factors to consider when determining the right timing:
Growth season: The best time to repot your rubber plant is during its active growth season, which typically occurs in spring or early summer. During this time, the plant is better equipped to recover from the transplanting process and adjust to its new surroundings.
Visible signs of distress: If you notice any signs of distress in your rubber plant, such as stunted growth, yellowing leaves, or the aforementioned signs that indicate the need for repotting, it’s important not to delay the process. Addressing these issues promptly will help prevent further damage and promote the plant’s overall well-being.
Before it becomes significantly root-bound: While it’s essential to wait for visible signs that the plant needs repotting, it’s also crucial not to wait until it becomes severely root-bound. Managing the size of the root system and ensuring it has the proper space to grow is crucial for the plant’s health and development.
Avoid repotting during winter dormancy: Rubber plants typically experience a period of dormancy during the winter months, and it’s best to avoid repotting during this time. The plant’s energy levels are low, and its capacity to recover from transplant shock is reduced. It’s better to wait until the following growing season to repot.
Availability of time and resources: Repotting a rubber plant requires some time and preparation. Make sure you have all the necessary supplies, such as a larger pot, fresh soil, and tools, and set aside a dedicated period to carry out the repotting process without rushing.
By carefully considering these factors, you can choose the right time to repot your rubber plant, ensuring the best chances for successful transplantation and continued growth.
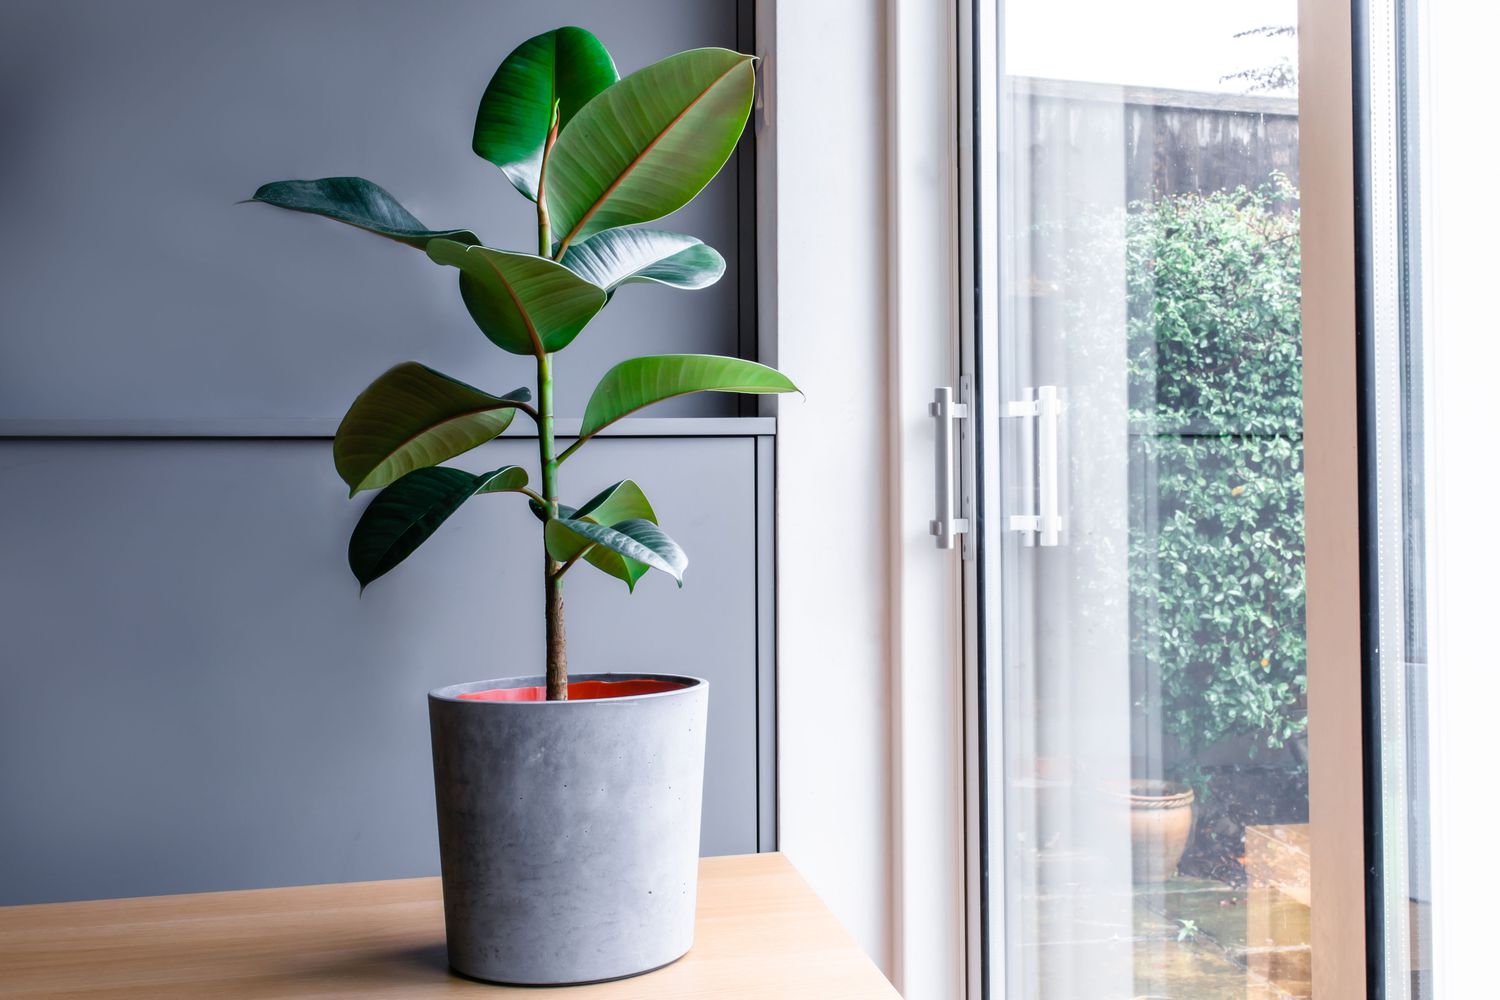
Selecting the Perfect Pot for Your Rubber Plant
Choosing the right pot for your rubber plant is crucial as it directly affects its growth and overall health. Here are some factors to consider when selecting the perfect pot:
Size: The new pot should be one to two inches larger in diameter than the current pot. Avoid going too big, as excessive space can lead to overwatering and potential root rot. A slightly larger pot allows for adequate root growth and prevents the plant from becoming root-bound.
Drainage: Ensure that the pot has drainage holes at the bottom to allow excess water to escape. Good drainage is crucial as it prevents water from stagnating in the soil, which can lead to root rot. Additionally, consider using a saucer under the pot to catch any water that drains out.
Material: Both plastic and terracotta pots are suitable options for rubber plants. Plastic pots retain moisture better and are lighter in weight, making them easier to handle. Terracotta pots are porous, allowing for better airflow to the roots, but they may lead to faster drying out of the soil, requiring more frequent watering.
Style and aesthetics: Consider the overall look and feel you want to achieve with your rubber plant. Choose a pot that complements your interior design and personal style. There are various colors, shapes, and finishes available, so you can find one that enhances the overall beauty of your plant.
Stability: Ensure that the pot is stable and will not easily tip over. Rubber plants can grow tall and become top-heavy, so a pot with a wider base or using a plant stand can provide additional stability and prevent accidents.
Quality: Invest in a high-quality pot that will withstand the test of time. Look for pots made from durable materials and ensure they are free from any cracks or damage that could hinder the plant’s growth.
By considering these factors, you can select the perfect pot for your rubber plant, providing it with a suitable environment for thriving growth and adding a touch of style to your space.
The Importance of Choosing the Right Soil for Repotting
When repotting your rubber plant, selecting the right soil is crucial for its overall health and well-being. Here’s why choosing the correct soil is so important:
Adequate drainage: Rubber plants prefer well-draining soil that allows excess water to flow through easily. This prevents water from pooling at the bottom of the pot, which can lead to root rot. A good potting mix should be light and airy, containing materials like perlite or vermiculite to enhance drainage.
Nutrient availability: The right soil should provide essential nutrients for your rubber plant’s growth. Look for a potting mix that is rich in organic matter, such as compost or peat moss. This will ensure that your plant receives the necessary nutrients for healthy foliage and overall development.
Aeration: Proper aeration is crucial for the root system of your rubber plant. The soil should allow for oxygen to reach the roots effectively, promoting root growth and preventing issues such as root suffocation. A well-draining soil with good aeration prevents excess moisture, which can lead to fungal and bacterial diseases.
pH balance: Rubber plants prefer slightly acidic to neutral soil, with a pH level between 6.0 and 7.0. Check the pH level of your chosen potting mix and ensure it falls within this range. This will help the roots absorb nutrients more efficiently and support the overall health of the plant.
Moisture retention: While good drainage is essential, the soil should also have the ability to retain moisture to ensure consistent hydration for your rubber plant. Look for a potting mix that strikes a balance between adequate moisture retention and efficient drainage. This will prevent the soil from drying out too quickly between waterings.
Quality and sterilization: It is important to use a high-quality, sterilized potting mix for repotting your rubber plant. This helps prevent the introduction of pests, diseases, and weed seeds that can harm your plant. Avoid using garden soil for indoor plants, as it may not provide the necessary characteristics required for successful indoor growth.
By choosing the right soil for repotting, you can provide your rubber plant with the optimal growing environment, ensuring its successful adaptation to its new pot and promoting healthy growth in the long run.
How to Prepare Your Rubber Plant for Repotting
Before repotting your rubber plant, it’s important to properly prepare the plant to minimize stress and ensure a successful transition. Here are the steps to follow:
1. Water the plant: A day or two before repotting, give your rubber plant a thorough watering. This will help hydrate the roots, making them easier to work with and reducing the risk of transplant shock.
2. Choose the right location: Find a well-lit area with enough space to comfortably work with your rubber plant. Clear a table or counter and gather all the necessary tools and materials beforehand.
3. Gather the materials: Collect all the items you’ll need for repotting, including a larger pot, fresh potting soil, gardening gloves, a trowel or scoop, and any additional supports or stakes if required.
4. Carefully remove the plant from its current pot: Gently turn the pot over and tap the sides to loosen the root ball. Slowly lift the plant out by grasping the base of the stem or using a hand on either side of the pot. Be careful not to damage the roots.
5. Inspect the roots: Once you’ve removed the plant from its pot, inspect the roots for any signs of damage, pests, or disease. Trim away any dead or rotting roots using clean, sharp pruning shears, ensuring that you cut at an angle to promote healthy growth.
6. Loosen the root ball: Gently loosen the root ball by using your fingers or a tool to carefully tease apart the roots. This helps stimulate new growth and encourages the roots to spread out in the new potting soil.
7. Prepare the new pot: Fill the new pot one-third of the way with fresh, well-draining potting soil. Create a small mound in the center for the plant to sit on, ensuring the top of the root ball is level with the rim of the pot.
8. Repot the plant: Place the rubber plant into the new pot, adjusting the position if necessary. Add more potting soil around the sides, gently pressing it down to provide stability and remove any air pockets. Continue filling the pot until the soil covers the roots and reaches the desired height.
9. Water and settle the soil: Thoroughly water the plant until the excess water drains through the bottom of the pot. This helps settle the soil and ensures proper hydration for the roots. Avoid overwatering, as it can lead to root rot.
10. Provide support if needed: If your rubber plant is top-heavy or prone to leaning, use stakes or supports to secure the plant in an upright position. This helps prevent damage to the stems and promotes straight and healthy growth.
By following these steps, you can properly prepare your rubber plant for repotting, minimizing stress and giving it the best chance to thrive in its new home.
Step-by-Step Guide to Repotting Your Rubber Plant
Repotting your rubber plant is a straightforward process when done correctly. Follow these step-by-step instructions for a successful repotting:
Step 1: Gather your materials: Collect all the necessary materials, including a larger pot, fresh potting soil, gardening gloves, pruning shears, a trowel or scoop, and any additional supports or stakes if needed.
Step 2: Prepare the new pot: Fill the new pot about one-third full with fresh, well-draining potting soil. Create a small mound in the center to support the plant.
Step 3: Water the plant: Give your rubber plant a thorough watering a day or two before repotting. This helps hydrate the roots and makes them easier to work with.
Step 4: Carefully remove the plant from its current pot: Turn the pot upside down and gently tap the sides to loosen the root ball. Slide the plant out, taking care not to damage the roots.
Step 5: Inspect and trim the roots: Inspect the roots for any signs of damage or disease. Trim away any dead or rotting roots using clean, sharp pruning shears.
Step 6: Loosen the root ball: Use your fingers or a tool to gently loosen the root ball. This stimulates new growth and helps the roots spread out in the new potting soil.
Step 7: Place the plant in the new pot: Position the rubber plant in the center of the new pot, ensuring the top of the root ball is level with the rim of the pot.
Step 8: Fill the pot with soil: Begin filling the pot with fresh potting soil, gradually adding it around the sides of the root ball. Gently press the soil down to provide stability and remove any air pockets.
Step 9: Water the plant: Thoroughly water the plant until the excess water drains through the bottom of the pot. This helps settle the soil and provides sufficient hydration for the roots.
Step 10: Provide support if needed: If your rubber plant is top-heavy or tends to lean, use stakes or supports to secure the plant in an upright position.
Step 11: Clean up: Clean up any soil or debris around the pot and give your rubber plant a gentle wipe-down to remove any dust or dirt.
Step 12: Place the plant in its new location: Find a suitable spot for your newly repotted rubber plant, ensuring it receives adequate light and is away from drafts or extreme temperature fluctuations.
By following these step-by-step instructions, you can confidently repot your rubber plant and provide it with a fresh start in a new pot, ensuring its continued growth and well-being.
Tips for Minimizing Stress During Repotting
Repotting can be a stressful process for your rubber plant. However, with the right techniques, you can minimize the stress and ensure a smooth transition. Here are some tips to help you during the repotting process:
1. Be gentle: Handle your rubber plant with care to avoid damaging the stems or roots. Use soft and gentle movements when removing it from the old pot and placing it into the new one.
2. Choose the right time: Repot your rubber plant during its active growth phase, typically in spring or early summer. During this time, the plant is better equipped to recover from the shock of transplanting.
3. Water beforehand: Give your rubber plant a thorough watering a day or two before repotting. This keeps the roots hydrated and makes them easier to work with during the process.
4. Use a well-draining soil: Ensure you choose a well-draining potting mix to prevent waterlogged soil, which can lead to root rot. Good drainage helps the roots breathe and minimizes the risk of overwatering.
5. Avoid direct sunlight: After repotting, keep your rubber plant away from direct sunlight for a few days. This allows the plant to recover from the stress of repotting without the added stress of intense sunlight.
6. Don’t fertilize immediately: Avoid applying fertilizer right after repotting. Wait for a few weeks to allow the plant to adjust to its new environment before reintroducing nutrients.
7. Maintain consistent watering: After repotting, it’s important to water your rubber plant consistently and avoid drastic changes in watering habits. This helps the plant settle into its new pot and minimizes stress.
8. Monitor humidity levels: Rubber plants prefer moderate humidity. Consider using a humidity tray or a room humidifier to help maintain optimal moisture levels while the plant adjusts to its new pot.
9. Observe and make adjustments: Keep a close eye on your rubber plant after repotting. Monitor its growth, check for signs of stress or nutrient deficiencies, and make adjustments as needed to ensure its well-being.
10. Be patient: Give your rubber plant time to adjust to its new pot. Transplant shock is normal, and it may take a few weeks for the plant to fully recover. Be patient and provide proper care during this time.
By following these tips, you can minimize stress and provide the best conditions for your rubber plant during the repotting process, ensuring a successful transition and continued growth.
Aftercare: Caring for Your Newly Repotted Rubber Plant
After repotting your rubber plant, it’s important to provide proper care to help it adjust and thrive in its new pot. Here are some essential tips for the aftercare of your newly repotted rubber plant:
1. Watering: Continue to water your rubber plant regularly, keeping the soil consistently moist but not waterlogged. Avoid overwatering, as it can lead to root rot. Allow the top inch or so of soil to dry out before watering again.
2. Lighting: Place your rubber plant in a location with bright, indirect sunlight. Avoid exposing it to direct sunlight, as it can scorch the leaves. Adequate light is essential for the plant’s growth and overall health.
3. Temperature and humidity: Rubber plants thrive in average room temperatures between 60-75°F (15-24°C). Maintain a moderate level of humidity around the plant, around 40-60%, to create a favorable environment.
4. Fertilizing: Wait for a few weeks after repotting before applying fertilizer. This gives the plant time to adjust to its new pot. Once it has settled, use a balanced, water-soluble fertilizer and feed your rubber plant every few months during the growing season.
5. Pruning: Regularly check your rubber plant for any dead, damaged, or yellowing leaves. Prune them off using clean pruning shears. This helps maintain the plant’s appearance and promotes new growth.
6. Preventing pests: Keep a close eye on your rubber plant for any signs of pests, such as spider mites or mealybugs. Regularly inspect the leaves and stems, and if you spot any pests, take appropriate measures to eradicate them. This may involve using insecticidal soap or wiping the pests off with a damp cloth.
7. Adjusting support: If you provided any support or stakes for your rubber plant, regularly check their effectiveness. As the plant grows, reposition or adjust the stakes to ensure they continue to provide the necessary support.
8. Patience: It’s important to be patient with your newly repotted rubber plant. It may take some time for the plant to adjust and fully recover from the repotting process. Allow it to settle into its new pot and provide consistent care as needed.
9. Regular maintenance: Monitor your rubber plant regularly for any signs of stress, nutrient deficiencies, or other issues. Take prompt action to address any problems that arise to ensure the continued health and vitality of your plant.
10. Enjoy your plant: Finally, take the time to appreciate and enjoy your newly repotted rubber plant. With proper care and attention, it will continue to grow and beautify your space for years to come.
By following these aftercare tips, you can ensure that your newly repotted rubber plant thrives and maintains its health and beauty in its new pot.