
Choosing the Right Stem for Propagation
Propagating a rubber plant in water is an easy and rewarding way to expand your plant collection. However, it is important to choose the right stem for successful propagation. Here are some key factors to consider when selecting a stem:
- Healthy and mature stem: Look for a stem that is healthy, free from any signs of disease or pests. It should also be mature enough to have developed nodes, which are crucial for root growth.
- Length and thickness: Opt for a stem that is around 6 to 8 inches long. This length allows for ample space for rooting. In terms of thickness, choose a stem that is about ¼ to ½ inch in diameter, as this will have a better chance of successfully developing roots in water.
- Leaf nodes: Check for leaf nodes along the stem. Leaf nodes are the small raised areas where the leaves are attached. These nodes contain dormant buds that will sprout new roots once placed in water.
- Aerial roots: If possible, select a stem that already has aerial roots emerging from the nodes. Aerial roots indicate that the plant is actively seeking water and nutrients, making it more likely to successfully root in water.
- Choose multiple stems: It’s recommended to select multiple stems for propagation, rather than relying on just one. This increases the chances of success and gives you more opportunities to grow new plants.
By carefully considering these factors, you can ensure that you choose the most suitable stem for propagation. Remember to handle the stem with care when cutting it from the mother plant to avoid any damage. With the right stem, you’ll be on your way to growing a flourishing rubber plant in no time.
Preparing the Stem for Propagation
Once you’ve selected the right stem for propagation, it’s crucial to properly prepare it to maximize its chances of successfully rooting in water. Follow these steps to prepare the stem:
- Clean and sharp tools: Before cutting the stem, make sure you have clean and sharp pruning shears or a knife. This helps to minimize the risk of introducing any diseases or pests to the plant.
- Cut just below a node: Using your sterilized tools, make a clean cut just below a leaf node. This will provide the best opportunity for the stem to develop new roots.
- Remove lower leaves: Strip away the leaves from the lower half of the stem. Leave a few leaves at the top to continue photosynthesis, but removing the lower ones helps to prevent them from rotting in the water.
- Optional use of rooting hormone: If you have a rooting hormone powder or gel, you can dip the bottom end of the stem into it. This can help stimulate root growth and increase the chances of successful propagation.
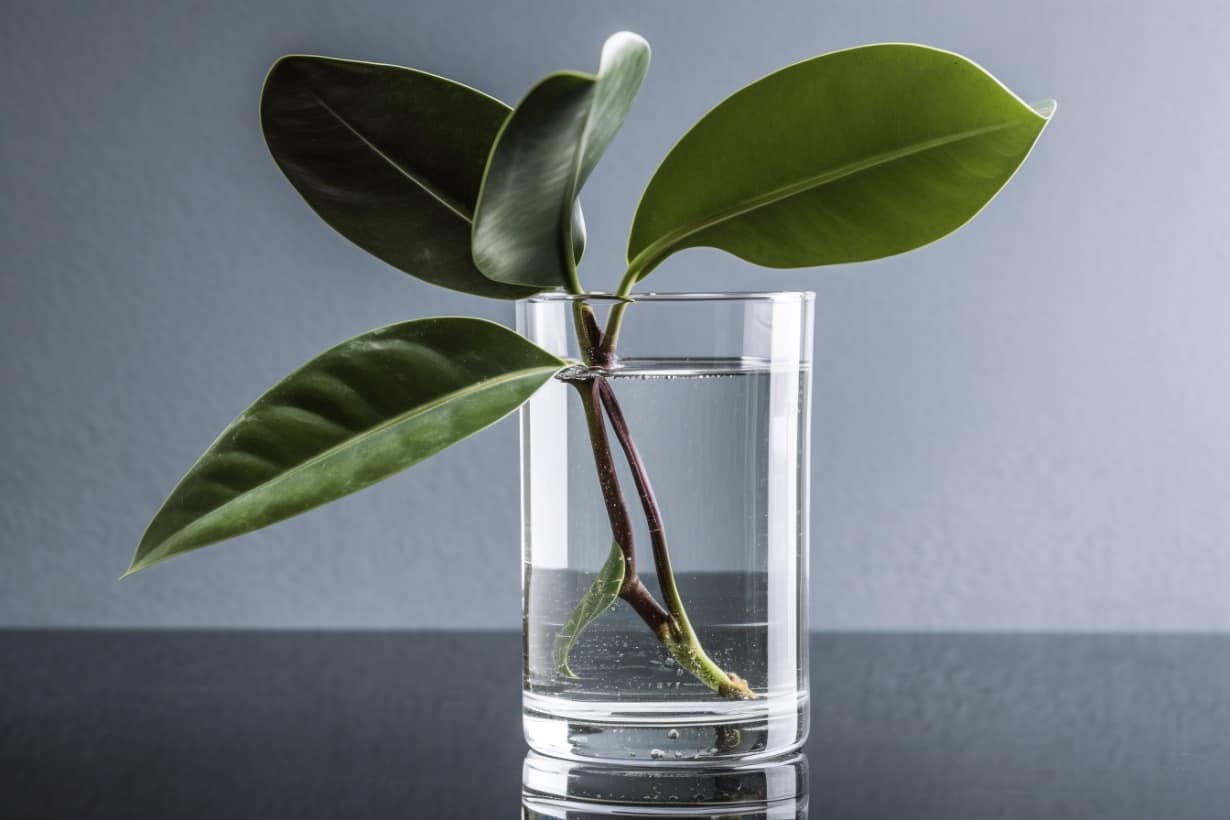
- Place the stem in water: Fill a clean glass or jar with filtered water or tap water that has been left to sit overnight. Place the prepared stem in the water, ensuring that the bottom end is submerged, while the leaves are kept above the water surface.
By following these preparation steps, you provide the stem with the optimal conditions to begin rooting. The clean cut, removal of lower leaves, and potential use of rooting hormone all support the stem’s ability to develop new roots. Placing the stem in water allows it to absorb the necessary moisture and nutrients for growth.
Remember to choose a vessel that allows the stem to stand upright and provides stability. Avoid using containers with narrow openings that could cause the stem to bend or topple over. Additionally, place the stem in a location with indirect sunlight to prevent excessive heat and light exposure, which could harm the cutting.
Placing the Stem in Water
After preparing the stem for propagation, the next step is to properly place it in water. This step is crucial as it provides the necessary environment for the stem to develop new roots. Here’s how to successfully place the stem in water:
- Select an appropriate container: Choose a glass or jar that is clean and tall enough to support the stem without it touching the sides. This prevents the leaves from submerging in water, which can cause them to rot.
- Fill the container with water: Fill the container with filtered water or tap water that has been left to sit overnight. Make sure there is enough water to cover the bottom portion of the stem.
- Place the stem in the water: Gently insert the prepared stem into the container, ensuring that the cut end is fully submerged in the water. The remaining leaves should be resting above the water’s surface.
- Stabilize the stem: If necessary, use small rocks or pebbles to keep the stem upright in the container. This will prevent it from leaning or falling over, allowing the roots to properly develop.
It’s important to choose a container that allows for stability and easy monitoring. A transparent container is preferred, as it allows you to observe any changes in water level or root development. Place the container in a location with indirect sunlight, as excessive heat or direct sunlight may harm the stem.
Throughout the propagation process, it’s essential to keep a close eye on the water level to ensure that the bottom end of the stem remains submerged. If the water level drops significantly, carefully add more water to maintain the desired depth.
By placing the stem in water, you provide it with the ideal environment to develop new roots. The water supplies the necessary hydration and nutrients for the stem to successfully propagate and grow into a thriving rubber plant.
Monitoring the Water Level
When propagating a rubber plant in water, it’s important to monitor the water level to ensure the optimal conditions for root development. Proper monitoring helps provide adequate hydration to the stem and prevents problems caused by water depletion or contamination. Here’s how to effectively monitor the water level:
- Check daily: Make it a habit to check the water level in the container every day. This allows you to spot any significant changes and take necessary actions promptly.
- Keep the stem submerged: Ensure that the bottom end of the stem remains fully submerged in water at all times. The water should cover the area where the stem was cut to encourage root growth.
- Refill as needed: If you notice the water level dropping below the cut end of the stem, carefully add enough water to bring it back to the desired level. Use room temperature water or allow any tap water to sit overnight before adding it to the container.
- Prevent water stagnation: While it’s essential to maintain a sufficient water level, avoid letting the water sit in the container for too long, as stagnant water can lead to fungal or bacterial growth. If necessary, replace the water every few days to keep it fresh.
- Observe plant health: Monitor the overall health of the stem and leaves during the propagation process. If you notice any yellowing or wilting, it may indicate that the water conditions are not optimal. Adjust the water level or quality, if necessary.
By regularly monitoring the water level, you are actively taking care of the propagation process. Consistently maintaining an appropriate water level ensures that the stem receives the necessary hydration, allowing it to focus its energy on root development. It also helps prevent issues such as water stress or rotting.
Remember to handle the stem and container with care when adjusting the water level to prevent any damage or accidents. With proper monitoring, you’ll provide the ideal environment for your rubber plant stem to develop healthy and robust roots.
Changing the Water Regularly
When propagating a rubber plant stem in water, it’s important to change the water regularly to maintain a healthy environment for root development. Stagnant water can lead to the accumulation of bacteria, algae, and other microorganisms, which can hinder the propagation process. Here’s why and how to change the water regularly:
- Preventing diseases: Regularly changing the water helps prevent the buildup of pathogens that can cause diseases in the stem. Fresh water promotes a clean and hygienic environment, reducing the risk of rot or fungal infections.
- Eliminating excess nutrients: Over time, the water can become saturated with nutrients from the decaying leaves or stem. Changing the water helps remove any excess nutrients that may hinder root development or lead to imbalances in the plant’s growth.
- Boosting oxygen levels: Oxygen is crucial for the development of healthy roots. Regularly changing the water ensures an adequate supply of oxygen, as stagnant water may become deprived of this essential element.
- Preventing foul odors: Old water that has been sitting for too long can develop a foul smell. By regularly changing the water, you can maintain a fresh and odor-free environment for the stem.
- Changing frequency: Aim to change the water every 5-7 days, or when you notice any cloudiness or unpleasant odors. Discard the old water and wash the container thoroughly before refilling it with fresh, room temperature water.
- Cleaning the container: While changing the water, take the opportunity to clean the container. Use mild soap and warm water to remove any accumulated residue. Rinse it thoroughly before refilling it with fresh water.
Changing the water regularly maintains a clean and oxygen-rich environment, fostering optimal conditions for root development. It helps prevent the risk of diseases, provides the necessary nutrients, and eliminates any stagnant water issues. Additionally, the fresh water promotes overall plant health and ensures a pleasant experience during the propagation process.
However, be cautious not to disturb the stem or the developing roots while changing the water. Handle the stem and container carefully to avoid any damage. By implementing regular water changes, you are actively nurturing and supporting the growth of your rubber plant stem.
Providing Proper Light and Temperature Conditions
When propagating a rubber plant stem in water, providing the right light and temperature conditions is crucial for successful rooting and overall plant health. Proper lighting and temperature create an ideal environment for the stem to develop strong roots. Here’s how to ensure optimal conditions:
- Indirect sunlight: Place the container with the stem in a location that receives bright, indirect sunlight. Avoid direct sunlight, as it can be too intense and cause the leaves to burn or the water to overheat. Indirect sunlight provides the necessary light energy for photosynthesis without causing harm.
- Avoid extreme temperatures: Rubber plants prefer moderate temperatures, ideally between 60°F (15°C) and 75°F (24°C). Avoid exposing the stem to extreme heat or cold as it can stress or damage the plant. Keep it away from drafts, air conditioning vents, or radiators that can create temperature fluctuations.
- Provide consistent warmth: Rubber plant stems thrive in warm environments. Aim for a consistent temperature around 70°F (21°C) to promote optimal rooting. Consider using a heating mat underneath the container to provide gentle, even warmth if necessary.
- Avoid overwatering: While proper hydration is essential, overwatering can lead to waterlogged conditions and root rot. Ensure the stem is not sitting in standing water for extended periods. The water level should remain below the leaves, and the container should have good drainage to prevent water accumulation.
- Monitor for signs of stress: During the propagation process, regularly observe the leaves and stem for any signs of stress or damage. Wilting, yellowing, or browning can indicate that the lighting or temperature conditions are not suitable. Adjust the placement of the stem accordingly to provide better lighting or temperature control.
By ensuring proper light and temperature conditions, you promote healthy growth and increase the chances of successful root development. Consistent, indirect sunlight provides the energy needed for photosynthesis, while moderate temperatures prevent stress and support optimal growth.
Remember to regularly rotate the container to ensure even light exposure on all sides of the stem. Additionally, pay attention to the moisture levels and the overall health of the stem during the propagation process. By providing the right light and temperature conditions, you create an environment where your rubber plant stem can thrive and develop into a robust, rooted plant.
Checking for Root Development
As you propagate a rubber plant stem in water, it’s important to regularly check for root development to ensure the progress of your propagation efforts. By monitoring the growth of roots, you can assess the success of your propagation and determine when it’s time to transfer the stem to soil. Here’s how to check for root development:
- Patience is key: Root development takes time, so allow at least a few weeks for roots to start forming. Be patient and avoid disturbing the stem unnecessarily during this initial stage.
- Observe the water: Transparent containers are especially helpful for monitoring root growth. Check the water regularly for any signs of roots. Look for thin, white, or light-colored structures emerging from the stem’s bottom end.
- Inspect the stem: Carefully lift the stem out of the water to examine the bottom end. Gently pat or rinse away any excess water to get a clear view of any root development.
- Look for new growth: In addition to roots, keep an eye on the stem itself for any signs of new leaf growth or increased overall vitality. This indicates that the stem is successfully adapting to its new environment and is on its way to becoming an established plant.
- Healthy root characteristics: Once roots start appearing, look for signs of healthy development. Roots should be firm, plump, and growing in a branching pattern. Avoid transferring the stem to soil until the roots are at least a few inches long.
It’s important to note that root development may vary in speed and intensity depending on several factors, including temperature, light, and genetics. Some stems may show quicker or more robust root growth than others. Be attentive and adjust the environment accordingly, if needed, to promote healthy and continuous root development.
Keep in mind that not every stem will successfully grow roots in water. If after several weeks, no roots have appeared, you may need to try a different stem or consider alternative propagation methods such as using rooting hormones or directly planting the stem in soil.
By regularly checking for root development, you can gauge the progress of your propagation efforts and determine when it’s time to transfer the stem to soil for further growth. Patience and attentive observation are key to successfully propagating a rubber plant stem in water.
Transferring the Stem to Soil
Once the rubber plant stem has successfully developed a healthy root system in water, it’s time to transfer it to soil for continued growth. Transferring the stem to soil provides the necessary nutrients and stability for the plant to thrive. Here’s how to smoothly transition the stem from water to soil:
- Select the right pot and soil: Choose a pot with drainage holes that is slightly larger than the root ball, allowing room for growth. Use well-draining potting soil mixed with perlite or sand to ensure proper moisture retention without waterlogging the roots.
- Gently remove the stem from the water: Carefully lift the stem out of the water, trying not to disturb the roots. Gently pat or rinse away any excess water, allowing the roots to be easily inserted into the soil.
- Prepare the planting hole: Make a hole in the soil with your finger or a small trowel. The hole should be large enough to accommodate the roots without bending or overcrowding them.
- Place the stem in the hole: Carefully position the stem in the planting hole, ensuring that the roots are spread out evenly and not excessively tangled. The stem should be planted at the same depth as it was in the water, with the soil covering the base of the stem.
- Backfill and firm the soil: Gently fill the hole with soil, lightly pressing it around the stem to provide stability and eliminate air pockets. Avoid packing the soil too tightly, as loose soil promotes proper root growth and aeration.
- Water thoroughly: After transferring the stem to soil, water it thoroughly to settle the soil and hydrate the roots. Water until the excess moisture drains out from the bottom of the pot. Then, place the pot in an area with bright, indirect sunlight.
Throughout the transition process, continue to monitor the plant’s health and adjust the care as needed. Avoid overwatering, as soggy soil can lead to root rot. Instead, water the plant when the top inch of soil feels dry, ensuring it receives adequate hydration without becoming waterlogged.
Transferring the rubber plant stem to soil provides a stable foundation for continued growth and development. With proper care and attention, the stem will begin to establish itself in its new environment, forming new leaves and growing into a mature rubber plant.
Remember, it’s normal for the plant to undergo a transition period as it adjusts to its new growing conditions. Give the plant time to acclimate and continue to provide the necessary care to support its growth and overall well-being.
Caring for the New Plant
After transferring the rubber plant stem to soil, it’s important to provide proper care to ensure the continued growth and well-being of the new plant. Here are some essential care tips to help your rubber plant thrive:
- Watering: Water the plant when the top inch of soil feels dry. Avoid overwatering, as it can lead to root rot. Ensure the pot has drainage holes to allow excess water to escape.
- Light: Place the rubber plant in an area with bright, indirect sunlight. Avoid direct sunlight, as it can scorch the leaves. Lack of sufficient light can cause leggy growth, so consider supplementing with artificial grow lights if needed.
- Temperature and humidity: Rubber plants prefer temperatures between 60°F (15°C) and 75°F (24°C), with moderate to high humidity. Avoid exposing the plant to cold drafts or extreme temperature fluctuations.
- Pruning: Regularly prune the rubber plant to encourage bushier growth and maintain its desired shape. Remove any dead, damaged, or yellowing leaves to promote overall plant health.
- Fertilizing: Feed the rubber plant with a balanced, water-soluble fertilizer every month during the growing season (spring and summer). Follow the instructions on the fertilizer package for proper dosage and application.
- Pest control: Monitor the plant for common pests such as spider mites, mealybugs, or scale insects. If pests are present, treat them promptly with organic insecticidal soap or neem oil, following label instructions.
- Rotate the plant: Rotate the rubber plant every few weeks to ensure even growth and prevent it from leaning towards the light source. This helps the plant maintain a balanced shape.
- Propagate more plants: Once your rubber plant is thriving, consider propagating more stems to expand your collection or share with fellow plant enthusiasts. Follow the same propagation process to create new plants.
By providing the necessary care, you create a favorable environment for your rubber plant to flourish. Regular observation of the plant’s overall health and addressing any issues promptly will help maintain its vitality.
Remember that each plant is unique, and adjustments to care may be needed based on its specific requirements. Pay attention to how your rubber plant responds to different conditions and tailor your care accordingly.
With proper care, your rubber plant will grow into a beautiful, thriving addition to your indoor garden. Enjoy the process of nurturing and witnessing the growth of your new plant!