
Choosing the Right Wood for Shelf Brackets
When it comes to building wood shelf brackets, selecting the right type of wood is crucial. The choice of wood not only affects the strength and durability of the brackets but also plays a significant role in the overall aesthetics. Here are a few factors to consider when choosing the right wood for your shelf brackets:
- Strength: Look for sturdy hardwoods such as oak, maple, or cherry that can withstand the weight of the shelves and items you plan to store. Avoid softwoods like pine or cedar, as they may not provide enough support.
- Size: Consider the size and thickness of the wood needed for your desired bracket design. Thicker wood will provide more stability, especially for larger or heavier shelves.
- Aesthetics: Think about the overall style and color scheme of your space. Choose a wood species that complements the existing decor. For a more rustic look, you might opt for reclaimed wood or distressed finishes.
- Moisture Resistance: If you plan to use the shelf brackets in a humid environment like a bathroom or kitchen, select a wood species that is naturally resistant to moisture, such as teak or cedar.
- Budget: Consider your budget when selecting the wood. Hardwoods are generally more expensive than softwoods, but they offer better durability and aesthetic appeal.
Remember to choose wood that is free from defects like knots or cracks, as these can weaken the brackets. Additionally, it’s a good idea to seal or stain the wood to protect it from moisture, scratches, and other potential sources of damage.
Measuring and Cutting the Wood
Once you have chosen the right wood for your shelf brackets, the next step is to accurately measure and cut the wood to the desired dimensions. This ensures a precise fit and proper functionality of the brackets. Here’s a step-by-step guide to measuring and cutting the wood for your shelf brackets:
- Measurements: Start by determining the desired width and depth of your shelf brackets. Measure the distance between the wall and the desired location of the shelf. Make sure to account for any trim or molding that might affect the measurements.
- Marking the Wood: Transfer your measurements onto the wood using a pencil or a marking tool. Use a square to ensure straight lines.
- Cutting: Use a miter saw or a hand saw to cut the wood along the marked lines. Take your time to ensure accurate and clean cuts.
- Safety Precautions: Always wear safety goggles and gloves when working with power tools or sharp objects. Follow proper safety guidelines to avoid accidents or injuries.
- Double-check: Verify that the cut pieces of wood are the correct dimensions and match each other. This step is crucial for maintaining balance and stability when the bracket is installed.
Remember that it’s always better to cut the wood pieces slightly longer than needed. You can trim them down gradually until you achieve the perfect fit. This approach allows for adjustments in case of any measurement errors or unforeseen changes in the wall or shelf placement.
Accurate measurements and precise cuts are vital for the success of your wood shelf brackets. Take your time and double-check your work to ensure that the brackets will fit snugly and securely in place.
Designing the Bracket Shape
The design of your wood shelf brackets not only adds functionality but also contributes to the overall aesthetic of your space. When it comes to designing the bracket shape, there are several factors to consider, including style, functionality, and load-bearing capacity. Here’s a step-by-step guide to help you design the perfect bracket shape:
- Research and Inspiration: Start by researching different bracket designs and gathering inspiration from various sources. Look for styles that align with your overall decor and personal preferences.
- Consider the Load: Assess the weight-bearing requirements of your shelves. If you plan on placing heavy items, you might want to consider a larger and more robust bracket design that can provide adequate support.
- Style and Aesthetics: Decide on the desired style of your bracket. Choose between simple and minimalist designs, ornate and decorative options, or even unique and custom shapes that reflect your personality.
- Functionality: Consider how the bracket design will affect the accessibility and usability of your shelves. Will the brackets obstruct or interfere with your ability to place or remove items from the shelves?
- Material Compatibility: Ensure that the chosen bracket design is feasible for the type of wood you are using. Complex and intricate designs might require advanced woodworking skills and tools.
- Mock-ups and Templates: Create mock-ups or templates of your bracket design using cardboard or a similar material. This allows you to visualize how the brackets will look and make any necessary adjustments before cutting the wood.
- Cutting and Shaping: Transfer the finalized bracket design onto the wood pieces and carefully cut and shape them accordingly. Take your time to ensure precision and accuracy.
Remember to prioritize functionality and load-bearing capacity when designing your brackets. While aesthetics are important, the primary purpose of the bracket is to provide support for your shelves. Don’t hesitate to consult with woodworking experts or seek inspiration from online resources to help you create a unique and visually appealing bracket design that meets your specific needs.
Sanding and Prepping the Wood
Before you proceed with assembling and installing your wood shelf brackets, it’s essential to properly sand and prep the wood. Sanding not only smoothens the surface but also helps in achieving a professional finish. Follow these steps to ensure that your wood is ready for the next stages of the project:
- Gather Materials: Collect the necessary tools and materials for sanding, including sandpaper (preferably in various grits), a sanding block or electric sander, and a dust mask.
- Clean the Wood: Use a damp cloth or tack cloth to remove any dust, dirt, or debris from the wood surface. This ensures that you have a clean canvas for sanding.
- Sand the Surface: Start with coarse-grit sandpaper (around 80 to 120 grit) to remove any rough edges, imperfections, or previous finishes. Apply even pressure and sand in the direction of the wood grain to avoid scratches.
- Progressive Sanding: Gradually transition to finer-grit sandpaper (around 220 to 400 grit) to smoothen the wood surface further. This step helps in achieving a polished and professional look.
- Remove Dust: After sanding, use a brush or a tack cloth to remove any sanding dust from the surface. Ensure that the wood is clean and free from any debris.
- Fill Imperfections (if necessary): If you notice any small cracks, holes, or gaps in the wood, now is the time to fill them using wood filler. Allow the filler to dry according to the manufacturer’s instructions.
- Finishing Prep: If desired, you can apply a wood conditioner or pre-stain treatment to prepare the wood for staining or painting. Follow the product instructions for the best results.
Sanding and prepping the wood not only enhances its appearance but also promotes better absorption of finishes, such as stains or paints, ensuring a long-lasting and professional-looking result. Take your time during this phase to achieve a smooth and flawless surface before moving on to the next steps of the project.
Attaching the Shelf Brackets to the Wall
After preparing the wood shelf brackets, it’s time to attach them securely to the wall. Proper installation ensures the stability and longevity of your shelves. Follow these steps to attach the brackets to the wall:
- Locate Studs: Use a stud finder to locate the wall studs where you want to install the brackets. Studs provide the necessary support for heavy shelves and prevent the brackets from pulling away from the wall.
- Mark Mounting Points: Mark the desired height for the brackets on the wall, ensuring they are level. Use a pencil to make small marks at the locations where the brackets will be mounted.
- Drill Pilot Holes: Using an appropriate-sized drill bit, drill pilot holes into the wall at the marked locations. The pilot holes should be slightly smaller than the screws you will use to attach the brackets.
- Attach the Brackets: Hold the first bracket against the wall, aligning it with the pilot holes. Insert screws through the bracket and into the pilot holes, but do not overtighten. Repeat this step for all brackets.
- Level Check: Use a level to ensure that the brackets are straight and level. Make any necessary adjustments as needed.
- Secure Brackets: Once you are satisfied with the placement and alignment, tighten the screws to securely attach the brackets to the wall.
It’s important to note that if you are unable to locate studs or if your bracket placement does not align with the stud locations, you will need to use wall anchors or toggle bolts to provide additional support. These hardware options can help distribute the weight evenly and prevent the brackets from loosening or pulling away from the wall.
Always follow the manufacturer’s guidelines and instructions when using wall anchors or toggle bolts, as the specific steps may vary depending on the type and size of the hardware.
Once the brackets are securely attached to the wall, they are ready to support your shelves and any items you choose to place on them. Take a moment to double-check the stability of the brackets before proceeding to the next steps of adding the shelves.
Adding the Shelf to the Brackets
With the brackets securely attached to the wall, the next step is to add the shelf onto the brackets. Proper installation of the shelf ensures stability and functionality. Follow these steps to correctly add the shelf to the brackets:
- Measure and Mark: Measure the length and depth of the shelf, then transfer these measurements onto the top surface of the shelf using a pencil or a marking tool. This will help you align the shelf properly with the brackets.
- Position the Shelf: Carefully place the shelf onto the brackets, ensuring that it aligns with the markings you made. Adjust the placement if needed to ensure equal overhang on both sides.
- Check for Level: Use a level to ensure that the shelf is level both horizontally and vertically. Make any adjustments as necessary.
- Secure the Shelf: Once the shelf is in the desired position and level, use screws or nails to secure the shelf to the brackets from underneath. Make sure to use hardware appropriate for your specific shelf material.
- Test Stability: Apply gentle pressure to the shelf to test its stability. The shelf should feel secure and not wobble or shift. If necessary, reinforce the shelf by adding additional screws or brackets.
It’s important to note that the weight capacity of the shelf should be considered when adding items to it. Avoid placing heavy objects that exceed the load-bearing capacity of the shelf and brackets.
Take your time during this step to ensure that the shelf is properly aligned and securely attached to the brackets. A well-installed shelf will provide a functional storage space while adding visual appeal to your room.
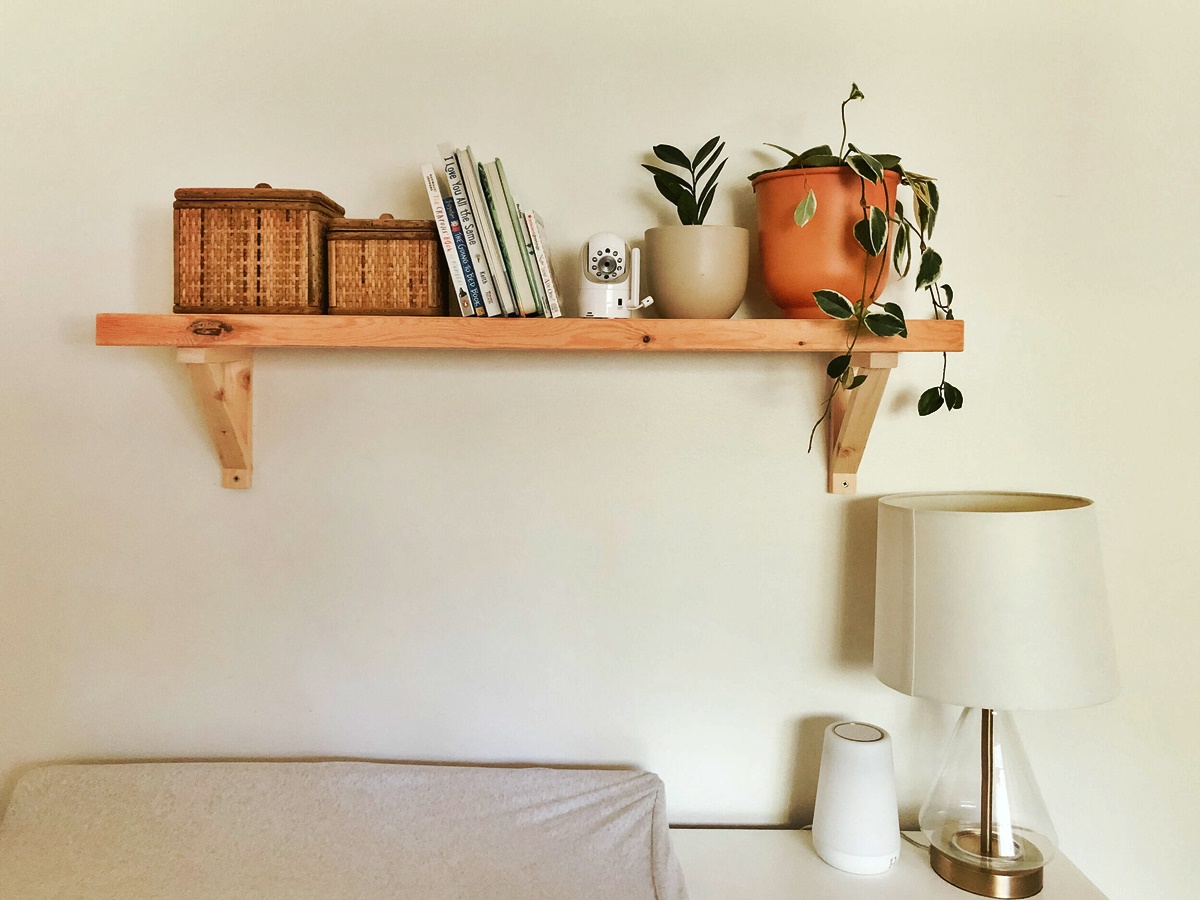
Finishing Touches and Decoration Options
Once your wood shelf brackets and shelf are securely installed, it’s time to add the finishing touches and consider the various decoration options available. These final details can enhance the overall look and functionality of your shelves. Here are some suggestions to consider:
- Stain or Paint: Apply a stain or paint to the wood brackets and shelf to enhance their appearance and match your desired color scheme. Choose a finish that complements the surrounding decor and provides the desired level of protection for the wood.
- Sealing: Consider applying a sealant or clear coat to the wood surfaces to protect them from moisture, stains, and scratches. This step can help maintain the longevity and beauty of your shelves.
- Decorative Accents: Add decorative elements such as brackets with intricate designs, decorative trim, or decorative shelf liners to personalize the look of your shelves and reflect your style.
- Organizing Solutions: Incorporate organization tools such as small baskets, dividers, or decorative storage boxes to keep your items neatly arranged and easily accessible on the shelves.
- Greenery and Plants: Bring life to your shelves by adding potted plants or small succulents. Greenery adds a fresh and vibrant touch to the space.
- Display Items: Showcase your favorite decor items, such as family photos, artwork, or stylish knick-knacks, on the shelves to personalize and enhance the overall aesthetic.
- Lighting: Consider adding under-shelf lighting or small LED lights to highlight the items on your shelves and create a cozy ambiance.
Remember that the finishing touches and decoration options are a chance to inject your personal style and creativity into the design of your shelves. Experiment with different ideas and arrangements to create a look that is both functional and visually appealing.
Regularly dust and clean your shelves to keep them looking their best. Avoid placing excessive weight on the shelves or overloading them, as this can compromise their stability and durability.
By considering these finishing touches and decoration options, you can transform your wood shelf brackets and shelves into a stunning focal point that adds charm and functionality to your space.