
Choosing the Right Wine Bottle
Choosing the right wine bottle is the first step in transforming it into a beautiful vase. When selecting a wine bottle for this purpose, there are a few factors to consider.
Firstly, think about the size of the bottle. Larger wine bottles, such as those that hold a standard 750ml, are great for creating statement vases that can hold a generous amount of flowers. On the other hand, smaller wine bottles, like those that house half bottles or splits, can make charming petite vases for single stems or small arrangements.
Next, consider the shape of the bottle. Wine bottles come in various shapes, from sleek and slender to curvy and wide. The shape will impact the overall aesthetic of the vase, so choose one that matches your personal style or the look you want to achieve.
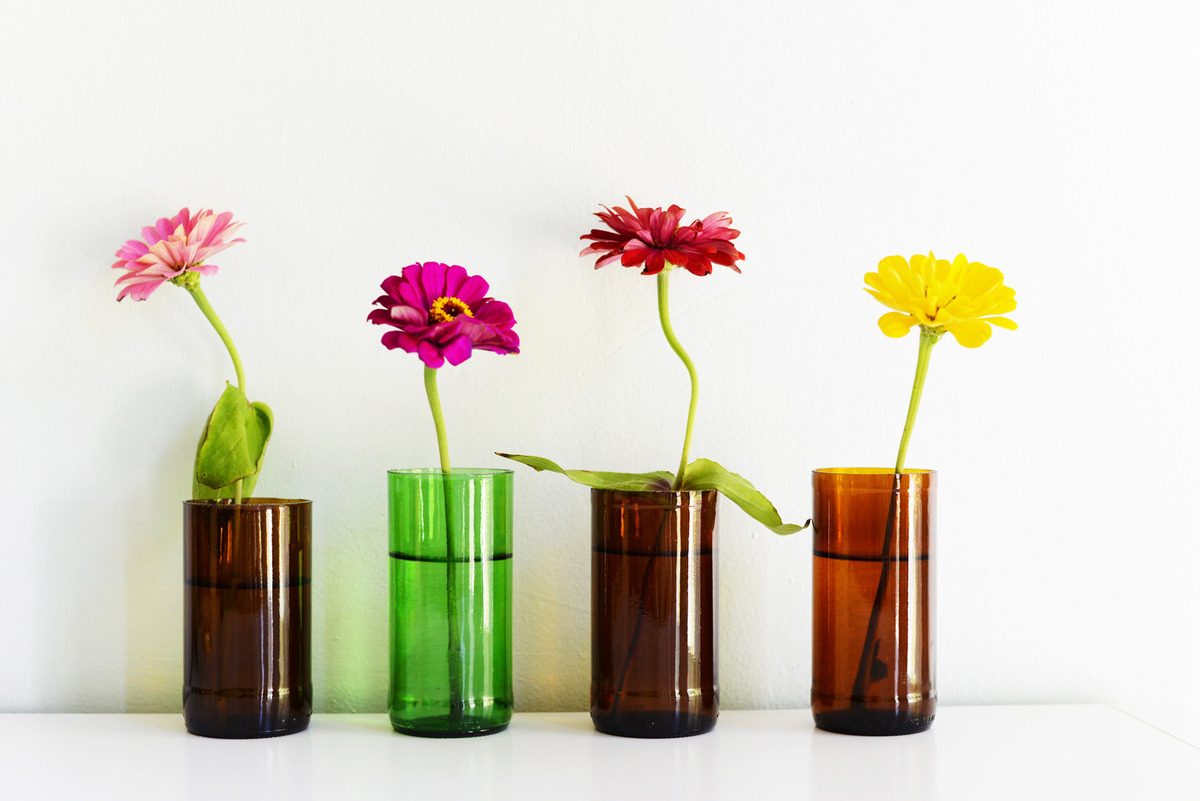
Additionally, pay attention to the color of the glass. Wine bottles come in a range of colors, including clear, green, and brown. Clear glass bottles allow for a transparent view of the stems and water, while colored bottles can add a pop of visual interest to your arrangement.
Lastly, if you’re feeling creative, you can even choose bottles with unique labels or designs. These can add an extra touch of character to your vase once the label is removed.
When searching for wine bottles to repurpose, consider visiting local wineries, asking friends and family for empty bottles, or exploring thrift stores for hidden gems. Remember to always thoroughly clean the bottles before using them for flower arrangements.
Removing the Label
Removing the label from a wine bottle is an essential step in turning it into a beautiful vase. Here’s a simple process to help you remove the label effectively:
1. Soak the Bottle: Start by filling a sink or basin with warm water and add a few drops of dish soap. Submerge the wine bottle, ensuring that the label is completely soaked. Allow it to soak for about 10-15 minutes to loosen the adhesive.
2. Gently Scrub the Label: After soaking, take a soft-bristled brush or sponge and scrub away the label. Start by applying gentle pressure and gradually increase if needed. The warm water and soap will help to loosen the label, making it easier to remove.
3. Use a Scraper: If the label is stubborn and doesn’t come off easily, you can use a plastic scraper or an old credit card to gently scrape away the remnants of the label. Be careful not to scratch or damage the glass surface in the process.
4. Remove Residue: Sometimes, sticky residue may be left behind after removing the label. To get rid of it, you can use a mixture of equal parts water and rubbing alcohol. Apply the solution to a clean cloth and gently rub the residue until it is completely gone.
5. Rinse and Dry: Once the label and residue are removed, rinse the bottle thoroughly with clean water to remove any soap or alcohol residue. After rinsing, towel dry the bottle or let it air dry completely before moving on to the next step.
By following these steps, you can successfully remove the label from your wine bottle, leaving behind a clean surface ready for further transformations. Remember to exercise caution while working with glass and to dispose of any label remnants or sticky residue properly.
Cleaning the Bottle
Before repurposing a wine bottle as a vase, it is important to thoroughly clean it to ensure that it is free from dirt, residue, and any potential odors. Follow these steps to clean the bottle effectively:
1. Remove any remaining label residue: If there is any sticky residue left on the bottle from removing the label, use a mixture of warm water and dish soap to clean it off. Apply the soapy solution to a clean cloth or sponge, then gently scrub the bottle, paying extra attention to areas with residue. Rinse the bottle with warm water and dry it with a clean towel.
2. Eliminate odors: Wine bottles can sometimes retain the aroma of the wine they previously held. To remove any lingering odors, rinse the bottle with a mixture of equal parts water and white vinegar. Let the solution sit inside the bottle for a few minutes, then rinse it out with warm water and dry thoroughly.
3. Sanitize the bottle: To ensure that the bottle is completely clean and free from bacteria, sanitize it with a solution of water and bleach. Mix one tablespoon of bleach with one gallon of water. Pour the solution into the bottle and swirl it around to coat the interior. Let it sit for a few minutes, then rinse thoroughly with water and allow it to air dry completely.
4. Check for any remaining residue: Inspect the bottle to make sure there is no residue or foreign particles inside. If necessary, use a bottle brush or a pipe cleaner to reach narrow areas and remove any stubborn residue. Rinse the bottle again to ensure it is completely clean, and dry it thoroughly before moving on to the next steps.
By following these cleaning steps, you can ensure that your wine bottle is properly sanitized and ready to be transformed into a stunning vase. Cleaning the bottle thoroughly will not only enhance its appearance but also ensure the longevity of your flower arrangement.
Removing the Cork
Once you have chosen and cleaned your wine bottle, the next step in transforming it into a vase is removing the cork. The cork can obstruct the opening and prevent you from easily inserting water and flowers. Here are a few methods to help you remove the cork:
1. Twist and Pull: Start by grasping the cork firmly with your hand. Twist the cork in a clockwise direction while applying gentle upward pressure. The goal is to gradually loosen the cork and pull it out of the bottle. This method works best for corks that have not been tightly inserted.
2. Use a Corkscrew: If the twisting and pulling method doesn’t work, you can use a corkscrew to remove the cork. Insert the screw into the center of the cork, making sure it goes straight down. Once the screw is firmly in place, hold onto the corkscrew handle and slowly and steadily pull the cork out of the bottle.
3. Corkscrew and Pliers Method: For stubborn or fragile corks, you can use a combination of a corkscrew and pliers. Insert the corkscrew partially into the cork, leaving a portion of the screw visible. Next, use a pair of pliers to grip the exposed part of the corkscrew and gently pull upward while holding the bottle steady. The pliers provide extra leverage and control while removing the cork.
4. Push the Cork: In some cases, the cork may be difficult to remove due to its deteriorated or fragile state. Rather than pulling it out, you can push the cork into the bottle using a blunt object, such as a wooden dowel or the handle of a spoon. Push the cork carefully and slowly, being cautious not to break the glass. Once the cork is fully inside the bottle, you can proceed to the next steps.
Remember to exercise caution while removing the cork, as broken glass or cork fragments can be sharp. Dispose of the cork responsibly and proceed to the next steps in transforming your wine bottle into a beautiful vase.
Cutting the Bottle
Once you have removed the cork from the wine bottle, the next step is to cut the bottle carefully. This process allows you to create the desired opening size for your vase. Here are a few methods to help you cut the bottle:
1. Hot/Cold Water Method: The hot/cold water method involves using hot and cold temperatures to create a clean cut. Start by scoring the bottle with a glass cutter, making a straight line around the circumference where you want to cut. Next, heat the score line with hot running tap water for around 1-2 minutes. Then, immediately switch to running cold tap water, making sure to alternate between hot and cold water for a few minutes. The temperature difference between hot and cold water helps to expand and contract the glass, creating a clean break along the score line.
2. Candle Method: The candle method is an alternative to the hot/cold water method. Score the bottle using a glass cutter just as in the previous method. Once the bottle is evenly scored, hold it over a candle flame, rotating it slowly to heat the score line. After a minute or so, plunge the bottle into a bucket of cold water. The contrasting temperatures will cause the glass to break cleanly along the score line.
3. Bottle Cutter Tool: Another option is to use a bottle cutter tool specifically designed for cutting glass bottles. These tools typically consist of an adjustable holder to stabilize the bottle and a cutting wheel that runs along the score line. Follow the instructions provided with the bottle cutter to ensure proper and safe use.
Regardless of the method you choose, it is crucial to wear safety goggles and gloves to protect yourself from potential glass fragments. Take your time and be patient during the cutting process to achieve a smooth and clean break. Once the bottle is cut, carefully remove any sharp edges or protrusions using sandpaper or a sanding block.
Remember, cutting a glass bottle requires precision and caution. Take your time, follow the instructions carefully, and prioritize your safety throughout the process.
Sanding the Cut Edge
After you have successfully cut the wine bottle, it’s important to sand the cut edge to ensure that it is smooth and safe to handle. Sanding the cut edge will remove any sharp edges or rough spots, creating a polished finish. Here’s a step-by-step guide on how to sand the cut edge of the bottle:
1. Prepare the Sandpaper: Start by preparing the sandpaper. You can use medium-grit sandpaper (around 100-120 grit) to begin sanding the cut edge. For a finer finish, switch to a higher grit sandpaper, such as 220-240 grit. Cut the sandpaper into a strip that is long enough to wrap around the circumference of the bottle.
2. Wet the Sandpaper: To prevent dust and improve the sanding process, it’s best to wet the sandpaper before using it. Wet the sandpaper under running water or soak it in a basin of water for a few minutes. Squeeze out any excess water, but ensure that the sandpaper remains damp throughout the sanding process.
3. Start Sanding: Hold the cut edge of the bottle firmly and wrap the damp sandpaper strip around it. Using a circular motion, begin sanding the cut edge. Apply moderate pressure while sanding, making sure to cover the entire circumference of the cut edge. Continue sanding until you achieve a smooth and even finish.
4. Switch to Finer Grit: If you desire an even smoother finish, switch to a higher grit sandpaper. Repeat the same circular sanding motion with the finer sandpaper, focusing on smoothing out any remaining rough areas or imperfections.
5. Rinse and Dry: Once you are satisfied with the smoothness of the cut edge, rinse the bottle under running water to remove any sanding residue. Dry the bottle with a clean towel or let it air dry completely.
By following these steps and taking your time while sanding, you can achieve a safe and polished cut edge on your wine bottle vase. Remember to wear safety goggles and gloves during the sanding process to protect yourself from any glass fragments.
Decorating the Bottle
Once you have prepared the wine bottle by choosing the right one, removing the label, cleaning it, removing the cork, cutting it, and sanding the cut edge, it’s time to let your creativity flow and decorate the bottle. Decorating the bottle will add a personal touch and enhance the overall aesthetic of your vase. Here are some ideas to inspire your decoration process:
1. Paint: Painting the bottle is a versatile and popular way to decorate it. Choose acrylic or glass paint in your preferred colors and apply it to the exterior of the bottle using a brush or sponge. You can create intricate designs, patterns, or even simple solid colors. Let your imagination guide you in expressing your personal style through paint.
2. Decoupage: Decoupage is a technique that involves applying cutouts of paper or fabric to the surface of an object using glue or decoupage medium. Cut out your favorite images, patterns, or designs from magazines, wrapping paper, or tissue paper and adhere them to the bottle. Seal the finished decoupage design with a layer of decoupage medium or clear varnish to protect it.
3. Wrap with Twine or Ribbon: For a rustic or bohemian look, wrap the bottle with twine or ribbon. Start at the top of the bottle and apply a small amount of glue to secure the twine or ribbon. Wrap it tightly, overlapping slightly as you go. Once you reach the desired length, cut the twine or ribbon and secure the end with another dab of glue.
4. Adorn with Gems or Beads: Add a touch of elegance by decorating the bottle with gems or beads. Use a strong adhesive to attach the gems or beads directly onto the surface of the bottle. You can create patterns, write messages, or simply scatter them randomly for a dazzling effect.
5. Stencils or Vinyl Decals: Using stencils or vinyl decals allows you to create precise and detailed designs on the bottle. Apply the stencil to the bottle surface and use a brush or sponge to fill in the design with paint. Alternatively, if you choose vinyl decals, simply peel off the backing and stick them onto the bottle.
Remember, the decoration possibilities are endless. You can combine different techniques, materials, and ideas to create a truly unique and personalized wine bottle vase. Let your creativity shine and have fun transforming the bottle into a stunning centerpiece or home decor item.
Adding Water and Flowers
After you have successfully decorated your wine bottle vase, it’s time to bring it to life by adding water and flowers. Here’s a step-by-step guide on how to achieve a beautiful floral arrangement:
1. Fill with Water: Start by filling the vase with clean water. The amount of water you need will depend on the size of the bottle and the length of the stems you plan to use. Fill the vase about halfway or to a level that suits your desired arrangement.
2. Choose Flowers: Select your flowers based on personal preference, the occasion, or the theme of your decor. Cut the flower stems at an angle, about 1-2 inches from the bottom, to ensure better water absorption. Remove any leaves that will be below the waterline to prevent them from decaying.
3. Arrange the Flowers: Begin arranging the flowers in the vase, starting with the focal flowers or larger blooms. Place them in the vase at various heights and angles to create depth and balance. Next, add in the filler flowers, such as baby’s breath or ferns, to fill in any gaps and add texture. Finally, include any accent flowers or greenery to complement the arrangement.
4. Adjust the Arrangement: Step back and assess the arrangement as you go. Rearrange and trim the stems as needed to achieve the desired look. Remember to rotate the vase to ensure all sides of the arrangement are equally attractive.
5. Replenish Water: Over time, the water in the vase will evaporate. To keep your flowers fresh, regularly check and replenish the water as needed. You can also add a floral preservative or a drop of bleach to the water to help prolong the lifespan of the flowers.
6. Display and Enjoy: Once you are satisfied with your floral arrangement, place the vase in a prominent location where it can be admired. Consider natural light, room temperature, and the compatibility of the flowers with their surroundings to ensure longevity.
Adding water and flowers to your decorated wine bottle vase will bring vibrancy and beauty to any space. Be creative with your flower selection and arrangement, and don’t be afraid to experiment with different colors, shapes, and textures. With proper care, your floral arrangement will become a stunning centerpiece or a delightful decorative element in your home.