
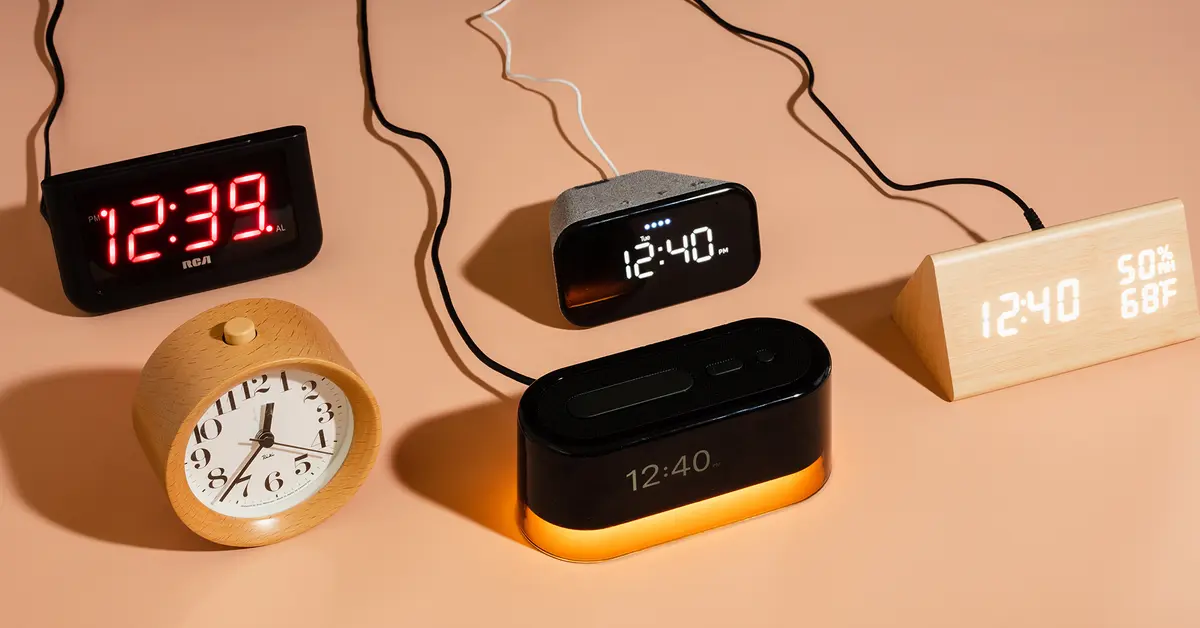
Step 1: Understand the Functions of Each Button
When setting a digital clock with five buttons, it’s important to familiarize yourself with the functions of each button. This will make the clock-setting process much smoother and help you avoid any confusion. Let’s take a look at the common functions you may find:
- Mode button: This button allows you to switch between different modes, such as time, date, alarm, or timer.
- Set button: The set button is used to enter the setting mode. Once in this mode, you can adjust the time, date, or other settings.
- Up and down buttons: These buttons are used to increase or decrease the value of a setting. For example, you would use them to change the hour or minute.
- Reset button: The reset button is used to revert a setting back to its default value. It can come in handy if you make a mistake or want to start fresh.
These buttons are typically labeled or indicated with symbols on the clock display. It’s important to refer to the user manual that came with your specific digital clock to determine the exact functions of each button. Once you understand what each button does, you’ll be ready to set the time and date accurately.
It’s worth noting that the functions may vary slightly depending on the brand and model of your digital clock. Some clocks may have additional buttons or different labels for these functions. Make sure to consult the user manual or manufacturer’s website for specific instructions related to your clock model.
Step 2: Start with a Blank Screen
Before setting the time on your digital clock with five buttons, it’s important to start with a blank screen. Turn off any alarms or timers that may currently be active. This will ensure that you have a clear starting point and avoid any potential confusion when setting the time.
If your digital clock has a mode button, press it until you reach the time display mode. Make sure there are no other indicators or symbols on the screen. If you see any alarm or timer icons, refer to your user manual to learn how to disable them.
Starting with a clean slate allows you to focus solely on the time-setting process. This way, you can concentrate on selecting the correct hour, minute, and other settings without any distractions.
Once you have ensured that the screen is clear of any existing alarms or timers, you’re ready to move on to the next step: setting the hour.
Step 3: Set the Hour
Now that you have a blank screen, it’s time to set the hour on your digital clock. Follow these steps to do so:
- Press the mode button until you reach the time setting mode.
- Use the up or down buttons to adjust the hour. Pay attention to whether it’s AM or PM, depending on your clock’s format.
- Some digital clocks may use a 12-hour format, while others use a 24-hour format. If your clock is set to the 12-hour format, you may need to toggle between AM and PM using a designated button.
- Once you have set the correct hour, press the set button to confirm and move on to setting the minutes.
Please note that the specific steps may vary depending on your clock’s brand and model. Always refer to the user manual for precise instructions tailored to your particular digital clock.
Ensure that you set the hour accurately to avoid any confusion when reading the time later. Double-check that you have selected the correct AM or PM designation if applicable. Once you’re satisfied with the hour setting, proceed to the next step: setting the minutes.
Step 4: Set the Minutes
After setting the hour on your digital clock, it’s time to move on to setting the minutes. Follow these steps to accurately adjust the minutes:
- Press the set button if you’re not already in the time setting mode.
- Use the up or down buttons to adjust the minutes. Pay attention to the numerical value and ensure that it reflects the correct time.
- If your digital clock has a feature that allows for precise minute adjustments, take advantage of it to fine-tune the time as needed.
- Once you have set the correct minutes, press the set button to confirm the setting. The time will be updated accordingly on your clock’s display.
Remember to refer to your clock’s user manual for any specific instructions or additional features relating to minute adjustments. Every digital clock may have slightly different button functions or settings.
Setting the minutes accurately ensures that your clock displays the correct time. It’s always a good idea to double-check your minute setting before moving on to the next step. Once you are satisfied with the minutes, proceed to the following step to set the seconds, if necessary.
Step 5: Set the Seconds
Setting the seconds on your digital clock may not always be necessary, as many clocks automatically synchronize with a time signal and display the seconds accurately. However, if your clock provides the option to manually set the seconds, follow these steps:
- Press the set button to enter the time setting mode, if you haven’t already.
- Look for a specific button or function that allows you to adjust the seconds. It might be labeled as “SEC” or have a symbol representing seconds.
- Use the up or down buttons to change the seconds value according to the current time. Keep in mind that you may need to synchronize the seconds with another time source, such as your smartphone or another clock.
- Once you have set the correct seconds, press the set button to confirm the setting. The seconds will then start ticking from the value you selected.
While setting the seconds manually may not be essential in most cases, it can be helpful to synchronize your clock with other timekeeping devices if precision is crucial to you. If your clock doesn’t provide the option to set seconds manually, rest assured that it will still display and update the seconds automatically based on its internal timekeeping mechanism.
With the seconds set, you now have the accurate hour, minute, and second displayed on your digital clock. This brings us to the next step of determining whether it’s AM or PM. Continue reading to learn how to set the AM or PM designation in Step 6.
Step 6: Set AM or PM
Many digital clocks provide the option to set the AM or PM designation to accurately display the time in a 12-hour format. Follow these steps to set the correct AM or PM on your clock:
- If your clock doesn’t automatically display the AM or PM designation, press the mode button until you reach the time setting mode.
- Look for a specific button or function that allows you to toggle between AM and PM. It might be labeled as “AM/PM” or have corresponding symbols.
- Use the up or down buttons to select the desired AM or PM designation. Pay attention to whether it aligns with the current time of day.
- Once you have set the correct AM or PM, press the set button to confirm the setting. The AM or PM designation will now be displayed alongside the time on your digital clock.
Setting the AM or PM designation accurately ensures that your digital clock displays the correct time of day. If your clock uses a 24-hour format, you may not have the option to set AM or PM since it already denotes the time in a 24-hour cycle.
Always consult your clock’s user manual for specific instructions tailored to your clock’s brand and model. The button functions and settings may vary, so it’s important to refer to the manual to ensure accurate AM or PM designation.
Now that you have set the correct AM or PM, the time on your digital clock is accurately displayed. The next step will guide you on how to save the time setting so that it’s preserved even when the clock is powered off. Continue reading to learn how in Step 7.
Step 7: Save the Time
Once you have set the correct time on your digital clock, it’s important to save the time setting to ensure that it remains accurate even when the clock is powered off or experiences a temporary loss of power. Follow these steps to save the time on your clock:
- Press the set button if you’re not already in the time setting mode.
- Look for a designated button or function that allows you to save or confirm the time setting. It may be labeled as “Save,” “Enter,” or have a checkmark symbol.
- Press the save button or function to finalize and store the time setting on your clock.
- Your clock may emit a beep sound or display a notification that the time has been saved.
By saving the time setting, you can rely on your digital clock to maintain the accurate time even after power interruptions or when the clock is turned off and on again.
If you’re unsure about how to save the time on your specific clock, consult the user manual provided by the manufacturer. The manual will provide precise instructions tailored to your clock’s model and will ensure that you save the time correctly.
Now that you have successfully set and saved the time on your digital clock, you can move on to adjusting additional settings such as brightness, alarms, or dates, depending on the features available on your clock. Continue reading to explore these additional features in Step 8 and beyond.
Step 8: Adjust the Brightness if Needed
Depending on the lighting conditions and your personal preferences, you may need to adjust the brightness of your digital clock’s display. Follow these steps to make the necessary brightness adjustments:
- Look for a designated button or function that allows you to control the brightness. It may be labeled as “Brightness,” “Dim,” or have corresponding symbols.
- Press the brightness button or function to cycle through different brightness levels. Some clocks may offer a gradual adjustment, while others may have preset brightness settings.
- Observe the display as you make the brightness adjustments and select the level that best suits your needs. You may want a brighter display during the day and a dimmer one at night.
- Once you have selected the desired brightness level, press the set or confirm button to save the setting.
Adjusting the brightness of your digital clock’s display can enhance readability and reduce eye strain in different lighting conditions. It’s important to find a balance that works best for your specific environment and personal preference.
If you’re unsure about how to adjust the brightness on your particular clock model, refer to the user manual provided by the manufacturer. The manual will provide specific instructions for adjusting the brightness and may include additional features related to display settings.
With the brightness adjusted to your liking, your digital clock’s display will be visually optimized for a comfortable and easy reading experience. Next, we’ll explore how to set the date on your clock in Step 9.
Step 9: Set the Date
In addition to setting the time, many digital clocks allow you to set the date as well. Follow these steps to accurately adjust the date on your clock:
- Press the mode button until you reach the date setting mode. Some clocks may have a separate button specifically for the date setting.
- Use the up or down buttons to adjust the day, month, and year. Start with the day and cycle through the available options until you reach the correct value.
- Once you have set the day, proceed to adjust the month by using the up or down buttons. Select the appropriate month that corresponds to the current date.
- Finally, set the year by using the up or down buttons to scroll to the desired year.
- Press the set button or a designated confirmation button to save the date setting.
Some digital clocks may automatically adjust the date based on the time information, especially if they receive regular updates from a reliable time source. However, it’s still beneficial to know how to manually set the date to ensure accuracy.
It’s important to refer to your clock’s user manual for any specific instructions or additional features related to setting the date. Different clock models may have varying button functions and settings.
With the date set correctly on your digital clock, you can now rely on it not only for accurate timekeeping but also for keeping track of the current date. Finally, let’s explore any additional features or functions that your digital clock may offer in Step 10.
Step 10: Utilize Additional Features and Functions
Aside from setting the time and date, many digital clocks offer additional features and functions that can enhance your overall experience and meet your specific needs. Here are some common features you may find:
- Alarms: Set alarms on your digital clock to wake up in the morning or remind yourself of important tasks throughout the day. Explore how to set multiple alarms, adjust the alarm volume, or customize alarm sounds according to your preferences.
- Snooze Function: Find out how to activate the snooze function on your clock to have a few extra minutes of sleep before the alarm goes off again.
- Timer: Utilize the timer function for activities such as cooking, exercising, or studying, by setting a specific duration that the clock will count down from.
- Backlight: Discover how to activate the backlight feature on your clock to illuminate the display for better visibility in low-light conditions.
- Temperature and Humidity: Some digital clocks may include built-in sensors to provide real-time temperature and humidity readings in your environment.
Take the time to explore and familiarize yourself with these additional features and functions to make the most of your digital clock. Refer to the user manual to understand the specific instructions and options available on your clock model.
Remember that every digital clock is unique, and the availability and functionality of these features may vary. Take advantage of the features that align with your needs and preferences to maximize the functionality of your digital clock.
By utilizing these additional features and functions, your digital clock becomes more than just a timekeeping device—it becomes a versatile tool that enhances your daily routine and helps you stay organized.