
Gather the necessary materials
Before you begin putting wire on your picture frame, it’s essential to gather all the necessary materials. Having everything prepared will make the process smoother and more efficient. Here are the items you’ll need:
- Picture frame: Choose the frame you want to hang, ensuring it is in good condition with sturdy backing.
- Wire: Select a suitable wire for your frame, considering the weight of the artwork and the frame’s size. Picture hanging wire, steel wire, or stainless steel wire are good options.
- Wire cutters: These will be used to trim the wire to the desired length.
- Screw eyes or D-rings: Depending on the type of frame, you’ll need either screw eyes or D-rings to attach the wire securely.
- Pliers: Pliers will come in handy for bending or twisting the wire if needed.
- Measuring tape: This will help you determine the appropriate length of wire for your frame.
- Screwdriver: You may need a screwdriver to attach the screw eyes or D-rings to the frame.
- Protective gloves: To ensure your safety, consider wearing protective gloves when handling wire or sharp edges during the process.
Having all of these materials ready will save you time and prevent any unnecessary interruptions during the wire installation process. Take a moment to gather these items before moving on to the next steps.
Determine the appropriate wire for your picture frame
Choosing the right wire for your picture frame is crucial to ensure proper support and stability. The wire you select should be able to withstand the weight of your artwork and the frame itself. Here are some factors to consider when determining the appropriate wire:
- Weight capacity: Check the weight limit indicated on the wire packaging. It should be able to support the combined weight of your picture frame and artwork.
- Frame size: Consider the dimensions of your frame. A larger frame may require a thicker and stronger wire to provide adequate support.
- Durability: Opt for a wire that is resistant to rust and corrosion, particularly if you plan on hanging your picture frame in a humid environment or exposed to moisture.
- Flexibility: Some wires have more flexibility than others. Choose a wire that allows you to adjust the tension and easily hang your picture frame without it sagging.
- Appearance: While the main focus is on functionality, you may also want to consider the wire’s appearance. Choose a wire that complements the overall aesthetic of your picture frame.
If you’re unsure about which type of wire to use, consult with an expert at your local art supply store. They can provide guidance based on your specific needs and recommend the most appropriate wire for your picture frame.
Remember, selecting the right wire is essential to ensure the safety and longevity of your picture frame. Take the time to research and choose wisely before moving on to the next steps.
Measure and cut the wire
Once you have determined the appropriate wire for your picture frame, the next step is to measure and cut the wire to the desired length. Follow these steps to ensure accurate measurements:
- Frame dimensions: Measure the width of your picture frame from one side to the other. This will help determine the length of the wire needed.
- Add extra length: Add a few inches to the measurements to allow for wrapping the wire around screws or attaching it to D-rings securely.
- Wire cutter: Use a wire cutter to cut the wire at the designated length. Ensure that you have a clean and straight cut.
It’s crucial to have precise measurements to prevent any sagging or uneven hanging of your picture frame. Take your time during this step to ensure accuracy.
If you prefer a visual guide, you can also use painters tape or masking tape to mark the desired wire length directly on the frame. This will help you visualize the wire placement before cutting it.
Remember, it’s always better to cut the wire longer than needed. You can always trim it down later if necessary. Having a slightly longer wire will give you more flexibility during the installation process.
Once you have measured and cut the wire to the appropriate length, you are ready to move on to the next step: attaching the wire to the frame.
Attach the wire to the frame
Now that you have measured and cut the wire for your picture frame, it’s time to attach it securely. Follow these steps to properly attach the wire:
- Identify attachment points: Determine where you will attach the wire to the frame. Typically, this is done at the upper third of the frame. Look for existing screw eyes or D-rings that are already installed or mark the spots where you will place them.
- Screw eyes: If your frame has pre-drilled holes or designated spots for screw eyes, carefully screw them into place using a screwdriver. Make sure they are securely fastened.
- D-rings: If your frame has D-ring hangers, align them along the upper edge of the frame. Mark the screw holes with a pencil or marker, then screw them into position.
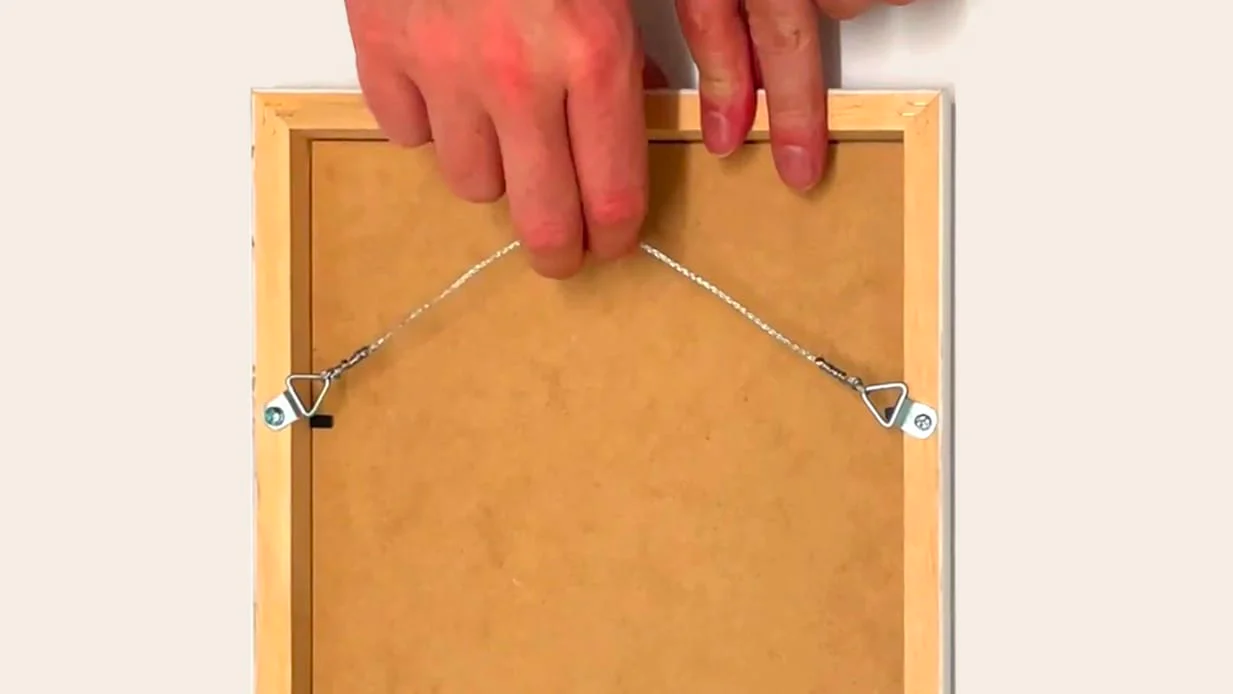
- Loop the wire: Take one end of the wire and thread it through the screw eye or D-ring. Create a loop by bringing the wire back over itself and twist it a couple of times to secure the loop.
- Repeat for the other end: Take the remaining end of the wire and thread it through the other screw eye or D-ring. Create a similar loop and twist it to secure.
Ensure that the wire is pulled tightly and evenly across the frame. This will help prevent the picture from tilting or hanging lopsidedly. Double-check that both ends of the wire are securely fastened to the attachment points.
If needed, use pliers to tighten the loops or make any adjustments to achieve the desired tension. Be careful not to overtighten, as it may cause damage to the frame or wire.
By following these steps, you will successfully attach the wire to your picture frame, bringing you one step closer to hanging it with confidence.
Secure the wire in place
After attaching the wire to your picture frame, it’s important to secure it properly to ensure the stability and safety of your artwork. Follow these steps to secure the wire in place:
- Check attachment points: Double-check that the screw eyes or D-rings are securely fastened to the frame. Ensure there is no movement or looseness.
- Tighten the wire: Go to one end of the wire and hold it firmly. Use pliers to twist the wire tightly around itself. Repeat this process for the other end of the wire. This will prevent the wire from slipping or coming loose over time.
- Trim excess wire: If there is any excess wire protruding past the twists, use wire cutters to trim it off. Be careful not to trim it too short, allowing for a comfortable amount of wire to work with during the hanging process.
- Inspect the wire: Take a moment to inspect the wire for any signs of damage or weak spots. If you notice any issues, it’s best to replace the wire before proceeding.
Once you have secured the wire and ensured its stability, gently tug on the wire to test its strength. It should hold up without any signs of slipping or giving way.
Remember, the wire plays a crucial role in supporting the weight of your picture frame and artwork. Taking the time to secure it properly will minimize the risk of accidents or damage.
With the wire securely in place, you’re now ready to make any necessary adjustments before hanging your picture frame with confidence.
Make any necessary adjustments
Before hanging your picture frame, it’s essential to make any necessary adjustments to ensure it is level and properly aligned. Follow these steps to make the necessary adjustments:
- Leveling: Use a level tool to ensure that your picture frame is straight. Adjust the tension of the wire by twisting it slightly with pliers if needed. This will help prevent the frame from tilting or hanging crookedly.
- Centering: If desired, center the picture frame on the wall or in relation to other surrounding artwork or furniture. Take measurements and use a pencil or tape to mark the desired position before proceeding.
- Functional check: Gently and carefully lift and lower the picture frame to check if it feels secure. Pay attention to any unusual movements or sounds that might indicate an issue with the wire or frame attachments.
- Double-checking: Take a step back and visually inspect the frame from different angles. Ensure that it appears level, centered, and aesthetically pleasing.
During this adjustment phase, do not rush the process. Take your time to achieve the desired outcome. Making these final tweaks will ensure that your picture frame is well-positioned and visually pleasing.
If you find that your adjustments are not satisfactory or that the wire is not providing sufficient support, consider reaching out to a professional for assistance. They can offer guidance and expertise to help you achieve the desired result.
Once you are satisfied with your adjustments, it’s time to move on to the final step: hanging your picture frame and enjoying your artwork on display.
Hang your picture frame
After preparing and adjusting your picture frame, it’s time to finally hang it on the wall. Follow these steps to hang your picture frame securely and with precision:
- Select the hanging location: Choose a suitable spot on the wall where you want to display your picture frame. Consider factors such as height, visibility, and surrounding decor.
- Mark the hanging position: Hold the frame against the wall and use a pencil or masking tape to mark the desired position of the hanging wire or attachment points. Use a level tool to ensure accuracy.
- Install wall anchors (if necessary): If you are hanging a heavy or large frame on drywall or a plaster wall, it may be necessary to install wall anchors before inserting screws to provide extra support.
- Insert screws or nails: Depending on the type of attachment points on your frame, insert appropriate screws or nails into the wall at the marked positions. Make sure they are secure and properly aligned.
- Hang the frame: Carefully lift and hook the picture frame’s wire or attachment points onto the screws or nails. Ensure that it hangs evenly and securely.
- Double-check the level: Use a level tool to confirm that the picture frame is straight and level once it is hanging on the wall. Make any minor adjustments if necessary.
Step back and admire your handiwork. Your picture frame is now beautifully displayed on the wall, showcasing your cherished artwork or photographs.
Remember to periodically check the integrity of the hanging system to ensure that the picture frame remains secure. If you ever notice any issues or the frame feels unstable, promptly address the situation by adjusting or reinforcing the hanging mechanism.
Now, step back and enjoy the sight of your picture frame gracefully adorning your wall.