
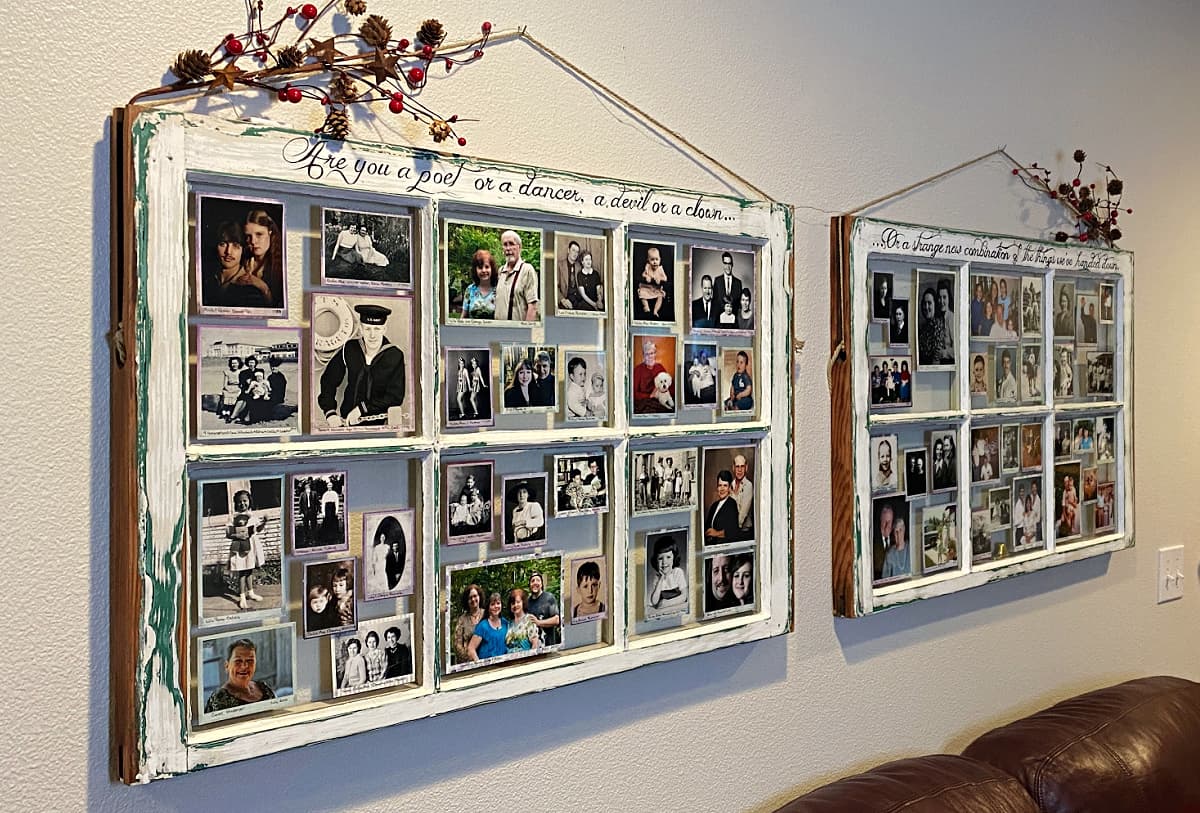
Gather Materials
Before you start creating your picture frame from an old window, it’s important to gather all the necessary materials. Here’s a list of items you’ll need:
- Old window frame
- Gloves and safety goggles
- Sandpaper (medium grit)
- Paint and paintbrushes
- Backing board
- Mat board
- Picture hanging wire
- Nails, screws, or glue
- Measuring tape and ruler
- Utility knife or mat cutter
- Scissors
- Hammer or screwdriver (depending on fastening method)
Make sure you have all these materials ready before you begin the project.
It’s essential to have an old window frame as the base for your picture frame. You can visit local thrift stores, salvage yards, or online marketplaces to find one. Ensure that the window frame is in good condition and free from any cracks or damage.
Additionally, it’s important to prioritize safety. Wear gloves and safety goggles to protect your hands and eyes during the project. This becomes particularly crucial when handling the glass or using tools.
Obtain the necessary sandpaper with a medium grit to smooth out any rough areas on the window frame and create a suitable surface for painting. Sanding will help the paint adhere better and give the frame a polished look.
Choose paint colors that complement your picture and the overall aesthetic you desire. Acrylic paint works well on window frames and allows for easy application and quick drying. Select paintbrushes of varying sizes to ensure optimal coverage and precision.
The backing board, usually made of plywood or foam core board, serves as the base that holds the picture and provides stability. Measure and cut the backing board according to the dimensions of the window frame.
The mat board enhances the overall appearance of the picture frame and adds a professional touch. Measure and cut the mat board to match the dimensions of the picture you plan to insert into the frame.
The picture hanging wire allows you to easily hang your frame on the wall. Choose a wire that can support the weight of the framed picture and follow instructions on how to attach it securely to the back of the frame.
Finally, gather nails, screws, or glue to secure the backing board to the window frame. The choice of fastening method depends on the specific design and materials of the window frame and backing board.
By gathering all the necessary materials, you’ll be well-prepared to embark on the journey of transforming your old window into a beautiful picture frame.
Prepare the Old Window
Now that you have gathered all the materials, it’s time to prepare the old window for the picture frame transformation. Follow these steps to ensure your window is ready:
1. Begin by thoroughly cleaning the window frame. Use a damp cloth or sponge to remove any dust, dirt, or debris that may have accumulated over time. This step will ensure that the paint adheres properly to the surface.
2. Inspect the window frame for any loose or damaged parts. Tighten any screws or nails that may have come loose and replace any broken or missing hardware. Repairing the frame will ensure stability and prevent any further damage during the framing process.
3. If the window frame has any old peeling paint or varnish, you may need to strip it off before applying a fresh coat of paint. Use a paint scraper or sandpaper to remove the old finish, ensuring a smooth and clean surface for painting. This step will help the new paint adhere better and prevent any uneven texture on the frame.
4. In some cases, the window frame may have imperfections or rough edges. Use sandpaper with a medium grit to sand down any rough areas, creating a smoother surface. This step is crucial to achieve a polished and professional look for your picture frame.
5. Take a moment to assess the overall condition of the window frame. If you notice any cracks or structural issues, consider repairing them before proceeding. Applying wood filler or epoxy glue to these areas will reinforce the frame and ensure its durability.
6. Once you have completed all the necessary repairs and preparations, wipe down the window frame with a clean, dry cloth to remove any remaining dust or debris. This step is essential to ensure a clean surface for painting.
Preparing the old window before transforming it into a picture frame is a crucial step in the process. By cleaning, repairing, and sanding the frame, you will create a solid foundation for the next steps, ensuring a professional and visually appealing end result for your homemade picture frame.
Remove Any Existing Glass from the Window
Before you can proceed with turning your old window into a picture frame, you’ll need to remove any existing glass from the window pane. Follow these steps to safely remove the glass:
1. Put on gloves and safety goggles to protect your hands and eyes from any potential glass shards.
2. Inspect the window frame and determine the type of glass used. It could be held in place by glazing putty, silicone, or metal clips.
3. If the glass is secured with glazing putty, use a putty knife to gently pry it away from the frame. Start at one corner and carefully work your way around, applying gentle pressure to loosen the putty. Take your time to avoid damaging the window frame.
4. If the glass is held in place with silicone, carefully cut through the silicone seal using a utility knife. Start at one corner and work your way along the edges, ensuring the blade is angled away from the window frame to prevent accidental damage.
5. For frames with metal clips, locate the clips that hold the glass in place. Use a screwdriver or pliers to remove the screws or release the clips, allowing the glass to come free. Be careful not to force the glass, as it can break easily.
6. Once you have removed the glass from the window frame, place it aside in a safe location. You may choose to keep the glass for future use or dispose of it properly according to your local recycling guidelines.
7. Take a moment to inspect the window frame for any remaining adhesive or debris. Use a clean cloth or sponge to wipe away any residue, ensuring a clean and smooth surface for the next steps of the framing process.
Removing the existing glass from the window is an essential step in creating your picture frame. By following these steps and taking the necessary precautions, you can safely and effectively separate the glass from the frame, setting the stage for the next stages of the transformation.
Sand and Paint the Window Frame
Now that you have removed the existing glass, it’s time to sand and paint the window frame to give it a fresh and polished look. Follow these steps to achieve a beautiful finish:
1. Put on gloves and safety goggles to protect yourself from any dust or paint particles.
2. Start by using medium-grit sandpaper to sand the entire surface of the window frame. This will help remove any rough areas, old paint, or imperfections, ensuring a smooth and even surface for painting. Be sure to sand in the direction of the wood grain for optimal results.
3. After sanding, use a clean cloth or sponge to wipe away any dust or debris from the frame. It’s important to have a clean surface before applying paint.
4. Choose a paint color that complements your desired aesthetic. Acrylic or latex paint works well for window frames, as they dry quickly and provide a durable finish. Use a paintbrush suitable for the size of the frame and apply the paint evenly, starting from one corner and working your way around the frame. Apply multiple thin coats for a smooth and professional finish, allowing each coat to dry completely before applying the next.
5. Pay attention to the details of the frame, such as grooves or intricate designs. Use a smaller brush or even a toothpick to ensure paint is applied evenly and reaches all the nooks and crannies of the frame.
6. Allow the final coat of paint to dry completely according to the paint manufacturer’s instructions. This will ensure that the paint adheres properly and prevents any smudging or damage during the next steps.
7. Once the paint is dry, inspect the frame for any touch-ups or areas that may need additional coats. Use a fine-grit sandpaper to lightly smooth out any uneven spots, if necessary. After sanding, wipe away any dust with a clean cloth.
Sanding and painting the window frame is a crucial step in creating your picture frame. By following these steps and taking the time to achieve a smooth and even paint finish, you’ll enhance the overall appearance of your frame and make it ready for the next stages of the framing process.
Cut the Backing Board
Now that you have sanded and painted the window frame, the next step in creating your picture frame is to cut the backing board. Follow these steps to ensure the backing board fits perfectly:
1. Measure the dimensions of the window frame using a measuring tape. Take note of the width and height of the inside edges where the backing board will sit.
2. Transfer the measurements onto the backing board material, whether it’s plywood or foam core board. Use a ruler to mark the dimensions accurately.
3. If using plywood, use a saw to carefully cut along the marked lines. Ensure that you have a steady hand and follow proper safety guidelines when using a saw.
4. If using foam core board, a utility knife should be sufficient to cut along the marked lines. Score the board lightly first, and then apply more pressure to cut through completely. Repeat this process until the board is cut to the desired dimensions.
5. After cutting the backing board, place it inside the window frame to check the fit. The backing board should fit snugly against the edges of the frame without any gaps or overlapping.
6. If needed, make any necessary adjustments to ensure a perfect fit. Use sandpaper or a utility knife to trim the edges of the backing board if it is slightly larger than the frame.
7. Once the backing board fits correctly, set it aside for the next steps of the framing process.
Cutting the backing board requires precision and attention to detail. By measuring accurately and cutting with care, you will create a solid foundation for your picture frame, ensuring that the backing board fits seamlessly inside the window frame.
Measure and Cut the Mat Board
Now that you have prepared the backing board, the next step in creating your picture frame is to measure and cut the mat board. Follow these steps to ensure the mat board is the perfect size for your picture:
1. Place the picture you intend to frame on top of the backing board. Take note of the size and orientation of the picture.
2. Measure the dimensions of the picture, including its width and height. Keep in mind any additional space you would like to leave around the picture for the mat board border.
3. Transfer the measurements onto the mat board with a pencil or fine-tip marker. Use a ruler or straightedge to ensure straight and precise lines.
4. If using a mat cutter, align the ruler or straightedge along the marked lines and carefully cut along them, applying moderate pressure. Be sure to follow the manufacturer’s instructions for your specific mat cutter.
5. If using a utility knife, place a straightedge along the marked lines and score the mat board lightly. Then, apply more pressure to cut through the board completely. Ensure that you have a steady hand and take caution to avoid slipping or accidental cuts.
6. After cutting the mat board, place it on top of the backing board to ensure the fit is correct. The mat board should be centered and aligned with the edges of the backing board.
7. If needed, make any necessary adjustments to the mat board’s size or shape. Use a ruler or utility knife to trim the edges for a precise fit.
8. Once the mat board fits perfectly on the backing board, set it aside and move on to the next steps of the framing process.
Measuring and cutting the mat board accurately is crucial to achieve a professional and polished look for your picture frame. By following these steps and paying attention to detail, you will create a mat board that perfectly complements your picture and enhances the overall appearance of your frame.
Attach the Mat Board to the Backing Board
With the backing board and mat board prepared, it’s time to securely attach the mat board to the backing board. Follow these steps to ensure a secure and seamless connection:
1. Place the backing board on a clean and flat surface. Ensure that the side you want to display faces upward.
2. Position the mat board on top of the backing board, aligning it with the edges. Double-check that it is centered and the desired amount of the backing board is visible around the mat board.
3. Use acid-free adhesive or tape specifically designed for framing to attach the mat board to the backing board. Apply small dots of adhesive or tape along the edges and corners of the mat board.
4. Carefully press the mat board down onto the backing board, starting from one corner and working your way along the edges. Ensure the adhesive or tape sticks firmly, holding the mat board securely in place.
5. Smooth out any wrinkles or bubbles as you go, ensuring a clean and professional appearance. Use a clean cloth or your fingers to press down on the mat board gently.
6. Allow the adhesive or tape to dry completely, following the manufacturer’s instructions. This will ensure a secure bond between the mat board and the backing board.
7. Once dry, double-check the attachment to ensure it is secure. Gently tug on the mat board to ensure it does not come loose from the backing board.
By attaching the mat board to the backing board, you provide a stable foundation for your picture and create a clean and appealing border around it. Taking the time to ensure a secure and seamless connection will result in a professional-looking picture frame that enhances the overall presentation of your artwork or photograph.
Add a Picture Hanging Wire
Adding a picture hanging wire to your frame will allow you to easily hang it on a wall. Follow these steps to securely attach a picture hanging wire:
1. Flip the frame over so that the back is facing upward. Place it on a clean and flat surface.
2. Measure the width of the frame and add a few inches to this measurement. This will give you enough wire to create a hanging loop. Cut a piece of picture hanging wire to this length using wire cutters.
3. Measure and mark two points on the sides of the frame, near the top, where you want the picture hanging wire to be attached. Make sure the points are equidistant from the top edge to ensure the frame hangs evenly.
4. Attach the picture hanging wire to the marked points. If your frame has pre-drilled holes or screw eyes, thread each end of the wire through them and twist the wire to secure it. If there are no pre-drilled holes, use small screws or eye hooks to anchor the wire in place, making sure to leave some slack in the wire for creating the hanging loop.
5. Once the wire is securely attached, pull it taut and twist the ends together several times to form a tight loop. This loop will provide a strong support for hanging the frame.
6. Double-check the stability of the picture hanging wire by gently tugging on it. Ensure that it is securely fastened and can bear the weight of the frame and the picture.
7. If desired, add additional support to the wire by attaching screw eyes or D-rings to the sides of the frame near the top. This will help distribute the weight and provide extra stability when hanging the frame.
By adding a picture hanging wire to your frame, you will have a convenient way to display your artwork or photograph on a wall. Ensure that the wire is securely attached and capable of supporting the weight of the frame to prevent any accidental damage or falls.
Insert the Picture into the Frame
Now that you have prepared the frame and attached the hanging wire, it’s time to carefully insert the picture or artwork into the frame. Follow these steps to ensure a smooth and secure insertion:
1. Lay the frame face down on a clean and flat surface. Make sure the back of the frame is easily accessible.
2. Gently place the picture or artwork face down on top of the mat board inside the frame. Ensure that it is centered and aligned to your liking. If necessary, adjust the position until you are satisfied with the placement.
3. If your frame has metal or plastic clips, use them to secure the picture in place. Slide the clips along the back of the frame, aligning them with the edges of the picture. Carefully push them down to secure the picture against the mat board.
4. For frames without clips, you can use masking tape or framers’ tape to secure the picture. Apply small pieces of tape along the edges of the picture, attaching it to the mat board. Be careful not to use excessive tape that could damage the picture or the frame.
5. Pay attention to the corners of the picture to ensure they are secure. If needed, add additional tape or adjust the position of the existing tape to provide extra support.
6. Once the picture is securely in place, gently press down along the edges to ensure it is flat against the mat board and there are no wrinkles or bubbles.
7. Carefully inspect the front of the frame to ensure the picture is centered and aligned correctly. Additionally, check the back of the frame to verify that the picture is securely held in place and there are no loose clips or tape.
By following these steps, you will be able to insert your picture or artwork into the frame securely and without causing any damage. Take your time to ensure the picture is centered and aligned properly, providing an aesthetically pleasing presentation when the frame is hung on the wall.
Secure the Backing Board to the Window Frame
With the picture inserted into the frame, the final step is to secure the backing board to the window frame. Follow these steps to ensure a secure and stable attachment:
1. Place the frame face down on a clean and flat surface. Ensure that the back of the frame is easily accessible.
2. Position the backing board inside the frame, ensuring that it is centered and aligned correctly. The edges of the backing board should be flush with the edges of the window frame.
3. Depending on the design of the frame, you can secure the backing board using one of the following methods:
- Nails: If the frame has pre-drilled holes or nail slots, insert nails into the holes or slots, going through the backing board and into the window frame. Use a hammer to gently tap the nails in, ensuring that the backing board is held securely against the frame.
- Screws: For frames with screw holes or brackets, use screws to attach the backing board to the window frame. Align the holes on the backing board with the corresponding holes or brackets on the frame. Use a screwdriver to tighten the screws, ensuring a tight and secure fit.
- Glue: In some cases, you may opt to use glue to secure the backing board to the window frame. Apply a thin layer of adhesive or wood glue along the edges of the backing board that will come into contact with the frame. Press the backing board firmly against the frame, holding it in place for a few minutes to allow the glue to bond.
4. After securing the backing board, double-check to ensure it is stable and there are no gaps or loose corners. Gently press on the back of the frame to verify that the backing board is securely attached.
5. Inspect the front of the frame to ensure that the backing board is not visible and that the framed picture is centered and aligned correctly.
By securely attaching the backing board to the window frame, you will provide stability and support for your framed picture. It is essential to choose a fastening method that suits the design of the frame and ensures a secure and professional finish.