
Choosing the Right Fabric
When it comes to making curtain eyelet rings, selecting the right fabric is crucial. The fabric you choose will not only determine the overall aesthetic of your curtains but also its functionality and durability. Here are some important factors to consider when selecting the fabric for your curtain eyelet rings:
- Weight and Thickness: The weight and thickness of the fabric are important considerations as they will affect how well the curtains hang. Lighter fabrics, such as voile or sheer, create an airy and elegant look, while heavier fabrics like velvet or brocade provide a more formal and dramatic appearance. Choose a fabric that fits both your desired style and the functionality of the room.
- Opacity: Consider how much light you want to filter through your curtains. If you prefer a room filled with natural light, opt for translucent or sheer fabrics. For a darker and more private space, choose thicker fabrics with higher opacity.
- Pattern and Color: The pattern and color of the fabric play a major role in the overall design scheme of your room. Consider the existing decor and color palette to ensure that the fabric complements the overall aesthetic. Patterns can add visual interest and personality to your curtains, so choose one that reflects your style.
- Maintenance: Keep in mind the maintenance requirements of the fabric you choose. Some fabrics are machine washable, while others require dry cleaning or more delicate care. Consider your lifestyle and the practicality of maintaining the curtains before making a decision.
- Budget: Lastly, consider your budget when selecting the fabric. Fabrics come in a wide range of prices, so determine what you are willing to spend and find a fabric that fits within your budget without compromising quality or style.
By considering these factors, you can choose the perfect fabric for your curtain eyelet rings that not only suits your style but also enhances the overall ambiance of your space. Remember to take your time and explore different options before making a final decision.
Measuring Your Curtains
Accurate measurements are essential when it comes to making curtain eyelet rings. Whether you are making new curtains from scratch or adding eyelet rings to existing ones, here are some steps to help you measure your curtains correctly:
- Height: Measure the desired height of your curtains from the top edge of the curtain rod to where you want them to end. Take into account any additional length you want for a puddling effect or if you prefer a floor-length or sill-length curtain.
- Width: Determine the required width by measuring the width of the curtain rod or the desired coverage of the window. Add extra width if you want the curtains to have a gathered look when closed.
- Pattern Placement: If you are using a patterned fabric, consider the pattern placement when measuring the width. Take into account whether you want the pattern centered or aligned in a specific way.
- Hem Allowance: Remember to add an allowance for the hem at the bottom and sides of the curtains. This will ensure that the curtains have a clean and finished look.
- Number of Panels: Determine the number of panels you need based on the width of your curtains and the desired fullness. Generally, two panels are sufficient for most windows, but larger windows may require more panels.
It is important to measure accurately to ensure that your curtain eyelet rings fit properly and your curtains hang just as you envisioned. Double-check your measurements before cutting the fabric to avoid any unnecessary mistakes.
Remember, when in doubt, it is always better to measure twice and cut once. Taking the time to measure your curtains accurately will result in a professional and polished final product. Now that you have your measurements, you are ready to move on to gathering the materials needed for your curtain eyelet rings.
Gathering the Materials
Before you can start making curtain eyelet rings, you need to gather the necessary materials. Here is a list of items you will need:
- Fabric: Choose the fabric that you measured and selected in the previous step. Make sure you have enough fabric to cover the desired width and height of your curtains.
- Lining (optional): If you want to add extra weight or insulation to your curtains, consider adding a lining fabric. This is particularly useful for blocking out light or reducing noise.
- Eyelet Rings: You will need eyelet rings specifically designed for curtains. These rings typically come in a variety of sizes and finishes. Choose a size that matches the diameter of your curtain rod and a finish that complements the overall design of your curtains.
- Thread: Select a thread color that matches your fabric or complements it. Make sure the thread is strong enough to hold the weight of your curtains and secure the eyelet rings.
- Scissors: A good pair of fabric scissors is essential for cutting the fabric and any necessary trimming.
- Measuring Tape: You will need a measuring tape to ensure accurate measurements throughout the process.
- Pins: Pins are handy for securing the fabric in place during cutting and sewing.
- Sewing Machine (optional): If you have access to a sewing machine, it will make the sewing process faster and more efficient. However, you can also sew the eyelet rings by hand if you prefer.
Make sure you have all these materials readily available before starting the curtain-making process. It’s always a good idea to double-check your supplies to ensure you have everything you need to complete the project smoothly.
Now that you have gathered all the necessary materials, it’s time to move on to the next step: marking and cutting the fabric to prepare for the eyelet rings.
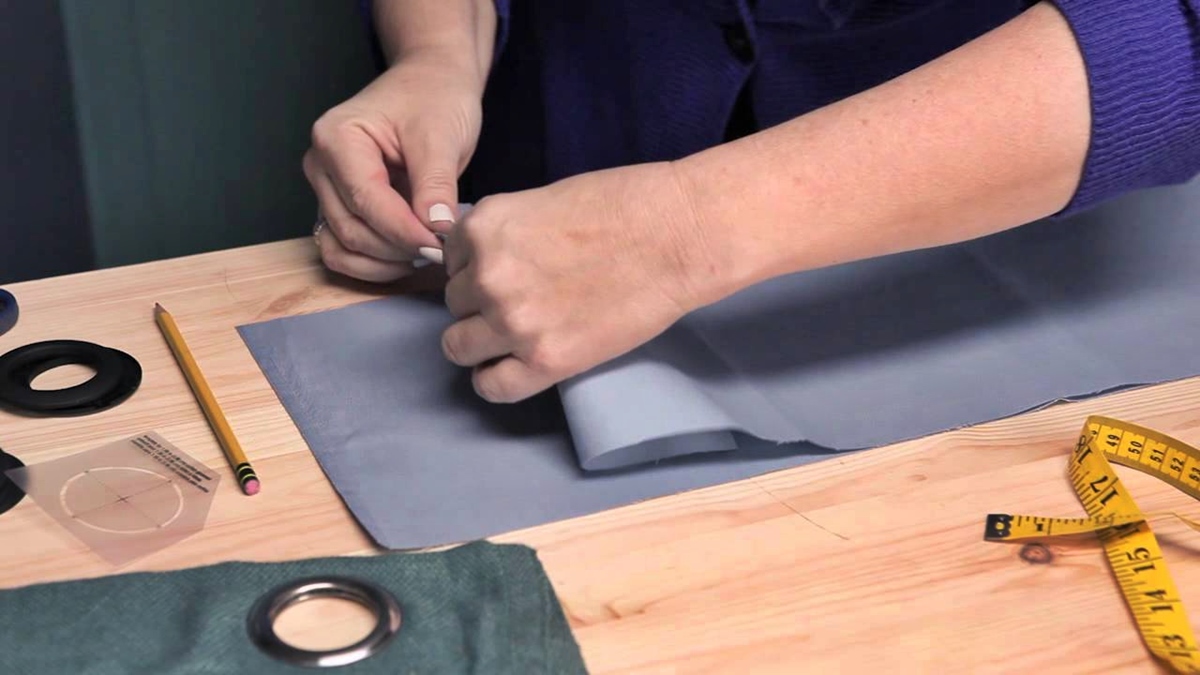
Marking and Cutting the Fabric
Once you have gathered all your materials, it’s time to mark and cut the fabric for your curtain eyelet rings. Follow these steps to ensure a precise and professional-looking result:
- Prepare Your Workstation: Find a clean and spacious area to lay out your fabric. Ensure that you have enough room to lay out the fabric smoothly without any obstructions.
- Mark the Measurements: Using a measuring tape, measure and mark the desired height and width of your curtains directly onto the fabric. Use a fabric pencil or chalk to make the marks visible but easily removable.
- Add Hem Allowance: If you haven’t already, add the necessary hem allowance to the bottom and sides of the fabric. This will ensure that your curtains have a clean and finished look. Use a ruler or straight edge to maintain straight lines while marking.
- Cut the Fabric: Carefully cut the fabric along the marked lines, using sharp fabric scissors. Take your time to ensure clean and even cuts.
- Double-Check Measurements: Before proceeding, double-check that the cut fabric matches your desired dimensions and that the edges are even. If needed, make any adjustments by trimming as necessary.
- Repeat for Multiple Panels: If you are making multiple curtain panels, repeat the marking and cutting process for each panel, ensuring that they are all the same size.
Remember to maintain a steady hand and take your time while cutting the fabric. Accuracy is key to achieving a professional-looking finished product. Once you have marked and cut the fabric, you are now ready to move on to the next step: sewing the eyelet rings onto the curtains.
Sewing the Eyelet Rings
Now that you have your fabric cut and ready, it’s time to sew the eyelet rings onto your curtains. Follow these steps to ensure a secure and polished finish:
- Position the Eyelet Rings: Lay your fabric panel flat and determine the placement of the eyelet rings. Keep in mind that the rings should be evenly spaced and positioned along the top edge of the fabric.
- Mark the Ring Placement: Use a fabric pencil or chalk to mark the placement of the eyelet rings on the fabric. Ensure that the marks are accurate and aligned to maintain consistency throughout the curtain.
- Prepare the Fabric: At each marked spot, create a small incision or a slit using sharp fabric scissors. This will allow you to insert the eyelet ring through the fabric.
- Attach the Eyelet Rings: Insert the eyelet rings into the slits or incisions on the fabric, following the manufacturer’s instructions. Make sure the rings are securely attached to the fabric and that the front side of the rings faces the desired side of the curtain.
- Secure the Rings: To ensure the eyelet rings stay in place, stitch around each ring using a sewing machine or by hand. Make a small, tight stitch around the inner edge of the ring, ensuring that the ring is securely attached to the fabric. Repeat the process for each eyelet ring.
- Trim any Excess Fabric: Once all the rings are securely attached, trim any excess fabric threads or loose ends to give your curtains a neat and tidy appearance.
Take your time and pay attention to detail while sewing the eyelet rings onto the fabric. The rings should be secure and evenly spaced to ensure the curtains hang properly. Once you have sewn the eyelet rings, you are now ready to move on to the next step: attaching the eyelet rings to the curtain rod.
Attaching the Eyelet Rings to the Curtain
With the eyelet rings sewn securely onto your fabric, it’s time to attach them to the curtain rod. Follow these steps to ensure a smooth and hassle-free installation:
- Remove the Curtain Rod: Take down the curtain rod and set it aside temporarily. This will make it easier to slide the eyelet rings onto the rod.
- Prepare the Eyelet Rings: Open each eyelet ring by either twisting or pulling it apart gently. Make sure they are wide enough for the curtain rod to pass through.
- Slide the Rings onto the Curtain Rod: Starting from one end, slide each eyelet ring onto the curtain rod, following the desired order and spacing. Use a steady and consistent motion to prevent any snagging or tangling of the rings.
- Distribute the Fabric Evenly: As you slide the curtain rings onto the rod, ensure that the fabric is evenly distributed along the curtain rod. This will help create a balanced and visually appealing look when the curtains are hung.
- Rehang the Curtain Rod: Once all the eyelet rings are in place, rehang the curtain rod back onto the brackets or hooks. Double-check that the rod is securely fastened and level.
- Test the Curtain Movement: Gently pull the curtains across the rod to ensure that they glide smoothly and without any obstructions. Make any necessary adjustments to the rings or fabric to ensure optimal functionality.
Attaching the eyelet rings to the curtain rod may require some patience and precision, but the result is well worth it. Once the rings are securely in place, you can move on to the next step: testing and adjusting the rings to achieve the desired curtain appearance.
Testing and Adjusting the Rings
After attaching the eyelet rings to the curtain rod, it’s essential to test and adjust them to ensure the curtains hang exactly as you desire. Follow these steps to achieve the perfect curtain appearance:
- Close and Open the Curtains: Gently close and open the curtains a few times to see how they move and drape. Check for any areas where the curtains may bunch up or catch on the rings.
- Adjusting the Ring Spacing: If you notice that the curtains are not hanging evenly or gathering as desired, you may need to adjust the spacing of the eyelet rings. Move them closer together or further apart as needed to achieve the desired curtain fullness.
- Synchronize the Rings: Ensure that all the eyelet rings on each curtain panel are synchronized and aligned horizontally. This will create a uniform and visually appealing appearance when the curtains are closed or open.
- Check for Uneven Hem: Examine the bottom hem of the curtains to ensure that it is even and level. Make any necessary adjustments by trimming excess fabric or resewing the hem.
- Smooth Out the Fabric: If you notice any wrinkles or unevenness in the fabric, gently smooth them out with your hands or lightly steam the curtains to remove any creases.
- Step Back and Evaluate: Step back and assess the overall appearance of the curtains. Make sure they hang evenly, the fabric drapes nicely, and the rings are not causing any distortion or puckering.
Testing and adjusting the rings is an essential part of the curtain-making process. Taking the time to ensure that everything is properly aligned and functional will result in curtains that look beautiful and function seamlessly.
Once you are satisfied with the curtain appearance and functionality, you are ready for the final step: hanging the curtains in their designated space.
Hanging the Curtains
With the curtains now fully prepared and adjusted, it’s time to hang them in their designated space. Follow these steps to ensure a successful and visually appealing installation:
- Prepare the Space: Clear the area around the window and make sure the curtain rod is securely fastened in place. Remove any obstructions or decor that may interfere with the curtain hanging process.
- Gently Hang the Curtains: Starting from one end, hang the curtains by sliding the curtain rod with the attached eyelet rings onto the brackets or hooks. Take your time to ensure that the rod is properly aligned and centered.
- Check the Curtain Alignment: Step back and evaluate the alignment of the curtains. Ensure they hang evenly and reach the desired length. Make any necessary adjustments by repositioning the bracket or adjusting the curtain rod.
- Tug and Adjust the Fabric: Gently tug on the curtains to smooth out any wrinkles or unevenness in the fabric. Adjust the gathers or folds as needed to achieve the desired curtain appearance.
- Step Back and Assess: Step back and evaluate the overall look of the curtains. Make sure they hang evenly and create the desired ambiance in the room. Ensure that any patterns in the fabric are aligned and centered correctly.
- Final Touches: Once the curtains are hung, make any last-minute adjustments to the eyelet rings or fabric as needed. Trim any loose threads or excess fabric for a neat and polished finish.
Hanging the curtains is the final step in the curtain-making process, and it’s the moment where you can see your hard work come to life. Take your time and ensure that everything is properly aligned and visually appealing. Once you are satisfied with the positioning and appearance of the curtains, stand back and enjoy the beautiful transformation they bring to your space.