
What is Roku Channel
The Roku Channel is a free streaming channel available on Roku devices that offers a wide range of movies, TV shows, live news, and more. It provides users with access to a variety of content without requiring a subscription or cable TV provider.
With the Roku Channel, you can enjoy a diverse selection of popular movies and TV shows, including both classic titles and recent releases. The channel is constantly updated with new content, ensuring that there is always something fresh to watch.
In addition to movies and TV shows, the Roku Channel also features a selection of live news channels, making it a convenient source for staying up-to-date with current events. Whether you’re interested in politics, sports, or entertainment news, you can find a channel that suits your preferences.
One of the key advantages of the Roku Channel is its simplicity and user-friendly interface. It is easy to navigate, allowing you to quickly find the content you want to watch. The channel is organized into different categories, such as Popular Movies, Featured Free, and News, making it effortless to discover new and exciting content.
Furthermore, the Roku Channel offers a personalized viewing experience. It provides recommendations based on your viewing history, suggesting movies and TV shows that align with your interests. This personalized approach ensures that you are constantly discovering new content that you enjoy.
The Roku Channel is available on a variety of Roku devices, including streaming players, smart TVs, and Roku-enabled soundbars. Whether you’ve just purchased a new Roku device or have had one for a while, accessing the Roku Channel is a straightforward process. Simply navigate to the Roku home screen and select the Roku Channel icon to start exploring the vast selection of free content.
With the Roku Channel, you can immerse yourself in a world of entertainment, without the need for cable TV subscriptions or additional expenses. It offers a wide range of movies, TV shows, and live news, all at no cost. So sit back, relax, and enjoy the diverse content available on the Roku Channel.
How to Set up Roku Device
Setting up a Roku device is a simple and hassle-free process that allows you to start streaming your favorite content in no time. Whether you’ve just purchased a new Roku device or are upgrading to a newer model, here’s a step-by-step guide on how to set up your Roku device:
- Connect your Roku device to your TV: Start by connecting the HDMI cable from your Roku device to an available HDMI port on your TV. If your Roku device supports Ethernet connection, you can also connect it to your router using an Ethernet cable for a more stable internet connection.
- Power up your Roku device: Plug the power adapter into your Roku device and connect it to a power source. Once connected, your Roku device should power on automatically.
- Select the appropriate input on your TV: Use your TV remote to navigate and select the input that matches the HDMI port you connected your Roku device to. You should see the Roku logo appear on your TV screen.
- Set up your internet connection: Follow the on-screen instructions to connect your Roku device to your home Wi-Fi network. Select your network from the list of available networks and enter your Wi-Fi password if prompted.
- Activate your Roku device: Once your Roku device is connected to the internet, it will display a unique activation code on your TV screen. Open a web browser on your computer or mobile device and go to the Roku activation website. Enter the activation code displayed on your TV and follow the prompts to activate your device.
- Create a Roku account: If you don’t already have a Roku account, you will be prompted to create one during the activation process. Provide the necessary details, including your email address and a password, to create your account.
- Complete the device setup: Once your Roku device is activated and your account is created, you will be prompted to complete the device setup on your TV screen. This includes downloading any available software updates and selecting your preferred language and display type.
- Add streaming channels: After completing the device setup, you can start adding your favorite streaming channels to your Roku device. Navigate to the Roku Channel Store and browse through the extensive collection of channels. Select the channels you want to add and follow the on-screen prompts to install them on your Roku device.
That’s it! Your Roku device is now set up and ready to use. You can explore the various streaming channels, customize your settings, and enjoy a wide range of content right from the comfort of your home.
How to Access Roku Channel Store
The Roku Channel Store is where you can find and add a variety of streaming channels to your Roku device. Whether you’re looking for movies, TV shows, sports, news, or any other type of content, the Roku Channel Store is your gateway to a vast selection of entertainment options. Here’s how you can easily access the Roku Channel Store:
- Go to the Roku home screen: Ensure that your Roku device is powered on and connected to your TV. Press the Home button on your Roku remote to navigate to the home screen.
- Select the Roku Channel Store: On the Roku home screen, scroll down to find the Roku Channel Store option. You can easily identify it by the colorful shopping bag icon.
- Access the Channel Store: Use the arrow keys on your Roku remote to highlight the Roku Channel Store and press the OK button to select it. This will open up the Channel Store and display a wide range of available channels.
- Browse the channel categories: The Roku Channel Store offers various categories to help you navigate and find the channels you’re interested in. Popular categories include Movies & TV, Sports, News, Kids & Family, and more. Use the arrow keys to browse through the categories and discover the channels that catch your eye.
- Explore channel recommendations: The Roku Channel Store also provides personalized channel recommendations based on your viewing history. These recommendations make it easier to find new channels that align with your interests. Simply scroll down on the Channel Store page to view the recommended channels and select the ones you want to explore further.
- Add channels to your Roku device: When you find a channel you’d like to add, select it from the Channel Store page. This will open the channel details screen, where you can learn more about the channel and its content. To add the channel, click on the “Add Channel” or “Install” button. The channel will then be added to your Roku device and appear on your home screen.
- Manage your channels: Once you have added channels to your Roku device, you can easily manage them. Go to your Roku home screen and scroll through the list of channels. Highlight a channel and press the * button on your remote to access the channel options. From here, you can move or delete channels as desired.
By following these steps, you can easily access the Roku Channel Store and discover a wealth of streaming channels to enhance your entertainment experience. Whether you’re in the mood for movies, TV shows, news, or sports, the Roku Channel Store has something for everyone.
How to Browse and Add Channels
The Roku platform offers thousands of channels, ranging from popular streaming services to niche content providers. Browsing and adding channels to your Roku device is a straightforward process that gives you access to a vast array of entertainment options. Here’s how you can easily browse and add channels:
- Go to your Roku home screen: Ensure that your Roku device is powered on and connected to your TV. Press the Home button on your Roku remote to navigate to the home screen.
- Scroll to the left and select “Streaming Channels”: Use the arrow keys on your remote to scroll to the left side of the home screen. Select the “Streaming Channels” option and press the OK button on your remote. This will open the Roku Channel Store.
- Browse the channel categories: The Roku Channel Store offers various categories to help you browse and discover channels. Some popular categories include Movies & TV, Sports, News, Kids & Family, and more. Navigate through these categories by scrolling up and down, and use the OK button to select a category of interest.
- Use the search feature: If you have a specific channel in mind, you can use the search feature to quickly find it. From the Roku Channel Store, press the up arrow key on your remote to activate the search bar. Use the on-screen keyboard to enter the name of the channel you’re looking for, and then select the channel from the search results.
- View channel details: When you find a channel you’re interested in, highlight it and press the OK button on your remote. This will open the channel details page, where you can learn more about the channel’s content, read user reviews, and view screenshots or previews.
- Add the channel: To add the channel to your Roku device, select the “Add Channel” or “Install” button on the channel details page. The channel will then be added to your Roku device.
- Manage your channels: After you’ve added channels to your Roku device, you can easily manage them. Go back to your Roku home screen and scroll through the list of channels. Highlight a channel and press the * button on your remote to access the channel options. From here, you can move, delete, or customize channel settings as desired.
By following these steps, you can effortlessly browse and add channels to your Roku device, expanding your streaming options and tailoring your entertainment lineup to suit your preferences. Whether you’re looking for movies, TV shows, sports, or news, the Roku platform has a channel for every interest.
How to Search for Specific Channels
Searching for specific channels on your Roku device allows you to quickly find and access the content you’re looking for. Whether you have a specific channel in mind or want to explore channels within a particular genre, the Roku platform provides a convenient search feature. Here’s how you can search for specific channels:
- Go to your Roku home screen: Make sure your Roku device is powered on and connected to your TV. Press the Home button on your Roku remote to navigate to the home screen.
- Scroll to the right and select “Search”: Use the arrow keys on your remote to scroll to the right side of the home screen. Select the “Search” option and press the OK button on your remote.
- Enter the channel name or keyword: On the search page, you’ll see a virtual keyboard. Use the arrow keys to navigate to the desired letters or characters and press the OK button to enter them. Enter the channel name or a keyword related to the channels you’re interested in.
- Explore search results: As you enter the channel name or keyword, the search results will appear below. Roku will display relevant channels based on your search terms. Scroll through the search results using the arrow keys on your remote.
- Select the desired channel: Once you find the channel you’re looking for in the search results, highlight it and press the OK button on your remote. This will open the channel details page, providing you with more information about the channel.
- Add the channel: From the channel details page, select the “Add Channel” or “Install” button to add the channel to your Roku device. The channel will then be added and available for you to stream.
- Manage your channels: After adding channels to your Roku device, you can easily manage them. Return to your Roku home screen and scroll through the list of channels. Highlight a channel and press the * button on your remote to access the channel options. From here, you can move, delete, or customize channel settings as desired.
By utilizing the search feature on your Roku device, you can quickly find and add specific channels to enhance your streaming experience. Whether you’re searching for a particular channel by name or exploring channels related to a specific genre, Roku’s search functionality makes it easy to discover and enjoy the content you love.
How to Add and Manage Channel Subscriptions
One of the great features of Roku is the ability to add and manage channel subscriptions, giving you access to premium content and services. Whether you want to subscribe to popular streaming services or niche channels, Roku provides a seamless way to expand your entertainment options. Here’s how you can add and manage channel subscriptions on your Roku device:
- Go to your Roku home screen: Ensure your Roku device is powered on and connected to your TV. Press the Home button on your Roku remote to navigate to the home screen.
- Scroll to the Roku Channel Store: Use the arrow keys on your remote to scroll to the left side of the home screen. Select the Roku Channel Store option and press the OK button on your remote.
- Browse or search for the desired channel: From the Roku Channel Store, you can browse through the available channels or use the search feature to find a specific channel.
- Select the channel: Once you find the channel you want to subscribe to, highlight it and press the OK button on your remote. This will open the channel details page.
- Subscribe to the channel: On the channel details page, you may see a “Subscribe” or “Free Trial” button. If it is a premium channel, you may need to sign up for a subscription or free trial to access its content. Select the appropriate option and follow the on-screen prompts to complete the subscription process.
- Manage your subscriptions: After subscribing to channels, you can easily manage them. Go back to your Roku home screen and scroll through the list of channels. Highlight a subscribed channel and press the * button on your remote to access the channel options. From here, you can manage your subscription, modify payment details, cancel a subscription, or view billing information.
- Access and enjoy subscribed channels: To access the subscribed channels, return to your Roku home screen and navigate to the “My Channels” section. Subscribed channels will appear alongside your other channels. Select a subscribed channel to start enjoying its content.
- Renew or cancel subscriptions: If you wish to renew or cancel a subscription, you can do so through your Roku account settings. Access your Roku account on a web browser, navigate to the “Manage your subscriptions” section, and make the necessary changes.
By following these steps, you can add and manage channel subscriptions on your Roku device, ensuring access to a wide range of premium content and services. Whether you want to enjoy popular streaming platforms or discover niche channels, Roku offers the flexibility and convenience to customize your entertainment experience.
How to Stream Roku Channel Content
Streaming content on the Roku Channel is a breeze, allowing you to enjoy a wide range of movies, TV shows, and live news with just a few simple steps. Whether you’re looking to relax with a movie marathon or catch up on the latest episodes of your favorite TV series, here’s how you can easily stream content on the Roku Channel:
- Navigate to the Roku home screen: Make sure your Roku device is powered on and connected to your TV. Press the Home button on your Roku remote to go to the home screen.
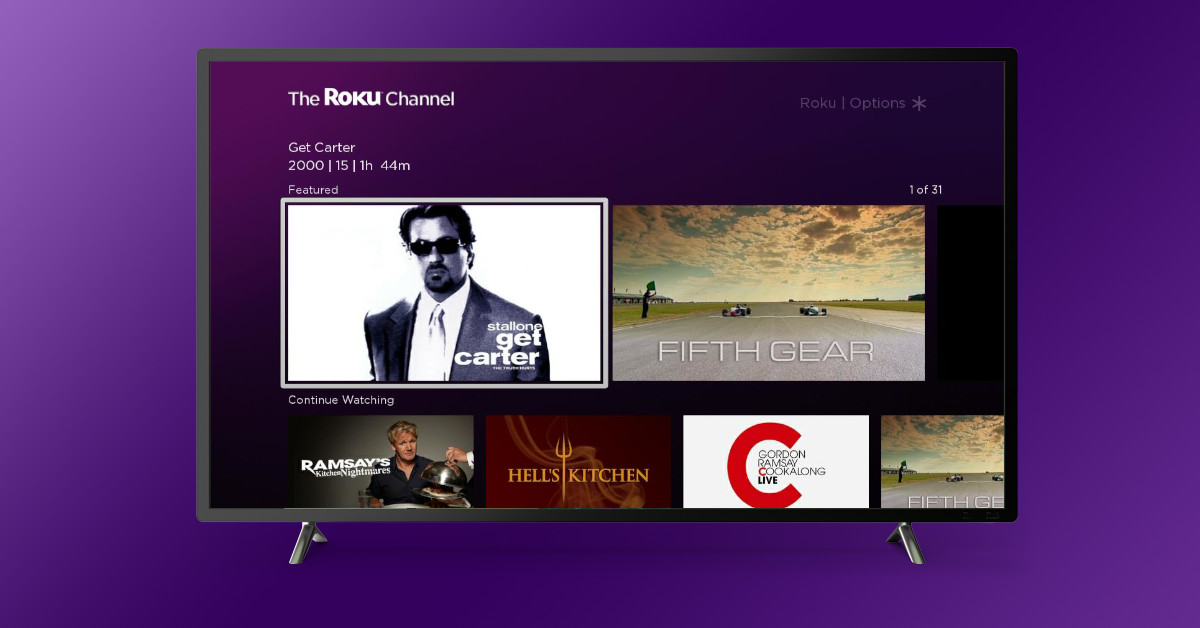
- Select the Roku Channel: Scroll through the list of channels on your home screen and locate the Roku Channel. Highlight it and press the OK button on your remote to launch the channel.
- Explore the content: On the Roku Channel, you’ll find a variety of categories and sections to browse through, such as Popular Movies, Featured Free, TV Shows, News, and more. Use the arrow keys on your remote to navigate through the available options and highlight the content you want to watch.
- Select the content: Once you’ve found the movie, TV show, or news program you want to stream, highlight it and press the OK button on your remote to view the content details.
- Start streaming: On the content details page, you’ll see a “Play” or “Watch Now” button. Select it and sit back as the Roku Channel buffers the content. Within moments, your selected movie, TV show, or news program will begin streaming on your TV screen.
- Control playback: While streaming, you can control playback using the buttons on your Roku remote. Pause, play, rewind, or fast-forward through the content to suit your preferences. You can also adjust the volume using the volume control buttons on your remote.
- Access additional options: During playback, you can access additional options by pressing the * button on your remote. This will bring up a menu where you can customize settings, enable subtitles or closed captions, view related content, or access other features specific to the Roku Channel.
- Enjoy uninterrupted streaming: To ensure uninterrupted streaming, make sure your Roku device is connected to a stable internet connection. For the best streaming experience, a high-speed internet connection is recommended.
- Explore other channels: If you want to switch to a different channel or explore more content, simply press the Home button on your remote to return to the Roku home screen. From there, you can browse and select other channels and continue streaming.
By following these steps, you can easily stream content on the Roku Channel, allowing you to enjoy a wide variety of movies, TV shows, and live news at your convenience. With its user-friendly interface and extensive content library, the Roku Channel offers a seamless streaming experience for hours of entertainment.
How to Customize Roku Channel Settings
Customizing the settings on your Roku Channel allows you to personalize your streaming experience and tailor it to your preferences. From adjusting display settings to managing parental controls, Roku offers various customization options. Here’s how you can easily customize the settings on your Roku Channel:
- Go to the Roku home screen: Ensure your Roku device is powered on and connected to your TV. Press the Home button on your Roku remote to navigate to the home screen.
- Select the Roku Channel: Scroll through the list of channels on your home screen and locate the Roku Channel. Highlight it and press the OK button on your remote to launch the channel.
- Access channel settings: Once inside the Roku Channel, press the * button on your remote to open the options menu. Use the arrow keys to navigate to the “Settings” option and press the OK button to select it.
- Adjust display settings: Within the channel settings, you can customize the display settings according to your preferences. You can change the screen resolution, adjust the display mode, enable or disable screensavers, and modify other display-related options.
- Set up parental controls: If you want to restrict access to certain content based on ratings or other criteria, you can set up parental controls. Within the settings menu, navigate to the “Parental Controls” option and follow the on-screen instructions to set your desired restrictions.
- Manage closed captions and subtitles: The Roku Channel offers closed captions and subtitles for select content. To customize these options, navigate to the “Captions & Subtitles” section in the settings menu. From there, you can enable or disable captions and subtitles, as well as adjust their appearance and language preferences.
- Configure audio settings: If you want to optimize the audio experience while streaming content, you can adjust the audio settings. Whether you prefer stereo, surround sound, or other audio modes, you can customize these options within the settings menu.
- Manage channel notifications: If you want to receive notifications about new content, updates, or special offers from the Roku Channel, you can manage your notification preferences. Navigate to the “Notifications” section within the settings menu and select the relevant options.
- Save changes and exit: Once you’ve made the desired customizations, navigate to the “Save” or “Apply” button within the settings menu to save your changes. You can then exit the channel settings by pressing the Home button on your remote.
By following these steps, you can easily customize the settings on your Roku Channel to enhance your streaming experience. Whether you’re adjusting the display settings, managing parental controls, or configuring the audio options, Roku offers a range of customization features to cater to your preferences.
How to Cast Roku Channel to Other Devices
Roku devices offer the convenience of casting or streaming content from the Roku Channel to other compatible devices, such as smart TVs or mobile devices. This allows you to enjoy your favorite movies, TV shows, and more on a larger screen or in a different location. Here’s how you can easily cast the Roku Channel to other devices:
- Ensure all devices are connected to the same Wi-Fi network: Make sure both your Roku device and the device you want to cast to (e.g., smart TV, mobile device) are connected to the same Wi-Fi network. This is necessary for them to be able to communicate with each other.
- Install the Roku app on your mobile device (if applicable): If you want to cast to a mobile device, such as a smartphone or tablet, you’ll need to install the Roku app from your device’s app store. The Roku app is available for both iOS and Android devices.
- Launch the Roku Channel: On your Roku device, navigate to the home screen and select the Roku Channel. This will open the channel on your TV screen.
- Access the casting feature: Depending on the device you want to cast to, the casting feature may be accessed differently. If you’re casting to a smart TV with built-in Roku, look for the casting icon or option in the settings or display menu. If you’re casting to a mobile device, launch the Roku app and tap on the casting icon within the app.
- Select the device to cast to: Once you’ve accessed the casting feature, a list of available devices to cast to will be displayed. Select the device you want to cast to from the list.
- Confirm the connection: On both devices, the casting process will initiate and a notification or prompt may appear to confirm the connection. Follow the on-screen instructions to complete the casting process.
- Start streaming on the casting device: Once the casting process is complete, you can navigate and control the Roku Channel directly from the casting device. Use the casting device’s remote or controls to select the content you want to stream on the Roku Channel.
- End the casting session: When you’re finished streaming, you can end the casting session by either disconnecting the devices within their respective settings menus or by selecting the “Stop Casting” or similar option from the casting device.
By following these steps, you can easily cast the Roku Channel from your Roku device to other compatible devices. Whether you want to enjoy content on a larger screen or stream it to a different location, the casting feature provides flexibility and convenience for an enhanced viewing experience.
How to Troubleshoot Roku Channel Issues
While Roku devices are generally reliable and easy to use, occasional issues may arise when using the Roku Channel. If you encounter any problems, don’t worry – there are several troubleshooting steps you can take to resolve common issues and get the Roku Channel running smoothly again. Here’s how to troubleshoot Roku Channel issues:
- Check your internet connection: Start by ensuring that your Roku device is connected to a stable internet connection. Go to the settings menu on your Roku device and select “Network” to verify the connection status. If there are any issues, try restarting your router or contacting your internet service provider.
- Restart your Roku device: A simple restart can often resolve minor glitches. Go to the settings menu on your Roku device, select “System,” and choose “System Restart.” Alternatively, you can unplug the power cable from your Roku device, wait for a few seconds, and then plug it back in.
- Check for software updates: Outdated software can sometimes cause compatibility issues. From the settings menu on your Roku device, select “System,” followed by “System Update.” Choose “Check Now” to see if any updates are available. If updates are found, install them and restart your Roku device.
- Clear cache and data: If the Roku Channel is running slowly or experiencing frequent buffering, clearing the cache and data may help. Go to the settings menu on your Roku device, select “System,” followed by “Advanced System Settings.” Choose “External Control,” and then “Clear cache” or “Clear data.” Note that clearing data will log you out of any signed-in apps.
- Reinstall the Roku Channel: If the Roku Channel is not functioning properly, you can try uninstalling and reinstalling it. Go to the Roku home screen and highlight the Roku Channel. Press the star (*) button on your remote and select “Remove Channel.” After removal, go back to the Roku Channel Store and reinstall the Roku Channel.
- Check for channel-specific issues: If the problem persists with a specific channel, check for any reported issues. Visit the Roku support website or search online for any known problems with that particular channel. If other users are experiencing similar issues, it’s likely a temporary problem that will be resolved soon.
- Contact Roku support: If none of the above steps resolve the issue, it may be necessary to contact Roku support. Visit the Roku support website for assistance. You can access live chat or find contact information to reach out to a support representative who can provide further guidance.
By following these troubleshooting steps, you can often resolve common Roku Channel issues and ensure a smooth streaming experience. Remember to consult Roku support for more specific or complex problems and to stay informed about any known issues affecting the Roku Channel.