
Tools Needed
When it comes to removing your I Watch band, having the right tools will make the process much easier. Here are the essential tools you’ll need:
- Spring Bar Tool: This tool is specifically designed for removing watch bands with spring bar pins. It features a pointed end to push in the spring bar and a forked end to leverage the bar out of the watch lugs.
- Precision Screwdriver Set: Some I Watch bands, such as the Link Bracelet, may require the use of small screws. A precision screwdriver set will allow you to remove these screws without causing any damage.
- Cloth or Soft Pad: It’s always a good idea to have a soft cloth or pad nearby to place your I Watch on while you’re working. This will help prevent scratches or damage to the watch face or casing.
- Cleaning Solution: Depending on the type of material your I Watch band is made of, you may need a specialized cleaning solution to remove dirt or grime. Refer to the manufacturer’s guidelines for the appropriate cleaning product.
- Pliers: In some cases, you may need a pair of pliers to help loosen or grip certain components of the watch band, especially if they are tightly secured.
By having these tools on hand, you’ll be well-equipped to safely and effectively remove your I Watch band. Remember to exercise caution while handling the tools and follow the specific instructions for your particular watch band type.
Step 1: Identify the Type of I Watch Band
Before you can remove your I Watch band, it’s important to first identify its type. Different watch bands have different mechanisms for attachment and removal. Here are some popular types of I Watch bands and how to identify them:
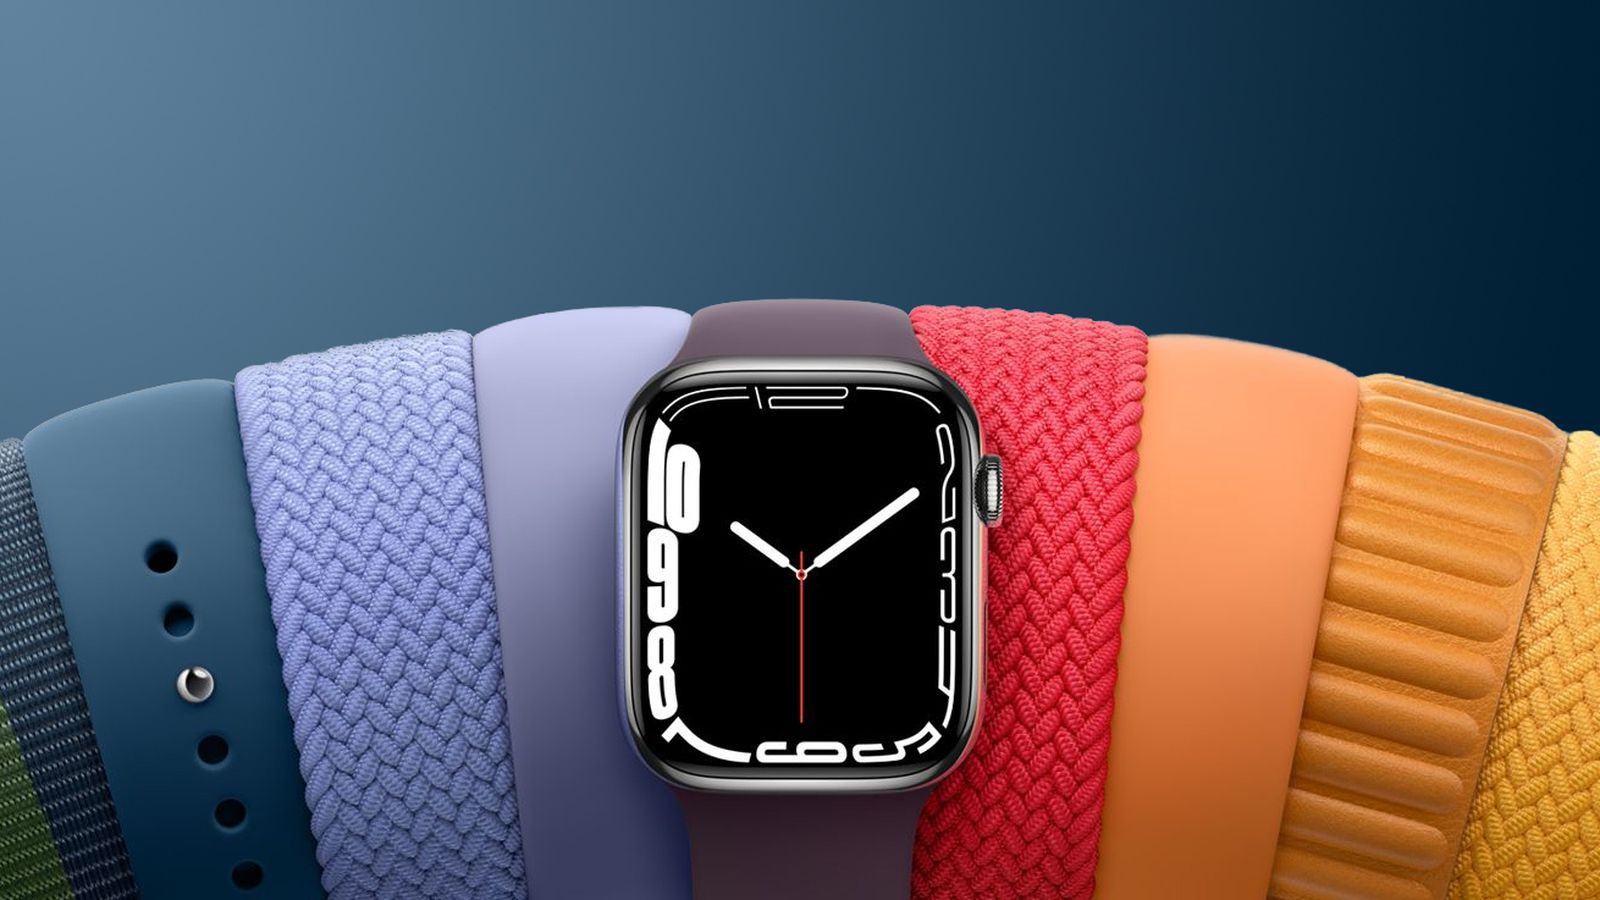
- Sport Band: The Sport Band is made of a smooth, flexible material with a pin-and-tuck closure. It typically has small holes throughout the band for breathability. To identify a Sport Band, look for its lightweight design and adjustable strap with multiple notches.
- Milanese Loop: The Milanese Loop features a mesh-like stainless steel design that wraps around the wrist. It has a magnetic closure for easy adjustment and a sophisticated look. To identify a Milanese Loop, look for its distinctive woven pattern and smooth texture.
- Leather Loop: The Leather Loop is made of leather with a magnetic closure. It offers a comfortable fit and a stylish, modern look. To identify a Leather Loop, look for its soft and supple leather construction with a loop-style closure.
- Link Bracelet: The Link Bracelet is made of stainless steel and has a flexible, adjustable band with removable links. It features a butterfly clasp for secure closure. To identify a Link Bracelet, look for its intricate link design and a sturdy, polished construction.
- Modern Buckle: The Modern Buckle is made of leather and has a buckle closure with a unique design. It provides a refined and elegant look. To identify a Modern Buckle, look for its thin, tapered leather strap and a distinctive buckle closure.
- Hermès Band: The Hermès Band is a collaboration between Apple and the luxury brand Hermès. It features high-quality leather and a unique closure system. To identify a Hermès Band, look for the Hermès branding on the band and its premium leather craftsmanship.
- Solo Loop: The Solo Loop is a seamless, continuous band made of stretchable silicone or braided yarn. It has no buckles or closures and stretches over the hand for a comfortable fit. To identify a Solo Loop, look for its clean, minimalistic design with no visible closures.
- Braided Solo Loop: The Braided Solo Loop is similar to the Solo Loop but features a braided design. It provides a unique and textured look. To identify a Braided Solo Loop, look for its intricately woven and textured appearance.
- Leather Solo Loop: The Leather Solo Loop is a loop-style band made of genuine leather. It offers a comfortable fit and a classic aesthetic. To identify a Leather Solo Loop, look for its smooth leather finish and loop closure.
- Apple Watch Band Adapter: This is not a specific band type, but an adapter that allows you to connect third-party bands to your I Watch. To identify an Apple Watch Band Adapter, look for a small piece that attaches to the watch lugs and provides compatibility with different band styles.
Identifying the type of I Watch band you have will help you follow the appropriate removal steps for that specific band. Make sure to take note of the unique features and characteristics of your band before moving on to the next step.
Step 2: Remove the Sport Band
The Sport Band is one of the most popular and easily removable I Watch bands. Follow these steps to remove it:
- Turn your I Watch over and locate the two small buttons on the underside of the watch face.
- Press and hold one of the buttons while simultaneously sliding the end of the Sport Band out of the watch lugs.
- Repeat the same process for the other side of the Sport Band.
- Once both sides are detached, you can simply slide the Sport Band out from the watch.
Be careful not to apply too much force when pressing the buttons to avoid damaging your I Watch. The Sport Band should come off smoothly with a gentle pull once it is released from both sides. Remember to keep the buttons pressed while sliding the band out of the watch lugs to ensure a secure removal.
If you plan to reattach the Sport Band or switch to a different band, align the new band’s connector with the lugs on your I Watch. Slide it in until you hear a click, indicating that it is securely attached.
Removing the Sport Band is a simple and straightforward process that allows you to switch up the style and look of your I Watch quickly and easily. Once you have successfully removed the Sport Band, you can proceed to remove other types of I Watch bands following their respective removal methods.
Step 3: Remove the Milanese Loop
The Milanese Loop adds a touch of elegance to your I Watch with its unique mesh-like stainless steel design. Follow these steps to remove the Milanese Loop:
- Place your I Watch face-down on a soft cloth or pad to avoid scratches.
- Locate the small button on the underside of the watch band where it attaches to the watch case.
- Press and hold the button while simultaneously sliding the Milanese Loop out of the watch lugs.
- Once the Milanese Loop is detached from one side, repeat the process for the other side, pressing the button and sliding the band out.
- With both sides released, carefully slide the Milanese Loop out from the watch.
Ensure that you’re holding onto the Milanese Loop securely as you remove it to prevent it from slipping out of your hand and potentially getting damaged. The button may require a bit of pressure to release, but avoid using excessive force to avoid any accidental damage.
If you want to reattach the Milanese Loop or switch to a different band, align the band’s connector with the lugs on your I Watch. Slide it in until you hear a click, confirming that it is securely attached.
Removing the Milanese Loop allows you to change the look and feel of your I Watch effortlessly. Whether you prefer a more formal or casual band, mastering the removal process allows you to enjoy the versatility of your I Watch to its fullest.
Step 4: Remove the Leather Loop
The Leather Loop band offers a stylish and comfortable option for your I Watch. Here’s how to remove it:
- Lay your I Watch face-down on a soft cloth or pad to protect the screen.
- Locate the button on the underside of the Leather Loop near where it attaches to the watch case.
- Press and hold the button while simultaneously sliding the Leather Loop band out of the watch lugs.
- Repeat the same process for the other side of the band, pressing the button and sliding it out.
- Once both sides are detached, slide the Leather Loop band out from the watch.
Take care not to use excessive force when pressing the button to avoid any potential damage to your I Watch. The Leather Loop should glide out smoothly from the watch lugs once it is released from both sides.
If you wish to reattach the Leather Loop or switch to a different band, align the band’s connector with the lugs on your I Watch. Slide it in until you hear a reassuring click, indicating that it is securely attached.
Removing the Leather Loop band gives you the freedom to change the style and look of your I Watch effortlessly. Whether you’re opting for a more formal or casual band, mastering the removal process allows you to fully utilize the versatility of your I Watch.
Step 5: Remove the Link Bracelet
The Link Bracelet is a sophisticated and adjustable stainless steel band for your I Watch. Follow these steps to remove it:
- Place your I Watch face-down on a soft cloth or pad to protect the screen.
- Locate the butterfly clasp on the underside of the Link Bracelet.
- Hold the Link Bracelet firmly and lift the clasp to expose the small release button.
- Press and hold the release button while simultaneously sliding the link section away from the clasp.
- Remove as many links as necessary by repeating the previous step.
- Once you’ve removed the desired number of links, slide the end of the Link Bracelet out of the watch lugs.
Take care while removing the links to avoid any accidental scratches or damage to your I Watch. The release button may require some pressure, but avoid using excessive force to prevent any potential harm.
If you plan to reattach the Link Bracelet or switch to a different band, align the band’s connector with the lugs on your I Watch. Slide it in until you hear a satisfying click, indicating that it is securely attached.
Removing the Link Bracelet offers you the flexibility to customize the fit and style of your I Watch. Whether you need a looser or tighter fit, mastering the removal process allows you to enjoy the versatility of your Link Bracelet band.
Step 6: Remove the Modern Buckle
The Modern Buckle is a sleek and sophisticated leather band with a unique buckle closure. Here’s how to remove it from your I Watch:
- Place your I Watch face-down on a soft cloth or pad to protect the screen.
- Locate the small lever on the back of the Modern Buckle.
- Flip the lever upwards to release the band.
- With the lever in the released position, gently slide the band out from the watch lugs.
Be careful not to force the lever or apply excessive pressure while removing the band to avoid any potential damage. The Modern Buckle should easily slide out once the lever is lifted.
If you wish to reattach the Modern Buckle or switch to a different band, align the band’s connector with the lugs on your I Watch. Slide it in until you hear a reassuring click, indicating a secure attachment.
Removing the Modern Buckle allows you to change the style and look of your I Watch effortlessly. Whether you’re transitioning from a formal to a casual setting, mastering the removal process empowers you to fully enjoy the versatility of your Modern Buckle band.
Step 7: Remove the Hermès Band
The Hermès band is a luxurious and premium option for your I Watch, combining high-quality leather craftsmanship with elegant design. Follow these steps to remove the Hermès Band:
- Lay your I Watch face-down on a soft cloth or pad to protect the screen.
- Locate the two release buttons on the underside of the Hermès Band near where it attaches to the watch case.
- Simultaneously press and hold both release buttons while gently sliding the band out of the watch lugs.
- Once the band is detached from one side, repeat the process for the other side, pressing the buttons and sliding the band out.
- With both sides released, carefully slide the Hermès Band out from the watch.
Ensure that you’re holding onto the Hermès Band securely as you remove it to prevent it from slipping out of your hand and getting damaged. The release buttons may require a bit of pressure, but avoid using excessive force to avoid any accidental harm.
If you plan to reattach the Hermès Band or switch to a different band, align the band’s connector with the lugs on your I Watch. Slide it in until you hear a satisfying click, indicating a secure attachment.
Removing the Hermès Band allows you to change up the style and sophistication of your I Watch effortlessly. Whether you’re opting for a different band or just want to switch things up, mastering the removal process allows you to fully appreciate the elegance of your Hermès Band.
Step 8: Remove the Solo Loop
The Solo Loop is a seamless and stretchable band that provides a secure and comfortable fit for your I Watch. Follow these steps to remove the Solo Loop:
- Place your I Watch face-down on a soft cloth or pad to protect the screen.
- Hold your I Watch and find the small notch on one side of the Solo Loop band.
- Gently pull the notch toward the opposite end of the band, stretching the Solo Loop.
- With the band stretched, slide it away from the watch lugs, releasing one side.
- Repeat the same process for the other side of the Solo Loop, pulling the notch and sliding the band off.
- Once both sides are detached, carefully remove the Solo Loop from your I Watch.
Be cautious not to pull the Solo Loop too forcefully, as it is made to stretch but may snap if excessive pressure is applied. Take your time to ensure a gentle and smooth removal.
If you wish to reattach the Solo Loop or switch to a different band, align the band’s connector with the lugs on your I Watch. Slide it in until you hear a satisfying click, indicating a secure attachment.
Removing the Solo Loop offers you the flexibility to change the fit and style of your I Watch effortlessly. Whether you need a looser or tighter fit, mastering the removal process allows you to fully enjoy the versatility of your Solo Loop band.
Step 9: Remove the Braided Solo Loop
The Braided Solo Loop is a unique and textured band made of interwoven braided yarn for your I Watch. Follow these steps to remove the Braided Solo Loop:
- Lay your I Watch face-down on a soft cloth or pad to protect the screen.
- Find the small notch on one side of the Braided Solo Loop band.
- Gently pull the notch away from the watch lugs, stretching the Braided Solo Loop.
- While the band is stretched, slide it away from the watch lugs to detach one side.
- Repeat the same process for the other side of the Braided Solo Loop, pulling the notch and sliding the band off.
- Once both sides are separated, carefully remove the Braided Solo Loop from your I Watch.
Take care not to pull the Braided Solo Loop too forcefully, as the braided yarn may stretch and lose its integrity. Maintain a gentle and controlled pull to ensure a smooth removal process.
If you plan to reattach the Braided Solo Loop or switch to a different band, align the band’s connector with the lugs on your I Watch. Slide it in until you hear a reassuring click, indicating a secure attachment.
Removing the Braided Solo Loop allows you to switch up the style and feel of your I Watch effortlessly. Whether you’re looking for a different texture or a change of color, mastering the removal process grants you the freedom to fully enjoy the uniqueness of your Braided Solo Loop band.
Step 10: Remove the Leather Solo Loop
The Leather Solo Loop is a loop-style band made of genuine leather that offers a classic and comfortable look for your I Watch. Follow these steps to remove the Leather Solo Loop:
- Place your I Watch face-down on a soft cloth or pad to protect the screen.
- Locate the small notch on one side of the Leather Solo Loop band.
- Gently pull the notch away from the watch lugs, stretching the Leather Solo Loop.
- While the band is stretched, slide it away from the watch lugs to detach one side.
- Repeat the same process for the other side of the Leather Solo Loop, pulling the notch and sliding the band off.
- Once both sides are separated, carefully remove the Leather Solo Loop from your I Watch.
Take care not to pull the Leather Solo Loop too forcefully, as the leather material may stretch and lose its shape. Maintain a gentle and controlled pull to ensure a smooth removal process.
If you wish to reattach the Leather Solo Loop or switch to a different band, align the band’s connector with the lugs on your I Watch. Slide it in until you hear a satisfying click, indicating a secure attachment.
Removing the Leather Solo Loop allows you to change the style and feel of your I Watch effortlessly. Whether you’re looking for a more formal or casual look, mastering the removal process grants you the freedom to fully appreciate the versatility of your Leather Solo Loop band.
Step 11: Remove the Apple Watch Band Adapter
The Apple Watch Band Adapter is not a specific band type, but rather an accessory that allows you to connect third-party bands to your I Watch. Here’s how to remove the Apple Watch Band Adapter:
- Lay your I Watch face-down on a soft cloth or pad to protect the screen.
- Locate the small release buttons on the underside of the Apple Watch Band Adapter.
- Simultaneously press and hold both release buttons.
- With the buttons pressed, gently slide the Apple Watch Band Adapter away from the watch lugs.
- Once the band adapter is detached from one side, repeat the process for the other side.
- With both sides released, carefully remove the Apple Watch Band Adapter from your I Watch.
Be cautious when pressing the release buttons, making sure not to apply excessive force. The Apple Watch Band Adapter should slide out smoothly once it is released from both sides.
Removing the Apple Watch Band Adapter allows you to switch between different third-party bands with ease. Simply slide the new band’s connector into the lugs on your I Watch until you hear a satisfying click, indicating a secure attachment.
Mastering the removal process of the Apple Watch Band Adapter provides you with the flexibility to explore various band options and personalize your I Watch according to your style and preferences.
Step 12: Clean and Maintain Your I Watch Band
To keep your I Watch band looking its best and prolong its lifespan, it’s important to clean and maintain it regularly. Here are some essential tips to follow:
- Read the Manufacturer’s Guidelines: Check the manufacturer’s instructions for specific cleaning and maintenance recommendations for your particular I Watch band. Different materials may require different care methods.
- Gently Remove Debris: Use a soft, lint-free cloth or a microfiber cloth to gently wipe away any dirt, dust, or residue from the surface of the band. Avoid using abrasive materials or harsh chemicals.
- Consider the Band Material: Depending on the material of your I Watch band, you may need to take additional precautions. For example, leather bands should be kept away from excessive moisture to prevent damage.
- Use Mild Soap or Cleaning Solution: If your band is resistant to water, you can dampen a cloth with mild soap or a specialized cleaning solution and gently wipe the band. Be sure to follow the manufacturer’s recommendations for cleaning products.
- Dry Thoroughly: After cleaning, make sure to thoroughly dry your I Watch band to prevent moisture buildup. Use a clean, dry cloth to remove any excess moisture and allow the band to air dry completely before reattaching it to your I Watch.
- Avoid Extreme Temperatures: Do not expose your I Watch band to extreme temperatures, as this can cause damage or distortion to certain materials. Keep your band away from direct sunlight, extreme heat, or cold.
- Store Properly: When you’re not wearing your I Watch band, store it in a cool, dry place away from direct sunlight to prevent discoloration or deformation. Consider using a dedicated watch band storage case or organizer to keep it safe and organized.
- Rotate Your Bands: If you have multiple I Watch bands, rotate them regularly to distribute wear and tear more evenly. This can help extend the lifespan of your bands.
- Check for Damage: Regularly inspect your I Watch band for any signs of wear, such as loose stitching, cracks, or tears. If you notice any damage, consider contacting the manufacturer or a professional to repair or replace the band.
By following these cleaning and maintenance tips, you can keep your I Watch band in top condition and enjoy its stylish appearance for years to come.