
Selecting the Right Watch Band
When it comes to choosing a watch band, there are several factors to consider to ensure you find the perfect fit for your timepiece. Whether you’re replacing an old band or looking to switch up the style of your watch, here are some key points to keep in mind:
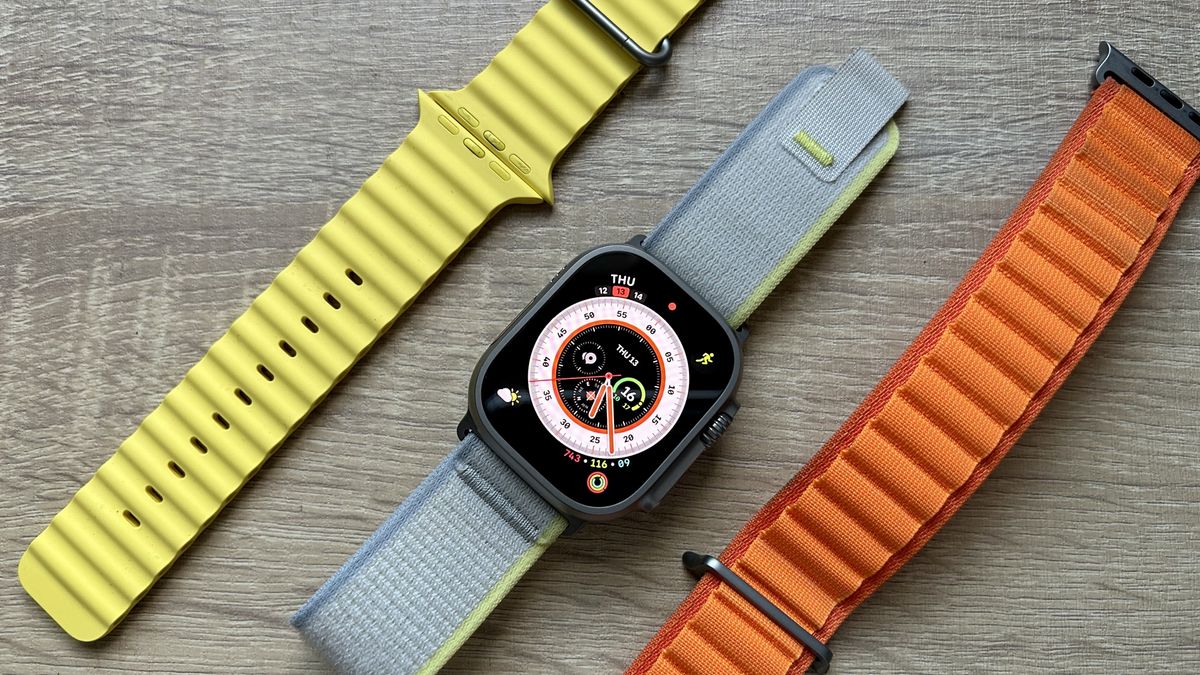
- Material: The material of the watch band plays a significant role in both its durability and aesthetics. Common options include metal, leather, rubber, nylon, and silicone. Each material has its own unique qualities, so think about your lifestyle and personal preferences when making a choice.
- Style: Consider the overall style and design of your watch. Do you want a classic look with a leather strap or a sporty vibe with a stainless steel bracelet? Look for a band that complements the watch’s face and case, ensuring a cohesive and stylish appearance.
- Size: Pay attention to the width of the watch band and ensure it is compatible with your watch’s lug width. If you’re unsure about the size, refer to your watch’s user manual or consult a professional to make sure you get the right fit.
- Color: The color of the watch band is another crucial aspect to consider. Opt for a color that matches or complements the watch’s dial color and case material. Alternatively, you can go for a contrasting color for a more eye-catching look.
- Comfort: Comfort is key when it comes to wearing a watch band for extended periods. Look for bands with adjustable straps or appropriate sizing options to ensure a comfortable and secure fit on your wrist.
By considering these factors, you’ll be able to narrow down your options and find the perfect watch band that suits both your personal style and the functional requirements of your watch.
Tools You Will Need
Before you start replacing or adjusting your watch band, gather the following tools to ensure a smooth and hassle-free process:
- Spring Bar Tool: This handy tool is essential for removing and attaching watch bands with spring bars. It typically features a pointed end and a forked end, allowing you to maneuver and release the spring bars from the watch’s lugs.
- Pliers: Pliers can be useful for some watch band removal tasks, especially if the spring bars are stubborn. Opt for a pair of small, fine-tipped pliers to provide more control and precision.
- Tape or Cloth: Having some tape or a soft cloth can come in handy to protect your watch’s case and crystal from accidental scratches or scuffs while working on the band.
- Pin Pusher: A pin pusher tool is useful for removing link pins in metal watch bands, allowing you to adjust the size accordingly. It typically features a pointed end for pushing out the pins and a flat end for pushing them back in.
- Scissors: If you’re working with a fabric or nylon watch band that needs trimming, a pair of scissors will be necessary to cut off any excess material.
- Tweezers: Tweezers can be handy for manipulating small parts or aligning spring bars during the process.
Having these tools ready will help simplify the task of replacing or adjusting your watch band. It’s important to handle them with care and ensure you use the appropriate tool for each specific task to avoid damaging your watch or the band.
Removing the Old Watch Band
Once you have gathered the necessary tools, it’s time to remove the old watch band from your timepiece. Follow these step-by-step instructions to ensure a successful band removal:
- Secure the Watch: Place the watch face-down on a soft and clean surface to prevent any scratches or damage to the watch’s case and crystal. You can use a soft cloth or a watch holder to keep it steady.
- Identify the Spring Bars: Look for the small spring bars located on each end of the watch band. These are typically responsible for attaching the band to the watch’s lugs.
- Insert the Spring Bar Tool: Take your spring bar tool and insert the pointed end into the small gap between the watch band and the watch’s lug. Apply gentle pressure inward to compress the spring bar.
- Release the Spring Bar: While holding the spring bar in a compressed position, carefully maneuver the tool to release the spring bar from its slot in the watch’s lugs. Repeat this step for the other end of the watch band as well.
- Remove the Old Band: Once both spring bars are released, gently slide or wiggle the old watch band out of the lugs. Take your time and ensure a steady hand to avoid any potential damage.
- Clean the Watch: While the watch band is removed, this is a good opportunity to clean the watch’s case and lugs. Use a soft cloth or a mild cleaning solution and gently wipe away any dirt or residue.
By following these steps, you will be able to successfully remove the old watch band from your timepiece. Remember to handle the watch with care and be patient throughout the process to avoid any accidental mishaps.
Attaching the New Watch Band
With the old watch band removed, it’s time to attach the new one to your watch. Follow these step-by-step instructions to ensure a secure and proper attachment:
- Prepare the New Watch Band: Make sure your new watch band is compatible with your watch’s lugs and correctly sized to fit your wrist. Check for any additional instructions or components that may come with the band, such as spring bars or screws.
- Insert the Spring Bars: If your new watch band requires spring bars, insert them into the holes on the band’s lugs. Ensure they are seated securely and properly aligned with the watch’s lugs.
- Align the Watch and Band: Hold the new watch band close to the watch’s lugs and align the holes in the band with the holes in the lugs. Make sure the band is positioned correctly and evenly on both sides of the watch.
- Insert the Spring Bar Tool: Take your spring bar tool and insert the pointed end into the hole between the watch band and the lug. Apply gentle pressure to compress the spring bar.
- Attach the Watch Band: While holding the spring bar in a compressed position, carefully slide the band’s lug onto the watch’s lug until the spring bar is aligned with the hole in the lug. Repeat this step for the other end of the watch band.
- Release the Spring Bar: Once the band is securely attached, slowly release the pressure on the spring bar tool to allow the spring bar to expand and lock the band into place. Ensure the spring bar is fully engaged and not sticking out.
- Test the Attachment: Gently tug on the watch band to ensure it is firmly attached to the watch. It should feel secure and not slide or move excessively.
By following these steps, you will be able to successfully attach the new watch band to your timepiece. Take your time and be careful throughout the process to ensure a proper and secure attachment.
Adjusting the Size of the Watch Band
When it comes to achieving a comfortable fit, sometimes the watch band needs to be adjusted to your wrist size. Follow these steps to adjust the size of your watch band:
- Determine the Desired Size: Measure your wrist to determine the desired length of the watch band. Keep in mind that it’s recommended to leave a little extra room for flexibility and comfort.
- Locate the Link Pins: If you have a metal watch band with links, look for the link pins that hold the links together. Most watches have arrows on the inside of the band to indicate the direction of the pin removal.
- Remove the Link Pins: Using a pin pusher tool or a small screwdriver, carefully push out the link pins in the direction indicated by the arrows. Start with the links closest to the clasp and remove the necessary number of links to achieve the desired length.
- Reconnect the Links: After removing the desired number of links, reconnect the remaining links by aligning them and inserting the link pins back into the holes. Make sure the pins are inserted securely and flush with the surface of the band.
- Secure the Clasp: If your watch band has a folding clasp or a deployment buckle, adjust the size by using the micro-adjustment holes or by moving the clasp along the band. Ensure a secure fit that feels comfortable on your wrist.
- Try on the Watch: Once you have made the necessary adjustments, try on the watch to ensure it fits comfortably. It should be snug but not too tight, allowing for a bit of movement.
By following these steps, you can easily adjust the size of your watch band to achieve a perfect fit. Remember to take your time, be careful while removing or reconnecting the links, and ensure that the watch feels comfortable on your wrist.
Tips and Tricks for a Perfect Fit
Getting the perfect fit for your watch band ensures both comfort and style. Here are some tips and tricks to help you achieve the ideal fit:
- Consult a Professional: If you’re unsure about adjusting the size of your watch band or have a complex band design, it’s best to seek assistance from a professional watchmaker or jeweler. They have the expertise to make precise adjustments without risking any damage to your watch.
- Consider Temperature and Swelling: Keep in mind that your wrist size may vary due to temperature or humidity. For a comfortable fit throughout the day, consider leaving a little extra room to accommodate any swelling that might occur.
- Pay Attention to Weight: Different watch bands have different weights, which can affect how the watch sits on your wrist. Consider the weight distribution and choose a band that balances well with your watch’s case.
- Experiment with Different Materials: Explore different watch band materials to find the one that suits your comfort preferences and lifestyle. For example, if you lead an active lifestyle, a rubber or silicone band might be more suitable, while a leather band offers an elegant and classic look for formal occasions.
- Use Micro-Adjustment Features: If your watch band has micro-adjustment holes or a clasp with fine-tuning options, take advantage of these features to find the perfect fit. This allows you to make small adjustments to the band’s size for optimal comfort.
- Periodically Check for Wear: Over time, watch bands can experience wear and tear. Regularly inspect the band for any signs of damage, such as loose links or worn-out clasps. Replace or repair the band as needed to maintain a secure and comfortable fit.
- Personalize with Accessories: Enhance the look and fit of your watch band by adding accessories such as NATO straps, leather wraps, or strap extenders. These can add a unique touch and improve the overall comfort and fit.
By following these tips and tricks, you can fine-tune the fit of your watch band to achieve the perfect combination of comfort and style. Remember to consider your needs and preferences while experimenting with different options to find what works best for you.
Caring for Your Watch Band
Proper care and maintenance of your watch band are crucial to ensure its longevity and to keep it looking great. Here are some important tips to help you care for your watch band:
- Regular Cleaning: Depending on the material of your watch band, clean it regularly to remove dirt, sweat, and oils. Use a soft cloth or a mild soap and water solution to gently wipe down the band. Avoid using harsh chemicals or abrasive materials that can damage the band.
- Avoid Moisture and Chemicals: Protect your watch band from excessive moisture and exposure to chemicals such as perfumes, lotions, and cleaning agents. These substances can cause discoloration, deterioration, or damage to the band.
- Store Properly: When you’re not wearing your watch, store it in a cool and dry place. Avoid storing it in direct sunlight or in a humid environment, as this can cause the band to deteriorate faster.
- Rotate Your Bands: If you have multiple watch bands, consider rotating them regularly. This allows each band to have a break and recover from daily wear, extending their overall lifespan.
- Be Mindful of Activities: Take caution when engaging in activities that may put stress on your watch band, such as intense sports or manual labor. Remove the watch or choose a more durable band option to prevent any damage.
- Service and Maintenance: Periodically have your watch serviced by a professional to ensure that the band is secure, the spring bars are in good condition, and any necessary adjustments or repairs are made.
- Follow Manufacturer’s Instructions: Always refer to the manufacturer’s instructions and guidelines for specific care instructions for your watch band. They may have specific recommendations based on the material and design of the band.
By following these care tips, you can prolong the lifespan of your watch band and keep it in optimal condition. Remember that proper care and maintenance not only preserve the aesthetics of the band but also ensure the overall functionality and longevity of your timepiece.