
Chapter 1: Understanding the Xperia Play Tablet
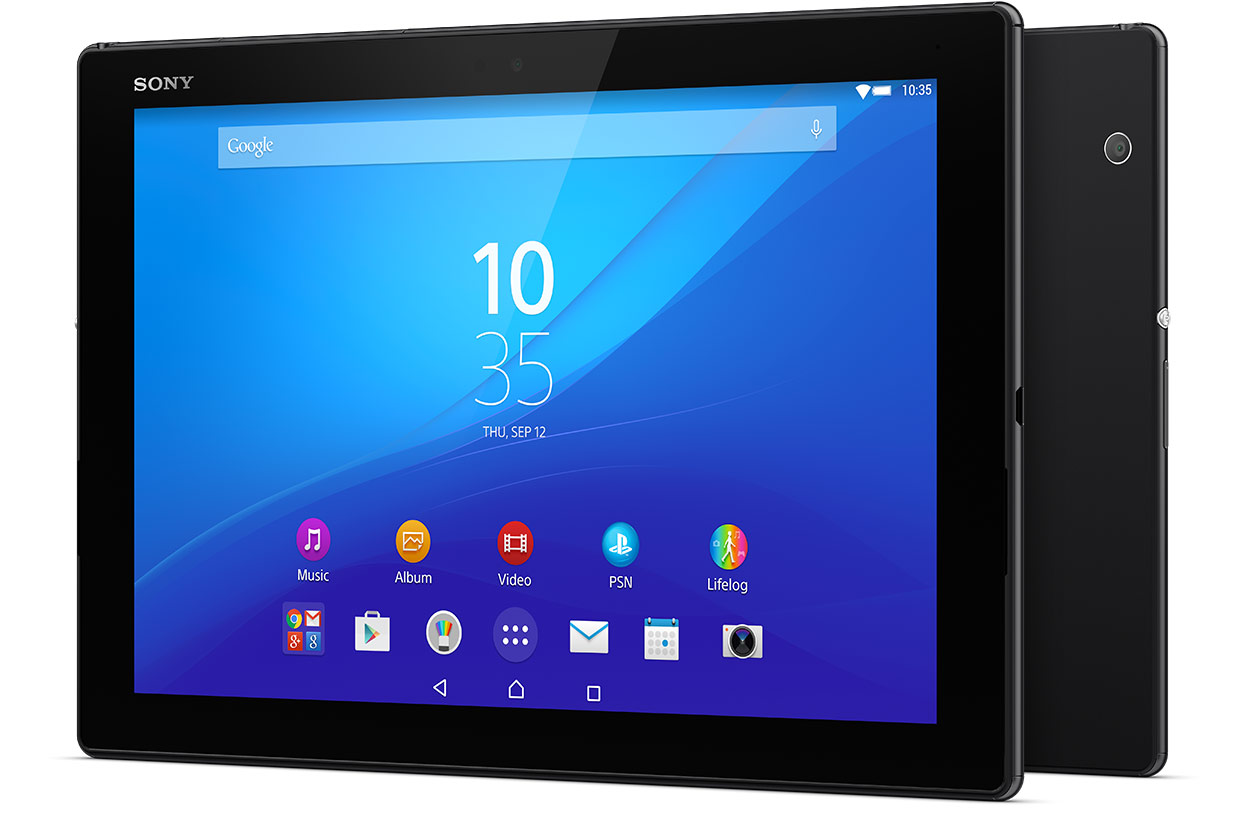
The Xperia Play Tablet, a revolutionary device that seamlessly combines the functionality of a tablet with the immersive gaming experience of a PlayStation, has captured the hearts of tech enthusiasts and gamers alike. This innovative gadget, released by Sony, boasts a sleek and ergonomic design, making it a standout in the ever-evolving world of portable entertainment.
At its core, the Xperia Play Tablet is powered by cutting-edge technology, featuring a high-resolution display that vividly showcases games, videos, and applications. With its intuitive touchscreen interface and responsive controls, users can effortlessly navigate through menus and interact with their favorite games with unparalleled ease.
Furthermore, the Xperia Play Tablet is equipped with a powerful processor and ample memory, ensuring smooth multitasking and seamless gaming performance. This means users can switch between gaming, browsing, and streaming without experiencing lags or slowdowns, enhancing the overall user experience.
One of the most captivating features of the Xperia Play Tablet is its integration of PlayStation gaming capabilities. With access to a vast library of PlayStation games, users can immerse themselves in a diverse range of gaming experiences, from classic titles to modern masterpieces, all within the portable convenience of a tablet.
In addition to its gaming prowess, the Xperia Play Tablet serves as a versatile multimedia hub, allowing users to enjoy high-definition videos, music, and e-books on a vibrant and immersive display. Its connectivity options, including Wi-Fi and Bluetooth, enable seamless integration with other devices and peripherals, expanding its functionality beyond gaming.
The Xperia Play Tablet's commitment to delivering an exceptional entertainment experience is further exemplified by its robust battery life, ensuring extended gaming and multimedia enjoyment on a single charge.
In essence, the Xperia Play Tablet represents a harmonious fusion of gaming innovation and tablet functionality, catering to the diverse needs of modern consumers who seek a portable, all-in-one entertainment solution. Its intuitive design, powerful performance, and seamless PlayStation integration make it a standout choice for individuals seeking a dynamic and immersive entertainment experience on the go.
Chapter 2: Common Issues and Troubleshooting
The Xperia Play Tablet, despite its advanced technology and reliable performance, may encounter common issues that can affect its functionality. Understanding these issues and knowing how to troubleshoot them is essential for maintaining the optimal performance of the device.
Screen Freezes or Unresponsive Touch
One prevalent issue experienced by users is the screen freezing or becoming unresponsive to touch inputs. This can be attributed to software glitches or excessive resource utilization. To troubleshoot this issue, a soft reset can be performed by pressing and holding the power button for 10-15 seconds until the device restarts. If the problem persists, a factory reset may be necessary, but it is recommended to back up important data before proceeding.
Battery Draining Quickly
Another common concern is rapid battery drainage, which can hinder the device's portability and usability. To address this issue, users can start by identifying power-hungry applications through the device's settings and either uninstall or optimize their usage. Additionally, reducing screen brightness, disabling background app refresh, and enabling power-saving modes can contribute to extending the battery life.
Overheating During Extended Usage
Extended gaming or multimedia consumption may lead to the device overheating, affecting performance and user comfort. To mitigate this issue, users can ensure proper ventilation by avoiding obstructing the device's vents and reducing the intensity of resource-demanding activities. If overheating persists, a firmware update or professional inspection may be necessary to address potential hardware-related issues.
Connectivity Problems
Issues related to Wi-Fi or Bluetooth connectivity can disrupt the device's seamless integration with other devices and online services. Troubleshooting these problems involves checking for software updates, resetting network settings, and ensuring that the device is within the optimal range of the wireless signal. In some cases, resetting the router or modem can also resolve connectivity issues.
Application Crashes and Performance Lag
Users may encounter instances where applications crash unexpectedly or the device experiences performance lag during multitasking. Clearing app caches, updating software, and ensuring sufficient available storage can help alleviate these issues. Additionally, terminating background processes and limiting the number of simultaneously running applications can contribute to smoother performance.
By being aware of these common issues and their respective troubleshooting methods, users can effectively address potential challenges encountered with the Xperia Play Tablet, ensuring a seamless and enjoyable user experience.
Chapter 3: Tools and Equipment Needed for Repair
When it comes to repairing the Xperia Play Tablet, having the right tools and equipment is essential for a successful and efficient restoration process. Whether addressing hardware malfunctions or conducting component replacements, the following tools and equipment are indispensable for carrying out repairs effectively:
-
Precision Screwdriver Set: A comprehensive set of precision screwdrivers with various head types and sizes is crucial for disassembling the Xperia Play Tablet without causing damage to the intricate components and fasteners.
-
Spudger Tool: This non-conductive tool is ideal for prying open the tablet's casing and disconnecting delicate ribbon cables and connectors during disassembly.
-
Tweezers: Fine-tipped, non-magnetic tweezers are essential for handling small screws, connectors, and components with precision and dexterity.
-
Opening Picks: These thin, flexible tools aid in separating the tablet's housing and prying apart adhesive components without causing scratches or damage.
-
Suction Cup: A suction cup with a handle facilitates the safe removal of the tablet's display assembly, minimizing the risk of accidental damage or breakage.
-
Heat Gun or Hair Dryer: When dealing with components adhered with adhesive, a heat gun or hair dryer can be used to gently apply heat, making it easier to detach and remove parts without causing structural damage.
-
Anti-Static Mat and Wrist Strap: To prevent electrostatic discharge (ESD) damage to sensitive electronic components, an anti-static mat and wrist strap are essential for maintaining a safe working environment during repairs.
-
Replacement Parts and Adhesives: It's crucial to have a stock of genuine replacement parts, including screens, batteries, cameras, and other components, as well as specialized adhesives for reassembling the tablet securely.
-
Magnifying Lamp or Headset: For intricate and detailed repair tasks, a magnifying lamp or headset can aid in visual clarity and precision, especially when working with small connectors and soldering components.
-
Cleaning Supplies: Isopropyl alcohol, lint-free cloths, and compressed air are essential for safely cleaning components, connectors, and surfaces during the repair process.
By ensuring the availability of these tools and equipment, repair technicians and enthusiasts can efficiently address a wide range of issues affecting the Xperia Play Tablet, from screen replacements to intricate component repairs, while maintaining the integrity and functionality of the device.
Chapter 4: Disassembly and Assembly
Disassembling and reassembling the Xperia Play Tablet requires meticulous attention to detail and a systematic approach to ensure the integrity of the device is maintained throughout the repair process. Here is a comprehensive guide to the disassembly and assembly procedures:
Disassembly Procedure:
-
Power Off and Preparation: Begin by powering off the tablet and ensuring a clean and well-lit workspace. Use an anti-static mat and wrist strap to prevent ESD damage to sensitive components.
-
Removal of External Components: Carefully remove the SIM card tray and any external accessories, such as stylus pens or protective cases, from the tablet.
-
Opening the Casing: Utilizing a spudger tool and opening picks, gently pry open the tablet's casing, taking care not to force or damage the plastic clips securing the housing.
-
Disconnecting Internal Components: Once the casing is removed, disconnect the battery, display assembly, and other internal components using appropriate tools and techniques to avoid damaging delicate ribbon cables and connectors.
-
Separating the Display Assembly: If the repair involves screen replacement, use a suction cup to lift and separate the display assembly from the tablet's frame, taking care not to damage the flex cables.
-
Removing Adhesive Components: In cases where adhesive is used to secure components, gently apply heat using a heat gun or hair dryer to soften the adhesive, making it easier to detach and remove parts without causing structural damage.
Assembly Procedure:
-
Replacement Part Preparation: If replacing components, ensure that the replacement parts are compatible and in optimal condition. Clean the mating surfaces and connectors to remove any debris or adhesive residue.
-
Reattaching Internal Components: Carefully reattach the display assembly, battery, and other internal components, ensuring proper alignment and secure connections to prevent functionality issues.
-
Securing the Casing: Align the tablet's casing and carefully snap it back into place, ensuring that all plastic clips are properly engaged without applying excessive force.
-
Final Checks and Testing: Power on the tablet and perform a comprehensive functionality test to ensure that the repaired or replaced components are functioning as expected. Verify the responsiveness of the touchscreen, display quality, and overall performance.
By following these detailed disassembly and assembly procedures, repair technicians and enthusiasts can effectively address a wide range of issues affecting the Xperia Play Tablet while maintaining the device's structural integrity and functionality.
Chapter 5: Screen Replacement
Replacing the screen of the Xperia Play Tablet is a delicate yet achievable task that requires precision and attention to detail. Whether the screen has suffered cracks, display abnormalities, or unresponsive touch functionality, a methodical approach to screen replacement can restore the tablet's visual and interactive capabilities.
Preparation and Safety Measures
Before initiating the screen replacement process, it is essential to power off the tablet and ensure a clean and organized workspace. Using an anti-static mat and wrist strap helps mitigate the risk of static discharge, safeguarding the tablet's sensitive electronic components. Additionally, gathering the necessary tools, including a precision screwdriver set, spudger tool, suction cup, and opening picks, is crucial for a seamless screen replacement procedure.
Disassembly of the Tablet
To access the screen for replacement, the tablet's casing must be carefully removed using the appropriate tools. Once the casing is detached, the display assembly, which includes the damaged screen, can be separated from the tablet's frame. Utilizing a suction cup to lift the display assembly and disconnecting the flex cables with precision are integral steps in the disassembly process.
Screen Replacement and Reassembly
Upon acquiring a compatible replacement screen, attention to detail is crucial during the installation. Carefully aligning the new screen with the tablet's frame and ensuring secure connections of the flex cables are vital for the successful integration of the replacement component. Once the new screen is in place, the tablet's casing can be meticulously secured, and a comprehensive functionality test should be conducted to verify the responsiveness and display quality of the replaced screen.
Final Checks and Testing
After reassembly, powering on the tablet and conducting a thorough functionality test is imperative to confirm the proper integration of the replacement screen. Verifying the touchscreen's responsiveness, display clarity, and absence of abnormalities ensures the successful completion of the screen replacement process.
By following these detailed steps and exercising precision throughout the screen replacement procedure, repair technicians and enthusiasts can effectively restore the visual and interactive capabilities of the Xperia Play Tablet, providing users with a seamless and immersive digital experience.
Chapter 6: Battery Replacement
The battery of the Xperia Play Tablet, like any rechargeable power source, undergoes natural degradation over time, leading to reduced battery life and overall performance. When the tablet's battery no longer holds a charge or exhibits signs of diminished capacity, a battery replacement becomes a viable solution to restore the device's portability and usability.
Preparing for Battery Replacement
Before initiating the battery replacement process, it is essential to power off the tablet and ensure a well-lit and organized workspace. Utilizing an anti-static mat and wrist strap helps mitigate the risk of electrostatic discharge, safeguarding the tablet's sensitive electronic components during the repair procedure. Additionally, having the necessary tools, including a precision screwdriver set, spudger tool, and tweezers, is crucial for a seamless battery replacement process.
Disassembly and Accessing the Battery
Accessing the tablet's battery requires careful disassembly of the device. Once the tablet's casing is removed using appropriate tools, the internal components are accessed to reach the battery. Disconnecting the battery from the tablet's circuitry and removing it from its housing are delicate yet essential steps in the disassembly process. Attention to detail is crucial to avoid damaging delicate connectors and components during this phase.
Battery Replacement and Reassembly
Acquiring a compatible replacement battery is fundamental for a successful battery replacement. Carefully inserting the new battery into its housing and ensuring secure connections to the tablet's circuitry are vital for the seamless integration of the replacement component. Once the new battery is in place, the tablet's casing can be meticulously secured, and a comprehensive functionality test should be conducted to verify the restored battery performance.
Final Checks and Testing
After reassembly, powering on the tablet and conducting a thorough functionality test is imperative to confirm the proper integration of the replacement battery. Verifying the tablet's ability to hold a charge, battery life, and overall performance ensures the successful completion of the battery replacement process.
By following these detailed steps and exercising precision throughout the battery replacement procedure, repair technicians and enthusiasts can effectively restore the portability and usability of the Xperia Play Tablet, providing users with extended battery life and uninterrupted digital experiences.
Chapter 7: Speaker and Microphone Repair
The speaker and microphone components of the Xperia Play Tablet play integral roles in facilitating seamless communication and immersive audio experiences. When these components encounter issues such as distorted sound, muffled audio, or microphone malfunctions, a systematic approach to repair is essential to restore the tablet's audio capabilities.
Diagnostic Assessment
Before initiating the repair process, a thorough diagnostic assessment of the speaker and microphone is crucial. This involves testing the audio output and input functionalities to identify specific issues affecting the components. Utilizing diagnostic tools and audio testing applications can aid in pinpointing the root cause of the problems, whether they stem from hardware malfunctions or software-related issues.
Disassembly and Component Access
Accessing the speaker and microphone components requires careful disassembly of the tablet. Once the casing is removed using appropriate tools, the internal components are accessed to reach the speaker and microphone units. Disconnecting these components from the tablet's circuitry and carefully removing them from their housing are delicate yet essential steps in the disassembly process.
Component Inspection and Replacement
Upon identifying the specific issues affecting the speaker and microphone components, a thorough inspection is conducted to assess for physical damage, loose connections, or component wear. If the issues are attributed to component malfunctions, acquiring compatible replacement speaker and microphone units becomes paramount. Carefully integrating the new components into their respective housing and ensuring secure connections to the tablet's circuitry are vital for the seamless installation of the replacement units.
Reassembly and Testing
Once the new speaker and microphone components are in place, the tablet's casing is meticulously secured, and a comprehensive functionality test is conducted. Verifying the restored audio output and input functionalities, including sound clarity and microphone responsiveness, ensures the successful completion of the repair process.
By following these detailed steps and exercising precision throughout the speaker and microphone repair procedure, repair technicians and enthusiasts can effectively restore the audio capabilities of the Xperia Play Tablet, providing users with clear communication and immersive audio experiences.
Chapter 8: Camera Repair
The camera functionality of the Xperia Play Tablet serves as a gateway to capturing memorable moments and engaging in visual communication. When the camera encounters issues such as blurred images, focus problems, or malfunctioning sensors, a systematic approach to repair is essential to restore the tablet's imaging capabilities.
Diagnostic Assessment
Before delving into the repair process, a comprehensive diagnostic assessment of the camera's performance is crucial. This involves testing the camera's functionalities, including image capture, autofocus, and sensor responsiveness. Utilizing diagnostic tools and camera testing applications aids in identifying specific issues affecting the camera components, whether they stem from hardware malfunctions or software-related anomalies.
Disassembly and Component Access
Accessing the camera components requires meticulous disassembly of the tablet. Once the casing is carefully removed using appropriate tools, the internal components are accessed to reach the camera unit. Disconnecting the camera from the tablet's circuitry and carefully detaching it from its housing are delicate yet essential steps in the disassembly process.
Component Inspection and Replacement
Upon identifying the specific issues affecting the camera, a thorough inspection is conducted to assess for physical damage, lens alignment, or sensor malfunctions. If the issues are attributed to component malfunctions, acquiring compatible replacement camera units becomes paramount. Carefully integrating the new camera unit into its housing and ensuring secure connections to the tablet's circuitry are vital for the seamless installation of the replacement component.
Reassembly and Testing
Once the new camera unit is in place, the tablet's casing is meticulously secured, and a comprehensive functionality test is conducted. Verifying the restored imaging capabilities, including image clarity, focus accuracy, and sensor responsiveness, ensures the successful completion of the repair process.
By following these detailed steps and exercising precision throughout the camera repair procedure, repair technicians and enthusiasts can effectively restore the imaging capabilities of the Xperia Play Tablet, providing users with the ability to capture and cherish moments through seamless visual communication.
Chapter 9: Charging Port Repair
The charging port of the Xperia Play Tablet is a vital interface that facilitates the replenishment of the device's battery and serves as a conduit for seamless connectivity with external power sources. When the charging port encounters issues such as intermittent charging, loose connections, or physical damage, a systematic approach to repair is essential to restore the tablet's charging functionality.
Diagnostic Assessment
Before embarking on the repair process, a thorough diagnostic assessment of the charging port's performance is imperative. This involves testing the port's connectivity with different charging cables and power sources to identify specific issues affecting its functionality. Utilizing diagnostic tools to measure voltage and inspecting the port for physical anomalies aids in pinpointing the root cause of the charging issues, whether they stem from internal component malfunctions or external damage.
Disassembly and Component Access
Accessing the charging port for repair necessitates careful disassembly of the tablet. Once the casing is meticulously removed using appropriate tools, the internal components are accessed to reach the charging port. Disconnecting the port from the tablet's circuitry and carefully detaching it from its housing are delicate yet essential steps in the disassembly process.
Component Inspection and Repair
Upon accessing the charging port, a thorough inspection is conducted to assess for loose connections, damaged pins, or debris accumulation. If the issues are attributed to component malfunctions, acquiring compatible replacement charging port units becomes paramount. Carefully integrating the new port into its housing and ensuring secure connections to the tablet's circuitry are vital for the seamless installation of the replacement component.
Reassembly and Testing
Once the new charging port is in place, the tablet's casing is meticulously secured, and a comprehensive functionality test is conducted. Verifying the restored charging functionality, including stable connectivity with charging cables and consistent power input, ensures the successful completion of the repair process.
By following these detailed steps and exercising precision throughout the charging port repair procedure, repair technicians and enthusiasts can effectively restore the charging capabilities of the Xperia Play Tablet, providing users with uninterrupted access to power and seamless connectivity with external power sources.
Chapter 10: Common Software Issues and Solutions
Software-related issues can significantly impact the performance and usability of the Xperia Play Tablet. Understanding and effectively addressing these common software issues is crucial for ensuring a seamless and enjoyable user experience. Here are some prevalent software issues encountered by users, along with practical solutions to mitigate these challenges:
1. System Freezes and Slow Performance
Symptoms: The tablet experiences frequent freezes, lags, or unresponsiveness, leading to a sluggish overall performance.
Solution: Clearing the system cache, uninstalling resource-intensive applications, and performing a factory reset can help resolve system freezes and restore optimal performance.
2. Application Crashes and Instability
Symptoms: Installed applications crash unexpectedly or exhibit instability during usage, disrupting the user experience.
Solution: Updating applications to the latest versions, clearing app caches, and ensuring compatibility with the tablet's operating system can address application crashes and instability.
3. Wi-Fi and Bluetooth Connectivity Issues
Symptoms: Inconsistent Wi-Fi connectivity, Bluetooth pairing failures, or signal dropouts hinder seamless wireless communication and connectivity.
Solution: Resetting network settings, updating the tablet's firmware, and ensuring proximity to the wireless router or Bluetooth devices can resolve connectivity issues and enhance wireless functionality.
4. Battery Drainage and Overheating
Symptoms: The tablet's battery depletes rapidly, and the device exhibits excessive heat generation during usage.
Solution: Identifying and optimizing power-hungry applications, enabling power-saving modes, and monitoring background processes can mitigate battery drainage and reduce overheating issues.
5. Software Update Failures
Symptoms: Inability to install or complete software updates, leading to outdated system software and potential security vulnerabilities.
Solution: Ensuring a stable internet connection, freeing up storage space for update downloads, and performing manual software updates can address issues related to software update failures.
By proactively addressing these common software issues through practical solutions, users can optimize the performance and functionality of the Xperia Play Tablet, ensuring a smooth and reliable digital experience.