
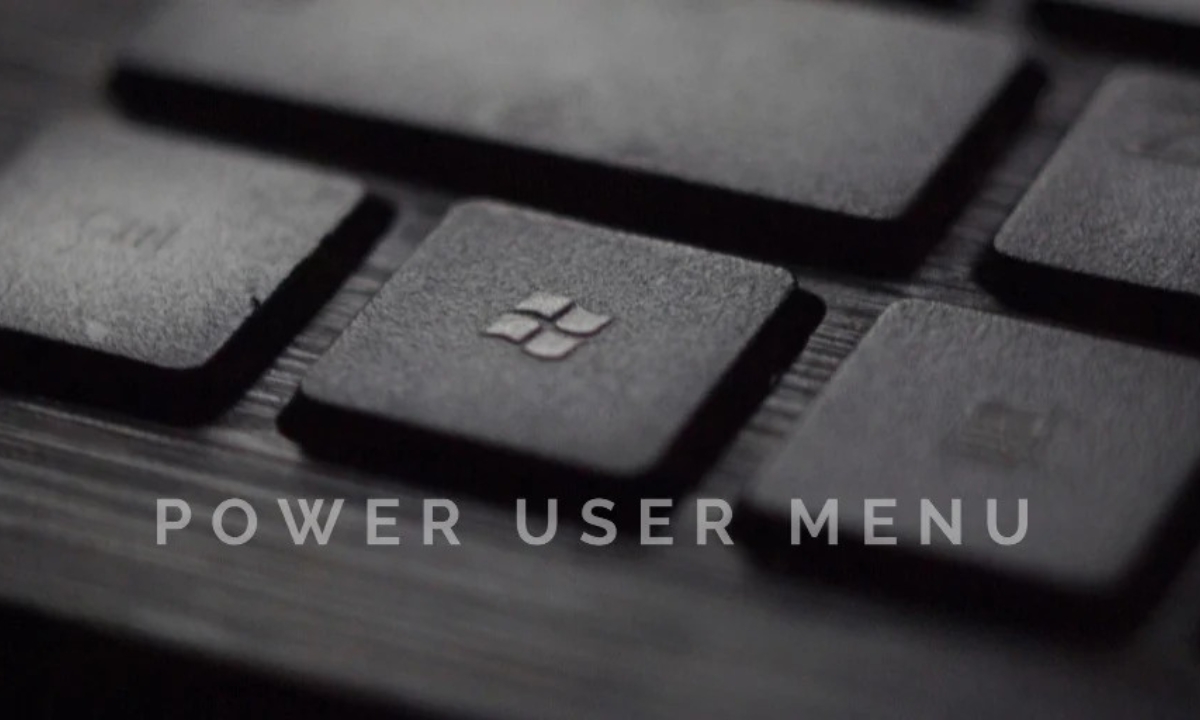
Enable the Power User Menu
The Power User Menu is a handy feature in Windows that provides quick access to various system tools and settings, allowing you to navigate your computer more efficiently. However, it may not be visible by default on your Windows operating system. In this section, we will guide you on how to enable the Power User Menu on your computer.
To enable the Power User Menu, follow the steps below:
- Right-click on the Start button or press the Windows key + X on your keyboard. This will open the WinX menu, also known as the Power User Menu.
- Click on “Windows PowerShell (Admin)” or “Command Prompt (Admin)” to open an elevated command prompt.
-
In the command prompt window, type the following command and press Enter:
reg delete HKEY_CURRENT_USER\Software\Microsoft\Windows\CurrentVersion\Explorer\Advanced /v EnableXamlStartMenu /f - After executing the command, close the command prompt window.
- Finally, right-click on the Start button or press the Windows key + X again. You should now see the Power User Menu displayed on the screen, offering a range of shortcuts to various system tools and settings.
Enabling the Power User Menu can greatly enhance your productivity by providing quick access to commonly used features. By following these simple steps, you can easily enable the Power User Menu on your Windows computer and start benefiting from its convenient shortcuts.
Access the Power User Menu
Once you have enabled the Power User Menu on your Windows computer, accessing it is a breeze. In this section, we will show you how to access the Power User Menu and start using its features to enhance your workflow.
Here are a few ways to access the Power User Menu:
- Right-click on the Start button: Simply right-click on the Start button located at the bottom-left corner of the screen. A context menu will appear, and you can select the desired tool or setting from the list.
- Press Windows key + X: Another quick way to access the Power User Menu is by pressing the Windows key and the X key simultaneously on your keyboard. This will instantly bring up the menu.
- Use the Win + X menu: If you prefer using keyboard shortcuts, you can press the Windows key + X to open the WinX menu, or Power User Menu, directly.
Once the Power User Menu is displayed on your screen, you will be presented with a list of options, including programs, settings, utility tools, and more. You can navigate through the menu using your mouse, arrow keys, or by simply typing the corresponding letter of the option you want to select.
It’s worth noting that the Power User Menu is customizable, allowing you to add or remove specific items to tailor it to your preferences. This flexibility provides you with a personalized experience, ensuring that the most frequently used tools and settings are readily available.
Accessing the Power User Menu gives you convenient access to a plethora of system tools and settings at your fingertips. By utilizing this feature, you can save time and streamline your tasks, ultimately boosting your productivity on your Windows computer.
Customize the Power User Menu
The Power User Menu in Windows is not only a powerful tool for accessing various system features, but it also offers customization options to tailor it to your needs. In this section, we will guide you through the process of customizing the Power User Menu according to your preferences.
To customize the Power User Menu, follow the steps below:
- Right-click on the Start button or press the Windows key + X to open the Power User Menu.
- From the list of options, click on “Settings” to open the Settings app.
- In the Settings app, click on “Personalization” and then select “Start” from the left sidebar.
- Scroll down until you find the “Power Menu” section.
- Here, you will see a list of available items that can be displayed in the Power User Menu. To add an item, simply toggle the switch next to its name to the “On” position. To remove an item, toggle the switch to the “Off” position.
- You can also rearrange the items by clicking and holding on an item, then dragging it up or down in the list.
- Once you have customized the Power User Menu to your liking, close the Settings app.
By customizing the Power User Menu, you can ensure that the most frequently used tools and settings are easily accessible. Whether you prefer to have quick access to the Control Panel, Device Manager, or any other system feature, you have the flexibility to personalize the menu according to your needs.
It’s important to note that the customization options may vary depending on the version of Windows you are using. However, most modern versions offer some degree of customization for the Power User Menu.
Take advantage of the customization options available to make the Power User Menu work best for you. By tailoring it to your preferences, you can optimize your workflow and streamline your tasks on your Windows computer.
Use Keyboard Shortcuts for Faster Access
In addition to the mouse-driven methods of accessing the Power User Menu, Windows provides keyboard shortcuts that allow for even faster access to the menu’s features. By utilizing these shortcuts, you can navigate through the Power User Menu with efficiency and speed. In this section, we will introduce you to some of the most commonly used keyboard shortcuts for accessing the Power User Menu.
Here are a few keyboard shortcuts to access the Power User Menu:
- Windows key + X: This popular shortcut instantly opens the Power User Menu, providing access to a range of system tools and settings.
- Windows key + A: This shortcut opens the Action Center, where you can quickly access notifications, system settings, and other features.
- Windows key + U: This shortcut opens the Ease of Access Center, which allows you to adjust accessibility settings such as high contrast, magnifier, narrator, and more.
- Windows key + I: This shortcut opens the Settings app, where you can customize various aspects of your Windows computer, including personalization, updates, security, and more.
- Windows key + P: This shortcut opens the Project menu, allowing you to quickly connect or disconnect external displays or projectors.
These keyboard shortcuts are just a few examples of the many options available to access specific features within the Power User Menu. However, it’s worth noting that the shortcuts may vary depending on the version of Windows you are using. It’s always a good idea to explore and familiarize yourself with the available keyboard shortcuts to optimize your workflow and boost productivity.
By leveraging keyboard shortcuts, you can save time and reduce reliance on the mouse, enabling you to navigate through the Power User Menu effortlessly. Incorporate these shortcuts into your daily routine and experience a faster, more efficient way of accessing essential system tools and settings on your Windows computer.
Launch Programs and Features
The Power User Menu in Windows provides a convenient way to launch frequently used programs and features without the need to navigate through multiple menus or search for shortcuts. In this section, we will explore how you can utilize the Power User Menu to quickly access and launch your favorite programs and features.
Follow these steps to launch programs and features using the Power User Menu:
- Right-click on the Start button or press the Windows key + X to open the Power User Menu.
- From the list of options, you will find a variety of pre-defined programs and features. Simply click on the desired item to launch it. For example, you can select “Apps and Features” to open the settings page where you can manage installed applications, or choose “Windows PowerShell” to open a command-line interface for advanced system administration tasks.
- If you don’t see the program or feature you want to launch in the default list, you can customize the Power User Menu (as described in the previous section) to add your preferred programs or features for easy access.
- Additionally, the Power User Menu provides quick access to frequently used system tools such as Device Manager, Task Manager, Control Panel, and more. Simply select the appropriate option from the menu to launch the respective tool.
The ability to launch programs and features directly from the Power User Menu can significantly enhance your productivity and efficiency. Instead of searching for shortcuts or navigating through numerous menus, you can quickly access your favorite programs and features with just a few clicks or keyboard strokes.
Take advantage of this convenient feature to streamline your workflow and make launching programs and accessing system features a seamless experience on your Windows computer.
Open File Explorer
File Explorer is an essential tool in Windows that allows you to navigate and manage files and folders on your computer. With the Power User Menu, you can quickly access File Explorer without the need to go through multiple steps. In this section, we will guide you on how to open File Explorer using the Power User Menu.
To open File Explorer using the Power User Menu, follow these steps:
- Right-click on the Start button or press the Windows key + X to open the Power User Menu.
- From the list of options, click on “File Explorer” or “Windows Explorer”. This will launch File Explorer, enabling you to browse through your files and folders.
- Alternatively, you can use the keyboard shortcut Windows key + E to instantly open File Explorer.
Once File Explorer is open, you can navigate through your computer’s directories, access your files, and perform various file management tasks such as copying, moving, renaming, and deleting files and folders.
File Explorer also offers additional features and functionalities, including quick access to frequently used folders, the ability to pin folders to the Quick Access menu, and the option to customize the view and layout of your files.
By utilizing the Power User Menu to open File Explorer, you can save time and easily access your files and folders without the hassle of navigating through multiple menus or searching for shortcuts. Incorporate this quick access method into your workflow to streamline your file management tasks on your Windows computer.
Access the Control Panel
The Control Panel in Windows is a central hub that allows you to manage and customize various system settings and configurations. With the Power User Menu, you can easily access the Control Panel without having to navigate through multiple menus. In this section, we will guide you on how to access the Control Panel using the Power User Menu.
To access the Control Panel using the Power User Menu, follow these steps:
- Right-click on the Start button or press the Windows key + X to open the Power User Menu.
- From the list of options, click on “Control Panel” to open the Control Panel window.
- Alternatively, you can use the keyboard shortcut Windows key + X, P to directly open the Control Panel.
Once the Control Panel is open, you can explore and customize a wide range of system settings and options. From here, you can manage hardware and devices, configure network settings, adjust power options, uninstall programs, manage user accounts, and much more.
The Control Panel provides a comprehensive set of tools and settings to customize and optimize your Windows computer according to your preferences and needs. It’s a powerful resource for troubleshooting issues, modifying system configurations, and accessing advanced settings.
By utilizing the Power User Menu to access the Control Panel, you can save time and easily navigate to the settings and options you need. Whether you’re making adjustments to your system or performing administrative tasks, the Control Panel is a valuable tool that empowers you to take control of your Windows computer.
Manage Devices and Printers
The Power User Menu in Windows provides a convenient way to manage devices and printers connected to your computer. Whether you need to troubleshoot device issues, update drivers, or configure printer settings, accessing the Devices and Printers section through the Power User Menu makes the process quick and straightforward. In this section, we will guide you on how to manage devices and printers using the Power User Menu.
To manage devices and printers using the Power User Menu, follow these steps:
- Right-click on the Start button or press the Windows key + X to open the Power User Menu.
- From the list of options, click on “Device Manager” to open the Device Manager window. Here, you can view and manage all devices connected to your computer, update drivers, disable or enable devices, and troubleshoot device-related issues.
- To manage printers, click on “Printers and Scanners” or “Devices and Printers”. This will open the Printers and Scanners or Devices and Printers window, respectively. From here, you can check the status of your printers, set a default printer, manage print queues, and perform various printer-related tasks.
Managing devices and printers through the Power User Menu offers a quick and efficient way to handle any issues or configurations related to your computer’s hardware and printing capabilities. Whether you’re installing a new device, updating drivers, or troubleshooting printer problems, accessing the Devices and Printers section through the Power User Menu streamlines the process.
By utilizing the Power User Menu, you’ll have easy access to all the necessary tools and settings to manage your devices and printers with ease. Take advantage of this feature to keep your hardware and printing functionalities running smoothly on your Windows computer.
Command Prompt and PowerShell
Command Prompt and PowerShell are command-line interfaces in Windows that allow you to execute various commands and perform advanced system administration tasks. With the Power User Menu, accessing Command Prompt and PowerShell becomes effortless. In this section, we will explore how you can open Command Prompt and PowerShell using the Power User Menu.
To open Command Prompt or PowerShell using the Power User Menu, follow these steps:
- Right-click on the Start button or press the Windows key + X to open the Power User Menu.
- From the list of options, click on “Command Prompt” to open the Command Prompt window. Alternatively, select “Windows PowerShell” to open a PowerShell command-line interface.
- You can also choose to open an elevated Command Prompt or PowerShell, which provides administrator-level access and additional privileges, by selecting “Command Prompt (Admin)” or “Windows PowerShell (Admin)” from the Power User Menu.
- Upon opening Command Prompt or PowerShell, you can now input and execute various commands to perform a wide range of tasks, such as managing files, configuring system settings, troubleshooting issues, and more.
Command Prompt and PowerShell are powerful tools that offer advanced capabilities for system administrators, power users, and developers. With their command-line interfaces, you have fine-grained control over your Windows computer and can execute tasks efficiently.
By utilizing the Power User Menu to access Command Prompt and PowerShell, you can save time and streamline your system administration tasks. Whether you’re troubleshooting issues, configuring system settings, or automating tasks, Command Prompt and PowerShell provide a robust environment to accomplish these tasks with ease.
Take advantage of these command-line interfaces through the Power User Menu to maximize your efficiency and control over your Windows computer.
View System Configuration
Viewing the system configuration of your Windows computer can provide valuable insights into the hardware and software components, as well as the overall performance and settings. With the Power User Menu, accessing the system configuration becomes a simple task. In this section, we will guide you on how to view the system configuration using the Power User Menu.
To view the system configuration using the Power User Menu, follow these steps:
- Right-click on the Start button or press the Windows key + X to open the Power User Menu.
- From the list of options, click on “System” or “System Information”. This will open the System window or System Information tool, respectively.
- In the System window or System Information tool, you can find essential information about your computer, such as the processor, installed memory (RAM), system type (32-bit or 64-bit), version and build number of Windows, and much more.
- Additionally, you can view and modify advanced system settings by clicking on “Advanced system settings” or “System properties” within the System window or System Information tool.
Viewing the system configuration provides you with a detailed overview of your computer’s hardware and software specifications. This information can be useful when troubleshooting issues, checking compatibility for software or hardware upgrades, or providing details to technical support.
By utilizing the Power User Menu to access the system configuration, you can quickly gather the necessary information about your Windows computer. Stay informed about your system’s specifications and settings to make informed decisions regarding maintenance, upgrades, and system optimizations.
Access Administrative Tools
Administrative Tools in Windows provide a collection of utilities designed for system administrators and advanced users to manage, monitor, and troubleshoot various aspects of the operating system. With the Power User Menu, accessing these tools becomes convenient and efficient. In this section, we will guide you on how to access the Administrative Tools using the Power User Menu.
To access the Administrative Tools using the Power User Menu, follow these steps:
- Right-click on the Start button or press the Windows key + X to open the Power User Menu.
- From the list of options, click on “Administrative Tools” to open the Administrative Tools window.
- In the Administrative Tools window, you will find a plethora of utilities categorized into various sections, helping you efficiently manage and monitor different aspects of your Windows computer.
- Click on the desired tool to launch it. Some commonly used administrative tools include Computer Management, Event Viewer, Task Scheduler, Services, Disk Management, and Device Manager.
Accessing the Administrative Tools through the Power User Menu provides you with a centralized location to manage and monitor a wide range of system settings and utilities. Whether you need to configure advanced system options, monitor system events, manage storage devices, or control services, the Administrative Tools offer the necessary functionalities.
By utilizing the Power User Menu to access the Administrative Tools, you can save time and significantly simplify the process of managing and troubleshooting your Windows computer. These utilities provide you with the tools and insights to ensure the smooth operation and maintenance of your system.
Take advantage of the Power User Menu to quickly access the Administrative Tools and effectively administer your Windows computer with ease.
Utilize Accessibility Options
Windows offers a range of accessibility options that are designed to make the operating system more user-friendly for individuals with disabilities or specific accessibility needs. With the Power User Menu, accessing and configuring these accessibility options becomes hassle-free. In this section, we will guide you on how to utilize the accessibility options using the Power User Menu.
To utilize accessibility options using the Power User Menu, follow these steps:
- Right-click on the Start button or press the Windows key + X to open the Power User Menu.
- From the list of options, click on “Accessibility Options” or “Ease of Access” to open the accessibility settings page.
- In the accessibility settings page, you will find various options to customize the user interface, adjust display settings, modify hearing and speech options, configure keyboard and mouse accessibility, and more.
- Click on the desired option to access its settings and make adjustments as per your accessibility requirements.
- Additionally, you can access the on-screen keyboard, magnifier, narrator, and other accessibility tools directly from the accessibility settings page.
By utilizing the accessibility options through the Power User Menu, you can make your Windows computer more accessible and inclusive. These features enable individuals with visual, auditory, mobility, and cognitive impairments to use the computer effectively and navigate the operating system comfortably.
Whether you need to increase the font size, enable closed captions, configure keyboard shortcuts, or utilize other accessibility features, Windows provides a comprehensive set of options to meet your needs.
Take advantage of the Power User Menu to quickly access and configure the accessibility options, and ensure that your Windows computer is accessible to all users, regardless of their specific accessibility needs.
Control Network Settings
Managing network settings is crucial for ensuring a stable and secure connection on your Windows computer. With the Power User Menu, controlling network settings becomes a straightforward process. In this section, we will guide you on how to access and configure network settings using the Power User Menu.
To control network settings using the Power User Menu, follow these steps:
- Right-click on the Start button or press the Windows key + X to open the Power User Menu.
- From the list of options, click on “Network Connections” to open the Network Connections window.
- In the Network Connections window, you will find a list of available network adapters and connections on your computer.
- Right-click on a network adapter or connection to access different configuration options such as enabling or disabling the adapter, modifying IP settings, managing wireless networks, and more.
- You can also click on “Open Network and Sharing Center” to access a centralized hub for managing and troubleshooting network connections, sharing files and printers, and viewing network status and diagnostic information.
Controlling network settings through the Power User Menu empowers you to manage your network connections efficiently. Whether you need to connect and disconnect from wireless networks, diagnose and troubleshoot network issues, or modify advanced network settings, the Network Connections window and Network and Sharing Center offer the necessary tools and options.
By utilizing the Power User Menu to control network settings, you can easily configure your network connections, ensure optimal performance, and protect your computer and data while connected to the internet or other networks.
Take advantage of these network management options through the Power User Menu to maintain a reliable, secure, and efficient network connection on your Windows computer.
Lock, Sign Out, or Switch User
Locking your Windows computer, signing out of your account, or switching user accounts are essential actions for maintaining privacy and security. With the Power User Menu, performing these tasks becomes quick and convenient. In this section, we will guide you on how to lock, sign out, or switch user accounts using the Power User Menu.
To lock your computer, sign out, or switch user accounts using the Power User Menu, follow these steps:
- Right-click on the Start button or press the Windows key + X to open the Power User Menu.
- From the list of options, click on “Shut down or sign out.”
-
In the sub-menu that appears, you have several options:
- Click on “Lock” to lock your computer and require a password or PIN to unlock it. This is useful when you need to step away from your computer temporarily but want to keep your data secure.
- Click on “Sign out” to log out of your current user account. This terminates all running applications and processes associated with your account and returns you to the sign-in screen.
- Click on “Switch user” to switch to a different user account on the computer without signing out of the current account. This is helpful when multiple users share the same computer and want to switch between accounts.
Locking your computer, signing out, or switching user accounts using the Power User Menu allows you to quickly secure your data or accommodate multiple users on the same computer. These actions are crucial for maintaining privacy, especially in shared or public computing environments.
By utilizing the Power User Menu to perform these tasks, you ensure that your Windows computer remains protected and that you have a seamless user experience, whether you’re locking your computer for a quick break, signing out to end your session, or switching between multiple user accounts.
Restart or Shutdown the Computer
Restarting or shutting down your Windows computer is a routine action that allows you to refresh the system, install updates, or completely power off your device. With the Power User Menu, performing these actions becomes easy and efficient. In this section, we will guide you on how to restart or shutdown your computer using the Power User Menu.
To restart or shutdown your computer using the Power User Menu, follow these steps:
- Right-click on the Start button or press the Windows key + X to open the Power User Menu.
- From the list of options, click on “Shut down or sign out.”
-
In the sub-menu that appears, you have several options:
- Click on “Restart” to restart your computer. This will close all running programs and processes and then boot up the system again.
- Click on “Shut down” to power off your computer completely. This will gracefully close all applications and processes before shutting down.
- You may also see additional options such as “Sleep” or “Hibernate,” depending on your computer’s power settings and configuration.
Restarting or shutting down your computer using the Power User Menu ensures a smooth and controlled process. This allows the system to make necessary changes and updates, resolve certain issues, or conserve power based on your preference.
It’s important to properly restart or shut down your computer to prevent data loss or system instability. The Power User Menu offers a quick and accessible way to initiate these actions, making it convenient to regularly refresh your system or perform a controlled shutdown whenever necessary.
By utilizing the Power User Menu to restart or shutdown your computer, you can ensure the proper functioning and longevity of your Windows device while maintaining a streamlined user experience.