
Checking Your iPhone's Compatibility
When considering unlocking your iPhone's SIM card, the first crucial step is to verify its compatibility for the process. Not all iPhones are eligible for unlocking, so it's essential to confirm this before proceeding. Here's how to check your iPhone's compatibility:
1. Determine Your iPhone's Status
First, determine whether your iPhone is currently locked to a specific carrier. You can do this by checking the status of your iPhone through your carrier's website or by contacting their customer support. Alternatively, you can insert a SIM card from a different carrier into your iPhone and see if it prompts you for an unlock code.
2. Check for Outstanding Financial Obligations
Ensure that there are no outstanding financial obligations tied to your iPhone. If you purchased the device through a carrier's installment plan or contract, make sure that all payments have been made and the contract terms have been fulfilled. Unpaid balances or unresolved contractual obligations may hinder the unlocking process.
3. Review Your Carrier's Unlocking Policy
Each carrier has its own set of criteria and procedures for unlocking iPhones. Visit your carrier's official website or contact their customer service to review their unlocking policy. Some carriers have specific requirements regarding the length of time the iPhone must have been active on their network before becoming eligible for unlocking.
4. Identify Your iPhone Model
Identify your iPhone model and its specifications. Not all iPhone models are capable of being unlocked, so it's essential to verify whether your specific model is eligible for the process. You can find your iPhone's model number in the Settings app under General > About, or by checking the model number on the back of the device.
By following these steps, you can confidently determine whether your iPhone is compatible for unlocking its SIM card. Once you've confirmed its eligibility, you can proceed with the subsequent steps to initiate the unlocking process.
Contacting Your Carrier
After confirming your iPhone’s compatibility for unlocking, the next crucial step is to reach out to your carrier to initiate the unlocking process. This involves contacting the carrier’s customer support and following their specific procedures for requesting an unlock. Here’s how to effectively navigate this process:
1. Gather Essential Information
Prior to contacting your carrier, gather essential information about your iPhone, including its IMEI number, serial number, and any relevant account details. The IMEI number can be found in the Settings app under General > About, or by dialing *#06# on your iPhone. Having this information readily available will streamline the unlocking request process.
2. Contact Customer Support
Reach out to your carrier’s customer support through their designated channels, such as phone, online chat, or in-person at a retail location. Clearly explain that you are seeking an unlock for your iPhone and provide the necessary details about your device. Be prepared to verify your account and ownership of the iPhone to comply with the carrier’s security protocols.
3. Follow the Carrier’s Instructions
Listen attentively to the carrier representative and follow their instructions for initiating the unlock request. They may provide specific forms to fill out, online portals to access, or further documentation to submit. Adhering to their guidelines will help expedite the unlocking process and ensure that all necessary requirements are met.
4. Document Your Interaction
Document all interactions with the carrier, including the names of representatives you spoke with, the date and time of the communication, and any reference numbers provided. This documentation can serve as valuable evidence in case of any discrepancies or delays in the unlocking process.
5. Exercise Patience and Persistence
Be patient and persistent throughout the unlocking request process. While some carriers may process unlock requests swiftly, others may have specific waiting periods or additional verification steps. Maintain regular communication with the carrier to stay informed about the progress of your request.
By effectively contacting your carrier and following their procedures for initiating an iPhone unlock, you set the stage for a smooth and successful unlocking process. Once the carrier approves your request, you can proceed with the subsequent steps to unlock your iPhone’s SIM card and enjoy the flexibility of using it with different carriers.
Requesting an Unlock Code
Once you’ve confirmed your iPhone’s compatibility for unlocking and contacted your carrier to initiate the process, the next step involves requesting an unlock code. This code is essential for unlocking your iPhone’s SIM card and enabling it to be used with other carriers. Here’s how to effectively request an unlock code:
1. Await Confirmation from Your Carrier
After initiating the unlocking process with your carrier, await confirmation that your request has been approved. This confirmation may come in the form of an email, text message, or notification through the carrier’s online portal. Once you receive this confirmation, it indicates that your iPhone is eligible for unlocking, and you can proceed with requesting the unlock code.
2. Follow the Carrier’s Designated Procedure
Adhere to the specific procedure outlined by your carrier for requesting the unlock code. This may involve accessing an online portal, filling out a form, or contacting customer support to formally request the code. Ensure that you provide all necessary details and comply with the carrier’s requirements to facilitate a smooth processing of your request.
3. Input the Unlock Code Request
When prompted, input the request for the unlock code through the carrier’s designated platform. Provide accurate information about your iPhone, including its IMEI number and any additional details required by the carrier. Double-check the information to ensure its accuracy, as any discrepancies may lead to delays in receiving the unlock code.
4. Await Delivery of the Unlock Code
After submitting the request, await the delivery of the unlock code from your carrier. The delivery method may vary, with some carriers providing the code instantly upon request, while others may send it via email, text message, or through their online portal. Exercise patience during this stage, and regularly check your designated communication channels for updates from the carrier.
5. Store the Unlock Code Securely
Once you receive the unlock code, store it securely for future use. Consider saving it in a secure digital format or writing it down in a safe location. The unlock code is a valuable asset for unlocking your iPhone’s SIM card, and its safekeeping is essential for future reference.
By effectively requesting the unlock code from your carrier and following their designated procedure, you ensure that you have the necessary code to proceed with unlocking your iPhone’s SIM card. With the unlock code in hand, you can move on to the subsequent steps to complete the unlocking process and enjoy the flexibility of using your iPhone with various carriers.
Backing Up Your iPhone
Prior to unlocking your iPhone’s SIM card and making any significant changes to its configuration, it is essential to back up your device to safeguard your data and settings. Creating a comprehensive backup ensures that you can restore your iPhone to its previous state if any unforeseen issues arise during the unlocking process. Here’s how to effectively back up your iPhone:
1. Utilize iCloud Backup
Take advantage of iCloud Backup, a convenient and secure method for backing up your iPhone’s data to Apple’s cloud storage. To enable iCloud Backup, go to Settings, tap on your Apple ID, select iCloud, then tap on iCloud Backup. Ensure that the iCloud Backup option is toggled on, and initiate a manual backup by tapping “Back Up Now.” This process will save your device’s data, including app data, photos, settings, and more, to your iCloud account.
2. Connect to a Computer and Use iTunes
Alternatively, you can back up your iPhone by connecting it to a computer with iTunes installed. Launch iTunes and connect your iPhone using a USB cable. Select your device in iTunes and choose “Back Up Now” to create a local backup on your computer. This method provides an additional layer of backup security, especially if you prefer having a physical copy of your iPhone’s data.
3. Verify the Backup Completion
Regardless of the backup method you choose, it is crucial to verify that the backup process is complete. Check the status of your iCloud Backup or iTunes backup to ensure that it has successfully captured all your device’s data. Confirm that the backup size is reasonable and reflects the entirety of your iPhone’s content to guarantee a comprehensive backup.
4. Securely Store Your Backup
Once the backup is complete, securely store the backup files in a safe location. If you used iCloud Backup, your data is securely stored in your iCloud account. If you opted for an iTunes backup, consider transferring the backup file to an external hard drive or a secure cloud storage service for added protection.
5. Regularly Update Your Backups
Make it a habit to regularly update your iPhone backups to ensure that your most recent data and settings are preserved. Set up automatic iCloud backups or periodically connect your iPhone to iTunes for manual backups. By maintaining up-to-date backups, you can confidently proceed with unlocking your iPhone’s SIM card, knowing that your data is securely preserved.
By diligently backing up your iPhone using iCloud Backup or iTunes, you establish a safety net for your device’s data and settings. With a comprehensive backup in place, you can proceed with confidence to unlock your iPhone’s SIM card, knowing that your valuable information is securely preserved and accessible for restoration if needed.
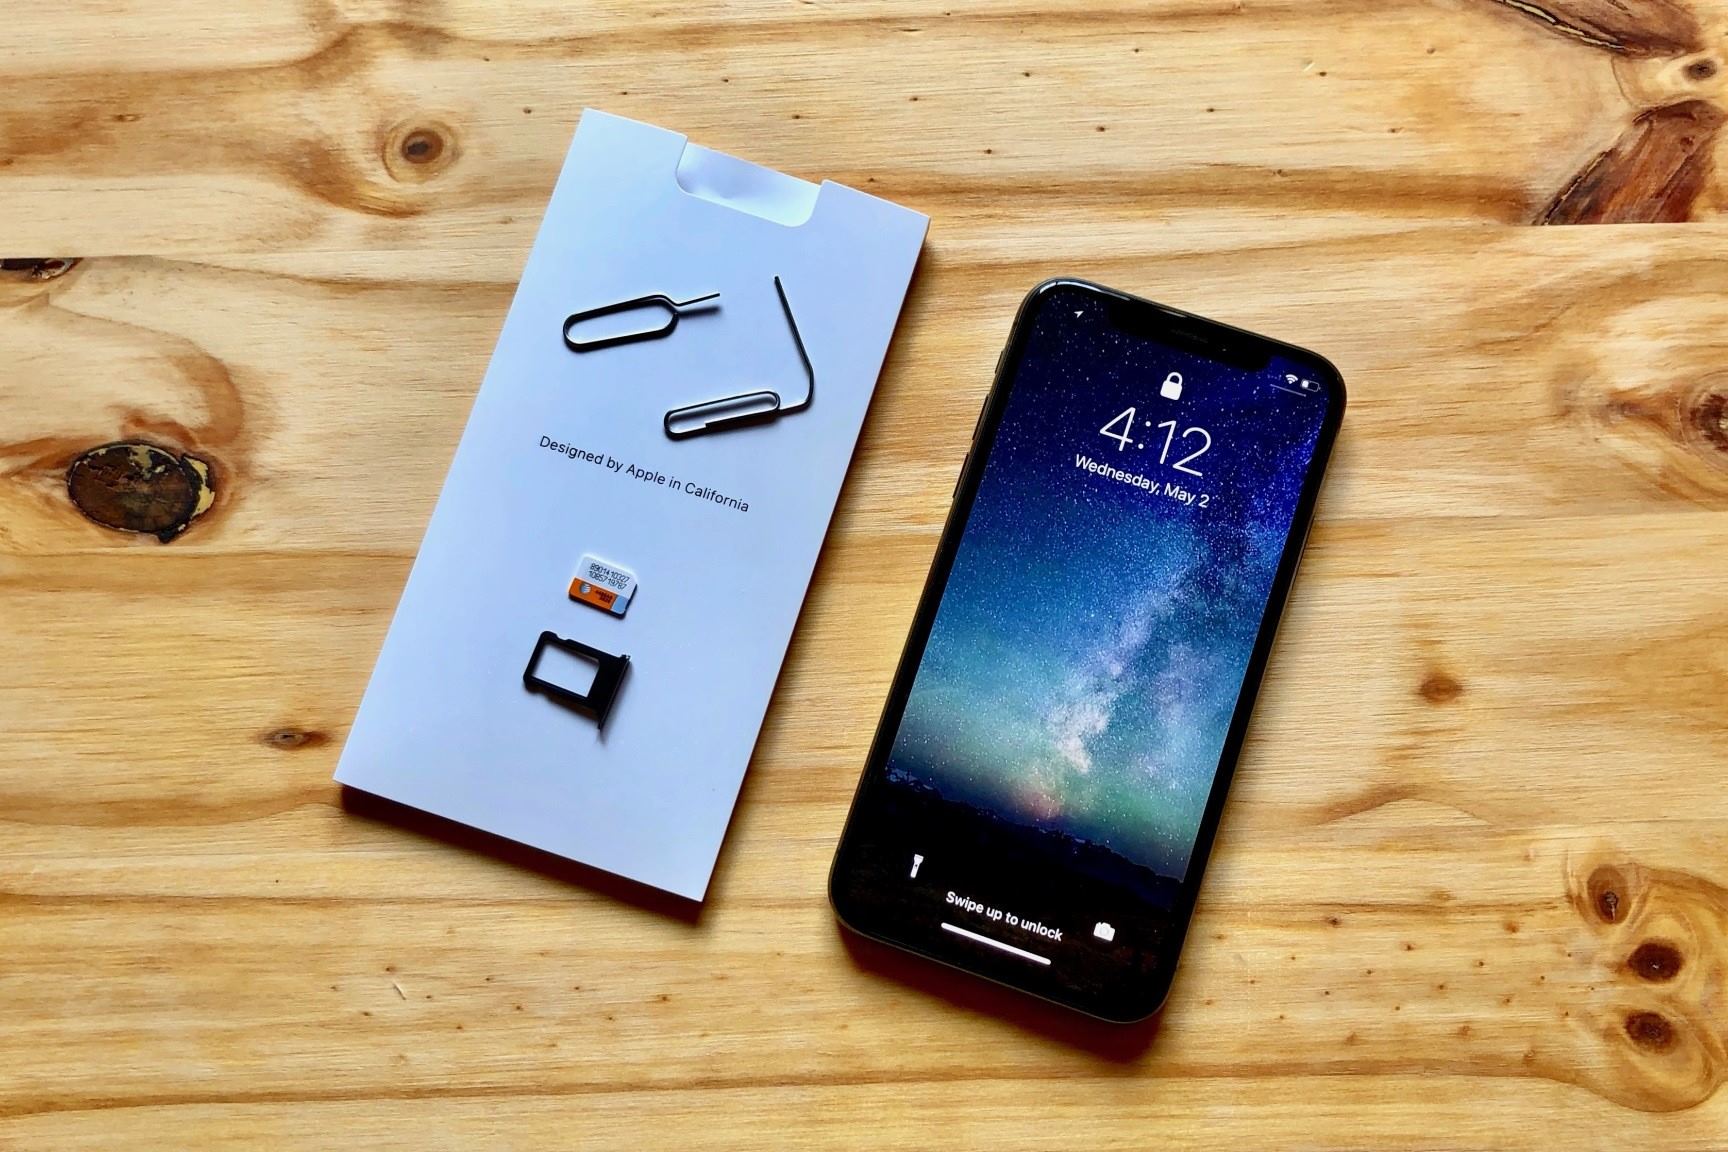
Inserting a New SIM Card
Once you’ve completed the essential steps of checking your iPhone’s compatibility, contacting your carrier, requesting an unlock code, and backing up your device, you’re ready to proceed with inserting a new SIM card. This pivotal step allows you to replace the existing SIM card with one from a different carrier, enabling your iPhone to function with the new network. Here’s a guide on how to effectively insert a new SIM card into your iPhone:
1. Power Off Your iPhone
Prior to inserting the new SIM card, power off your iPhone to ensure a safe and seamless transition. Press and hold the power button, then slide the on-screen prompt to power off your device. It’s crucial to perform this step to prevent any potential disruptions during the SIM card insertion process.
2. Locate the SIM Card Tray
Identify the SIM card tray on your iPhone. The location of the SIM card tray varies depending on the iPhone model. Generally, it is located on the side of the device and can be accessed by inserting a SIM card removal tool or a small paperclip into the pinhole adjacent to the tray.
3. Eject the Existing SIM Card
Using the SIM card removal tool or a paperclip, gently insert it into the pinhole next to the SIM card tray. Apply slight pressure to release the tray and carefully remove the existing SIM card from the tray. Handle the SIM card with care to avoid damaging it or the tray.
4. Insert the New SIM Card
Take the new SIM card provided by your desired carrier and carefully place it into the SIM card tray. Ensure that the SIM card is oriented correctly according to the tray’s configuration, aligning the notched corner of the SIM card with the corresponding notch in the tray. Gently slide the tray back into the iPhone until it is securely in place.
5. Power On Your iPhone
Once the new SIM card is inserted, power on your iPhone to initiate the setup process with the new carrier. Follow any on-screen prompts or setup instructions provided by the new carrier to configure your iPhone for use with their network. Your iPhone should now be ready to make calls, send messages, and access data using the new SIM card’s network.
By effectively inserting a new SIM card into your iPhone, you successfully transition your device to operate with a different carrier’s network. This step opens up the opportunity to experience the services and coverage offered by the new carrier, providing you with enhanced flexibility and connectivity for your iPhone.
Inputting the Unlock Code
After acquiring the unlock code from your carrier, the next crucial step in unlocking your iPhone’s SIM card involves inputting the code to enable the device to function with different carriers. The unlock code, once successfully entered, allows your iPhone to recognize and connect to new network providers. Here’s a guide on how to effectively input the unlock code into your iPhone:
1. Access the Unlock Prompt
Once you have the unlock code, insert a SIM card from a different carrier into your iPhone. Upon doing so, your iPhone may prompt you to enter the unlock code. If the prompt does not appear automatically, restart your iPhone with the new SIM card inserted to trigger the unlock prompt.
2. Enter the Unlock Code
When prompted, carefully input the unlock code provided by your carrier. Take your time to accurately input the code, ensuring that each digit is entered correctly. The unlock code is typically a series of numbers, and precision in inputting it is crucial for the successful unlocking of your iPhone’s SIM card.
3. Confirm the Unlock Code
After entering the unlock code, your iPhone will prompt you to confirm the input. Double-check the code displayed on the screen to ensure that it matches the unlock code provided by your carrier. Once you confirm the code, your iPhone will process the unlock request and apply the code to enable compatibility with the new SIM card.
4. Await Confirmation of Unlock
Upon successful input of the unlock code, your iPhone will process the request and apply the unlock to the device. You may receive a confirmation message or notification indicating that the unlocking process was successful. This confirmation signifies that your iPhone is now capable of operating with different carriers’ SIM cards.
5. Test the New Network Connectivity
After inputting the unlock code and receiving confirmation, test the new network connectivity by making a call or sending a message using the new SIM card. Ensure that your iPhone seamlessly connects to the new carrier’s network and that you can access voice, messaging, and data services without any issues. This validation confirms that the unlocking process was executed successfully.
By effectively inputting the unlock code into your iPhone, you pave the way for the device to operate with different carriers, offering you enhanced flexibility and choice in selecting a network provider. With the unlock code successfully applied, your iPhone is now capable of seamlessly connecting to various networks, providing you with expanded options for communication and connectivity.
Verifying the Unlock
After inputting the unlock code and transitioning your iPhone to operate with a new carrier’s SIM card, it’s essential to verify that the unlocking process was successful. This verification ensures that your iPhone is seamlessly compatible with the new network provider, allowing you to utilize voice, messaging, and data services without any limitations. Here’s how to effectively verify the unlock of your iPhone:
1. Test Call and Messaging Functions
Initiate a test call and send a text message using the new SIM card inserted into your iPhone. Verify that you can make and receive calls without encountering any restrictions. Similarly, ensure that you can send and receive text messages seamlessly. These basic communication functions serve as initial indicators of the successful unlock of your iPhone.
2. Check Data Connectivity
Verify that your iPhone can access mobile data services using the new carrier’s network. Open web pages, use apps that require internet connectivity, and perform activities that utilize mobile data to confirm that your iPhone can seamlessly connect to the internet without any limitations. This validation ensures that the data connectivity aspect of the unlock is functioning as expected.
3. Confirm Network Signal Strength
Observe the network signal strength displayed on your iPhone while using the new SIM card. Ensure that the signal strength is robust and consistent, indicating reliable network coverage. This confirmation validates that your iPhone is effectively communicating with the new carrier’s network and receiving optimal signal reception.
4. Test Additional Features
Explore additional features such as visual voicemail, call forwarding, and other carrier-specific services to ensure that they function seamlessly with the new SIM card. Verify that all essential functionalities and services provided by the carrier are accessible and operational on your iPhone, affirming the comprehensive compatibility achieved through the unlock process.
5. Seek Technical Support if Needed
If you encounter any challenges or limitations while verifying the unlock of your iPhone, consider reaching out to the new carrier’s technical support for assistance. They can provide guidance and troubleshooting steps to address any potential issues and ensure that your iPhone operates optimally with their network.
By effectively verifying the unlock of your iPhone, you confirm that the device is seamlessly compatible with the new carrier’s network, allowing you to confidently utilize its services and features. This validation marks the successful completion of the unlocking process, providing you with the flexibility to enjoy enhanced connectivity and communication options with your iPhone.
Troubleshooting Common Issues
While unlocking your iPhone’s SIM card can lead to seamless compatibility with new carriers, you may encounter common issues that require troubleshooting to ensure optimal functionality. Addressing these issues effectively can help you maximize the benefits of unlocking your iPhone and utilizing different network providers. Here’s a guide on troubleshooting common issues associated with unlocking your iPhone’s SIM card:
1. No Signal or Limited Connectivity
If you experience a lack of signal or limited connectivity after inserting a new SIM card, ensure that the SIM card is inserted correctly and that it is compatible with your iPhone model. Additionally, verify that the new carrier’s network coverage extends to your location. If issues persist, contact the new carrier’s customer support for assistance in troubleshooting signal and connectivity problems.
2. Invalid or Rejected Unlock Code
If the unlock code you received from your carrier is deemed invalid or is rejected by your iPhone, double-check the accuracy of the code input. Ensure that each digit is entered correctly and matches the provided unlock code. If the issue persists, reach out to your carrier’s support team to verify the authenticity of the provided unlock code and seek further assistance.
3. Incompatibility with New Carrier’s Services
In some cases, certain services or features offered by the new carrier may not be fully compatible with your iPhone, leading to limitations in functionality. Verify with the new carrier whether all services, including data features, visual voicemail, and call forwarding, are fully supported on your specific iPhone model. If discrepancies arise, seek guidance from the carrier’s technical support to address compatibility issues.
4. Activation and Setup Challenges
If you encounter challenges in activating the new SIM card or setting up your iPhone with the new carrier, ensure that you follow the carrier’s specific activation instructions. This may involve accessing their online activation portal, contacting customer support for assistance, or verifying that the SIM card is provisioned correctly for your iPhone. Clear guidance from the carrier’s support team can help address activation and setup challenges effectively.
5. Persistent Network Roaming Issues
If your iPhone continues to experience network roaming issues or struggles to maintain a stable connection with the new carrier’s network, review the network settings on your device. Ensure that roaming options are configured appropriately and that your iPhone is set to prioritize the new carrier’s network. If issues persist, seek technical assistance from the new carrier to troubleshoot and resolve network roaming challenges.
By effectively troubleshooting common issues associated with unlocking your iPhone’s SIM card, you can address potential challenges and optimize the functionality of your device with new carriers. This proactive approach ensures that you can fully leverage the benefits of unlocking your iPhone, facilitating seamless connectivity and communication experiences across various network providers.