
Reasons to Change Chrome’s Default Languages
Chrome, the popular web browser developed by Google, allows users to customize various settings to enhance their browsing experience. One of the most useful features is the ability to change the default language settings. While many users are content with using Chrome in their native language, there are several compelling reasons why you might consider changing the default languages.
Firstly, changing Chrome’s default language can be particularly useful for individuals who are bilingual or multilingual. If you frequently switch between different languages, having Chrome display content in your preferred language can greatly enhance your browsing experience. This ensures that web pages, search results, and even error messages are displayed in a language you understand, eliminating any confusion or frustration that may arise from encountering content in an unfamiliar language.
Moreover, changing the default language settings can also be beneficial for individuals who are learning a new language. By using Chrome in the language you are trying to learn, you can immerse yourself in an environment that promotes language acquisition. This can include having websites, menus, and other browser elements displayed in the target language, allowing you to practice and familiarize yourself with the vocabulary and sentence structures in a practical context.
Another reason to change Chrome’s default language is to enhance accessibility for individuals with visual impairments or learning disabilities. Chrome offers various screen reader extensions and other assistive technologies to facilitate web browsing for those with different accessibility needs. By changing the default language, users can ensure that these assistive technologies function optimally in their preferred language, making it easier for them to navigate the web and access online content.
Additionally, changing the default language settings can also help individuals who live in a country where the primary language differs from their native language. For instance, if you are an expatriate or a frequent traveler, changing Chrome’s default language to match the language of your current location can streamline your online activities. It allows you to seamlessly interact with local websites, search for information, and communicate online.
Steps to Change Chrome’s Default Languages
Changing Chrome’s default languages is a straightforward process that can be done in a few easy steps. Here’s a guide on how to do it:
- Open Google Chrome on your computer and click on the three vertical dots in the upper-right corner of the browser window to open the Chrome menu.
- From the dropdown menu, select “Settings” to open the Chrome settings page.
- Scroll down to the bottom of the page and click on the “Advanced” option to expand the advanced settings.
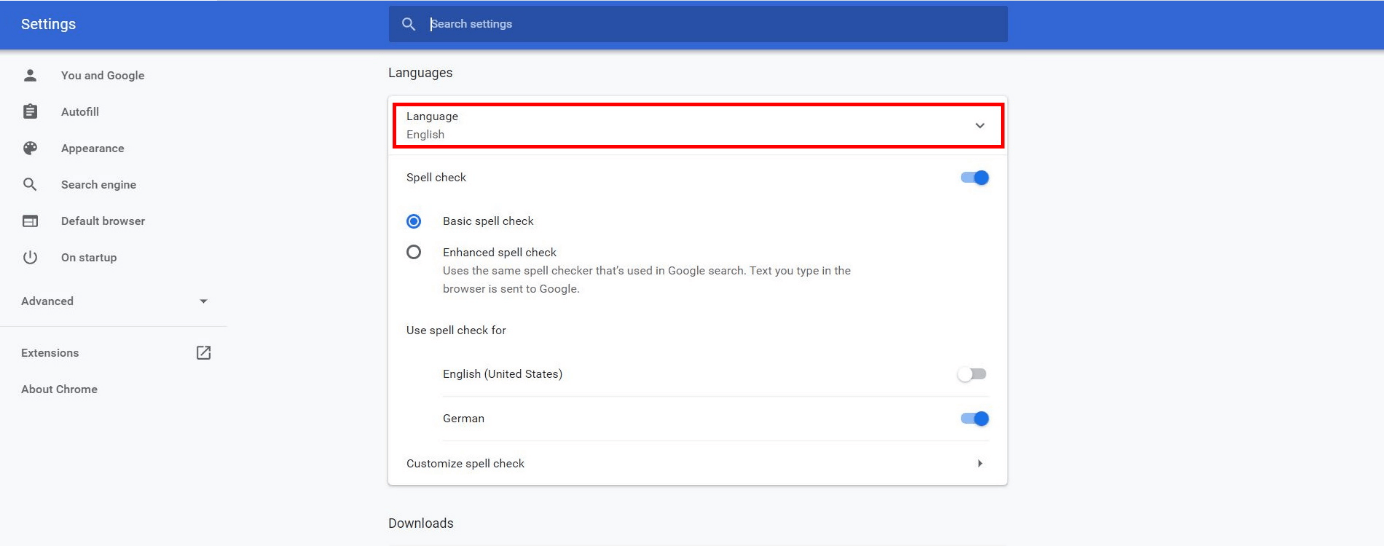
- Locate the “Language” section and click on the “Language” button to open the language settings.
- You will see a list of languages already added to Chrome. To add a language, click on the “Add languages” button.
- A pop-up window will appear with a list of available languages. Scroll through the list and click on the language(s) you want to add. You can also search for a specific language using the search bar at the top.
- Once you have selected the desired language(s), click on the “Add” button.
- The newly added language(s) will now appear in the language settings. To set a language as the default, click on the three vertical dots next to the language and select “Display Google Chrome in this language” from the dropdown menu.
- To remove a language from Chrome, click on the three vertical dots next to the language and select “Remove” from the menu.
- After making any changes, click on the “Done” button to save your settings.
Once you have changed the default languages in Chrome, you may need to relaunch the browser for the changes to take effect. After relaunching, Chrome will display content in the newly selected language(s) as per your preferences.
Please note that changing the default languages only affects the language in which Chrome’s interface is displayed. It does not automatically translate web pages or content to the selected language. To translate individual web pages, you can use the built-in translation feature of Chrome or install a translation extension from the Chrome Web Store.
Method 1: Changing the Language Settings in Chrome
One of the simplest ways to change the default language settings in Chrome is through the browser’s built-in settings menu. Here’s how you can do it:
- Launch Google Chrome on your computer and click on the three vertical dots in the top-right corner of the browser window to open the Chrome menu.
- From the dropdown menu, select “Settings” to open the Chrome settings page.
- Scroll down to the bottom of the page and click on the “Advanced” option to expand the advanced settings.
- In the “Language” section, click on the “Language” button to open the language settings.
- You will see a list of languages already added to Chrome. To add a new language, click on the “Add languages” button.
- A pop-up window will appear displaying a list of available languages. Scroll through the list and click on the language(s) you want to add. You can also search for a specific language using the search bar at the top.
- After selecting the desired language(s), click on the “Add” button.
- The newly added language(s) will now appear in the language settings. To set a language as the default, click on the three vertical dots next to the language and select “Display Google Chrome in this language” from the dropdown menu.
- If you want to remove a language from Chrome, click on the three vertical dots next to the language and select “Remove” from the menu.
- Once you have made the necessary changes, click on the “Done” button to save your settings.
It’s important to note that changing the default languages in Chrome only affects the language in which Chrome’s interface is displayed. It does not automatically translate web pages or content to the selected language. To translate individual web pages, you can use the built-in translation feature of Chrome or install a translation extension from the Chrome Web Store.
By modifying the language settings in Chrome, you can enjoy a personalized browsing experience and ensure that web pages, search results, and other browser elements are displayed in a language that suits your preferences.
Method 2: Adding and Removing Languages in Chrome
In addition to changing the default language settings in Chrome, you can also add or remove specific languages to suit your needs. Here’s how you can easily add or remove languages in Chrome:
- Open Google Chrome on your computer and click on the three vertical dots in the upper-right corner of the browser window to open the Chrome menu.
- From the dropdown menu, select “Settings” to access the Chrome settings page.
- Scroll down and click on the “Advanced” option to expand the advanced settings.
- In the “Language” section, click on the “Language” button to view the language settings.
- To add a new language, click on the “Add languages” button.
- A list of available languages will appear. Scroll through the list and click on the language(s) you want to add. You can also use the search bar at the top to find a specific language.
- Once you have selected the desired language(s), click on the “Add” button.
- The newly added language(s) will now appear in the language settings. To set a language as the default, click on the three vertical dots next to the language and choose “Display Google Chrome in this language” from the dropdown menu.
- If you want to remove a language from Chrome, click on the three vertical dots next to the language and select “Remove” from the menu.
- After making any changes, click on the “Done” button to save your settings.
By adding and removing languages in Chrome, you can customize your browsing experience to include the specific languages that are most relevant and useful to you. This can be especially beneficial if you frequently switch between languages or if you prefer to access websites and content in multiple languages.
Remember that modifying the language settings in Chrome only affects the language in which Chrome’s interface is displayed. It does not automatically translate web pages or content to the selected language. To translate individual web pages, you can use the built-in translation feature of Chrome or install a translation extension from the Chrome Web Store.
Method 3: Setting a Preferred Language in Chrome
In addition to changing the default language settings and adding multiple languages in Chrome, you can also set a preferred language for web content. This allows Chrome to prioritize displaying web pages in your preferred language when available. Here’s how to set a preferred language in Chrome:
- Open Google Chrome on your computer and click on the three vertical dots in the upper-right corner of the browser window to open the Chrome menu.
- From the dropdown menu, select “Settings” to access the Chrome settings page.
- Scroll down and click on the “Advanced” option to expand the advanced settings.
- In the “Language” section, click on the “Language” button to open the language settings.
- Under the “Languages” section, you will see a list of the languages added to Chrome. Click on the three vertical dots next to the preferred language and select “Move to the top” from the menu.
- This action rearranges the selected language to the top of the list, indicating it as your preferred language for web content.
- If you want to remove a preferred language, click on the three vertical dots next to the language and select “Remove” from the menu.
- After making any changes, click on the “Done” button to save your settings.
By setting a preferred language, Chrome will attempt to display web content in that language when it is available. However, keep in mind that not all websites support different languages, and the availability of content in your preferred language may vary.
It’s important to note that the preferred language setting in Chrome is independent of the default language and added languages. It simply influences the language Chrome will attempt to display web content in, prioritizing your preferred language when possible.
Setting a preferred language can be especially useful if you frequently browse websites that are available in multiple languages and want to ensure that content is displayed in the language you prefer.
Method 4: Using Language Switchers or Extensions in Chrome
If you frequently browse websites in multiple languages or need to quickly switch between languages while using Chrome, you can utilize language switchers or extensions. These tools provide convenient options for changing the language settings on the go. Here’s how you can use language switchers or extensions in Chrome:
- Open Google Chrome on your computer and navigate to the Chrome Web Store.
- In the search bar, type “language switcher” or “language extension” and press Enter to search for available options.
- Browse through the search results and select a language switcher or extension that suits your needs. Read the description and reviews to ensure it is reputable and user-friendly.
- Click on the “Add to Chrome” button next to the chosen language switcher or extension.
- A pop-up window will appear, providing information about the permissions required by the extension. Review the permissions, and if you are comfortable, click on the “Add extension” button to install it.
- Once installed, the language switcher or extension will typically appear as an icon in your Chrome toolbar.
- Click on the icon to open the language switcher or extension settings.
- Depending on the specific language switcher or extension, you may have various options available, such as changing the language on the current webpage, translating web pages, or switching between multiple languages with a single click.
- Configure the settings according to your preferences and needs.
- Use the language switcher or extension to toggle between languages on web pages as desired or perform any other language-related functions provided by the tool.
Language switchers and extensions in Chrome offer flexibility and convenience, allowing you to navigate and interact with multilingual web content seamlessly. They provide a quick and accessible way to switch between languages without going through the Chrome settings.
Remember to review and install reputable language switchers or extensions from trusted sources to ensure their reliability and security.
Common Issues and Troubleshooting Tips
While changing the default languages in Chrome is usually a smooth process, you may encounter some common issues along the way. Here are a few troubleshooting tips to help resolve these issues:
1. Language not displaying correctly: If the language you have set as the default is not displaying correctly, check your language settings to ensure it is correctly selected and positioned at the top of the list.
2. Changes not taking effect: After making changes to the language settings in Chrome, you may need to relaunch the browser for the changes to take effect. Close all Chrome windows and reopen the browser to see if the changes have been applied.
3. Web pages not translating: If you have installed a translation extension or are using the built-in translation feature, but web pages are not translating, ensure that the extension is enabled and functioning properly. Check the extension settings and make sure it is set to translate pages automatically.
4. Language switcher or extension not working: If you are experiencing issues with a language switcher or extension, try disabling and re-enabling the extension. You can also check for any updates or reinstall the extension to verify if it resolves the problem.
5. Limited language support on websites: Not all websites provide content in multiple languages. If you are expecting a webpage to display in your preferred language but it remains in the default language, it could be due to the website’s language support limitations. In such cases, you can manually translate the page using the translation feature or extension.
6. Clearing browser cache: If you encounter persistent language-related issues, clearing your browser cache may help. Go to Chrome settings, navigate to the “Privacy and Security” section, and click on “Clear browsing data.” Select the “Cached images and files” option and click “Clear data.”
If the above troubleshooting tips do not resolve your language-related issues in Chrome, you can also consider seeking assistance from Chrome support forums or contacting Google support directly for further guidance.
Remember that Chrome’s language settings are customizable to suit your preferences, making your browsing experience more comfortable and understandable across different languages.