Features of TeamViewer
TeamViewer is a powerful remote access tool that offers a wide range of features to enhance productivity and streamline collaboration. Whether you are using it for personal or professional purposes, TeamViewer delivers a seamless and reliable remote connection experience. Here are some of the standout features of TeamViewer:
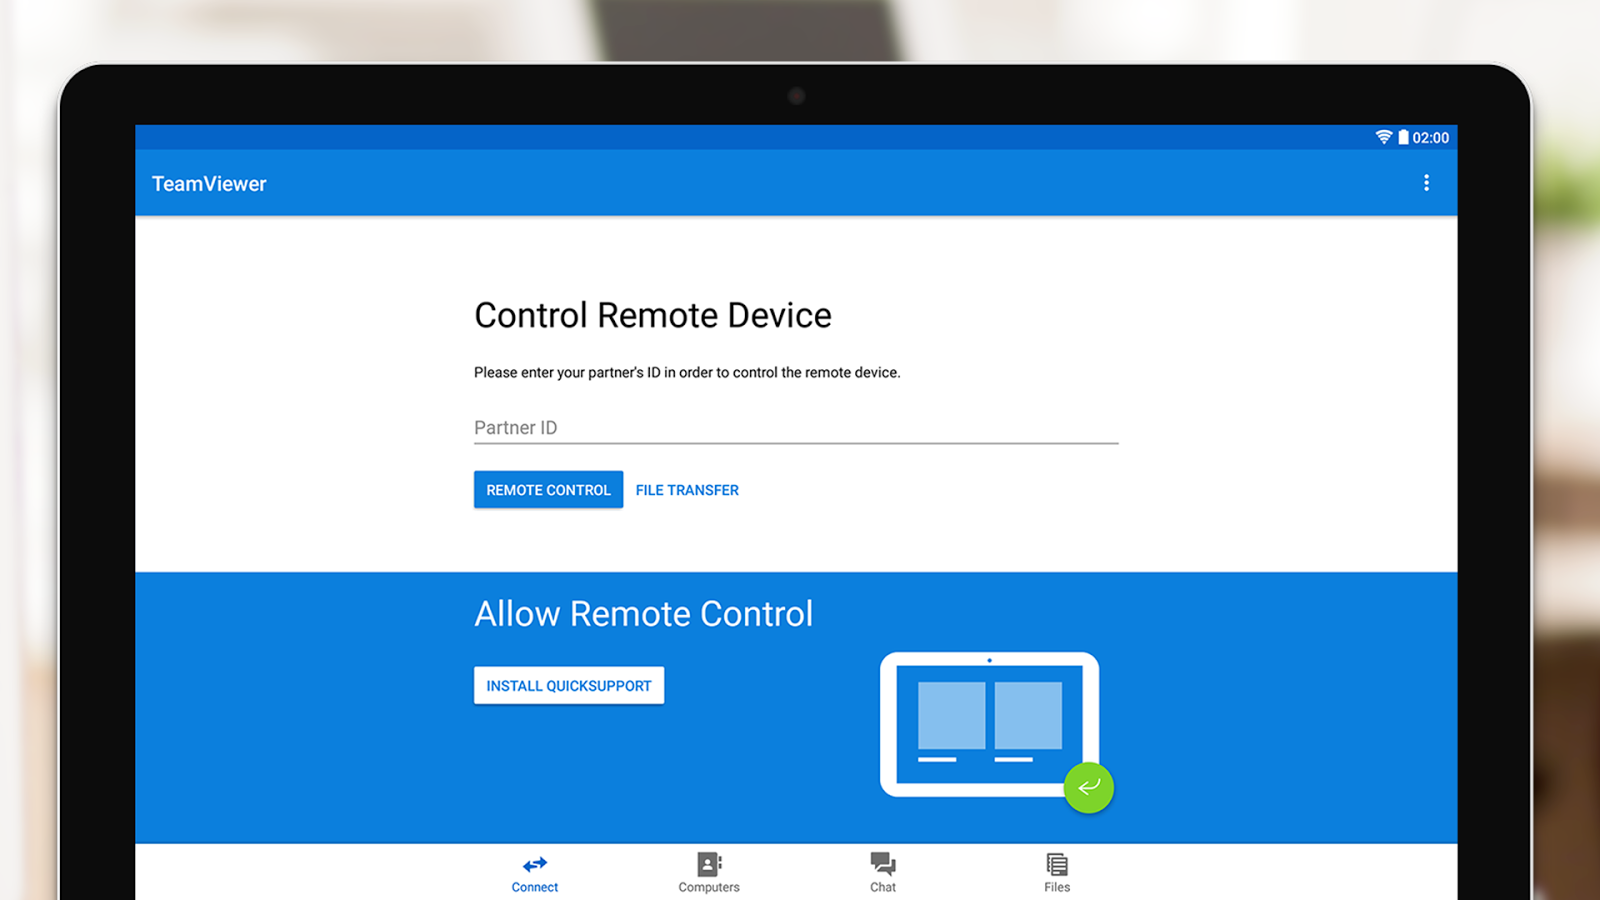
- Remote Control: With TeamViewer, you can access and control remote devices from anywhere in the world. Whether it’s a computer, smartphone, or tablet, you can easily navigate and control the remote device with just a few clicks.
- File Transfer: TeamViewer allows you to transfer files between connected devices effortlessly. Whether it’s sharing documents, images, or even large multimedia files, the file transfer feature ensures quick and secure data exchange.
- Screen Sharing: Collaborate effectively by sharing your screen with others. TeamViewer allows you to share your desktop with remote users, making it easy to conduct presentations, provide technical support, or work on projects together in real-time.
- Remote Printing: Print documents from a remote device to a local printer connected to your computer. This convenient feature saves time and ensures that you can easily access and print important documents, even from a remote location.
- Meetings and Presentations: Conduct online meetings and presentations with TeamViewer’s meeting feature. You can host virtual gatherings, share screens, and collaborate with participants around the world, making it an ideal tool for remote team collaboration or client meetings.
- Mobile Access: TeamViewer allows you to access and control remote devices using your smartphone or tablet. Whether you’re on the go or away from your computer, you can manage and troubleshoot remote devices with ease.
- Cross-Platform Support: TeamViewer is compatible with a wide range of operating systems, including Windows, macOS, Linux, iOS, and Android. This ensures that you can connect and control remote devices regardless of the platform you are using.
- High Performance and Secure Connection: TeamViewer utilizes advanced technology to provide fast and secure remote connections. With robust encryption and secure data transfer protocols, your remote sessions are protected from unauthorized access.
These are just a few of the many features offered by TeamViewer. Whether you need remote access for IT support, remote work, or simply to connect with friends and family, TeamViewer provides a comprehensive and user-friendly solution for all your remote access needs.
System Requirements
Before you install TeamViewer on your device, it’s important to ensure that your system meets the minimum requirements. Here are the system requirements for using TeamViewer:
- Operating System: TeamViewer is compatible with a wide range of operating systems, including Windows (10, 8, 7, Vista, and XP), macOS (10.11 and higher), Linux, iOS (9 and higher), and Android (4.4 and higher). Make sure your device is running on one of these operating systems for a seamless TeamViewer experience.
- Processor: The minimum requirement for TeamViewer is a 1 GHz x86 or x64 processor. However, for optimal performance, it is recommended to have a multicore processor with at least 2 GHz speed.
- RAM: For smooth operation, TeamViewer requires a minimum of 1 GB RAM. However, for better performance, it is recommended to have at least 2 GB or more RAM available on your device.
- Internet Connection: TeamViewer relies on the internet connection to establish remote access and transfer data. For optimal performance, a high-speed internet connection is recommended. The minimum requirement is a 1 Mbps download and upload speed, but a faster connection will ensure a smoother remote access experience.
- Hard Disk Space: TeamViewer requires a minimum of 300 MB of free disk space for installation. It is advisable to have additional space available for temporary files and file transfers.
- Screen Resolution: To view and navigate the remote device effectively, it is recommended to have a minimum screen resolution of 1024×768 pixels.
It’s worth noting that these are the minimum system requirements, and for optimal performance, your device should meet or exceed these specifications. Additionally, the system requirements may vary depending on the version of TeamViewer you are installing and the specific features you plan to use.
By ensuring that your device meets these system requirements, you can take full advantage of TeamViewer’s features and enjoy a smooth and efficient remote access experience without any compatibility issues.
How to Install TeamViewer
Installing TeamViewer is a straightforward process that can be completed in just a few simple steps. Here’s a step-by-step guide on how to install TeamViewer:
- Download TeamViewer: Visit the official TeamViewer website (www.teamviewer.com) and navigate to the “Downloads” section. Choose the appropriate version of TeamViewer for your operating system and click on the download link to start the download.
- Run the Installer: Once the download is complete, locate the downloaded installer file and double-click on it to run the installation process. Follow the on-screen prompts to proceed with the installation.
- Installation Options: During the installation process, you will be presented with several options. You can choose whether you want to install TeamViewer for personal or commercial use, as well as select the installation type (default or custom). Review and adjust these options as per your preferences.
- Accept End User License Agreement (EULA): To proceed with the installation, you will be required to accept the End User License Agreement (EULA) of TeamViewer. Read through the agreement and check the box to indicate your acceptance.
- Select Installation Folder: Choose the destination folder where you want TeamViewer to be installed. The default installation directory is typically the Program Files folder for Windows or the Applications folder for macOS. You can choose a different location if desired.
- Wait for the Installation: Once you have selected the installation folder, click on the “Install” button to begin the installation process. The installer will extract the necessary files and install TeamViewer on your device. The process may take a few minutes, so be patient.
- Finish Installation: Once the installation is complete, you will see a confirmation message. Click on the “Finish” button to exit the installation wizard.
- Launch TeamViewer: After the installation, you can launch TeamViewer by locating the application icon on your desktop or through the Start menu (Windows) or the Applications folder (macOS). Click on the icon to open TeamViewer.
That’s it! TeamViewer is now successfully installed on your device, and you can start using it to establish remote connections, share screens, and collaborate with others easily.
It’s worth noting that TeamViewer may prompt you to create a TeamViewer account during the installation process. While it is not mandatory to create an account, having one can provide additional features and benefits, such as easy access to your remote devices and improved security.
Now that you have installed TeamViewer, you are ready to experience the convenience and power of remote access and collaboration.
Remote Access with TeamViewer
One of the key functionalities of TeamViewer is its ability to provide seamless remote access to devices. Whether you need to access your office computer from home, provide technical support to a colleague, or retrieve files from your personal computer on the go, TeamViewer makes remote access a breeze. Here’s how you can use TeamViewer for remote access:
- Launch TeamViewer: Open the TeamViewer application on both the device you want to access remotely (the host) and the device you will use to establish the connection (the client).
- Establish Connection: On the client device, enter the unique ID and password associated with the host device in the TeamViewer interface. The ID and password can be found on the host device under the “Allow Remote Control” section of the TeamViewer application.
- Authenticate Access: Once the ID and password are entered, click on the “Connect” button to initiate the connection. The host device will receive a notification asking for permission to grant remote access. The user on the host device needs to allow access by clicking on the appropriate prompt.
- Remote Control: After the connection is established and access is granted, you can remotely control the host device. You will have full control over the mouse, keyboard, and other input devices, allowing you to navigate and operate the remote device as if you were physically present.
- Collaborate and Communicate: While accessing the remote device, you can collaborate and communicate with the user on the host device through chat, voice calls, or video calls. This enables effective communication and allows you to troubleshoot issues, share instructions, or work on tasks together remotely.
- Disconnect and End Session: When you are done with the remote access session, you can choose to disconnect from the host device. Simply close the TeamViewer application or click on the “End Session” button to terminate the connection. The host device will no longer be accessible remotely unless another connection is established.
TeamViewer’s remote access feature provides a user-friendly and secure solution for accessing remote devices. Whether you’re a business professional, IT technician, or someone who needs to access their personal computer remotely, TeamViewer simplifies the process and ensures a smooth and efficient remote access experience.
It’s important to note that while using remote access tools like TeamViewer, it’s crucial to prioritize security. Ensure that you have a strong and unique password for your TeamViewer account, regularly update the software to the latest version, and follow best practices to protect your devices and data from unauthorized access.
File Transfer with TeamViewer
TeamViewer not only enables remote access and screen sharing but also provides a convenient and secure way to transfer files between connected devices. Whether you need to send important documents, images, or even large multimedia files, TeamViewer’s file transfer feature makes it quick and easy. Here’s how you can use TeamViewer for file transfer:
- Establish Remote Connection: Start by establishing a remote connection with the target device. Ensure that both the host (remote) and the client (local) devices are connected via TeamViewer.
- Initiate File Transfer: On the client device, navigate to the TeamViewer interface and locate the “File Transfer” tab or the file transfer icon. Click on it to open the file transfer window.
- Select Files: In the file transfer window, you will see a split-screen interface where you can browse files and folders on both the local and remote devices. Navigate to the location of the file(s) you want to transfer on the local device.
- Transfer Files: To transfer files, select the file(s) you want to send from the local device and drag them to the desired location on the remote device. Alternatively, you can use the buttons or context menu options provided in the file transfer window to initiate the transfer.
- Monitor Transfer Progress: Once the file transfer begins, you can monitor the progress of the transfer in real-time. TeamViewer displays a progress bar or indicator that shows the transfer speed and estimated time remaining.
- Confirm Successful Transfer: Once the file transfer is complete, you will receive a notification confirming the successful transfer. You can then verify on the remote device that the transferred files are in the intended location.
- Disconnect and End Session: After completing the file transfer process, you can choose to disconnect from the remote device or end the session. Simply close the TeamViewer application or click on the appropriate options to terminate the connection.
TeamViewer’s file transfer feature ensures that your files are transferred securely and efficiently between connected devices. The convenience and simplicity of this feature make it ideal for sharing important documents, collaborating on projects, or transferring media files with ease.
It’s important to note that TeamViewer utilizes encryption to secure the file transfer process, ensuring that your data remains protected during transmission. However, it’s always recommended to exercise caution and avoid transferring sensitive or confidential information over remote connections unless necessary.
By leveraging TeamViewer’s file transfer feature, you can save time and effort by seamlessly transferring files between devices, whether you’re working remotely, providing tech support, or collaborating with others.
Other Collaboration Features
TeamViewer offers a range of collaboration features that enhance productivity and enable seamless teamwork, making it an invaluable tool for remote work, virtual meetings, and project collaboration. In addition to remote access and file transfer, TeamViewer provides the following collaboration features:
- Meeting Scheduler: TeamViewer’s meeting scheduler allows you to schedule and organize online meetings in advance. You can send invitations to participants, set reminders, and manage meeting details from within the TeamViewer interface. This feature ensures that everyone is on the same page and ready for the meeting when the time comes.
- Whiteboard: Collaborate visually with the whiteboard feature in TeamViewer. It enables participants to draw, write, and share ideas on a virtual whiteboard in real-time. This interactive tool is perfect for brainstorming sessions, visual explanations, and illustrating concepts during meetings.
- VoIP and Video Calls: TeamViewer allows you to make Voice over IP (VoIP) calls or initiate video calls with participants during a remote session or a meeting. This feature facilitates clear and effective communication, eliminating the need for external communication tools.
- Annotations: The annotation feature enables users to annotate or highlight specific areas on the screen during remote access or screen sharing sessions. This helps in providing visual cues, emphasizing important details, or guiding others during collaborations and presentations.
- Multi-Monitor Navigation: When accessing a remote device with multiple monitors, TeamViewer allows seamless navigation between the connected screens. This feature enhances productivity and improves the overall experience by allowing easy access to all the available screens during remote sessions.
- Session Recording: TeamViewer’s session recording feature enables users to record their remote access or meeting sessions. This is particularly useful for training purposes, documentation, or reviewing discussions and actions taken during a meeting or a support session.
- Remote Device Information: TeamViewer provides detailed information about the remote device, including device status, system information, hardware specifications, and installed software. This feature allows for efficient troubleshooting, asset management, and remote diagnosis.
These collaboration features offered by TeamViewer enhance team productivity, foster effective communication, and simplify remote collaborations. Whether you’re conducting virtual meetings, providing support, or collaborating on projects, these features empower users to work together seamlessly and efficiently.
By leveraging TeamViewer’s collaboration features, you can bridge the gap between remote team members, improve communication and collaboration, and boost productivity in an increasingly digital and interconnected work environment.
Security and Privacy with TeamViewer
When it comes to remote access and collaboration, security and privacy are of utmost importance. TeamViewer prioritizes these aspects by implementing robust security measures to protect your data and ensure a safe remote connection. Here’s how TeamViewer ensures security and privacy:
- End-to-End Encryption: TeamViewer utilizes end-to-end encryption to secure remote connections. This means that all data transmitted between the local and remote devices is encrypted and cannot be intercepted or accessed by unauthorized parties.
- Two-Factor Authentication (2FA): TeamViewer offers two-factor authentication, an additional layer of security that requires users to provide a verification code in addition to their credentials. Enabling 2FA adds an extra level of protection, preventing unauthorized access to your TeamViewer account.
- Access Control: TeamViewer allows users to define and customize access permissions for remote devices. You can restrict access to specific devices, grant temporary access, or revoke access privileges when necessary. This granular control ensures that only authorized individuals can access your devices.
- Blacklisting and Whitelisting: TeamViewer enables users to create blacklists and whitelists, specifying which devices can or cannot initiate connections to their devices. This feature helps prevent unauthorized remote access attempts and adds an additional layer of security.
- Integrity Checks: To ensure that the TeamViewer executable files haven’t been tampered with, TeamViewer performs regular integrity checks. This ensures that the software is running in its original and unaltered form, protecting users from potential security risks.
- Audit Logs: TeamViewer keeps detailed logs of all connections and activities conducted within the application. These audit logs provide a transparent record of remote access sessions, allowing users to track and review any actions taken during the sessions for security and compliance purposes.
- GDPR Compliance: TeamViewer complies with the requirements of the General Data Protection Regulation (GDPR), ensuring that user data is processed and handled in accordance with privacy regulations. User data is treated with the utmost confidentiality and used only for the purposes outlined in the privacy policy.
TeamViewer takes security and privacy seriously and continuously updates and enhances its security features to adapt to changing threats and ensure the safety of its users’ data. It is advisable to keep TeamViewer updated to the latest version to benefit from the most recent security improvements.
While TeamViewer implements robust security measures, it’s important for users to follow best practices to further enhance security when using the software. This includes choosing strong and unique passwords, using up-to-date antivirus software, and regularly monitoring and managing access permissions within TeamViewer.
By utilizing TeamViewer’s security features and implementing best practices, you can confidently use the software for remote access and collaboration, knowing that your data and privacy are protected.
TeamViewer Support and Pricing
TeamViewer offers comprehensive support options and flexible pricing plans to cater to the needs of its diverse user base. Whether you require technical assistance or want to explore the licensing options available, TeamViewer provides reliable support and pricing options. Here is an overview of TeamViewer’s support and pricing:
- Support Options: TeamViewer offers various support channels to assist users with their inquiries. The support options include online documentation, knowledge base articles, community forums, and a ticket-based support system. These resources provide detailed information and solutions for common issues users may encounter.
- Customer Success Team: For more personalized support, TeamViewer offers a dedicated customer success team that can provide guidance and assistance with any challenges users may face. This includes technical support, product training, and account management services.
- Pricing Plans: TeamViewer offers a range of pricing plans to accommodate different user requirements. The plans include options for personal use, business use, and enterprise-level solutions. The pricing is based on several factors such as the number of devices, concurrent users, and additional features required.
- Flexible Licensing Options: TeamViewer provides flexible licensing options tailored to individual and business needs. Whether you require a single-user license or a multi-user license, TeamViewer offers various licensing models, including annual subscriptions and one-time purchase options.
- Free Version: TeamViewer offers a free version for personal use, allowing users to connect to remote devices for non-commercial purposes. The free version provides many basic features, making it a popular choice for individuals who require occasional remote access or support.
- Additional Features: TeamViewer offers add-on features that can be included in premium licensing plans. These features include enhanced security measures, advanced device management, customized branding options, detailed reporting, and integration capabilities with other applications, among others.
- Trial Period: TeamViewer provides a trial period for users who want to explore the full range of features available in premium versions. This allows users to experience the advanced functionalities before making a purchasing decision.
TeamViewer’s support resources and flexible pricing options make it accessible and user-friendly for individuals and businesses alike. Whether you need basic support, advanced technical assistance, or a comprehensive licensing plan, TeamViewer offers options to meet your specific requirements.
It’s worth noting that the availability of support options, pricing plans, and features may vary depending on the specific version and licensing options chosen. To get detailed information about the support options and pricing plans that best suit your needs, it is recommended to visit the official TeamViewer website or contact the TeamViewer sales team.
By leveraging TeamViewer’s support resources and exploring the pricing options available, you can make the most of this reliable and feature-rich remote access and collaboration tool.