
Understanding the SIM Card Slot
Before removing the SIM card from your Android device, it’s crucial to understand the purpose and location of the SIM card slot. The SIM (Subscriber Identity Module) card serves as the key to accessing your mobile network, enabling you to make calls, send texts, and access data services. It securely stores your service-subscriber key and other essential information, making it a vital component of your device.
Typically, modern Android smartphones feature a dedicated slot for the SIM card, often located on the side of the device. In some models, the SIM card slot may be situated on the top or bottom edge. It’s important to consult your device’s user manual or manufacturer’s website to pinpoint the exact location of the SIM card slot. Additionally, some Android devices may accommodate dual SIM cards, allowing users to switch between multiple mobile networks seamlessly.
Understanding the significance of the SIM card slot is essential, as mishandling the SIM card or the slot itself can lead to connectivity issues and potential damage to the card or the device. By familiarizing yourself with the location and function of the SIM card slot, you’ll be better prepared to safely and effectively remove and reinsert the SIM card when necessary.
Powering Off the Device
Before undertaking any task that involves manipulating the SIM card on your Android device, it’s imperative to power off the device. This step is crucial as it ensures that the device is in a safe state for handling the SIM card and prevents any potential damage to the card or the device itself.
To power off your Android device, you can typically follow these steps:
- Press and hold the power button located on the side or top of the device.
- After a few seconds, a menu should appear on the screen with options to power off, restart, or enter other modes.
- Select the “Power Off” option by tapping on the screen or using the volume buttons to navigate the menu, depending on your device’s interface.
- Confirm the action if prompted, and the device will begin the shutdown process.
It’s important to ensure that the device is completely powered off before proceeding to the next steps of removing the SIM card. This precautionary measure minimizes the risk of damaging the SIM card or the device’s internal components during the removal and reinsertion process.
By powering off the device, you create a safe environment for handling the SIM card, reducing the likelihood of errors or mishaps. This simple yet critical step sets the stage for a smooth and successful SIM card removal and reinstallation process on your Android device.
Locating the SIM Card Slot
Locating the SIM card slot on your Android device is the first step in the process of removing the SIM card. The exact placement of the SIM card slot may vary depending on the make and model of your device. To locate the SIM card slot:
- Refer to the device’s user manual or visit the manufacturer’s website for specific guidance on the location of the SIM card slot.
- Inspect the edges of your device for a small pinhole or a removable panel. Some devices have a small tray that houses the SIM card, while others may have a slot with a tray that slides out.
- If your device supports dual SIM cards, there may be multiple slots or a shared slot for accommodating the SIM cards.
Once you’ve located the SIM card slot, take note of its position and the mechanism for accessing the SIM card tray. Familiarizing yourself with the physical location of the SIM card slot sets the stage for the subsequent steps of ejecting and removing the SIM card safely and efficiently.
It’s important to handle the device with care during this process to avoid accidental damage. By identifying the SIM card slot and understanding its design, you’ll be better prepared to proceed with the next steps of removing and reinserting the SIM card on your Android device.
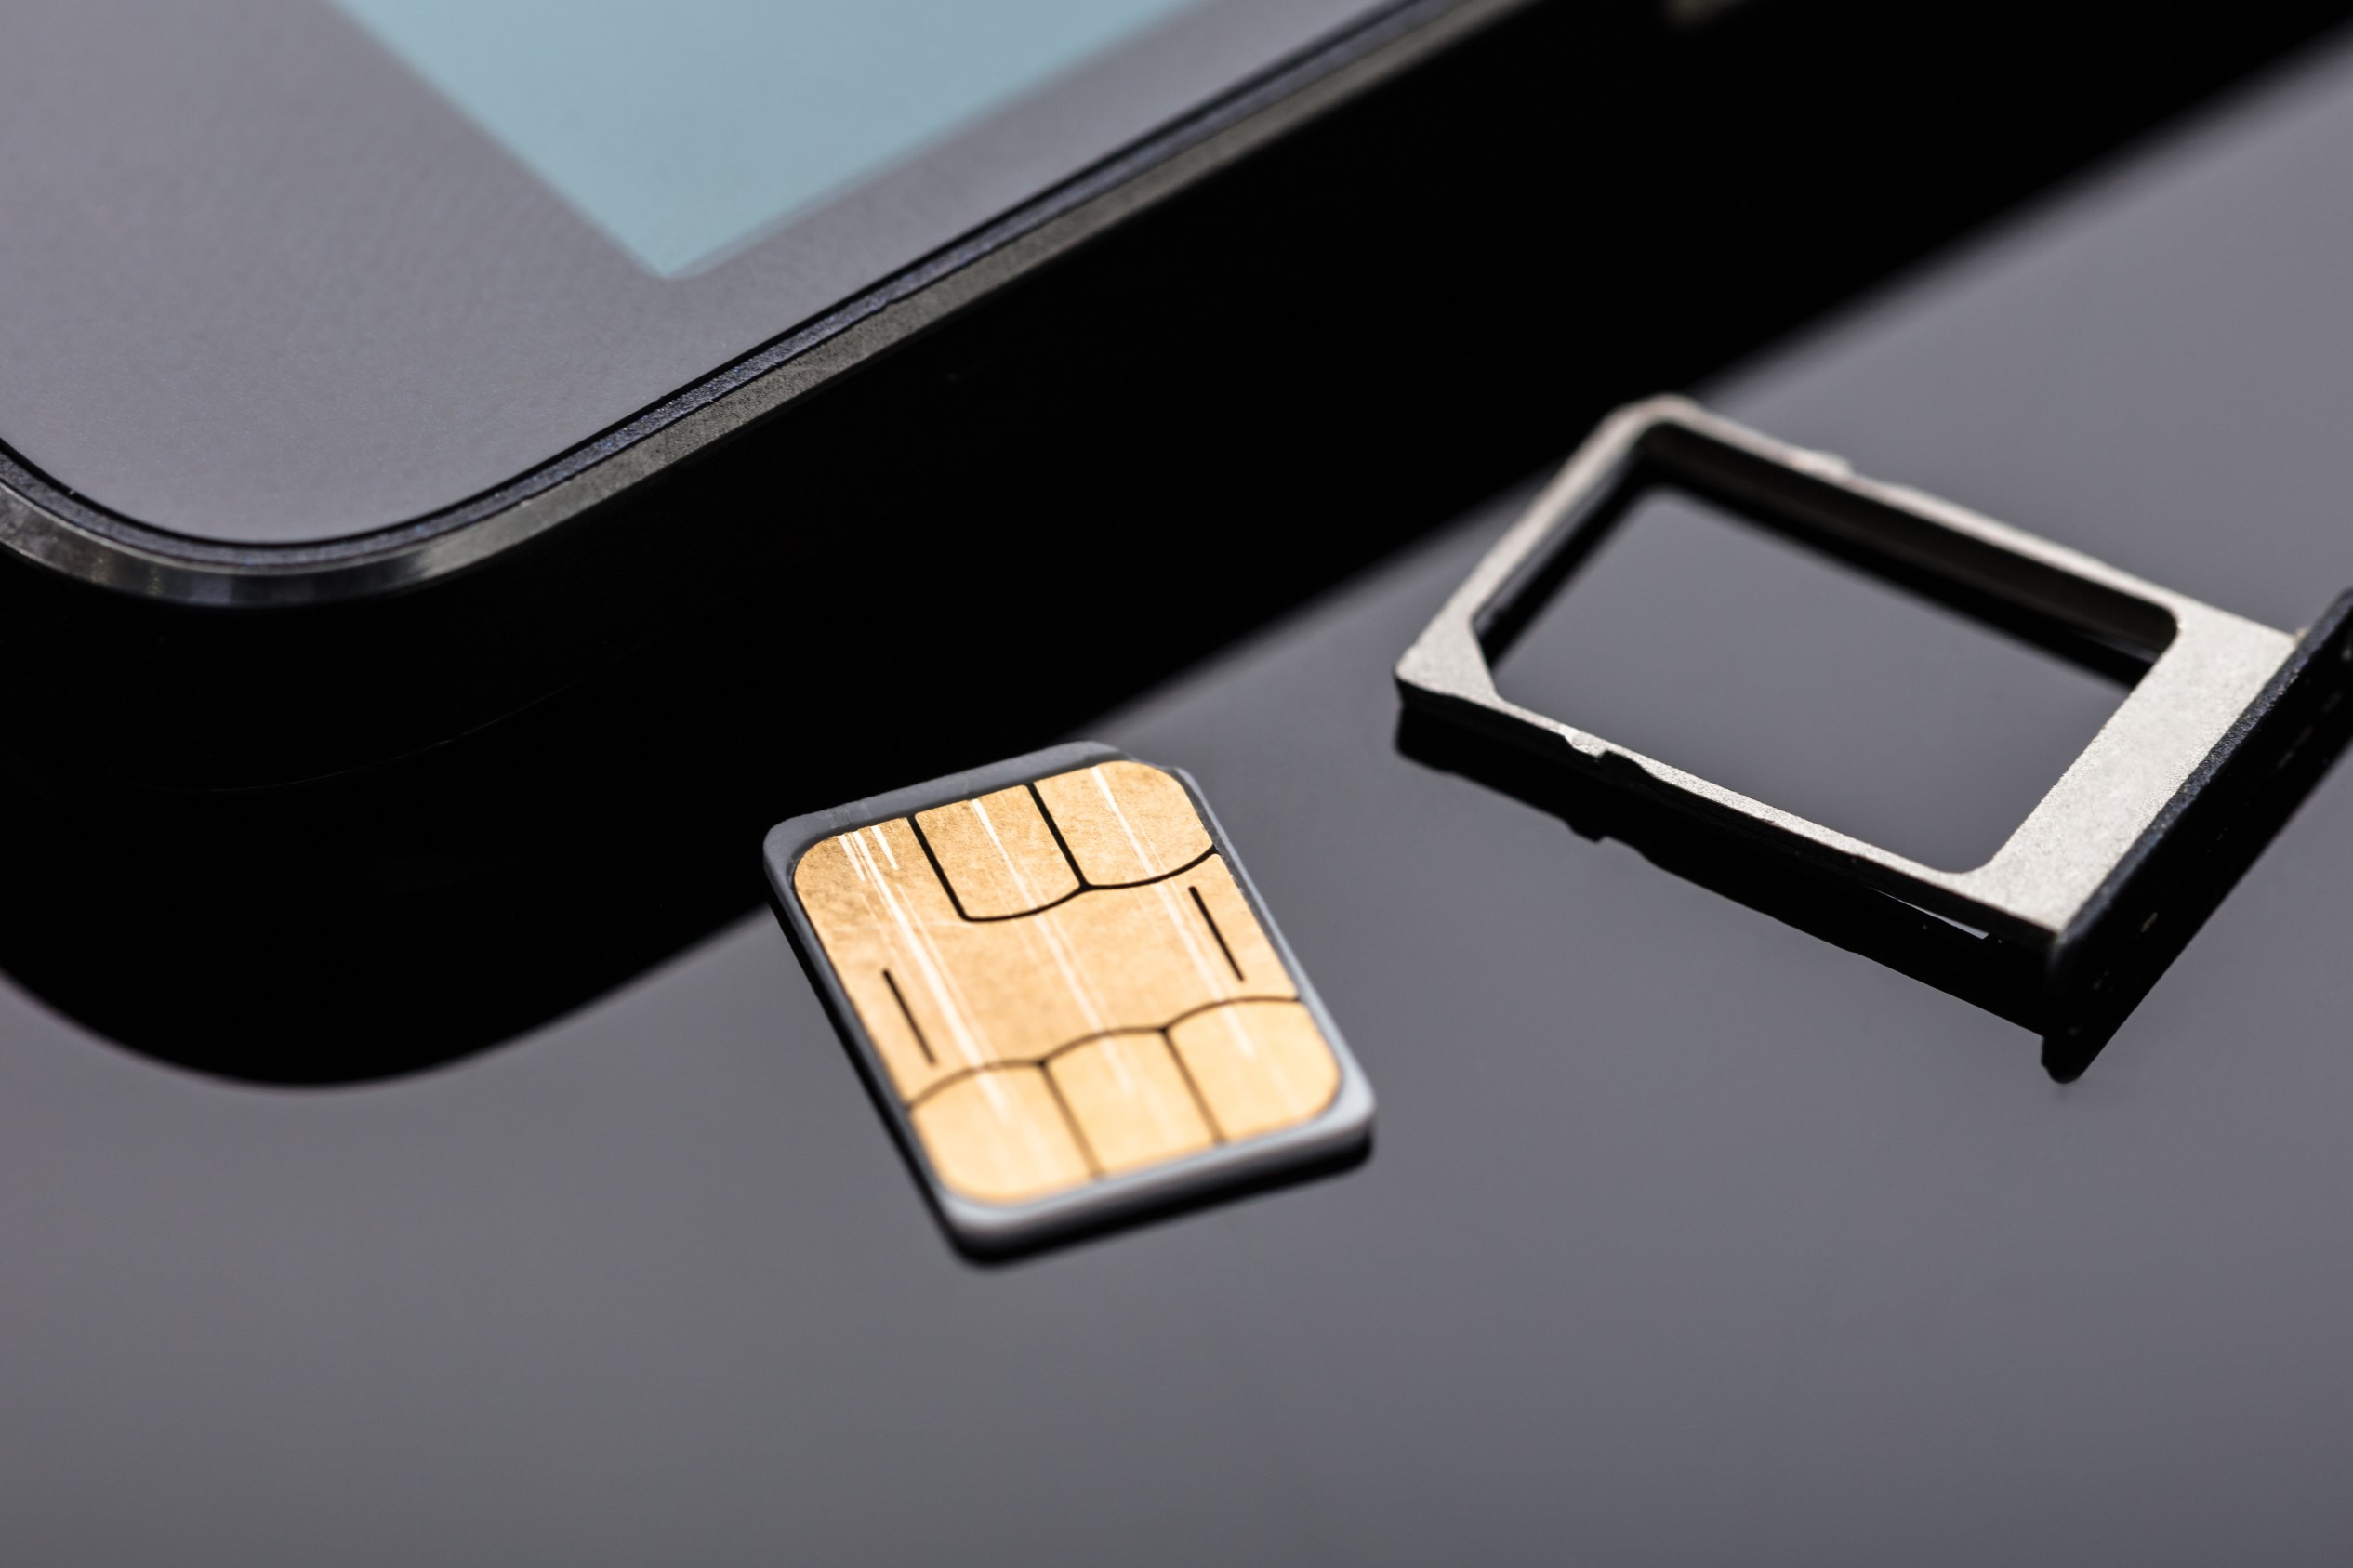
Ejecting the SIM Card Tray
Once you have located the SIM card slot on your Android device, the next step is to eject the SIM card tray. This tray holds the SIM card securely within the device and needs to be carefully removed to access the SIM card. The process for ejecting the SIM card tray may vary slightly depending on the device model, but the general steps are as follows:
- Identify the small pinhole or slot on the side of the device that corresponds to the SIM card tray.
- Insert the provided SIM card ejection tool or a paperclip into the pinhole or slot with gentle pressure until the tray begins to protrude.
- Gently pull the tray out of the device, ensuring a smooth and steady motion to prevent any damage to the tray or the device.
If your device has a removable panel instead of a pinhole, carefully remove the panel to access the SIM card tray. It’s essential to exercise caution and precision during this step to avoid any accidental damage to the SIM card, the tray, or the device itself.
By successfully ejecting the SIM card tray, you gain access to the SIM card, which can then be safely removed from the tray. This careful and deliberate process sets the stage for the subsequent step of removing the SIM card from your Android device without any complications.
Removing the SIM Card
After successfully ejecting the SIM card tray from your Android device, the next step is to remove the SIM card from the tray. This process requires precision and care to ensure the safe extraction of the SIM card without causing any damage. Here’s how you can remove the SIM card:
- Inspect the SIM card tray to locate the position of the SIM card. It is usually situated within a small indentation or slot on the tray.
- Gently slide the SIM card out of the tray by applying light pressure to push it out from the slot. Be mindful not to use excessive force, as this may damage the SIM card or the tray.
- Hold the SIM card by its edges to avoid contact with the metal contacts or the chip on the card. This helps prevent any potential damage from static electricity or physical contact.
- Place the removed SIM card in a safe and clean location, away from dust, moisture, or direct sunlight, to maintain its integrity and functionality.
By carefully removing the SIM card from the tray, you ensure that it remains in optimal condition for reinsertion or storage. Handling the SIM card with delicacy and attention to detail minimizes the risk of any damage that could compromise its functionality.
Once the SIM card is safely removed, you can proceed to the next step of reinserting the SIM card tray into your Android device, ensuring that the SIM card is securely placed for seamless operation.
Reinserting the SIM Card Tray
After removing the SIM card from the tray, the next step in the process of managing your Android device’s SIM card involves reinserting the SIM card tray. This step is crucial in ensuring that the SIM card is securely placed within the device, allowing for seamless connectivity and functionality. Here’s how you can reinsert the SIM card tray:
- Inspect the SIM card tray to identify the orientation for placing the SIM card. Most trays have a designated area or outline that matches the shape of the SIM card, ensuring proper alignment.
- Gently place the SIM card back into the tray, aligning it with the designated slot and ensuring that it fits snugly without any forceful pressure.
- Once the SIM card is positioned correctly, carefully slide the tray back into the device, ensuring a smooth and steady motion to prevent any jostling or misalignment.
- Ensure that the SIM card tray is securely inserted into the device, with no protrusions or misalignment that could impede its functionality.
By reinserting the SIM card tray with precision and care, you guarantee that the SIM card is properly seated within the device, ready to facilitate your mobile connectivity needs. This meticulous approach minimizes the risk of any connectivity issues or damage to the SIM card or the device.
Once the SIM card tray is securely reinserted, you can proceed to power on your Android device, allowing the SIM card to establish a stable connection with the mobile network for uninterrupted communication and data services.
Powering On the Device
After successfully reinserting the SIM card tray into your Android device, the final step in the process of managing the SIM card involves powering on the device. This crucial step allows the device to establish a stable connection with the mobile network, ensuring that the SIM card is recognized and ready for use. Here’s how you can power on your device:
- Press and hold the power button located on the side or top of the device until the screen displays the device’s logo or the initial boot-up sequence.
- Release the power button and allow the device to complete the startup process, which may include displaying the manufacturer’s logo, an animation, or a lock screen.
- Once the device has powered on, unlock the screen and navigate to the home screen or the app drawer to access your device’s features and applications.
- Observe the device’s status bar or settings to ensure that the SIM card is recognized and that the mobile network connectivity is established.
By powering on the device after reinserting the SIM card tray, you ensure that the SIM card is operational and ready to facilitate your communication and data needs. This step is essential for verifying that the SIM card is recognized by the device and that the mobile network connectivity is functioning as expected.
Once the device is powered on and the SIM card is recognized, you can proceed to make calls, send texts, and access data services, confident that your Android device is fully equipped to keep you connected and productive.