
How does System Restore work?
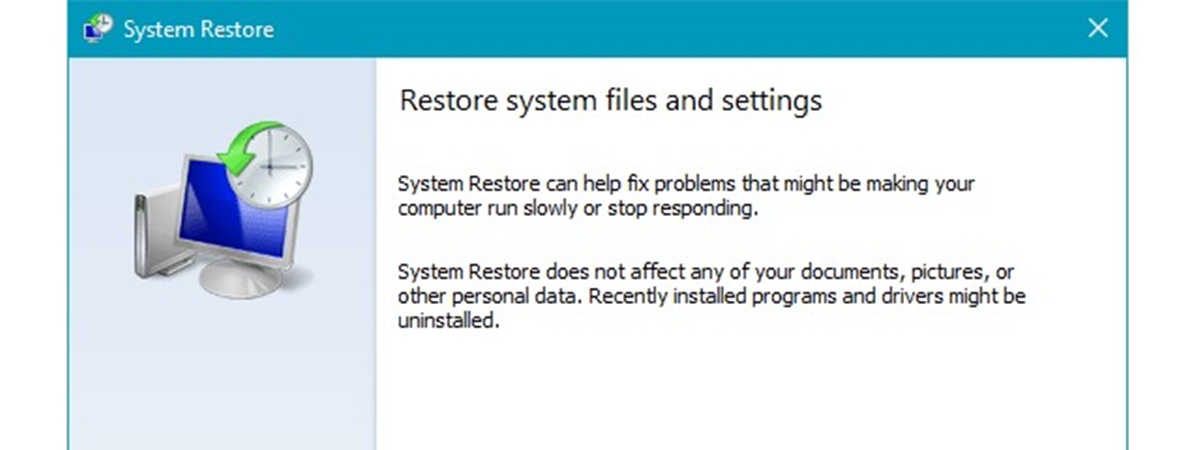
System Restore is a valuable tool designed to help you revert your computer’s settings and system files to a previous point in time. It creates restore points, which are snapshots of your computer’s configuration and critical system files. These restore points serve as reference points that allow you to roll back your computer’s state to a previous state if something goes wrong or if you encounter issues.
When you enable System Restore, it periodically creates restore points automatically. This can happen when you install new software, drivers, or Windows updates, or when significant changes are made to your system settings. These restore points are stored on your computer’s hard drive or an external storage device.
Should you encounter problems with your computer, such as crashes, software malfunctions, or errors, you can use System Restore to go back to a time when your computer was working correctly. By restoring your system to an earlier restore point, you can undo any recent changes that may have caused the issues.
It’s important to note that System Restore primarily affects system files, settings, and registry entries. It does not modify or remove personal files, such as documents, photos, or videos. These files remain unaffected during the System Restore process.
System Restore also offers the option to restore specific files or folders, which can be useful if you accidentally delete or modify important files. By selecting the files or folders you want to restore, System Restore allows you to retrieve previous versions of those specific items without affecting the rest of your system.
Overall, System Restore is a powerful tool that provides a safety net for your computer. It allows you to undo changes that may have caused issues, ensuring your system runs smoothly and efficiently.
When should you use System Restore?
System Restore is a helpful feature in Windows that can be used in various situations. Here are some scenarios where you might consider using System Restore:
1. Software or driver issues: If you recently installed a new software program or driver that is causing problems on your computer such as crashes, errors, or conflicts with existing programs, System Restore can help you revert back to a previous state when your system was functioning properly.
2. Windows update problems: Sometimes, Windows updates can cause unexpected issues or conflicts with certain software applications. If you experience problems after installing a Windows update, using System Restore can effectively remove the update and restore your system to a point before the update installation.
3. Malware or virus infections: If your computer gets infected with malware or viruses, System Restore can be used as a last resort to restore your system to a previous state before the infection occurred. Keep in mind that it’s important to use a reliable antivirus software to protect your system and prevent such infections.
4. Unwanted system changes: System settings or configurations that were accidentally modified or changed by yourself or by certain programs can be reverted back using System Restore. This can help undo any unintended changes and restore your system to its previous state.
5. File or folder recovery: In some cases, you may accidentally delete or modify important files or folders. System Restore provides the option to restore specific files or folders to a previous version, allowing you to retrieve the lost or overwritten data.
Remember, System Restore is not intended to be used as a backup solution for your personal files. It primarily focuses on system files, settings, and configurations. It’s always a good practice to regularly back up your important files to an external storage device or cloud storage service.
How to access System Restore on Windows 10
Accessing System Restore on Windows 10 is a straightforward process. Here are the steps to access System Restore:
1. Open the System Properties: Right-click on the Start button and select “System” from the context menu. Alternatively, you can press the Windows key + Pause/Break key to open the System window.
2. Access System Protection: In the System window, click on the “System protection” link located on the left-hand side of the window. This will open the System Properties window.
3. Open System Restore: In the System Properties window, click on the “System Restore” button. You may need to enter your administrator password or provide confirmation if prompted.
4. Choose a restore point: The System Restore window will appear, displaying a list of available restore points. You can select any restore point that is dated before the issue or problem occurred. Click on the “Next” button to proceed.
5. Review and confirm: On the next screen, you will see a summary of the restore point you selected. Take a moment to review the details and ensure that you have selected the correct restore point. Click on the “Finish” button to start the restoration process.
6. Restart your computer: Windows will prompt you to confirm the restoration process. Make sure to save any unsaved work, as your computer will restart automatically during the restoration process.
After your computer restarts, it will be restored to the selected restore point, with your system files and settings reverted back to the previous state. It’s important to note that any changes made after the selected restore point will be lost, so make sure to back up any important files before proceeding with System Restore.
If you are unable to access System Restore through the System Properties, you can also try accessing it through the Advanced Startup Options menu or through Windows Recovery Environment (WinRE), which can be accessed by pressing the F8 key during startup or by using a Windows 10 installation media.
How to enable System Restore
By default, System Restore is enabled on Windows 10, but it’s always a good idea to double-check its status and ensure it’s enabled. Here’s how you can enable System Restore:
1. Open the System Properties: Right-click on the Start button and select “System” from the context menu. Alternatively, you can press the Windows key + Pause/Break key to open the System window.
2. Access System Protection: In the System window, click on the “System protection” link located on the left-hand side of the window. This will open the System Properties window.
3. Enable System Restore: In the System Properties window, ensure that the “Protection” tab is selected. Under the “Protection Settings” section, you will see a list of drives on your computer. Choose the drive where you want to enable System Restore and click on the “Configure” button.
4. Turn on System Restore: In the System Restore Settings window, make sure that the “Turn on system protection” option is selected. You can also adjust the maximum disk space allocated for restore points using the slider. Click on the “Apply” button to save the changes.
5. Confirm the settings: After enabling System Restore, Windows will create an initial restore point for the selected drive. Click on the “OK” button to exit the system properties window.
You have now enabled System Restore on Windows 10. It’s recommended to periodically review your System Restore settings and allocate sufficient disk space to hold multiple restore points. This will allow you to have a wider range of restore options to choose from in case of any issues or problems.
Enabling System Restore provides an extra layer of protection for your computer, allowing you to easily revert back to a previous state if necessary. It’s important to note that System Restore is not a substitute for regular backups. It’s always a good practice to back up your important files and data to ensure their safety and easy recovery in the event of a system failure or data loss.
How to create a restore point manually
While Windows 10 automatically creates restore points, you also have the option to manually create a restore point. This can be useful when you want to ensure that you have a specific restore point to revert to. Here’s how you can create a restore point manually:
1. Open the System Protection window: Right-click on the Start button and select “System” from the context menu. Alternatively, you can press the Windows key + Pause/Break key to open the System window. In the System window, click on the “System protection” link on the left-hand side of the window.
2. Access System Restore: In the System Properties window, click on the “System Restore” button. You may need to enter your administrator password or provide confirmation if prompted.
3. Manually create a restore point: In the System Restore window, click on the “Create” button. This will open the “Create a Restore Point” window.
4. Provide a description: In the “Create a Restore Point” window, enter a descriptive name for the restore point. This will help you identify it in the future. For example, you could use a name like “Manually Created Restore Point – [Date]”.
5. Create the restore point: After providing a name, click on the “Create” button to create the restore point. Windows will then start creating the restore point, which may take a few moments.
6. Confirm the creation: Once the restore point is successfully created, you will receive a confirmation message. Click on the “Close” button to exit the windows.
You have now successfully created a restore point manually. This restore point will be available in the System Restore window, and you can use it to restore your system back to this specific point if needed.
It’s a good practice to periodically create manual restore points, especially before making significant changes to your system, such as installing new software or making system modifications. This allows you to have more control and flexibility over your system’s restore points and ensures you have specific points to fall back on whenever necessary.
How to restore your computer using System Restore
If you encounter issues or problems with your computer, you can use System Restore to revert your system back to a previous state. Here’s how you can restore your computer using System Restore:
1. Access System Restore: Open the System Properties window by right-clicking on the Start button and selecting “System” from the context menu. Alternatively, you can press the Windows key + Pause/Break key. In the System window, click on the “System protection” link on the left-hand side, and then click on the “System Restore” button. Enter your administrator password or provide confirmation if prompted.
2. Choose a restore point: In the System Restore window, select the “Recommended restore” option to choose a recommended restore point. If you prefer, you can select the “Choose a different restore point” option and click on the “Next” button to see a list of available restore points.
3. Start the restoration process: After selecting the restore point, click on the “Next” button to proceed. Review the details of the restore point you selected and click on the “Finish” button to start the restoration process.
4. Confirm and restart: Windows will prompt you to confirm the restoration process. Make sure to save any unsaved work, as your computer will restart automatically during the restoration process. Click on the “Yes” or “OK” button to proceed.
5. Wait for the restoration to complete: Windows will now begin restoring your computer to the selected restore point. This process may take some time, so be patient and avoid interrupting the process.
6. Log in and verify the restoration: After the restoration is complete, Windows will restart your computer. Log in to your user account and verify if the issues or problems you were experiencing are resolved.
If the restoration process was not successful or did not resolve the issues, you can try selecting a different restore point and repeating the process. It’s important to note that any changes made after the selected restore point will be lost, so make sure to back up any important files before proceeding with System Restore.
System Restore is a powerful tool that can help you undo recent changes and restore your computer to a state when it was functioning properly. It’s recommended to regularly create restore points or enable automatic restore point creation for added convenience and protection.
How to restore specific files or folders using System Restore
System Restore not only allows you to restore your entire computer to a previous state, but it also offers the option to restore specific files or folders. This can be particularly useful if you accidentally delete or modify important files. Here’s how you can restore specific files or folders using System Restore:
1. Access System Restore: Open the System Properties window by right-clicking on the Start button and selecting “System” from the context menu. Alternatively, you can press the Windows key + Pause/Break key. In the System window, click on the “System protection” link on the left-hand side, and then click on the “System Restore” button. Enter your administrator password or provide confirmation if prompted.
2. Choose a restore point: In the System Restore window, select the “Choose a different restore point” option and click on the “Next” button. You will see a list of available restore points.
3. Open the System Restore Files window: After selecting a restore point, click on the “Scan for affected programs” button. This will scan your system to see which files and folders will be affected by the chosen restore point.
4. Select the files or folders for restoration: In the System Restore Files window, you will see a list of files and folders that will be restored based on the selected restore point. By default, all files and folders are selected for restoration. However, you can click on the “Choose a different restore point” link to view a detailed list and deselect any files or folders that you don’t want to restore.
5. Start the restoration process: After selecting the desired files or folders, click on the “Next” button to proceed. Review the details of the restore point and the files to be restored, and then click on the “Finish” button to start the restoration process.
6. Wait for the files to be restored: Windows will now begin restoring the selected files or folders from the chosen restore point. This process may take some time, depending on the size and number of files being restored. Avoid interrupting the process to ensure successful restoration.
Once the restoration is complete, the selected files or folders will be restored to their previous versions. It’s important to note that the rest of your system settings and configurations will not be affected by this restoration process.
Restoring specific files or folders using System Restore provides a convenient way to recover important data that may have been accidentally modified or deleted. It’s always a good practice to regularly back up your files to prevent data loss and to ensure you have multiple options for data recovery.
How to undo a System Restore
If you have recently performed a System Restore and find that it did not resolve the issues or problems you were experiencing, you can undo the restoration and revert your computer back to its previous state. Here’s how you can undo a System Restore:
1. Access System Restore: Open the System Properties window by right-clicking on the Start button and selecting “System” from the context menu. Alternatively, you can press the Windows key + Pause/Break key. In the System window, click on the “System protection” link on the left-hand side, and then click on the “System Restore” button. Enter your administrator password or provide confirmation if prompted.
2. Choose a restore point to undo: In the System Restore window, select the “Undo my last restoration” option and click on the “Next” button. This will show a list of the most recent restore points available for undoing.
3. Start the undo process: After selecting the restore point to undo, click on the “Finish” button to start the undo process. Windows will begin undoing the System Restore operation, restoring your computer back to its previous state.
4. Restart your computer: Once the undo process is complete, Windows will prompt you to restart your computer. Make sure to save any unsaved work before proceeding. Click on the “Yes” or “OK” button to restart your computer.
5. Verify the restoration: After your computer restarts, log in to your user account and verify if the system has been successfully reverted to its previous state. Check if the issues or problems you were experiencing before the System Restore have been resolved.
It’s important to note that undoing a System Restore will not affect any personal files or data you have created or modified since the restoration. However, any system settings, configurations, and applications that were changed or installed after the restoration will be reverted back.
If you still face issues or problems after undoing a System Restore, you may want to consider selecting a different restore point or exploring other troubleshooting methods to resolve the underlying issues.
Undoing a System Restore allows you to roll back any changes that were made during the restoration process, giving you the opportunity to explore other solutions or approaches to resolving the issues you are encountering on your computer.
Frequently Asked Questions about System Restore
1. Does System Restore affect personal files?
No, System Restore primarily affects system files, settings, and configurations. It does not modify or remove personal files such as documents, photos, or videos. Your personal files remain unaffected during the System Restore process.
2. How far back can I restore my computer using System Restore?
The availability of restore points depends on the storage capacity allocated for restore points and how often they are created on your computer. Generally, you can restore your computer to any restore point created within the last few weeks or months. Older restore points may be automatically deleted to make room for new ones.
3. Can I create a restore point while performing a System Restore?
No, you cannot create a restore point while performing a System Restore. Restore points are created prior to the restoration process to ensure that you have a previous state to revert back to. Once the restoration is initiated, a new restore point is not created alongside it.
4. Can I undo a System Restore after restarting my computer?
No, once you restart your computer following a System Restore, the restore operation is considered complete. If you wish to undo a System Restore, it needs to be done before restarting your computer. Once you restart, the restoration process is irreversible, and you would need to use the “Undo” option within System Restore.
5. Can I use System Restore to recover deleted files?
No, System Restore is not designed to recover specifically deleted files. While it may help restore system files and settings to a previous state, it does not prioritize the recovery of deleted files. To recover deleted files, it’s recommended to use dedicated file recovery software or restore them from a recent backup.
6. Can I use System Restore to fix hardware issues?
No, System Restore is primarily intended for resolving software-related issues. It focuses on restoring system files, configurations, and settings to a previous state. If you are experiencing hardware issues, such as faulty hardware components, you may need to consult with a technician or seek hardware repairs or replacements.
7. Can I run System Restore in Safe Mode?
Yes, you can run System Restore in Safe Mode. Boot your computer into Safe Mode and follow the same steps to access System Restore. Running System Restore in Safe Mode can be helpful if you are unable to start your computer normally and need to restore your system to a previous state.
These are some frequently asked questions about System Restore. Remember to always create regular backups of your important files and data to ensure their safety and easy recovery in case of system issues or failures.