
Step 1: Gather the Necessary Tools
Before embarking on the process of changing the SIM card in your iPhone, it’s essential to gather the necessary tools to ensure a smooth transition. Here’s a list of items you’ll need:
- Sim Ejector Tool: This small, metal tool is specifically designed to eject the SIM card tray from your iPhone. It often comes included with the iPhone packaging.
- New SIM Card: Ensure that you have the new SIM card ready for installation. This card is typically provided by your mobile service provider when you sign up for a new plan or replace a lost SIM card. It contains vital information that allows your iPhone to connect to the cellular network.
- Clean, Lint-Free Cloth: It’s important to have a clean cloth on hand to wipe the SIM card tray and the new SIM card before installation. This helps to ensure a proper connection and prevents any potential issues due to dust or debris.
- Stable Work Surface: Find a flat and stable surface to work on, such as a table or desk, to prevent any accidental drops or damage to the iPhone or the SIM card.
By gathering these tools beforehand, you’ll be well-prepared to proceed with the SIM card replacement process smoothly and efficiently.
Step 2: Locate the SIM Card Tray
Before diving into the process of changing your iPhone’s SIM card, it’s crucial to locate the SIM card tray. The SIM card tray is a small, recessed component of your iPhone that houses the SIM card. Here’s how to find it:
For most iPhone models, the SIM card tray is located on the right-hand side of the device. Look for a small pinhole or a tiny slot near the edge of your iPhone. This slot is where the SIM card tray is housed. It’s important to note that the exact location of the SIM card tray may vary slightly depending on the iPhone model you own.
Once you’ve located the SIM card tray, take a moment to familiarize yourself with its placement and the surrounding features. This will help you prepare for the next steps in the SIM card replacement process.
Locating the SIM card tray is the crucial first step in the process of changing your iPhone’s SIM card. It sets the stage for the subsequent actions you’ll need to take to complete the replacement seamlessly.
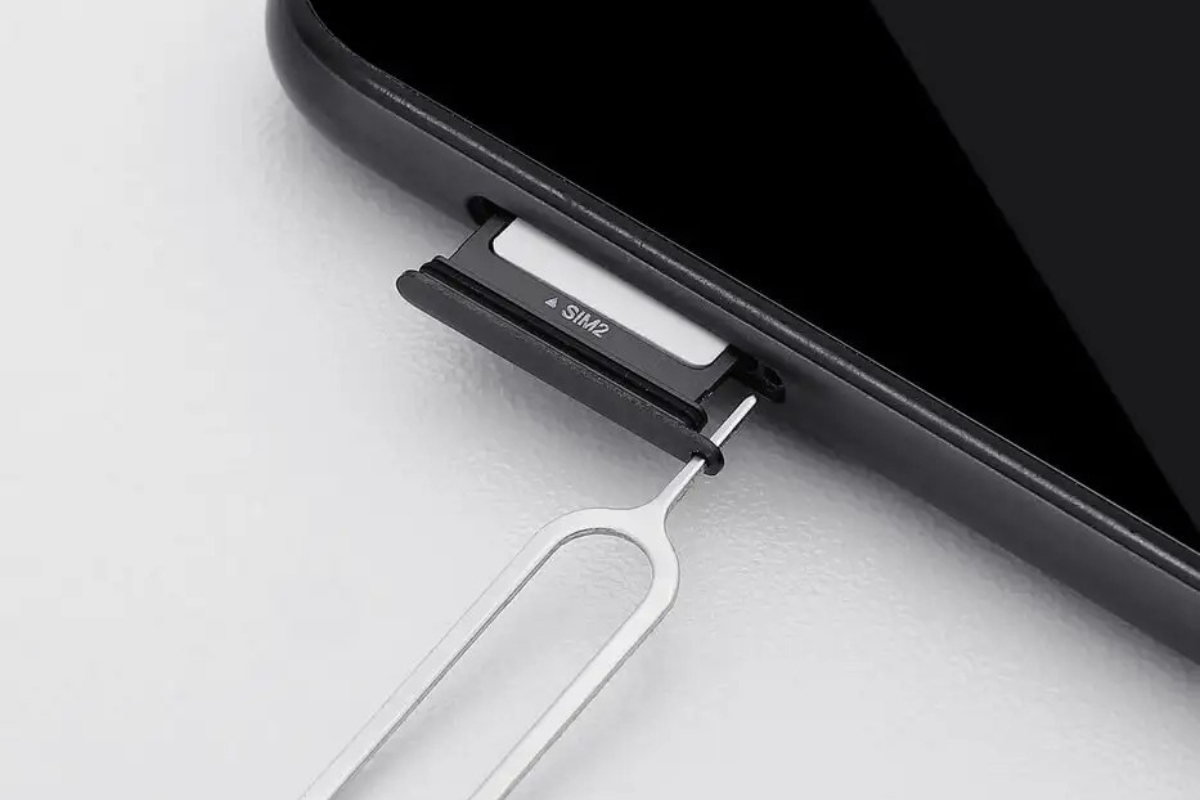
Step 3: Eject the SIM Card Tray
After locating the SIM card tray on your iPhone, the next step is to eject the tray in order to access the SIM card. Here’s how to do it:
Using the provided SIM ejector tool or a small paperclip, gently insert the tool into the pinhole or slot located near the SIM card tray. Apply slight pressure until you feel a small resistance, indicating that the tray is being released.
Once you sense the tray being released, carefully pull it out from the iPhone. Take care to avoid using excessive force, as this may cause damage to the tray or the iPhone itself. The SIM card tray should slide out smoothly, revealing the current SIM card nestled within it.
It’s important to handle the SIM card tray and the iPhone with care during this process to prevent any accidental damage. By following these steps, you’ll successfully eject the SIM card tray and be ready to proceed with the next stages of replacing the SIM card in your iPhone.
Step 4: Remove the Old SIM Card
With the SIM card tray now ejected from your iPhone, the next step is to carefully remove the old SIM card from the tray. Here’s how to do it:
Gently lift the old SIM card from the tray, taking care to handle it delicately. The SIM card is a small, rectangular chip that contains important information for connecting to your mobile network. Avoid touching the metal contacts on the SIM card, as oils and debris from your fingers could affect its functionality.
Inspect the old SIM card for any signs of damage, such as scratches or bends. If the SIM card appears to be damaged, it’s advisable to contact your mobile service provider for a replacement before proceeding further.
Once the old SIM card has been safely removed from the tray, place it in a secure location, as it may still contain important data. Now that the old SIM card has been extracted, you’re ready to move on to the next step of inserting the new SIM card into your iPhone.
Step 5: Insert the New SIM Card
With the old SIM card removed from the tray, it’s time to insert the new SIM card into your iPhone. Follow these steps to ensure a smooth installation:
Take the new SIM card provided by your mobile service provider and carefully align it with the SIM card tray. The SIM card has a notched corner, which should match the shape of the SIM card tray, ensuring that it is inserted correctly.
Gently place the new SIM card into the designated area within the SIM card tray, ensuring that it fits snugly. Avoid applying excessive force, as the SIM card should slide into place smoothly. Double-check to ensure that the SIM card is oriented correctly and lies flat within the tray.
Before reinserting the SIM card tray into your iPhone, take a moment to inspect the new SIM card and ensure that it is free from any visible damage or debris. This will help ensure a proper connection to the mobile network once the tray is back in place.
With the new SIM card securely seated in the tray, you’re now prepared to proceed to the next step of reinserting the SIM card tray into your iPhone.
Step 6: Reinsert the SIM Card Tray
Now that the new SIM card has been securely placed in the SIM card tray, it’s time to reinsert the tray into your iPhone. Follow these steps to complete this process:
Align the SIM card tray with the slot on your iPhone, ensuring that it is positioned correctly. Take care to orient the tray in the same direction and manner in which it was removed to prevent any potential issues with misalignment.
Gently slide the SIM card tray back into the slot, applying light pressure to ensure that it glides smoothly into place. Take care to avoid forcing the tray, as it should fit seamlessly into the iPhone without resistance. Once the tray is fully inserted, it should sit flush with the side of the device.
Before proceeding to the final step, take a moment to ensure that the SIM card tray is securely positioned within the iPhone. This will help prevent any connectivity issues and ensure that the SIM card remains in place during regular use.
With the SIM card tray reinserted, you’re now ready to proceed to the final step of turning on your iPhone and activating the new SIM card.
Step 7: Turn on Your iPhone
With the new SIM card securely in place and the SIM card tray reinserted into your iPhone, the final step is to turn on your device and activate the new SIM card. Follow these steps to complete the process:
Press and hold the power button on your iPhone until the Apple logo appears on the screen. This indicates that your iPhone is powering on and initializing the new SIM card. Allow your iPhone a few moments to complete the startup process.
Once your iPhone has fully powered on, it will search for the mobile network and activate the new SIM card. Depending on your mobile service provider, you may receive on-screen prompts or instructions to complete the activation process. Follow any provided instructions to ensure that the new SIM card is successfully activated and connected to the mobile network.
After the activation process is complete, your iPhone will display the network signal strength, indicating that the new SIM card is functioning properly. You can now make calls, send messages, and access mobile data using your new SIM card.
Congratulations! You have successfully changed the SIM card in your iPhone and activated the new SIM card. Your device is now ready to use with the updated mobile network information provided by the new SIM card.