
Tools and Materials Needed
Before you begin the process of removing a faucet connector, it’s essential to gather the necessary tools and materials to ensure a smooth and efficient procedure. Here’s a comprehensive list of items you’ll need:
- Adjustable Wrench: This versatile tool will come in handy for loosening and tightening various components during the removal process.
- Bucket: Keep a bucket nearby to catch any residual water that may spill during the disconnection of the water lines.
- Towels or Rags: Having these on hand will help you wipe up any water and keep the work area clean and dry.
- Plumber’s Tape: Also known as Teflon tape, this material is crucial for creating a watertight seal when reattaching the water lines to the new faucet connector.
- New Faucet Connector: Ensure you have the replacement faucet connector ready for installation once the old one is removed.
- Bucket Wrench: This specialized wrench is designed specifically for removing and installing faucet connectors, making the process much easier.
- Safety Glasses: Protect your eyes from any debris or water splashes during the removal process.
- Gloves: Keep your hands clean and protected while working on the faucet connector.
- Flashlight: A flashlight will be useful for illuminating dark or hard-to-reach areas under the sink.
- Pliers: These may be needed to disconnect certain types of water lines or fasteners.
- Penetrating Oil: In case the faucet connector is stuck or corroded, a penetrating oil can help loosen it for easier removal.
By ensuring you have these essential tools and materials on hand, you’ll be well-prepared to tackle the task of removing a faucet connector with confidence and efficiency.
Turn Off the Water Supply
Before initiating any work on the faucet connector, it’s crucial to shut off the water supply to the sink. This step is essential for preventing any water spillage or leaks during the removal process. Follow these steps to safely turn off the water:
- Locate the Shut-Off Valve: Typically, the shut-off valve can be found under the sink, connected to the water lines leading to the faucet. In some cases, it may be located in a nearby cabinet or on the wall behind the sink.
- Turn the Valve Clockwise: Using a firm grip, turn the shut-off valve clockwise until it stops. This action will halt the flow of water to the faucet, ensuring that the water lines are no longer pressurized.
- Test the Water Flow: To confirm that the water supply has been successfully turned off, attempt to turn on the faucet. If no water comes out, you have effectively shut off the water supply.
It’s essential to verify that the water supply is off before proceeding with the removal of the faucet connector. This precaution will minimize the risk of water leakage and make the entire process safer and more manageable.
Disconnect the Water Lines
With the water supply turned off, you can now focus on disconnecting the water lines from the faucet connector. This step is crucial in preparing the old faucet connector for removal and making way for the installation of a new one. Follow these steps to disconnect the water lines:
- Place a Bucket Underneath: Position a bucket under the area where the water lines connect to the faucet. This will catch any residual water that may drain out during the disconnection process.
- Use an Adjustable Wrench: Locate the nuts or connectors securing the water lines to the faucet connector. Use an adjustable wrench to loosen and remove these fasteners. Be prepared for some water to spill out as you disconnect the lines.
- Label the Water Lines: To simplify the reconnection process later, consider labeling the hot and cold water lines or taking a photograph for reference. This step will prevent confusion when attaching the water lines to the new faucet connector.
- Inspect for Leakage: After disconnecting the water lines, inspect the area for any signs of leakage or moisture. Use a towel or rag to dry the connections and ensure a clean work environment.
By carefully disconnecting the water lines from the old faucet connector, you pave the way for a seamless removal process and set the stage for installing a new connector with ease. This meticulous approach will contribute to the overall success of the project.
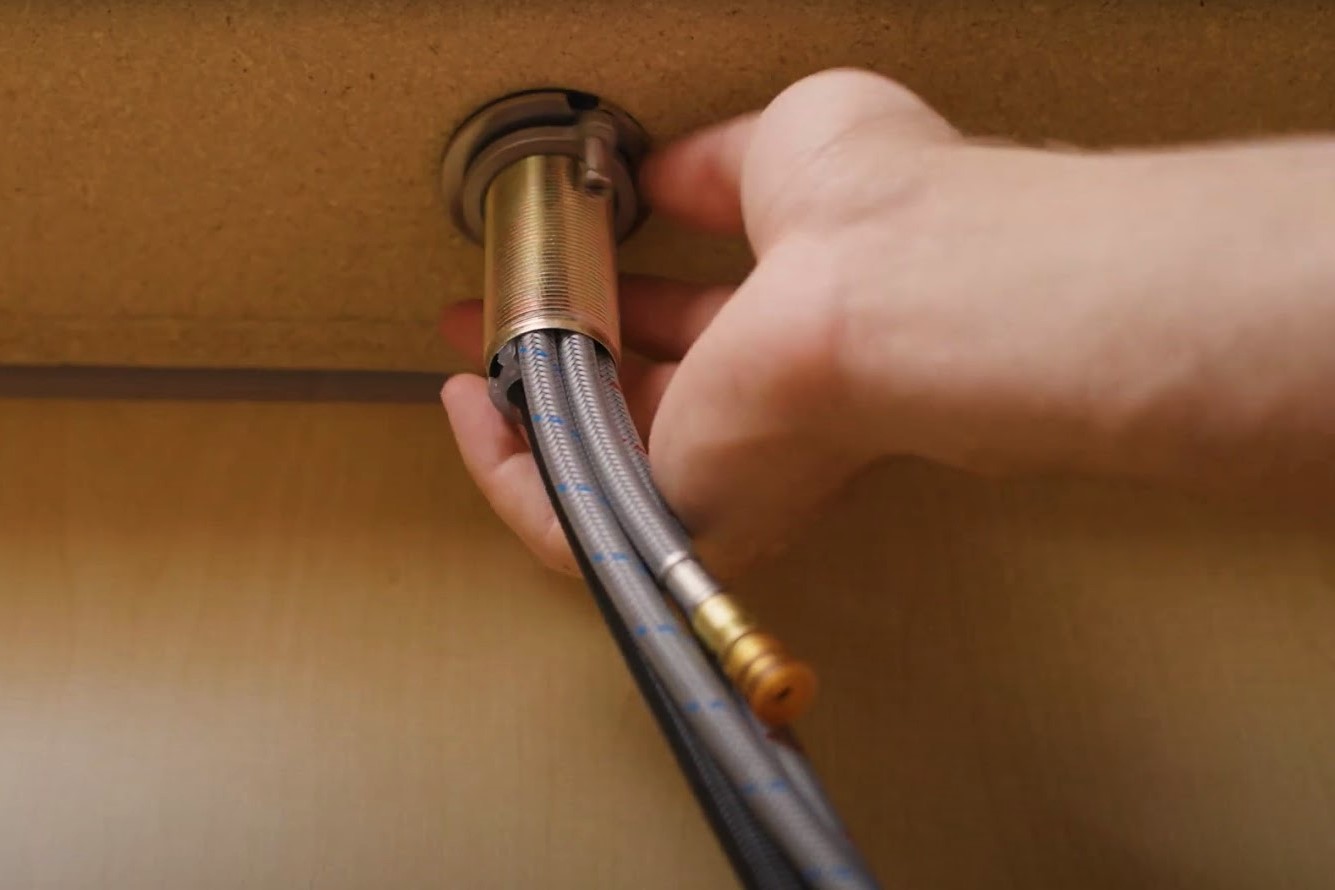
Remove the Faucet Connector
With the water lines disconnected, the next step involves removing the old faucet connector from the sink. This process requires attention to detail and a systematic approach to ensure a successful extraction. Follow these steps to remove the faucet connector:
- Inspect the Fasteners: Examine the fasteners or mounting nuts securing the faucet connector to the sink. Use an adjustable wrench or a specialized bucket wrench, if necessary, to loosen and remove these fasteners.
- Apply Penetrating Oil (if needed): In cases where the faucet connector is stubborn or corroded, applying a small amount of penetrating oil to the fasteners can help loosen them for easier removal. Allow the oil to penetrate for a few minutes before attempting to loosen the fasteners.
- Gently Wiggle and Maneuver: Once the fasteners are loosened, gently wiggle and maneuver the faucet connector to detach it from the sink. Take care not to force it, as this could cause damage to the surrounding plumbing or the sink itself.
- Inspect for Residue: After removing the old faucet connector, inspect the area for any residue or debris. Clean the mounting surface of the sink to ensure a smooth and clean foundation for installing the new faucet connector.
By following these steps, you can effectively remove the old faucet connector, clearing the way for the installation of a new one. This meticulous approach ensures that the removal process is carried out with precision and care, setting the stage for a successful replacement.
Clean the Area
After removing the old faucet connector, it’s essential to thoroughly clean the surrounding area to prepare it for the installation of the new connector. This step not only ensures a clean and professional-looking result but also contributes to the longevity of the new installation. Follow these steps to clean the area effectively:
- Remove Debris and Residue: Use a damp cloth or sponge to wipe away any debris, residue, or old plumber’s tape from the mounting surface of the sink. Ensure that the area is free of any obstructions that could hinder the proper installation of the new faucet connector.
- Inspect for Damage: Take a moment to inspect the mounting surface and surrounding plumbing for any signs of damage or wear. Address any issues that may compromise the stability or integrity of the new installation before proceeding.
- Apply New Plumber’s Tape: If necessary, apply a fresh layer of plumber’s tape to the threads of the water line connections on the new faucet connector. This tape will help create a secure and watertight seal when reattaching the water lines.
- Ensure Dryness: Before installing the new faucet connector, ensure that the cleaned area is completely dry to promote optimal adhesion and prevent any moisture-related issues.
By meticulously cleaning the area and preparing it for the new installation, you set the stage for a successful and long-lasting outcome. This attention to detail ensures that the new faucet connector is installed on a clean and stable surface, minimizing the risk of future complications.
Install the New Faucet Connector
With the area cleaned and prepared, it’s time to proceed with the installation of the new faucet connector. This step marks the culmination of the removal and replacement process, and it’s crucial to execute it with precision to ensure a secure and reliable installation. Follow these steps to install the new faucet connector:
- Position the New Connector: Carefully position the new faucet connector in place, aligning it with the mounting holes on the sink. Ensure that the connector sits flush and level against the mounting surface.
- Attach the Fasteners: Secure the new faucet connector to the sink by attaching and tightening the mounting nuts or fasteners. Use an adjustable wrench or a specialized bucket wrench to achieve a snug and secure fit.
- Reconnect the Water Lines: Reattach the hot and cold water lines to the corresponding connections on the new faucet connector. Use an adjustable wrench to tighten the connections, ensuring a firm and leak-free seal.
- Test for Leaks: Once the new faucet connector is installed and the water lines are reconnected, turn on the water supply and test the connections for any signs of leakage. Address any leaks immediately to prevent water damage.
- Inspect and Secure: Conduct a final inspection of the installed faucet connector, ensuring that all connections are secure and free of leaks. Double-check the tightness of the fasteners and the integrity of the water line connections.
By methodically installing the new faucet connector and conducting thorough checks, you ensure that the replacement is carried out with precision and care. This meticulous approach guarantees a reliable and long-lasting installation, providing peace of mind and functionality for your sink and faucet system.