
Understanding the Shark Bite Connector
The Shark Bite connector is a popular choice for joining pipes because of its simplicity and ease of use. It is a push-to-connect fitting that allows for quick and straightforward installation without the need for soldering, gluing, or specialized tools. The connector is designed to work with copper, CPVC, and PEX tubing, making it a versatile option for various plumbing applications.
One of the key features of the Shark Bite connector is its ability to be removed and reused, providing flexibility in case of mistakes or the need for adjustments. The connector utilizes a collet system and O-ring to create a secure and watertight seal, ensuring reliable performance.
It’s important to note that while the Shark Bite connector offers convenience and ease of installation, proper understanding of its functionality and correct removal procedures are essential. Improper removal can lead to damage to the pipe or the connector itself, potentially causing leaks or other issues. Therefore, it’s crucial to follow the correct steps when undoing a Shark Bite connector to ensure a successful and safe disconnection.
Safety Precautions
Before attempting to undo a Shark Bite connector, it’s crucial to prioritize safety to prevent accidents and damage. Here are some essential safety precautions to keep in mind:
- Turn off the Water Supply: Prior to working on the plumbing system, always shut off the water supply to avoid any unexpected leaks or water pressure.
- Release the Pressure: After turning off the water supply, open a faucet or tap to release any remaining pressure in the pipes. This step helps minimize the risk of water spraying out when disconnecting the Shark Bite fitting.
- Use Protective Gear: Wear appropriate protective gear, such as gloves and safety goggles, to shield yourself from any potential water exposure or sharp tools during the disconnection process.
- Inspect the Connector: Before proceeding, inspect the Shark Bite connector for any signs of damage or wear. If the connector appears compromised, it’s advisable to replace it rather than attempting to disconnect and reuse it.
- Work in a Well-Ventilated Area: If working in an enclosed space, ensure proper ventilation to prevent the buildup of fumes or gases from soldering or other plumbing activities.
By adhering to these safety precautions, you can minimize the risks associated with undoing a Shark Bite connector and carry out the disconnection process with confidence and peace of mind.
Tools Needed
When preparing to undo a Shark Bite connector, having the right tools at your disposal is crucial for a successful disconnection process. Here are the essential tools you’ll need:
- Disconnect Clip: This specialized tool is designed specifically for releasing the Shark Bite fitting from the pipe. It provides a safe and efficient way to detach the connector without causing damage to the pipe or the fitting itself.
- Pipe Cutter: In some cases, cutting the pipe may be necessary to remove the Shark Bite connector. A pipe cutter allows for clean and precise cuts, enabling you to prepare the pipe for disconnection and potential reuse.
- Adjustable Wrench: An adjustable wrench can be useful for gripping and stabilizing the pipe while working on the disconnection process. It provides additional leverage and support when dealing with stubborn or tightly secured Shark Bite connectors.
- Safety Gloves and Goggles: Personal protective equipment, including safety gloves and goggles, is essential for safeguarding yourself during the disconnection process. These items protect your hands and eyes from potential water exposure and sharp tools.
- Deburring Tool: A deburring tool helps remove any rough edges or burrs from the cut end of the pipe, ensuring a smooth surface for reinstallation or alternative connections.
Having these tools readily available will streamline the process of undoing a Shark Bite connector and contribute to a safe and efficient disconnection experience.
Step 1: Turn Off the Water Supply
Before initiating the process of undoing a Shark Bite connector, the first and most crucial step is to turn off the water supply to the affected plumbing line. This preventive measure is essential for minimizing the risk of water leakage and ensuring a safe disconnection. Here’s a detailed guide on how to carry out this initial step:
- Locate the Main Water Shut-Off Valve: Identify the main water shut-off valve for your property. This valve is typically located near the water meter or at the point where the main water line enters the building. In some cases, the shut-off valve may be situated in a basement, utility room, or outdoor water meter box.
- Turn Off the Main Water Supply: Using a valve key or a wrench, carefully turn the main shut-off valve clockwise to close it completely. This action will stop the flow of water into the plumbing system, preventing any water pressure during the disconnection process.
- Open a Faucet to Release Pressure: After shutting off the main water supply, open a faucet or tap connected to the affected plumbing line to release any remaining water pressure in the pipes. This step helps minimize the risk of water spraying out when disconnecting the Shark Bite fitting.
By diligently following these steps to turn off the water supply, you create a safe working environment for the subsequent stages of removing the Shark Bite connector.
Step 2: Release the Pressure
After turning off the water supply, it’s crucial to release any remaining pressure in the plumbing system to minimize the risk of water spraying out during the disconnection process. Here’s a detailed guide on how to effectively release the pressure:
- Open a Faucet or Tap: Select a faucet or tap connected to the plumbing line where the Shark Bite connector is located. Turn the handle to open the faucet and allow any pressurized water to escape.
- Wait for the Water to Stop Flowing: Allow the water to run for a few moments until it slows to a trickle and eventually stops flowing. This indicates that the pressure in the pipes has been successfully released.
- Verify Pressure Release: To confirm that the pressure has been released, listen for any residual hissing or sputtering sounds from the open faucet. Once the sounds cease, it’s a sign that the pressure has dissipated.
By carefully following these steps to release the pressure, you create a safer working environment for the subsequent stages of undoing the Shark Bite connector, reducing the risk of unexpected water discharge and ensuring a controlled disconnection process.
Step 3: Identify the Shark Bite Fitting
Before proceeding with the disconnection process, it’s essential to accurately identify the Shark Bite fitting to ensure a targeted approach. Here’s a detailed guide on how to effectively identify the Shark Bite fitting:
- Inspect the Plumbing Configuration: Survey the plumbing layout to locate the Shark Bite fitting. It may be situated at a joint, tee, or connection point along the pipe where two sections are joined together.
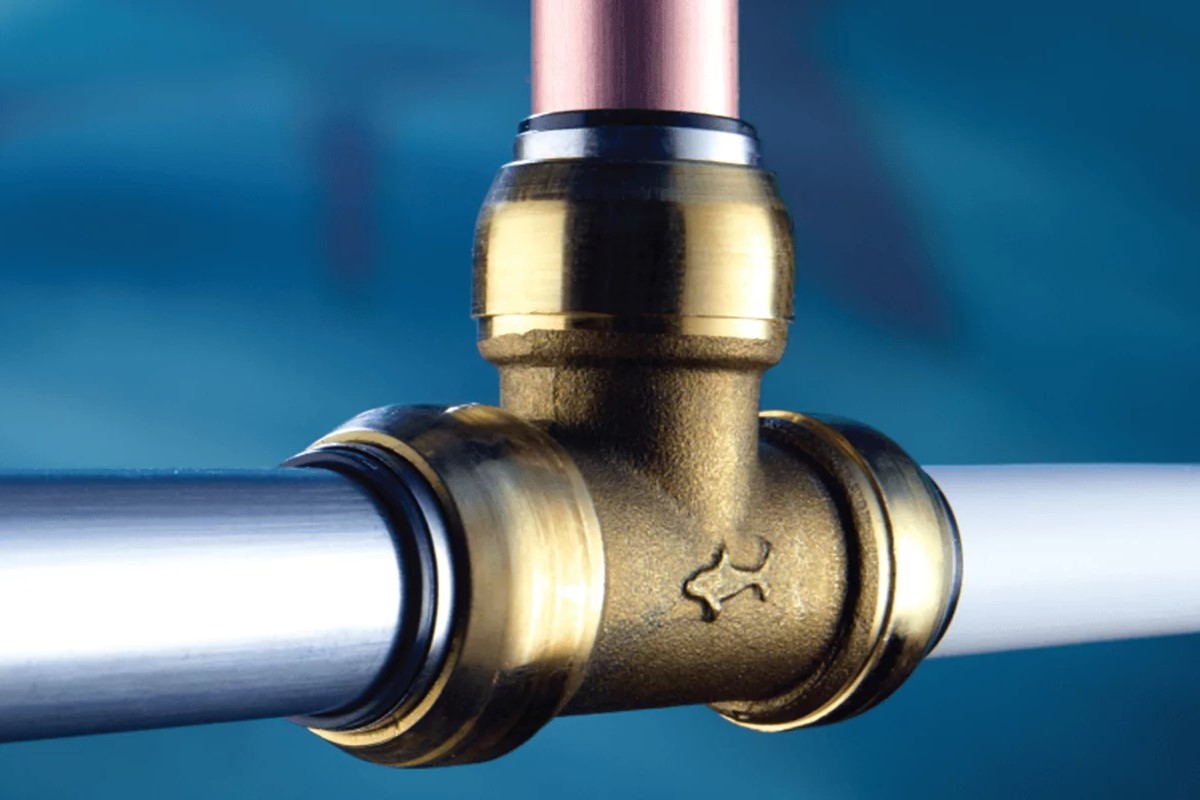
- Look for the Shark Bite Logo: The Shark Bite logo is typically imprinted on the body of the fitting. It features a distinct shark design and the brand name, making it easily recognizable for identification purposes.
- Verify the Push-to-Connect Design: Examine the fitting to confirm that it features a push-to-connect design, characterized by a cylindrical body and a release collar. This design distinguishes Shark Bite fittings from traditional soldered or threaded connections.
- Check for Labeling or Color: In some cases, Shark Bite fittings may have color-coded collars or labeling to signify the type of pipe they are compatible with, such as blue for PEX tubing, tan for CPVC, and white for standard copper tubing.
By meticulously identifying the Shark Bite fitting, you can proceed with confidence and precision in the subsequent steps of disconnecting the fitting from the pipe, ensuring a targeted and effective disconnection process.
Step 4: Use a Disconnect Clip
When it comes to undoing a Shark Bite connector, utilizing a disconnect clip is a highly effective method for safely releasing the fitting from the pipe. Here’s a comprehensive guide on how to use a disconnect clip for this purpose:
- Select the Correct Size Disconnect Clip: Ensure that the disconnect clip matches the size of the Shark Bite fitting you are working with. Shark Bite disconnect clips are available in various sizes to accommodate different pipe diameters, so it’s essential to use the appropriate clip for a secure and efficient disconnection.
- Position the Disconnect Clip: Slide the disconnect clip over the pipe and align it with the release collar of the Shark Bite fitting. The clip should fit snugly against the release collar, preparing it for the disengagement process.
- Apply Even Pressure: With the disconnect clip in place, apply even pressure to depress the release collar on the Shark Bite fitting. This action allows the teeth inside the fitting to disengage from the pipe, facilitating the removal of the connector.
- Pull the Pipe and Fitting Apart: Once the release collar is depressed, gently pull the pipe and the Shark Bite fitting in opposite directions to separate them. The disconnect clip helps maintain the release collar in the depressed position, enabling a smooth disconnection without causing damage to the pipe or the fitting.
By following these steps to use a disconnect clip, you can effectively and safely release the Shark Bite connector from the pipe, setting the stage for the subsequent stages of the disconnection process.
Step 5: Cutting the Pipe
In some instances, cutting the pipe may be necessary to facilitate the removal of the Shark Bite connector. Here’s a detailed guide on how to approach the process of cutting the pipe effectively:
- Assess the Pipe Length: Evaluate the length of the pipe connected to the Shark Bite fitting. Determine if there is sufficient space to maneuver and disconnect the fitting without the need for cutting.
- Use a Pipe Cutter: If cutting the pipe is deemed necessary, utilize a pipe cutter to make a clean and precise cut. Position the pipe cutter’s blade around the pipe at the desired cutting point, ensuring that it is perpendicular to the pipe’s axis.
- Rotate the Pipe Cutter: Gradually rotate the pipe cutter around the pipe, tightening it after each rotation to score the surface. Continue rotating the cutter until the pipe is cleanly severed.
- Deburr the Cut End: After cutting the pipe, use a deburring tool to remove any rough edges or burrs from the freshly cut end. This step ensures that the pipe end is smooth and free of imperfections, facilitating a secure reconnection or alternative fitting installation.
By carefully considering the need to cut the pipe and following these steps to execute the cutting process, you can prepare the pipe for disconnection and removal of the Shark Bite connector, ensuring a streamlined and effective disconnection experience.
Step 6: Removing the Connector
Once the necessary preparations have been made, the process of removing the Shark Bite connector can be initiated. Here’s a detailed guide on how to effectively remove the connector from the pipe:
- Utilize the Disconnect Clip: If not already in use, ensure that the disconnect clip is securely positioned over the pipe and aligned with the release collar of the Shark Bite fitting. The disconnect clip facilitates the safe disengagement of the connector from the pipe.
- Depress the Release Collar: With the disconnect clip in place, apply even pressure to depress the release collar on the Shark Bite fitting. This action allows the teeth inside the fitting to disengage from the pipe, preparing it for removal.
- Gently Pull Apart: Once the release collar is depressed, gently pull the pipe and the Shark Bite fitting in opposite directions to separate them. The disconnect clip helps maintain the release collar in the depressed position, enabling a smooth disconnection without causing damage to the pipe or the fitting.
- Inspect the Pipe End: After removing the Shark Bite connector, inspect the exposed end of the pipe for any irregularities or damage. If necessary, use a deburring tool to remove any rough edges or burrs, ensuring a smooth and clean surface for reinstallation or alternative fittings.
By following these steps to remove the Shark Bite connector, you can effectively disengage the fitting from the pipe, setting the stage for potential reinstallation or alternative connection methods as needed.
Step 7: Reusing the Shark Bite Connector
After successfully removing the Shark Bite connector, the option to reuse the fitting may arise, especially in situations where adjustments or modifications to the plumbing system are necessary. Here’s a comprehensive guide on how to effectively prepare the Shark Bite connector for potential reuse:
- Inspect the Connector: Thoroughly examine the removed Shark Bite connector for any signs of damage, wear, or deformation. It’s essential to ensure that the connector is in optimal condition for reuse without compromising its sealing and connection integrity.
- Clean the Connector: If the connector exhibits any dirt, debris, or residue, carefully clean it using a soft cloth or brush. Ensure that the interior and exterior surfaces are free from any contaminants that could hinder its performance during reinstallation.
- Replace the O-Ring: Consider replacing the O-ring inside the Shark Bite connector if it shows signs of wear or deterioration. A fresh O-ring ensures a reliable and watertight seal when the connector is reinstalled, minimizing the risk of leaks or seepage.
- Test the Connector: Before reinstallation, conduct a test fit of the Shark Bite connector on the pipe to verify its compatibility and proper engagement. Ensure that the release collar operates smoothly and securely grips the pipe when connected.
- Reinstall the Connector: If the Shark Bite connector meets the necessary criteria for reuse, carefully reinstall it on the pipe following the manufacturer’s guidelines and recommendations. Ensure that the connector is securely and correctly positioned for optimal performance.
By conscientiously following these steps to prepare and potentially reuse the Shark Bite connector, you can effectively assess its suitability for reinstallation and contribute to the efficient and reliable functioning of the plumbing system.