
Choosing the Right Tools and Equipment
Before you embark on crimping a BNC connector, it’s crucial to gather the essential tools and equipment. Having the right gear not only ensures a smooth crimping process but also contributes to the overall quality and reliability of the connection. Here’s a step-by-step guide to help you select the necessary tools and equipment for this task:
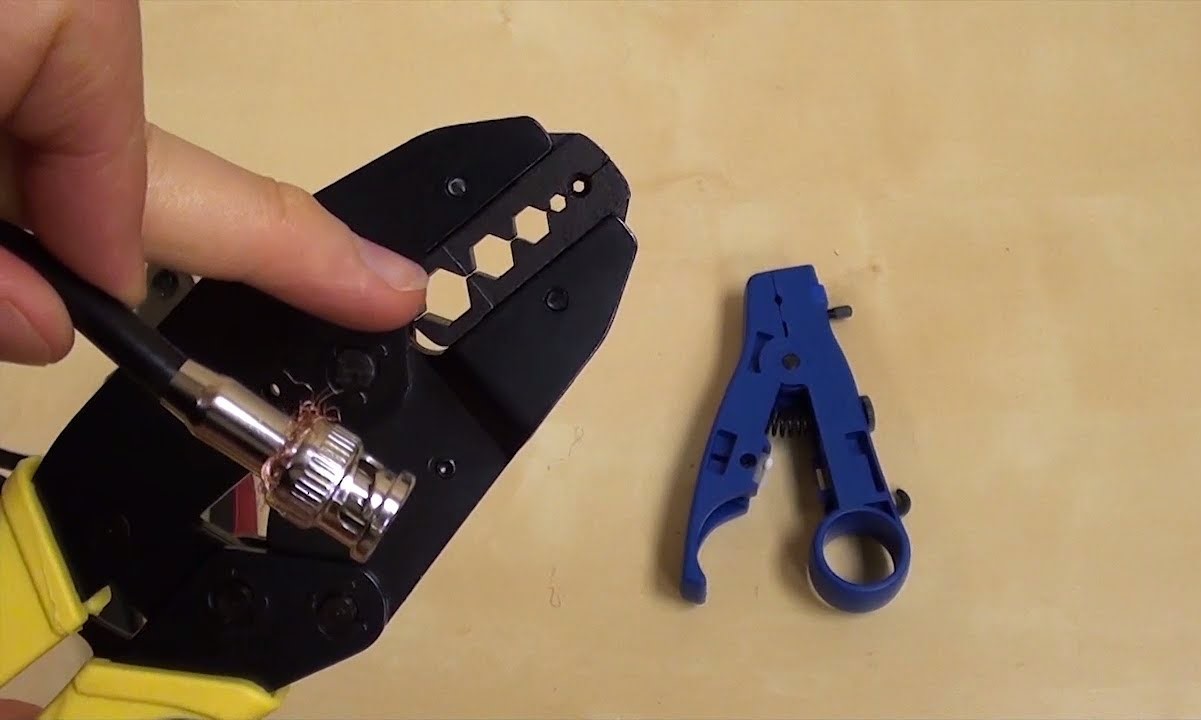
- Crimping Tool: The crimping tool is the backbone of this operation. It’s imperative to choose a high-quality crimping tool specifically designed for BNC connectors. Look for a tool that provides a secure and uniform crimp, as this directly impacts the stability of the connection.
- Coaxial Cable Stripper: A coaxial cable stripper is essential for precisely removing the outer insulation and shielding from the coaxial cable. This tool ensures that the inner conductor remains intact and undamaged during the stripping process.
- BNC Connectors: Select high-quality BNC connectors that are compatible with the type of coaxial cable you are using. It’s essential to choose connectors that match the cable’s specifications to guarantee a secure and reliable connection.
- Coaxial Cable: The coaxial cable serves as the lifeline of the connection. Ensure that you have the appropriate length and type of coaxial cable for your specific application. Quality coaxial cable is crucial for maintaining signal integrity and minimizing interference.
- Cable Cutter: A cable cutter is indispensable for cleanly and accurately trimming the coaxial cable to the required length. Precision is key when preparing the cable for crimping, and a reliable cable cutter facilitates this process.
- Wire Strippers: While not always necessary, wire strippers can be handy for removing the insulation from the inner conductor of the coaxial cable. This step is crucial for ensuring a proper connection and optimal signal transmission.
By ensuring that you have the right tools and equipment at your disposal, you set the stage for a successful BNC connector crimping endeavor. The quality of the tools directly impacts the precision and reliability of the connection, making the selection of these items a critical first step in the crimping process.
Stripping the Coaxial Cable
Properly stripping the coaxial cable is a fundamental step in preparing it for crimping a BNC connector. This process requires precision and attention to detail to ensure optimal signal transmission and a secure connection. Here’s a detailed guide on how to strip the coaxial cable effectively:
1. Measure and Mark: Begin by measuring the required length of the cable and marking it for stripping. Precision is key, so use a marker or tape to indicate the exact point where the outer insulation will be removed.
2. Use the Coaxial Cable Stripper: With the marked point as a guide, carefully position the coaxial cable within the coaxial cable stripper. Adjust the cutting blades of the stripper to match the diameter of the cable, ensuring a clean and precise cut. Gently rotate the stripper around the cable to score the outer insulation without damaging the underlying shielding or inner conductor.
3. Remove the Outer Insulation: Once the cable has been scored, carefully pull the outer insulation away from the cable, ensuring that the shielding and inner conductor remain intact. Take your time to avoid causing any damage to the underlying components, as this can compromise the integrity of the connection.
4. Expose the Inner Conductor: After removing the outer insulation, expose the inner conductor of the coaxial cable. If necessary, use wire strippers to carefully remove any additional insulation from the inner conductor, exposing the bare metal for proper connection to the BNC connector.
5. Inspect the Stripped Cable: Once the stripping process is complete, thoroughly inspect the exposed components of the coaxial cable. Ensure that the inner conductor is undamaged and that no stray strands of shielding are present. Any irregularities should be addressed before proceeding to the next step.
By following these steps, you can effectively strip the coaxial cable in preparation for crimping a BNC connector. Attention to detail and precision are crucial during this process, as they directly impact the quality and reliability of the final connection.
Preparing the BNC Connector
Before crimping the BNC connector onto the coaxial cable, it’s essential to prepare the connector to ensure a secure and reliable connection. Proper preparation sets the stage for a successful crimping process and contributes to the overall integrity of the connection. Here’s a step-by-step guide on how to prepare the BNC connector:
1. Inspect the BNC Connector: Begin by examining the BNC connector to ensure that it is in optimal condition. Check for any signs of damage, such as bent or misaligned components, as these can affect the crimping process and the integrity of the connection. Use a high-quality connector that is designed for the specific type of coaxial cable being used.
2. Identify the Components: Familiarize yourself with the various components of the BNC connector, including the body, crimp sleeve, and pin. Understanding how these elements fit together is crucial for a successful crimping process.
3. Prepare the Cable End: Carefully insert the stripped end of the coaxial cable into the BNC connector. Ensure that the inner conductor makes proper contact with the pin inside the connector, and that the shielding is correctly positioned within the crimp sleeve. Proper alignment at this stage is essential for a secure and reliable connection.
4. Secure the Connector: Once the cable end is properly positioned within the BNC connector, secure the components in place. Ensure that the crimp sleeve is aligned with the outer insulation of the cable and that it provides a snug fit. This step is crucial for maintaining the integrity of the connection and preventing any strain on the cable.
5. Verify the Alignment: Double-check the alignment of the cable and connector components to ensure that everything is properly seated and secured. Any misalignment at this stage can lead to a compromised connection, so attention to detail is paramount.
By meticulously preparing the BNC connector, you lay the groundwork for a successful crimping process and a reliable connection. Attention to detail and precision during this stage directly contribute to the overall quality and integrity of the final connection.
Inserting the Coaxial Cable into the BNC Connector
Once the BNC connector is prepared, the next critical step in the crimping process is to insert the stripped coaxial cable into the connector. Proper insertion ensures that the inner conductor and shielding make secure contact with the connector’s components, laying the foundation for a reliable and stable connection. Here’s a detailed guide on how to insert the coaxial cable into the BNC connector:
1. Position the Cable End: With the stripped end of the coaxial cable prepared, carefully position it within the BNC connector. Ensure that the inner conductor makes full contact with the pin inside the connector, as this is essential for optimal signal transmission and a secure connection.
2. Verify Shielding Contact: Confirm that the shielding of the coaxial cable is correctly positioned within the BNC connector. The shielding plays a crucial role in maintaining signal integrity and minimizing interference, making proper contact essential for the overall performance of the connection.
3. Secure the Cable: Once the cable end is positioned within the BNC connector, secure it in place to prevent any movement or dislodging during the crimping process. A stable and secure connection at this stage is vital for the overall reliability of the crimped BNC connector.
4. Check Alignment: Double-check the alignment of the cable within the connector to ensure that it is properly seated and positioned. Any misalignment at this stage can compromise the integrity of the connection, so meticulous attention to detail is crucial.
5. Ensure Proper Fit: Confirm that the crimp sleeve of the BNC connector aligns with the outer insulation of the coaxial cable. This ensures a secure fit and prevents any strain on the cable, contributing to the overall stability and longevity of the connection.
By effectively inserting the coaxial cable into the BNC connector, you establish the groundwork for a successful crimping process and a reliable connection. Attention to detail and precision during this stage directly impact the quality and integrity of the final crimped BNC connector.
Crimping the BNC Connector
As you proceed with crimping the BNC connector onto the coaxial cable, precision and attention to detail are paramount for achieving a secure and reliable connection. The crimping process involves applying controlled pressure to the connector to secure it to the cable, ensuring optimal signal transmission and mechanical stability. Here’s a comprehensive guide on how to effectively crimp the BNC connector:
1. Select the Crimping Tool: Choose a high-quality crimping tool specifically designed for BNC connectors. The tool should provide the appropriate die set for the connector and cable combination being used, ensuring a precise and uniform crimp.
2. Position the Connector: Carefully place the prepared BNC connector with the coaxial cable into the crimping tool, ensuring that it is securely held in place for the crimping process. Proper positioning is essential for achieving a consistent and reliable crimp.
3. Apply Controlled Pressure: Engage the crimping tool to apply controlled pressure to the connector, compressing it onto the coaxial cable. The goal is to create a secure and uniform crimp that firmly attaches the connector to the cable, providing both electrical and mechanical stability.
4. Verify the Crimp: After crimping, carefully inspect the connector to ensure that it has been uniformly and securely attached to the coaxial cable. Check for any signs of irregular crimping or incomplete compression, as these can compromise the integrity of the connection.
5. Test the Crimped Connection: Once the crimping process is complete, perform a thorough visual inspection of the crimped BNC connector to verify its integrity. Additionally, consider conducting a continuity test or using a cable tester to ensure that the connection is secure and that signal transmission is optimal.
By following these steps, you can effectively crimp the BNC connector onto the coaxial cable, creating a secure and reliable connection. Precision and attention to detail during the crimping process directly contribute to the overall quality and integrity of the final connection.
Testing the Connection
After crimping the BNC connector onto the coaxial cable, it’s crucial to thoroughly test the connection to ensure its reliability and performance. Testing the connection involves verifying the integrity of the crimped connector, as well as assessing signal transmission and continuity. Here’s a comprehensive guide on how to effectively test the crimped BNC connector connection:
1. Visual Inspection: Begin by visually inspecting the crimped BNC connector to ensure that it is securely and uniformly attached to the coaxial cable. Check for any signs of irregular crimping, incomplete compression, or visible damage that could compromise the connection’s integrity.
2. Continuity Test: Use a multimeter or continuity tester to verify that the connection between the inner conductor and the pin of the BNC connector is secure. This test ensures that the electrical continuity is maintained, which is essential for signal transmission and proper functionality.
3. Signal Transmission Test: If possible, conduct a signal transmission test to verify that the crimped BNC connector effectively transmits signals without distortion or interference. This test provides valuable insight into the performance of the connection and its ability to maintain signal integrity.
4. Physical Integrity Check: Gently tug and manipulate the cable near the crimped connector to ensure that the connection remains stable and secure. Any signs of movement or instability indicate a potential issue with the crimping process that needs to be addressed.
5. Environmental Considerations: If the connection will be exposed to specific environmental conditions, such as moisture or temperature variations, consider conducting tests to assess the connection’s resilience under these circumstances. This step ensures that the connection is reliable in its intended operating environment.
By meticulously testing the crimped BNC connector connection, you can verify its integrity, signal transmission capabilities, and overall reliability. Thorough testing provides assurance that the connection meets the required performance standards and is ready for its intended application.