
Access the Audio MIDI Setup Utility
When it comes to managing your audio devices on a Mac, the Audio MIDI Setup Utility is a handy tool that allows you to configure and control various settings. Whether you need to select your input and output devices, adjust volume levels, or fine-tune the audio settings, this utility has got you covered.
To access the Audio MIDI Setup Utility, follow these steps:
- Click on the Apple menu at the top-left corner of your screen.
- Select “System Preferences” from the drop-down menu.
- In the System Preferences window, click on the “Sound” icon.
- Within the Sound preferences pane, click on the “Output” or “Input” tab depending on whether you want to configure the output or input devices.
- At the bottom of the Sound preferences pane, click on the “Audio MIDI Setup” button.
Once you click on the “Audio MIDI Setup” button, the Audio MIDI Setup Utility window will open, displaying a list of your available audio devices. From here, you can make adjustments to your devices and customize their behavior.
The Audio MIDI Setup Utility provides a user-friendly interface that allows you to easily navigate and configure your audio devices. Being able to access this utility gives you greater control over your sound settings and ensures your audio is optimized for your specific needs.
Enable the Audio MIDI Setup Utility on Your Mac
The Audio MIDI Setup Utility is a powerful tool that comes pre-installed on Mac computers. However, in order to access its functionality, you need to enable it first. Here’s how you can do it:
- Go to your Applications folder and open the “Utilities” folder.
- Within the Utilities folder, locate and open the “Audio MIDI Setup” application.
- Once the Audio MIDI Setup window opens, click on the “Window” option in the menu bar.
- In the drop-down menu, select “Show MIDI Studio” to enable the MIDI functionality in the Audio MIDI Setup Utility.
By enabling the Audio MIDI Setup Utility, you gain access to a wide range of features and settings to enhance your audio experience. It allows you to configure MIDI devices, create virtual MIDI configurations, modify sample rates, and much more.
Keep in mind that the availability of certain options within the utility may vary depending on the specific audio devices connected to your Mac. Some devices may have additional settings and controls that can be accessed through the Audio MIDI Setup Utility.
Enabling the Audio MIDI Setup Utility on your Mac opens up a world of possibilities for managing and optimizing your audio devices. You can now take full advantage of the powerful tools and features provided by this utility to fine-tune your audio settings and ensure the best possible sound quality.
Configure Audio Devices Using the Audio MIDI Setup Utility
The Audio MIDI Setup Utility on your Mac provides a straightforward way to configure your audio devices to meet your specific needs. Whether you want to modify sample rates, channel configurations, or test the functionality of your devices, this utility has the tools you need.
To configure your audio devices using the Audio MIDI Setup Utility, follow these steps:
- Open the Audio MIDI Setup Utility by navigating to the “Utilities” folder within your Applications folder and launching the “Audio MIDI Setup” application.
- Once the Audio MIDI Setup window opens, you will see a list of your connected audio devices on the left side of the window.
- Select the audio device you wish to configure.
- On the right side of the window, you will find various options to adjust the settings of the selected device.
- For example, you can modify the sample rate, bit depth, clock source, and channel configuration of your audio device.
- Experiment with different settings to find the optimal configuration for your specific audio needs.
Additionally, the Audio MIDI Setup Utility allows you to create and manage aggregated audio devices, which combine multiple physical audio devices into a single virtual device. This can be useful, for example, if you want to route audio inputs and outputs from different devices to a single application.
By configuring your audio devices using the Audio MIDI Setup Utility, you can ensure that they are set up correctly and perform optimally. Take advantage of the utility’s extensive options and customize your audio devices to suit your preferences and requirements.
Add or Remove Audio Devices from Your Mac’s Menu Bar
Your Mac’s menu bar offers quick and convenient access to various system settings and utilities, including audio devices. By adding your frequently used audio devices to the menu bar, you can easily switch between them without navigating through multiple menus. Here’s how you can add or remove audio devices from your Mac’s menu bar:
- Open the Audio MIDI Setup Utility on your Mac by going to the “Utilities” folder within the Applications folder and launching the “Audio MIDI Setup” application.
- In the Audio MIDI Setup window, select the audio device that you want to add to the menu bar.
- Click on the “Enable” button located at the bottom of the window.
- The selected audio device will now appear in the menu bar.
- To remove an audio device from the menu bar, open the Audio MIDI Setup Utility and select the device you want to remove.
- Click on the “Disable” button located at the bottom of the window.
- The audio device will be removed from the menu bar.
Adding your most frequently used audio devices to the menu bar provides quick access to switching between them on the fly. This is particularly useful if you often connect and disconnect external audio interfaces, headphones, or speakers.
By removing audio devices from the menu bar that you no longer use regularly, you can declutter your menu bar and customize it to display only the most relevant options.
Take advantage of this feature to streamline your audio setup and make it more efficient and user-friendly.
Change Input and Output Devices from Your Mac’s Menu Bar
Changing your audio input and output devices on your Mac is made easy and convenient through the menu bar. With just a few clicks, you can switch between different devices to ensure that your audio is directed to the right source and that you have the appropriate input device selected for your needs. Here’s how to change input and output devices from your Mac’s menu bar:
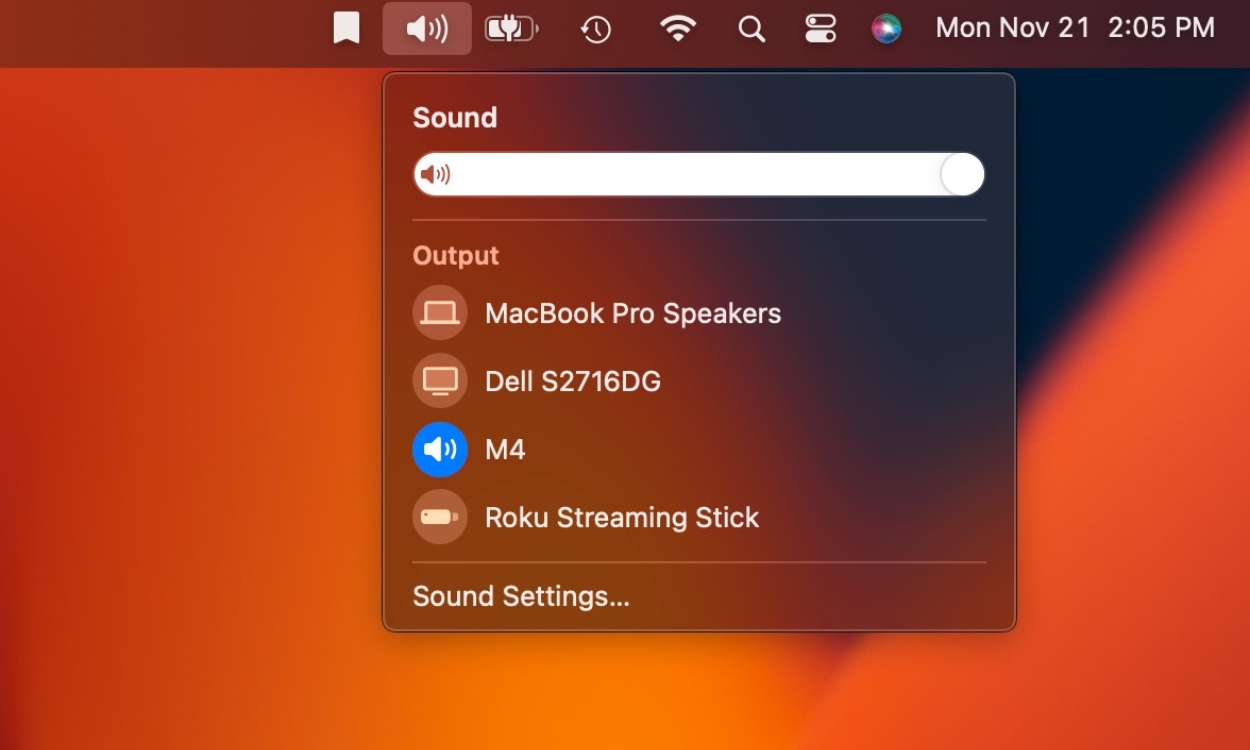
- Locate the speaker-shaped audio icon on the right side of your menu bar.
- Click on the audio icon to reveal a drop-down menu.
- In the drop-down menu, you will see a list of available audio input and output devices.
- To change the output device, hover over the “Output Device” option and select the desired device from the submenu.
- To change the input device, hover over the “Input Device” option and select the desired device from the submenu.
Once you select a new input or output device, your Mac will immediately start using it for audio input or output, respectively. This seamless process allows you to switch between different devices with ease, whether you prefer to use internal speakers, external headphones, or a connected audio interface.
Being able to change input and output devices directly from the menu bar provides a convenient way to adapt to different audio setups and ensures that you have the correct devices selected for your specific audio needs.
Take advantage of this feature to quickly and easily switch between input and output devices without having to navigate through multiple system settings menus.
Adjust Output Volume from Your Mac’s Menu Bar
Controlling the output volume of your Mac’s audio is a breeze with the volume control feature on the menu bar. This handy tool allows you to quickly and easily adjust the volume level of your output devices to suit your preferences. Here’s how you can adjust the output volume from your Mac’s menu bar:
- Locate the speaker-shaped audio icon on the right side of your menu bar.
- Click on the audio icon to reveal a vertical slider representing the volume control.
- Drag the slider up or down to increase or decrease the output volume, respectively.
- As you drag the slider, you will see a visual feedback indicating the current volume level.
- Release the slider at your desired volume level.
The output volume control on the menu bar provides precise control over the audio level. You can easily adjust the volume for various situations, whether you need to lower it for late-night listening or increase it for a more immersive experience.
Alternatively, you can also use the volume keys on your keyboard to adjust the output volume. Press the volume-up (+) key to increase the volume and the volume-down (-) key to decrease it.
Having the ability to adjust the output volume from the menu bar gives you quick and convenient control over your Mac’s audio output, allowing you to tailor the volume to your specific preferences and environmental requirements.
Take advantage of this feature to ensure that your audio is at the perfect volume level for an optimal listening experience.
Control Input Levels from Your Mac’s Menu Bar
Controlling the input levels of your audio devices on your Mac is made easy through the menu bar. This feature allows you to adjust the input volume levels to ensure clear and balanced audio recordings or calls. Here’s how you can control input levels from your Mac’s menu bar:
- Locate the speaker-shaped audio icon on the right side of your menu bar.
- Click on the audio icon to reveal a drop-down menu.
- In the drop-down menu, you will find a list of available input devices.
- Hover over the input device you want to adjust and click on the “Input” option beside it.
- A slider will appear, allowing you to adjust the input volume level for the selected device.
- Drag the slider up or down to increase or decrease the input level, respectively.
- Monitor the input level via the visual feedback provided by the slider.
- Release the slider at your desired input level.
Controlling the input levels from the menu bar ensures that you can optimize the audio input quality when recording audio or participating in voice or video calls. It allows you to prevent distorted or overly soft audio by adjusting the input volume to the optimal level for capturing clear sound.
Some applications, such as recording software or video conferencing tools, may also have their own input level controls. In those cases, you can use the menu bar input level control as a global adjustment that will affect all applications.
Take advantage of this feature to easily control and fine-tune the input levels of your audio devices, providing you with better audio quality for your recordings and communication.
Switch Between Stereo and Multichannel Audio
The ability to switch between stereo and multichannel audio configurations on your Mac gives you the flexibility to adapt to various audio setups and preferences. Whether you’re listening to music, watching movies, or editing audio files, being able to choose between stereo and multichannel audio can enhance your overall audio experience. Here’s how you can switch between stereo and multichannel audio:
- Locate the speaker-shaped audio icon on the right side of your menu bar.
- Click on the audio icon to reveal a drop-down menu.
- In the drop-down menu, you will find a list of available audio devices.
- Hover over the audio device for which you want to switch between stereo and multichannel audio.
- Click on the “Configure Speakers” or “Configure Audio Channels” option, depending on the available settings for your device.
- In the configuration window that appears, select the desired audio configuration, such as stereo or multichannel.
- Apply the changes.
By switching between stereo and multichannel audio, you can optimize your listening experience based on the content you are consuming. Stereo audio is a two-channel audio format that is suitable for general audio playback, while multichannel audio provides a more immersive surround sound experience, particularly ideal for movies and games.
Note that the availability of multichannel audio depends on your specific audio hardware capabilities and the content you are playing. Not all audio devices and applications support multichannel playback.
Take advantage of this feature to optimize your audio experience and enjoy the content you love in the most suitable audio configuration.
Set Sample Rate and Bit Depth for Audio Devices in the Menu Bar
The sample rate and bit depth of your audio devices play a crucial role in determining the audio quality and accuracy of playback or recording. With the menu bar options on your Mac, you can easily set the sample rate and bit depth for your audio devices to match your desired specifications. Here’s how to do it:
- Locate the speaker-shaped audio icon on the right side of your menu bar.
- Click on the audio icon to reveal a drop-down menu.
- Hover over the audio device for which you want to set the sample rate and bit depth.
- Click on the “Configure Speakers” or “Configure Audio Channels” option, depending on the available settings for your device.
- In the configuration window that appears, you will find options to adjust the sample rate and bit depth.
- Select the desired sample rate and bit depth settings from the available options.
- Apply the changes.
Setting the sample rate and bit depth is important as it determines the accuracy and resolution of the audio reproduction or recording. Higher sample rates and bit depths can result in a more detailed and faithful representation of the original audio source.
It’s worth noting that the available sample rate and bit depth options may vary depending on your audio device and the capabilities it supports. Some common sample rate options include 44.1 kHz, 48 kHz, and 96 kHz, while bit depth options typically range from 16-bit to 32-bit.
When choosing the sample rate and bit depth, consider the requirements of your audio tasks. For casual listening, the standard 44.1 kHz and 16-bit depth may suffice. However, for professional audio production or high-quality playback, higher sample rates and bit depths may be preferred.
Take advantage of this functionality in the menu bar to customize and optimize the sample rate and bit depth settings for your audio devices, ensuring the best possible audio quality for your specific needs.
Use the Sound Preferences Pane to Customize Audio Settings
The Sound preferences pane on your Mac provides a comprehensive set of options to customize various audio settings and preferences. From output and input volume controls to sound effects and audio routing, this feature-rich pane allows you to fine-tune your audio experience. Here’s how you can use the Sound preferences pane to customize your audio settings:
- Click on the Apple menu at the top-left corner of your screen.
- Select “System Preferences” from the drop-down menu.
- In the System Preferences window, click on the “Sound” icon.
- The Sound preferences pane will open, presenting you with several tabs and options.
- Within the Sound preferences pane, you can adjust the output volume by dragging the slider or using the volume keys on your keyboard.
- Switch to the “Input” tab to adjust the input volume or configure microphone settings. You can also enable background noise reduction or ambient noise cancellation, if available.
- Explore other tabs, such as “Sound Effects” or “Output”, to further customize audio settings such as system alert sounds or selecting different output devices.
- Depending on your Mac model and available features, additional options may be available in the Sound preferences pane, such as configuring audio routing for specific input and output devices.
The Sound preferences pane serves as a central hub for customizing various audio settings on your Mac. It allows you to tailor your audio experience according to your preferences, the connected devices, and your specific audio requirements.
By exploring the different tabs and options within the Sound preferences pane, you can personalize your audio settings, adjust volume levels, fine-tune microphone input, and configure system sounds to create an optimal audio environment.
Take advantage of this powerful tool to customize and enhance your audio experience on your Mac.