
What is Network File Sharing?
Network file sharing refers to the ability to access and exchange files or resources between multiple computers or devices connected on a network. It allows users to collaborate, share, and retrieve files from other computers within the same network, eliminating the need for physically transferring files using external storage devices.
In a network file sharing environment, one computer acts as a file server, hosting and sharing files or folders with other computers, which are known as clients. Through network file sharing, users can access shared files from their own computers, edit or modify them, and save the changes back to the server, ensuring efficient collaboration and data management among multiple users or devices.
Network file sharing can be incredibly beneficial in various scenarios, whether it is at home, in small businesses, or large organizations. It simplifies data sharing, promotes teamwork, enhances productivity, and provides a centralized location for storing and accessing files. It also reduces the need for duplicate files, as users can access shared files directly instead of creating copies on their personal devices.
Additionally, network file sharing allows for better backup and security measures. By centralizing data on a file server, regular backups can be performed to protect against data loss. Access to shared files can also be controlled and restricted with user permissions, ensuring that only authorized individuals can view, edit, or delete files.
Overall, network file sharing streamlines file management and collaboration, creating a more efficient and organized work environment. It eliminates the need for physical file transfers, reduces storage costs, and promotes data security and accessibility within a networked setting.
Benefits of Network File Sharing
Network file sharing offers a wide range of advantages for both individuals and businesses. Here are some key benefits of implementing network file sharing:
- Collaboration: Network file sharing enables seamless collaboration among users by providing a centralized platform to share and edit files. Multiple users can work on the same document simultaneously, making it easy to exchange ideas and improve productivity.
- Efficiency: With network file sharing, files can be accessed and shared instantly, eliminating the need for physical media or manual file transfers. This results in faster and more efficient workflows, saving time and effort for users.
- Centralized Data Storage: Network file sharing allows for centralizing data storage, making it easier to organize and manage files. This reduces the risk of data duplication and ensures everyone accesses the latest version of a file from a single source.
- Data Security: By implementing network file sharing, organizations can enhance data security by imposing user permissions and access controls. This ensures that sensitive files are only accessible to authorized individuals, reducing the risk of data breaches.
- Backup and Disaster Recovery: With network file sharing, it becomes easier to implement regular backups of shared files, minimizing the risk of data loss. In the event of a system failure or data corruption, files can be easily restored from the backup, ensuring business continuity.
- Cost Savings: Network file sharing eliminates the need for external storage devices like USB drives or external hard drives. This helps reduce costs associated with purchasing and maintaining physical storage devices, resulting in long-term savings.
- Remote Accessibility: Network file sharing allows users to access shared files remotely, enabling seamless collaboration and file retrieval from any location. This is particularly beneficial for businesses with remote employees or those who need to access files while on the go.
By leveraging the benefits of network file sharing, individuals and organizations can streamline their workflows, enhance collaboration, improve data security, and achieve greater efficiency and productivity.
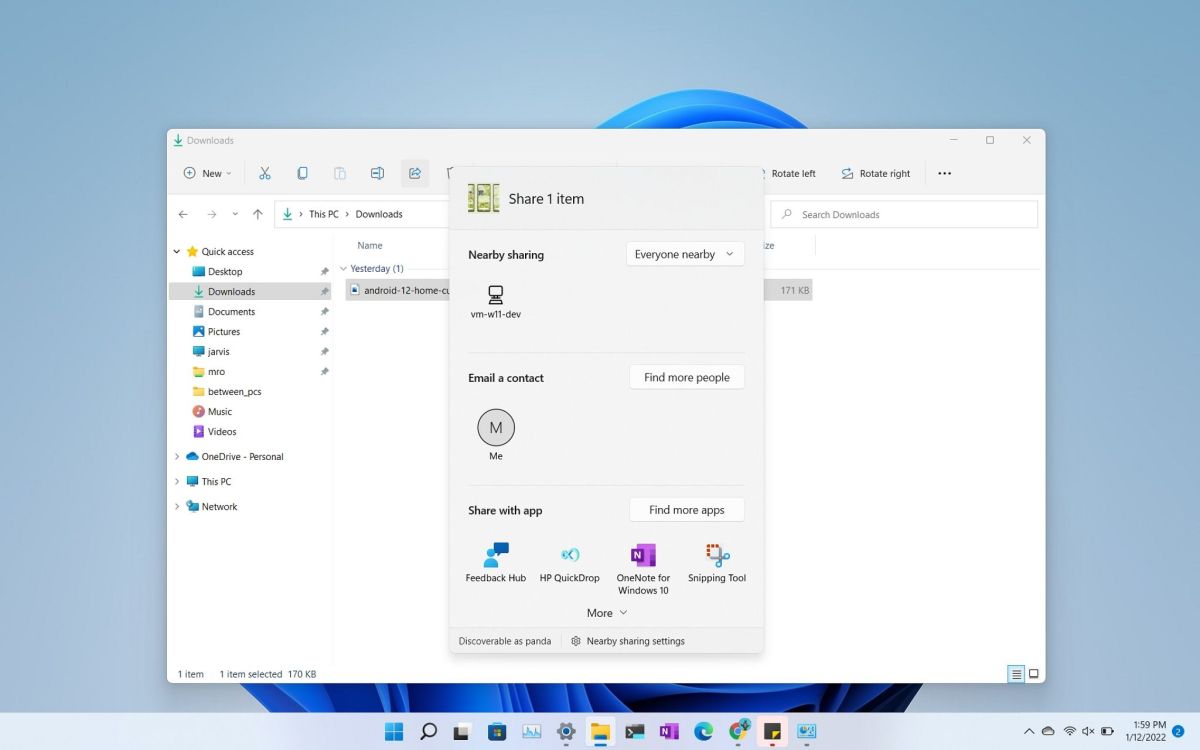
How to Enable Network File Sharing in Windows
Enabling network file sharing in Windows allows you to share files and folders with other computers on the same network. Here’s a step-by-step guide on how to enable network file sharing in Windows:
- Open File Explorer: Open the File Explorer by clicking on the folder icon in the taskbar or pressing the Windows key + E.
- Select Network: From the left-hand sidebar, click on the “Network” tab. This will display all the computers and devices connected to the same network as your computer.
- Enable Network Discovery: Click on the “Network” icon in the top menu and then select “Network and Sharing Center”. In the new window, click on the “Change advanced sharing settings” option. Under the “Private” network profile, make sure that the “Turn on network discovery” and “Turn on file and printer sharing” options are selected.
- Create a Shared Folder: Right-click on the folder you want to share and select “Properties” from the context menu. In the properties window, go to the “Sharing” tab and click on the “Advanced Sharing” button. Check the box that says “Share this folder” and assign a share name to the folder.
- Set Permissions: In the same window, click on the “Permissions” button to set permissions for the shared folder. Here, you can specify who can access the folder and what level of access they have (read, write, etc.).
- Access the Shared Folder: On another computer connected to the same network, open the File Explorer, select “Network” from the sidebar, and locate the shared folder under the computer name. Double-click on the shared folder to access its contents.
- Map the Shared Folder (optional): If you frequently access the shared folder, you can map it as a network drive. Right-click on “This PC” in the File Explorer, select “Map network drive”, choose a drive letter, and enter the path of the shared folder.
By following these steps, you can enable network file sharing in Windows and start sharing files and folders with other users on the same network. Remember to adjust the permissions and access levels to ensure the security of your shared files.
Setting Up a Workgroup or Domain
When setting up network file sharing in Windows, you have the option to choose between a workgroup or a domain. Both options have their own advantages, and the choice depends on your specific needs and requirements. Here’s a breakdown of the two options:
Workgroup:
- A workgroup is a basic form of network organization where multiple computers are connected together without a centralized authority.
- In a workgroup, each computer has its own local user accounts and password authentication.
- Workgroups are ideal for small networks or home environments with a limited number of computers.
- Setting up a workgroup is relatively simple and doesn’t require a dedicated server.
- Users can easily share files and resources between computers in the same workgroup.
- A workgroup isn’t suitable for centralized administration or advanced security management.
Domain:
- A domain is a more advanced form of network organization where computers are connected to a centralized server.
- In a domain, users have individual user accounts on the domain controller server, and authentication is performed centrally.
- Domains are ideal for larger networks or business environments, offering better security, centralized management, and enhanced control over resources.
- Setting up and managing a domain requires a dedicated server running Windows Server operating system.
- Domain administrators can set group policies, manage user accounts, allocate permissions, and implement advanced security measures.
- Domains provide better scalability, allowing for the addition of more computers and users as the network grows.
To set up a workgroup, simply assign the same workgroup name to each computer in the network by going to “Control Panel” > “System and Security” > “System” > “Advanced system settings” > “Computer Name” > “Change”.
To set up a domain, you need to install and configure Windows Server operating system on a dedicated server machine. This involves setting up Active Directory, creating user accounts, and joining client computers to the domain.
Consider your network size, security requirements, and scalability needs when choosing between a workgroup and a domain. Remember to plan ahead to ensure smooth network file sharing and efficient management of resources.
Creating Shared Folders
Creating shared folders is a crucial step in network file sharing as it allows you to designate specific folders or directories that can be accessed by other users on the network. Here’s how you can create shared folders in Windows:
- Select the Folder: Choose the folder or directory that you want to share. Right-click on the folder and select “Properties” from the context menu.
- Enable Sharing: In the properties window, navigate to the “Sharing” tab. Click on the “Advanced Sharing” button.
- Share the Folder: In the Advanced Sharing window, check the box that says “Share this folder”. Assign a share name to the folder that other users will see when accessing it over the network. You can also add a description for the folder.
- Set Permissions: Click on the “Permissions” button to define the level of access for users or groups. By default, the “Everyone” group has read-only access. You can add specific users or groups and assign them appropriate permissions (read, write, modify, etc.).
- Apply Changes: Once you have set the sharing and permissions settings, click “OK” to save the changes and close the properties window.
- Verification: To verify that the folder has been successfully shared, you can look for the shared hand icon on the folder or check the “Shared” column in the File Explorer. You can also access the folder through the network by navigating to “Network” and locating the shared folder under the computer name.
Repeat these steps for any additional folders you wish to share. Remember that while sharing folders over the network can facilitate collaboration, it’s equally important to review and manage folder permissions regularly to maintain data security and control access to sensitive information.
By creating shared folders, you can make specific files and resources accessible to other users on the network, promoting efficient file sharing and collaboration in a controlled and organized manner.
Setting Permissions for Shared Folders
Setting permissions for shared folders is crucial to ensure that only authorized individuals or groups can access, modify, or delete files within the shared folder. Here’s how you can set permissions for shared folders in Windows:
- Select the Folder: Right-click on the shared folder and select “Properties” from the context menu.
- Open the Security Tab: In the properties window, navigate to the “Security” tab.
- Manage Permissions: Click on the “Edit” or “Advanced” button (depending on the version of Windows you are using) to manage the permissions for the folder.
- Grant or Deny Permissions: In the permissions window, you can add, remove, or modify permissions for different users or groups. By default, the “Everyone” group has read-only access. You can select specific users, groups, or even create custom permission levels based on your requirements.
- Full Control: The “Full Control” permission grants the highest level of access, allowing users to modify, delete, and manage files within the shared folder.
- Modify, Read and Execute, Read, or Write: These permissions offer varying levels of access, allowing users to modify files, read and execute them, only read them, or only write to the folder.
- Apply Changes: Once you have set the desired permissions, click “OK” to save the changes and close the permissions window.
It’s important to consider the principle of least privilege when setting permissions. Only grant the necessary permissions to ensure data security and prevent unauthorized access or modification of files.
Regularly review and update folder permissions as user roles and responsibilities change within your organization. This will help maintain data integrity and ensure that the right users have the appropriate level of access to shared folders.
By setting permissions for shared folders, you can establish granular control over who can access and modify files, enhancing data security and protecting sensitive information within your network.
Accessing Shared Folders from Another Windows PC
Accessing shared folders from another Windows PC on the same network allows you to retrieve and collaborate on files stored on different computers. Here’s how you can access shared folders from another Windows PC:
- Open File Explorer: On the Windows PC from which you want to access the shared folder, open the File Explorer by clicking on the folder icon in the taskbar or pressing the Windows key + E.
- Select Network: From the left-hand sidebar, click on the “Network” tab. This will display all the computers and devices connected to the same network as your computer.
- Locate the Shared Folder: Under the “Network” section, locate the computer name that hosts the shared folder. Double-click on the computer name to view the shared folders available on that computer.
- Enter Credentials (If Required): If prompted, enter the username and password of an account that has access to the shared folder. This is necessary if the shared folder has specific permissions for certain users or groups.
- Access the Shared Folder: Double-click on the shared folder to access its contents. You can now view, edit, and interact with the files within the shared folder as if they were stored locally on your own computer.
To simplify the process of accessing shared folders, you can also map a network drive to the shared folder. This will assign a drive letter to the shared folder, making it easy to access and work with files from various applications.
Remember that access to shared folders may require proper permissions set by the owner or administrator of the shared folder. If you encounter any issues accessing shared folders, ensure that you have the necessary credentials and network permissions.
By following these steps, you can easily access shared folders from another Windows PC on the same network, allowing for seamless collaboration and file sharing among multiple users.
Accessing Shared Folders from a Mac or Linux PC
Accessing shared folders from a Mac or Linux PC to a Windows network allows you to retrieve and collaborate on files stored on different computers. Here’s how you can access shared folders from a Mac or Linux PC:
- Enable File Sharing on Windows: Make sure that the shared folder is properly set up and accessible from other Windows PCs on the network. Follow the steps mentioned earlier to create and share the folder.
- Connect to the Network: On your Mac or Linux PC, ensure that both the Windows computer and the Mac/Linux PC are connected to the same network. This can be a Wi-Fi network or a wired Ethernet connection.
- Discover the Shared Folder: On a Mac, open the Finder, click on “Go” in the menu bar, and select “Connect to Server”. On Linux, use the file manager or file browser to access the network or shared folders.
- Enter Server Address: In the “Connect to Server” or similar window, enter the server address of the Windows computer hosting the shared folder. The server address can be in the format of “//computername” or “//IP address”.
- Authenticate: If prompted, enter a valid username and password for an account that has access to the shared folder on the Windows computer. This is necessary if the shared folder has specific permissions for certain users or groups.
- Access the Shared Folder: Once connected, you should see the shared folders from the Windows computer listed. Double-click on the desired shared folder to access its contents. You can then view, edit, or copy files as needed.
It’s important to note that the steps for accessing shared folders may vary slightly depending on the operating system version or specific file browser used on your Mac or Linux PC. However, the general concept remains the same.
If you encounter any issues accessing shared folders from a Mac or Linux PC, ensure that both the Windows computer and the Mac/Linux PC are properly connected to the network and that the correct server address and login credentials are used.
By following these steps, you can easily access shared folders from a Mac or Linux PC on the same network, allowing for seamless collaboration and file sharing between different operating systems.
Troubleshooting Network File Sharing Issues
Network file sharing can sometimes encounter issues that prevent users from accessing shared folders or collaborating effectively. Here are some common troubleshooting steps to help resolve network file sharing issues:
- Check Network Connectivity: Ensure that all devices involved in the network file sharing are properly connected to the same network. Verify network cables, Wi-Fi connections, or Ethernet settings to rule out any connectivity problems.
- Verify Folder Sharing Settings: Double-check the sharing settings on the host computer. Ensure that the folder is shared and accessible by the appropriate users or groups. Adjust permissions if necessary.
- Verify Firewall and Antivirus Settings: Check the firewall and antivirus settings on both the host computer and the client computer. Temporarily disable the firewall or adjust the settings to allow file and printer sharing. Ensure that antivirus software is not blocking network file sharing.
- Update Network Drivers: Outdated or incompatible network drivers can cause issues with network file sharing. Update the drivers on both the host and client computers to ensure compatibility and optimal network performance.
- Restart Services and Computers: Restarting the host computer, as well as the client computers, can sometimes resolve temporary network file sharing issues. Additionally, restarting relevant services like the “Server” service or the “Workstation” service on the host computer can help resolve issues related to file sharing.
- Check Network Discovery Settings: Ensure that network discovery is enabled on both the host and client computers. This allows devices on the network to detect and communicate with each other.
- Use IP Addresses for Connection: If you’re having trouble connecting using the computer name, try connecting using the IP address of the host computer. This can help bypass any DNS-related issues.
- Scan for Malware: Malware can affect network functionality, including file sharing. Run a scan on the host and client computers to check for any malware or malicious software that could be interfering with network file sharing.
- Consult Network Administrator or IT Support: If you’re unable to resolve the issue using the above steps, reach out to your network administrator or IT support team for further assistance. They can help troubleshoot the specific network configuration and provide tailored solutions.
By following these troubleshooting steps, you can address common network file sharing issues and restore seamless collaboration and file access across your network.
Best Practices for Network File Sharing in Windows
Implementing best practices for network file sharing in Windows ensures secure and efficient collaboration while maintaining data integrity. Here are some recommended practices to follow:
- Plan Folder Structure: Organize shared folders in a logical and intuitive manner. Create a hierarchy of folders with clear naming conventions to facilitate easy navigation and file management.
- Assign Proper Permissions: Regularly review and set appropriate permissions for shared folders. Only grant necessary access to users or groups to maintain data security and prevent unauthorized modifications.
- Backup Shared Data: Regularly back up shared data to protect against accidental deletion, data corruption, or hardware failures. Implement automated backup solutions to ensure data resilience and enable easy recovery.
- Use Strong Passwords: Enforce password complexity rules and ensure that users have strong and unique passwords for their accounts. This helps prevent unauthorized access to shared folders and sensitive data.
- Implement User Training: Educate users on the proper use of shared folders and network file sharing protocols. Train them on best practices, such as avoiding file duplication, maintaining organization, and protecting sensitive information.
- Regularly Update Windows: Keep Windows systems up to date with the latest security patches and updates. This helps protect against vulnerabilities that could be exploited by malicious actors seeking unauthorized access to shared folders.
- Monitor and Audit Access: Implement logging and auditing systems to track access to shared folders. Regularly review logs to identify any suspicious activities and take appropriate action if necessary.
- Implement Data Encryption: Consider encrypting sensitive data stored in shared folders. Windows provides features like BitLocker for encrypting entire drives or folders, ensuring that data remains protected even if unauthorized access occurs.
- Secure the Network: Implement robust network security measures, such as firewalls, intrusion detection systems, and regular network scans. These measures help protect against external threats and unauthorized access attempts.
- Monitor File Size and Cleanup: Regularly monitor the size of shared folders and periodically clean up obsolete or unused files. This helps optimize storage space and ensures efficient file management.
By following these best practices, organizations can ensure the security, integrity, and efficiency of network file sharing in a Windows environment. Regular maintenance and adherence to these practices will help create a robust and reliable file-sharing system.