
Creating an Oculus Account
To fully experience the immersive world of virtual reality offered by Oculus, the first step is to create an Oculus account. This account will serve as your gateway to a myriad of captivating VR experiences and social interactions. Follow these simple steps to set up your Oculus account and embark on your VR journey.
Step 1: Accessing the Oculus Website
Begin by navigating to the official Oculus website using your preferred web browser. Once there, locate and click on the "Sign Up" or "Create Account" option to initiate the account creation process.
Step 2: Providing Your Details
Upon clicking the sign-up option, you will be prompted to enter your personal details, including your name, email address, and a secure password. It is essential to choose a strong password to safeguard your account against unauthorized access.
Step 3: Verifying Your Email
After submitting your details, a verification email will be sent to the address you provided during the sign-up process. Access your email inbox and locate the verification message from Oculus. Click on the verification link within the email to confirm and activate your account.
Step 4: Setting Up Your Profile
Once your account is verified, you can proceed to set up your profile by adding a profile picture and customizing your username. Personalizing your profile enhances your social presence within the Oculus community and allows you to connect with friends and other VR enthusiasts.
Step 5: Exploring the Oculus Store
With your account successfully created, take a moment to explore the Oculus Store, where you can discover a diverse range of VR games, apps, and experiences. The Oculus Store is your virtual marketplace for accessing an array of captivating content tailored to your interests.
By following these straightforward steps, you will have successfully created an Oculus account, unlocking a world of limitless VR possibilities and social connections. Now that your account is set up, you are ready to move on to the next phase of the process: setting up your Oculus headset.
Setting Up Your Oculus Headset
Now that your Oculus account is ready, it’s time to set up your Oculus headset for an unparalleled virtual reality experience. Whether you have the Oculus Quest, Rift, or Go, the setup process is designed to be user-friendly and seamless. Follow these steps to bring your Oculus headset to life.
Step 1: Unboxing and Charging
Upon unboxing your Oculus headset, ensure that it is adequately charged before initiating the setup. Connect the provided charging cable to the headset and a power source to begin the charging process. While the headset charges, familiarize yourself with its design and features.
Step 2: Powering On the Headset
Once the headset is sufficiently charged, press and hold the power button to turn it on. Follow the on-screen prompts to select your preferred language and confirm any initial setup settings. This step will initiate the setup wizard, guiding you through the configuration process.
Step 3: Creating a Guardian Boundary
For Oculus Quest users, the next crucial step is defining your play area by creating a Guardian boundary. This feature ensures that you remain within a safe and designated space while immersed in VR experiences. Use the Touch controllers to trace your play area, and the Guardian system will alert you if you approach the boundaries during gameplay.
Step 4: Adjusting the Straps and Lenses
Properly adjust the headset’s straps to ensure a comfortable and secure fit. Additionally, adjust the interpupillary distance (IPD) to align the lenses with your eyes for optimal clarity and visual comfort. These adjustments contribute to an immersive and enjoyable VR experience.
Step 5: Pairing the Controllers
If your Oculus headset includes controllers, follow the on-screen instructions to pair them with the headset. This process typically involves holding down specific buttons on the controllers to establish a wireless connection with the headset. Once paired, the controllers are ready for action in the virtual world.
By following these steps, you have successfully set up your Oculus headset, positioning yourself to delve into a captivating realm of virtual reality. With the headset now configured, the next phase involves installing the Oculus app on your smartphone to seamlessly integrate it with your VR experience.
Installing the Oculus App on Your Smartphone
To maximize the functionality of your Oculus headset and unlock its full potential, it is essential to install the Oculus app on your smartphone. This dedicated app serves as a bridge between your mobile device and the immersive world of virtual reality, offering seamless connectivity and access to a plethora of VR content. Follow these steps to install the Oculus app on your smartphone and prepare for a truly immersive experience.
Step 1: Accessing the App Store
Begin by unlocking your smartphone and accessing the respective app store based on your device’s operating system. For Android users, navigate to the Google Play Store, while iOS users should access the Apple App Store. Once in the app store, utilize the search function to locate the Oculus app.
Step 2: Initiating the Download
Upon finding the Oculus app in the app store, tap the "Download" or "Install" button to commence the download and installation process. Ensure that your smartphone is connected to a stable Wi-Fi network to expedite the download and minimize potential interruptions.
Step 3: Granting Permissions
As the app installs, your smartphone may prompt you to grant certain permissions, such as access to your device’s camera, storage, and location. These permissions are necessary for the Oculus app to facilitate seamless interactions between your smartphone and Oculus headset, including features like casting and social connectivity.
Step 4: Logging In to Your Account
Once the installation is complete, launch the Oculus app on your smartphone. You will be prompted to log in using the credentials of the Oculus account created earlier. Enter your email address and password to access your account within the app.
Step 5: Navigating the App Interface
Upon logging in, take a moment to familiarize yourself with the Oculus app’s interface. Explore the diverse range of VR experiences, social features, and settings available within the app. This interface serves as your portal to a captivating virtual reality ecosystem.
With the Oculus app successfully installed on your smartphone, you are now ready to seamlessly pair your smartphone with your Oculus headset, paving the way for an integrated and immersive VR experience.
Pairing Your Smartphone with Your Oculus Headset
Pairing your smartphone with your Oculus headset is a pivotal step that facilitates seamless communication between the two devices, enabling enhanced functionality and interaction. Through this pairing, you can access features such as app management, social connectivity, and casting your VR experiences to a mobile screen. Follow these steps to effortlessly pair your smartphone with your Oculus headset and unlock a new dimension of immersive experiences.
Step 1: Launching the Oculus App
Begin by launching the Oculus app on your smartphone. Once the app is open, ensure that you are logged in to your Oculus account. This step is essential for establishing a secure and synchronized connection between your smartphone and headset.
Step 2: Accessing the Devices Tab
Within the Oculus app, navigate to the "Devices" tab, which is typically located in the app’s bottom menu or within the settings section. This tab serves as the central hub for managing and pairing devices, including your Oculus headset.
Step 3: Selecting Your Oculus Headset
Upon accessing the "Devices" tab, locate and select your specific Oculus headset from the list of available devices. This action prompts the app to initiate the pairing process, establishing a secure and seamless connection between your smartphone and headset.
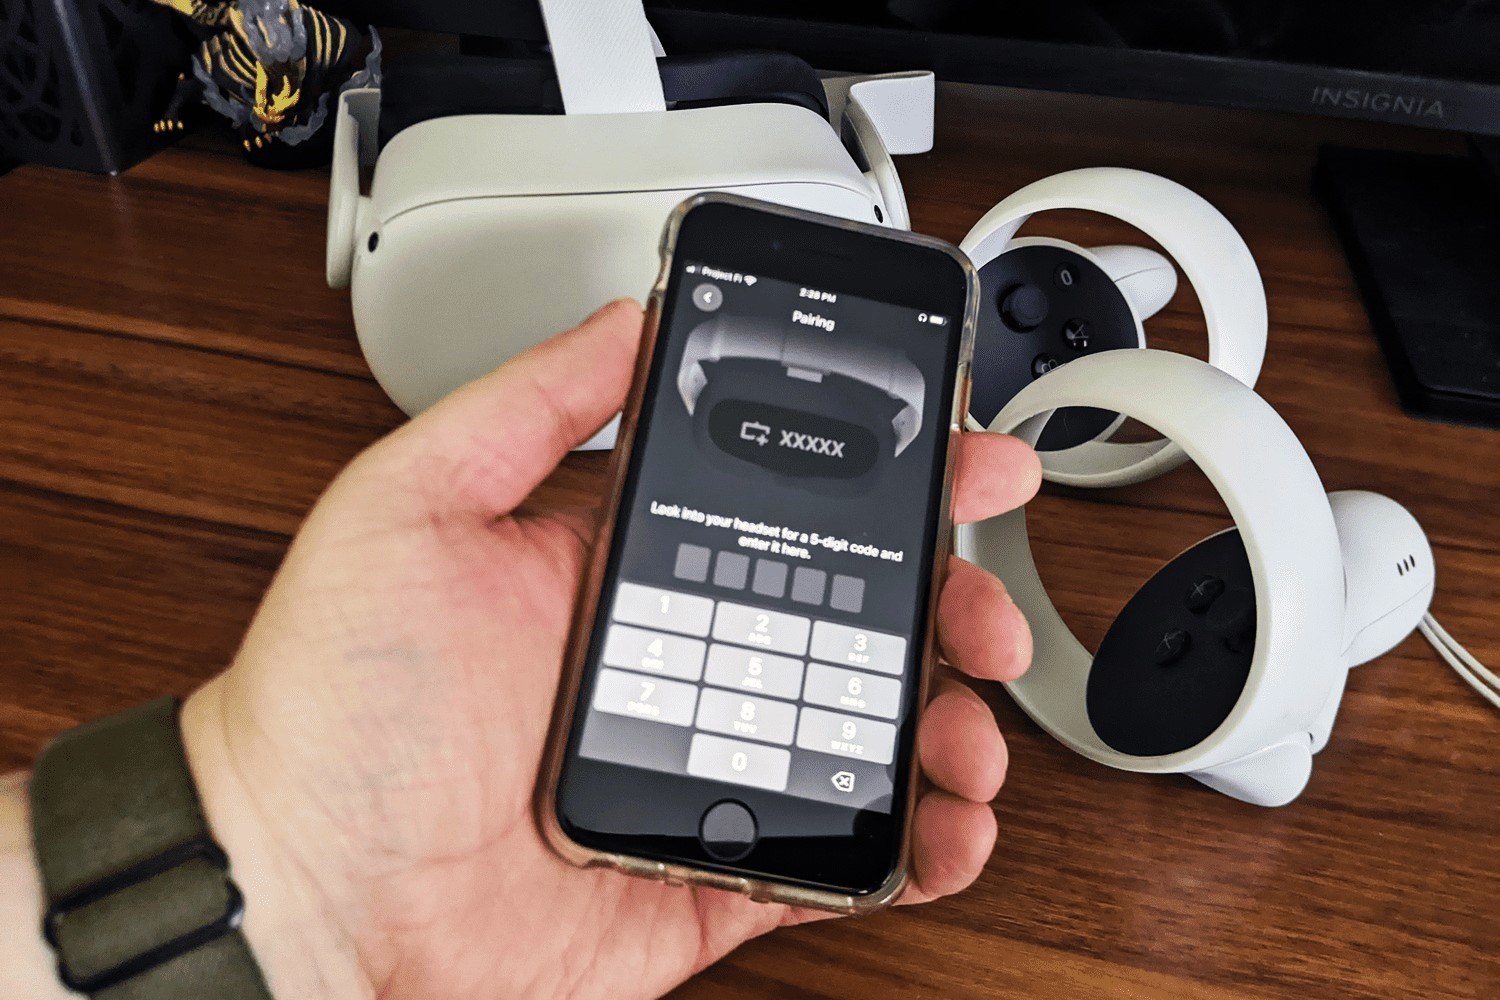
Step 4: Following the On-Screen Prompts
As you select your Oculus headset within the app, follow any on-screen prompts that guide you through the pairing process. These prompts may include confirming the connection on both your smartphone and headset, as well as granting necessary permissions for seamless interaction.
Step 5: Verifying the Connection
After following the pairing prompts, verify that your smartphone and Oculus headset are successfully paired. This verification can be confirmed by the appearance of your headset within the app’s connected devices list, indicating that the pairing process is complete and the devices are ready to interact.
With your smartphone now paired with your Oculus headset, you have established a vital link that enhances your VR experience. This pairing enables you to seamlessly manage your VR content, connect with friends, and cast your experiences to a mobile screen, further enriching your virtual reality journey.
Linking Your Oculus App with Your Headset
Linking your Oculus app with your headset is the final step in creating a cohesive and immersive virtual reality environment. This crucial linkage enables you to manage your VR experiences, connect with friends, and explore a myriad of captivating content seamlessly. Follow these steps to effortlessly link your Oculus app with your headset and embark on an unparalleled VR journey.
Step 1: Accessing the Oculus App
Begin by launching the Oculus app on your smartphone. Ensure that you are logged in to your Oculus account to enable full access to the app’s features and seamless integration with your Oculus headset.
Step 2: Navigating to the Devices Tab
Within the Oculus app, navigate to the "Devices" tab, which serves as the central location for managing and interacting with your Oculus headset. This tab provides access to essential settings and features related to your VR device.
Step 3: Selecting Your Oculus Headset
Once in the "Devices" tab, locate and select your specific Oculus headset from the list of available devices. This action initiates the process of linking your Oculus app with your headset, establishing a seamless connection between the two devices.
Step 4: Confirming the Linkage
Follow any on-screen prompts within the Oculus app to confirm the linkage between your smartphone and Oculus headset. These prompts may include verifying the connection on both devices and ensuring that the app has the necessary permissions to interact with your headset.
Step 5: Exploring Integrated Features
Upon successfully linking your Oculus app with your headset, take a moment to explore the integrated features and functionalities. These may include the ability to manage your VR content, connect with friends in VR, and cast your experiences to a mobile screen for shared enjoyment.
With your Oculus app seamlessly linked with your headset, you have established a vital connection that enhances your VR experience. This linkage empowers you to effortlessly manage and explore a diverse range of VR content while staying connected with the vibrant Oculus community, elevating your virtual reality journey to new heights.