
Choosing the Right Jumper Cables
When it comes to jump-starting a vehicle, having the right jumper cables is essential. These cables are the lifeline that connects a dead battery to a live one, allowing the transfer of power to revive the vehicle. Here's what you need to consider when choosing the right jumper cables.
Cable Length
The length of the jumper cables is a crucial factor to consider. Longer cables provide flexibility in positioning vehicles, especially in tight spaces or when the distance between the two cars is significant. It's advisable to opt for cables that are at least 12 feet long to ensure that you can easily maneuver the vehicles into position without placing undue strain on the cables.
Cable Gauge
The gauge of the jumper cables determines their ability to carry electrical current. A lower gauge number indicates a thicker cable, which translates to better conductivity and power transfer. For most passenger vehicles, a cable with a gauge of 6 or 8 should suffice. However, for larger vehicles such as trucks or SUVs, a lower gauge, such as 4, would be more suitable to accommodate the higher electrical demands.
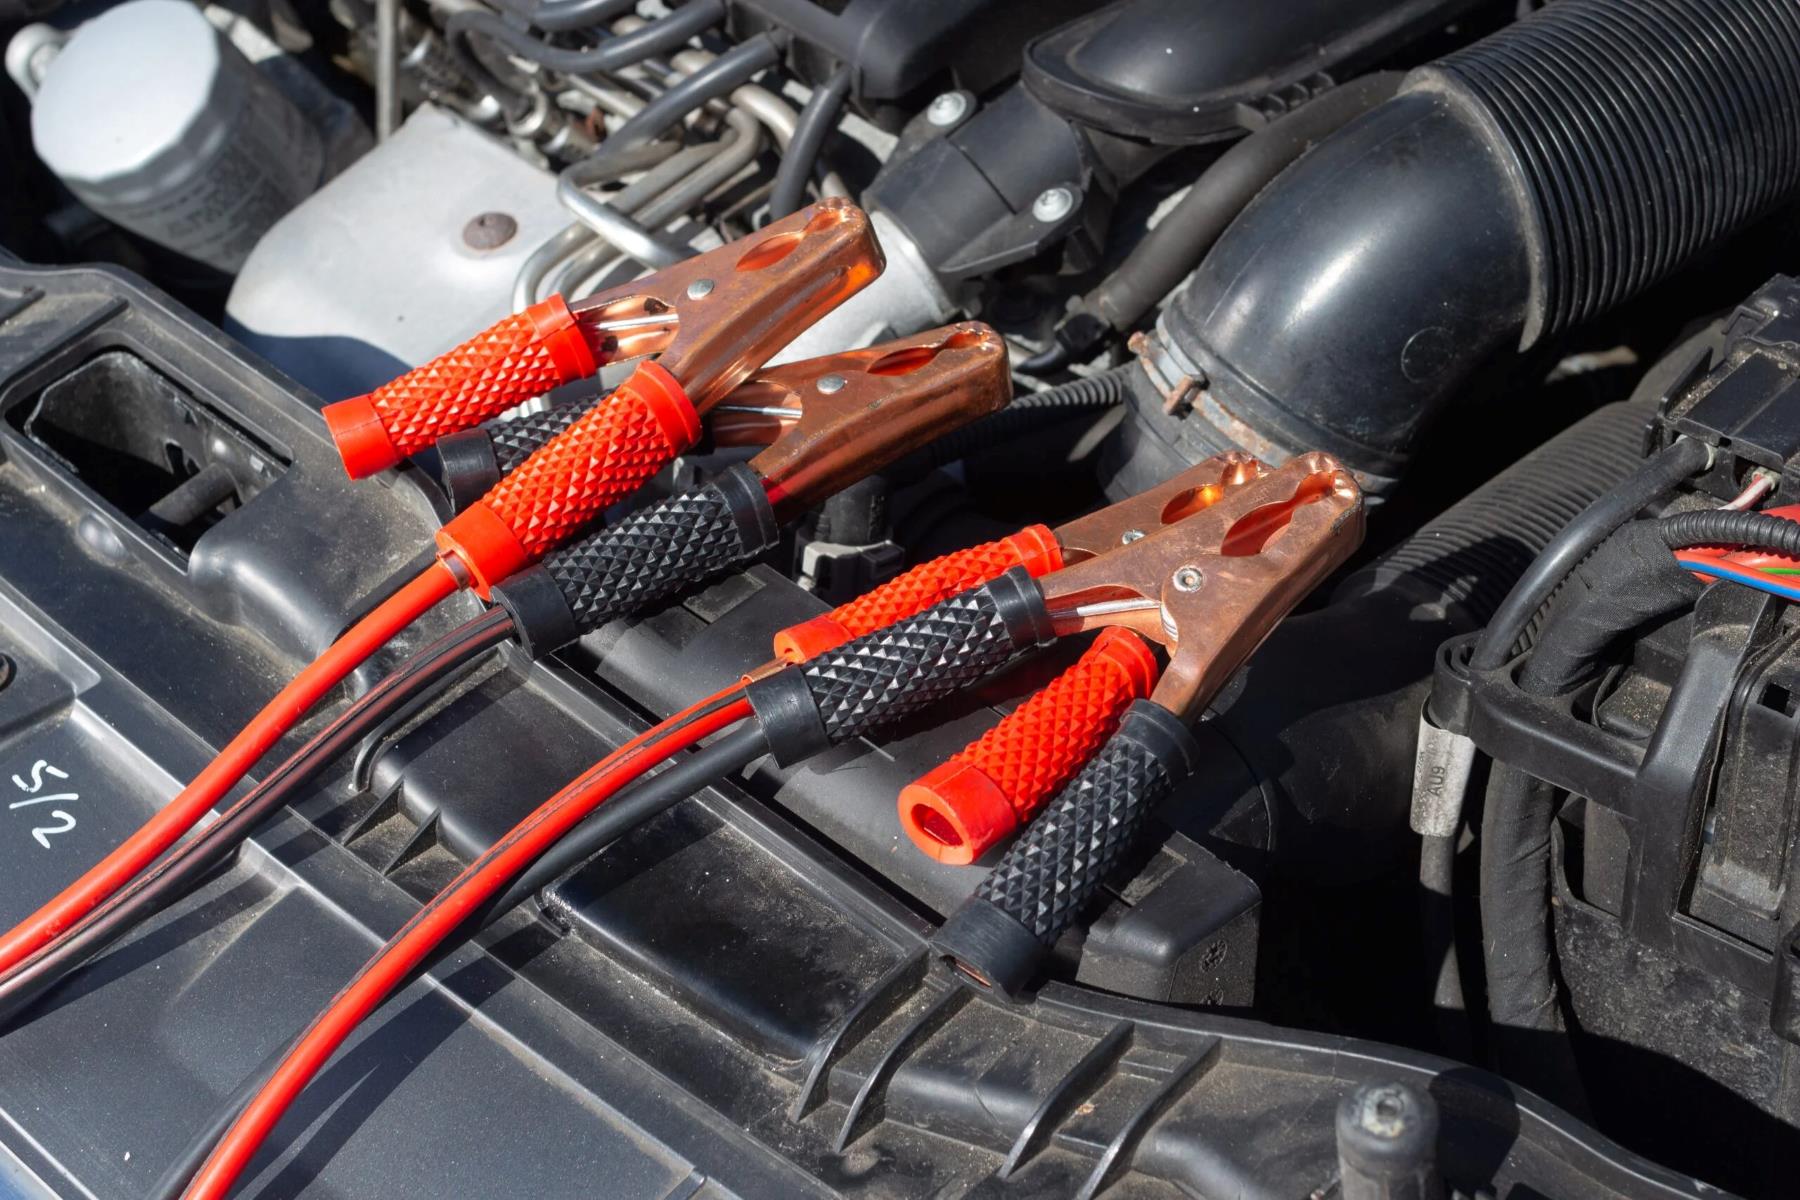
Insulation and Clamps
Quality insulation is vital for jumper cables, as it ensures safety during use. Insulation prevents the risk of electric shock and protects the cables from damage. Additionally, sturdy, well-insulated clamps with strong springs provide a secure grip on the battery terminals, minimizing the chances of slippage or detachment during the jump-start process.
Durability and Storage
Opt for jumper cables that are durable and built to withstand frequent use. Look for cables with robust, tangle-resistant construction and sturdy clamps that can endure the rigors of jump-starting various vehicles. Additionally, consider the ease of storage. Some jumper cables come with tangle-free designs or storage bags, making them convenient to stow in your vehicle without the hassle of untangling them when needed.
Compatibility and Safety Ratings
It's essential to ensure that the jumper cables you choose are suitable for the vehicles you intend to jump-start. Consider the compatibility with different battery types, including standard lead-acid batteries and newer AGM (Absorbent Glass Mat) or gel-cell batteries. Moreover, look for safety ratings and certifications, such as compliance with SAE (Society of Automotive Engineers) standards, to guarantee the cables' reliability and safety during use.
Selecting the right jumper cables is a crucial step in preparing for a jump-start situation. By considering cable length, gauge, insulation, durability, compatibility, and safety ratings, you can equip yourself with reliable jumper cables that are ready to assist in reviving a dead battery when the need arises.
Positioning the Vehicles
Properly positioning the vehicles when jump-starting is vital for safety and effective power transfer. Here’s a step-by-step guide to positioning the vehicles for a successful jump-start.
Location
First and foremost, ensure that both vehicles are parked in a safe and level area. Ideally, the vehicles should be facing each other, allowing easy access to their battery compartments. If the location is dimly lit, consider using a flashlight or portable light source to illuminate the battery terminals for better visibility.
Distance and Alignment
Position the vehicles close enough to each other so that the jumper cables can reach the batteries comfortably but ensure that they are not touching. It’s essential to leave a slight gap between the vehicles to prevent accidental contact, which could result in a short circuit. Aligning the vehicles parallel to each other facilitates easy access to the batteries and ensures a clear path for the jumper cables.
Battery Accessibility
Before attempting to connect the jumper cables, ensure that the hoods of both vehicles are propped open, and any obstructions around the battery terminals are removed. This includes removing any debris, such as leaves or dirt, that may have accumulated around the battery area. Clearing the terminals and their surroundings minimizes the risk of accidental short circuits and ensures a secure connection for the jumper cables.
Safe Distance from Traffic
If the jump-start is taking place on a road or in an area with passing traffic, position the vehicles in a way that minimizes the risk of interference from other vehicles. If possible, park the vehicles in a less congested area or use hazard indicators to alert other drivers to the ongoing jump-start process. Safety should always be a priority when positioning the vehicles, especially in potentially hazardous environments.
Passenger Compartment Safety
When positioning the vehicles, consider the safety of the occupants. Ensure that the vehicles are parked in a way that allows the passengers to exit and enter safely, especially if the jump-start process is taking place in a confined space. Additionally, if the vehicles are parked on an incline, take precautions to prevent unintended movement by engaging the parking brake and chocking the wheels if necessary.
By following these guidelines for positioning the vehicles, you can create a safe and accessible environment for jump-starting a vehicle, setting the stage for a successful and hassle-free revival of a dead battery.
Identifying the Positive and Negative Terminals
Before connecting the jumper cables, it’s crucial to identify the positive and negative terminals on the vehicle batteries. Proper identification ensures that the jumper cables are connected correctly, minimizing the risk of electrical hazards and damage to the vehicles’ electrical systems. Here’s how to identify the positive and negative terminals on the batteries:
Terminal Markings
Most modern vehicle batteries have clearly marked terminals. The positive terminal is usually marked with a plus sign (+) and is often red in color. Conversely, the negative terminal is marked with a minus sign (-) and is typically black. In some cases, the terminals may also be labeled as “POS” for positive and “NEG” for negative. These markings provide a clear indication of the terminal polarity, simplifying the identification process.
Battery Configuration
In the absence of terminal markings, understanding the typical configuration of vehicle batteries can help identify the positive and negative terminals. The positive terminal is connected to the vehicle’s electrical system and is usually attached to a red cable. On the other hand, the negative terminal is grounded to the vehicle’s chassis and is connected to a black cable. By tracing the cables from the battery terminals, it’s possible to determine the polarity of the terminals based on their respective connections.
Terminal Size and Shape
In some cases, the positive and negative terminals may be differentiated by their size and shape. The positive terminal is often slightly larger in diameter than the negative terminal and may have a protruding post, while the negative terminal is relatively smaller and may have a flat or recessed design. Additionally, the positive terminal may have a protective cover or cap, serving as a visual indicator of its polarity.
Consulting the Vehicle Manual
If uncertainty persists regarding the terminal identification, referring to the vehicle’s manual can provide definitive information about the battery terminals. The manual typically includes detailed diagrams and descriptions of the vehicle’s components, including the battery and its terminals. This resource can offer specific guidance tailored to the vehicle’s make and model, ensuring accurate identification of the positive and negative terminals.
Professional Assistance
If the terminal identification remains unclear or if there are concerns about connecting the jumper cables, seeking assistance from a professional mechanic or roadside service provider is advisable. These experts possess the knowledge and experience to safely identify and connect the jumper cables, ensuring a secure and hazard-free jump-start process.
By utilizing these methods to identify the positive and negative terminals on the vehicle batteries, you can confidently proceed with connecting the jumper cables, setting the stage for a successful jump-start without compromising safety or causing damage to the vehicles’ electrical systems.
Connecting the Jumper Cables
Once the vehicles are properly positioned and the positive and negative terminals are identified, it’s time to connect the jumper cables. This process requires careful attention to detail to ensure a safe and effective transfer of power. Here’s a step-by-step guide to connecting the jumper cables:
Sequence of Connection
Before connecting the jumper cables, ensure that the vehicles’ engines are turned off. Begin by identifying the positive and negative terminals on both batteries. It’s crucial to follow the correct sequence when connecting the jumper cables. Start by connecting one end of the red (positive) jumper cable to the positive terminal of the dead battery. Next, connect the other end of the red jumper cable to the positive terminal of the good (live) battery. Ensure that the connections are secure to prevent accidental detachment during the jump-start process.
Negative Terminal Connection
After connecting the red jumper cable, move on to the negative terminal of the good (live) battery. Connect one end of the black (negative) jumper cable to the negative terminal of the live battery. However, when connecting the other end of the black jumper cable, avoid attaching it to the negative terminal of the dead battery. Instead, locate a bare metal surface in the engine compartment of the vehicle with the dead battery. This surface should be away from the battery, the carburetor, and the fuel lines. This step ensures a safer and more stable ground connection, minimizing the risk of sparks near the battery.
Secure Connections and Cable Positioning
Throughout the connection process, ensure that the jumper cables are positioned away from moving engine parts, belts, and other potential hazards in the engine compartments of both vehicles. Additionally, double-check the security of the cable connections to the battery terminals and the grounding point. Any loose connections can impede the transfer of power and may pose safety risks during the jump-start process.
Verification of Connections
Once all the jumper cables are connected, visually inspect the connections to ensure that they are secure and properly positioned. It’s essential to verify that the red (positive) and black (negative) jumper cables are connected to the corresponding terminals and that the grounding point for the black cable is away from the dead battery. This verification minimizes the risk of errors and ensures a safe and effective jump-start process.
Final Preparations
Prior to starting the vehicle with the live battery, ensure that all accessories and electrical components, such as lights, radios, and air conditioning, are turned off to reduce the electrical load on the vehicle’s battery. Once the preparations are complete and the jumper cables are securely connected, the vehicles are ready to proceed with the jump-start process.
By following these steps to connect the jumper cables, you can establish a secure and reliable electrical connection between the two vehicles, paving the way for a successful jump-start and the revival of a dead battery.
Starting the Dead Battery
After the jumper cables are securely connected, the next crucial step is starting the vehicle with the dead battery. This process requires careful coordination and attention to safety measures to ensure a successful jump-start. Here’s a guide to starting the dead battery:
Engine Start Procedure
Once the jumper cables are in place and the live vehicle’s engine is running, the vehicle with the dead battery can be started. Before turning the ignition key, ensure that all electrical accessories, such as lights, radios, and air conditioning, are turned off. This minimizes the strain on the dead battery and allows the maximum transfer of power from the live battery.
Ignition and Starting Attempts
Turn the ignition key of the vehicle with the dead battery to the “ON” position. Allow a few moments for the electrical systems to initialize. While keeping the live vehicle’s engine running, attempt to start the vehicle with the dead battery. If the engine does not start on the first attempt, wait for a brief period before making additional starting attempts. Excessive and prolonged attempts to start the engine can overheat the starter motor and may lead to damage.
Observing the Jump-Start Process
During the starting attempts, observe the behavior of the vehicle with the dead battery. If the engine cranks slowly or exhibits signs of struggling to start, it may indicate that the jump-start process requires more time to charge the dead battery adequately. In such cases, allow more time for the live vehicle’s engine to run and transfer power to the dead battery before making additional starting attempts.
Disconnecting the Jumper Cables
If the vehicle with the dead battery successfully starts, it’s essential to disconnect the jumper cables in the correct sequence. Begin by removing the black (negative) jumper cable from the grounded point in the engine compartment of the vehicle with the dead battery. Next, detach the other end of the black cable from the negative terminal of the live battery. Subsequently, remove the red (positive) jumper cable from the positive terminal of the live battery, followed by disconnecting the other end from the positive terminal of the previously dead battery.
Post-Jump-Start Precautions
After the jump-start process is complete, drive the vehicle with the previously dead battery for a sufficient duration to allow the alternator to recharge the battery. This helps restore the battery’s charge and ensures that it can hold a sufficient charge for future use. Additionally, consider having the vehicle’s battery and charging system inspected by a professional to address any underlying issues that may have caused the battery to become discharged.
By following these steps to start the dead battery, you can effectively complete the jump-start process and restore the functionality of the previously inactive vehicle, paving the way for continued and reliable operation.