
Prerequisites for Setting Up the iPad
Before you begin setting up your iPad, there are a few things you should have in place to ensure a smooth and hassle-free setup process. These prerequisites will help you get your iPad up and running quickly and efficiently.
1. An iPad: Obviously, you will need an iPad device. Make sure you have a fully charged iPad ready for setup.
2. Wi-Fi Network: To connect to the internet and download apps, you will need access to a Wi-Fi network. Ensure that you have a stable and reliable Wi-Fi connection available.
3. iTunes Account: You will need an iTunes account to download apps from the App Store and access various Apple services. If you don’t have an iTunes account, you can create one during the setup process.
4. Apple ID and Password: An Apple ID is necessary to sign in to your iPad and access iCloud services, such as iCloud backup and Find My iPad. Make sure you have your Apple ID credentials handy.
5. Backup Data: If you have an existing iPad or iPhone, consider backing up your data to iCloud or iTunes. This will allow you to easily restore your apps, settings, and content onto your new iPad during the setup process.
Having these prerequisites in place will ensure a seamless setup experience for your iPad. With everything prepared, you can now move on to the step-by-step setup instructions, which will guide you through configuring your iPad and personalizing it to your preferences.
Step 1: Turning On the iPad
The first step in setting up your iPad is to turn it on. Follow these simple instructions to power on your device:
- Locate the Power/Sleep-Wake button: The Power/Sleep-Wake button is typically located on the top or on the side of the iPad. It is used to turn the device on and off.
- Press and hold the Power/Sleep-Wake button: Press and hold the button until the Apple logo appears on the screen. This indicates that your iPad is powering on. Release the button once you see the logo.
- Wait for the iPad to start up: After the Apple logo appears, your iPad will go through the startup process. This may take a few moments, so be patient and let the device complete the startup sequence.
- Set up language and region: Once the startup process is complete, you will be prompted to select your preferred language and region. Tap on your desired language and region from the list provided.
That’s it! Your iPad is now turned on and ready for the next steps in the setup process. Proceed to the next section to learn how to connect your iPad to a Wi-Fi network and continue the setup.
Step 2: Selecting Your Language and Region
After turning on your iPad, the next step in the setup process is selecting your preferred language and region. Follow these steps to choose the appropriate options:
- Language Selection: On the welcome screen, you will see a list of available languages. Scroll through the list and tap on your preferred language. This selection will determine the language used throughout the iPad’s interface.
- Region Selection: Once you have chosen your language, you will be asked to select your region. This setting affects various features and services on your iPad, such as the date and time format, currency, and regional-specific apps.
- Selecting Date and Time Preferences: Depending on the region you choose, you may be prompted to select your preferred date and time format. Tap on the options that best match your preferences.
- Choosing the Correct Keyboard Layout: To ensure that your keyboard layout matches your language, you can select the correct keyboard layout during the setup process. This will make typing and entering text more efficient and intuitive.
Remember to carefully review your selections before proceeding. Once you are satisfied with your language and region choices, continue to the next step to connect your iPad to a Wi-Fi network.
Step 3: Connecting to Wi-Fi
To fully utilize your iPad’s features and access the internet, it’s crucial to connect it to a Wi-Fi network. Follow these steps to establish a Wi-Fi connection:
- Open the Settings app: Locate the Settings app on your iPad’s home screen. It can typically be identified by its gear-shaped icon. Tap on it to open the app.
- Select Wi-Fi: Within the Settings app, locate and tap on the “Wi-Fi” option. This will take you to the Wi-Fi settings page.
- Toggle Wi-Fi On: Make sure the Wi-Fi feature is turned on by sliding the toggle switch to the right. It will turn green when enabled.
- Choose a Wi-Fi network: Your iPad will display a list of available Wi-Fi networks. Tap on the name of the network you want to connect to. If the network is password-protected, you will be prompted to enter the password.
- Enter the Wi-Fi password: If prompted, enter the password for the selected Wi-Fi network. Be cautious when entering the password, as it is case-sensitive. Double-check to ensure you enter it correctly.
- Wait for connection: After entering the password, your iPad will attempt to connect to the selected Wi-Fi network. If successful, you will see a checkmark next to the network name, indicating a successful connection.
Once your iPad is connected to a Wi-Fi network, you can proceed to the next step and set up Touch ID or a passcode for added security.
Step 4: Setting Up Touch ID or Passcode
Protecting your iPad with a passcode or Touch ID adds an extra layer of security to your device. Follow these steps to set up either option:
- Open the Settings app: Locate and tap on the Settings app on your iPad’s home screen.
- Select “Touch ID & Passcode” or “Face ID & Passcode”: Scroll down and tap on “Touch ID & Passcode” if your iPad has a Touch ID sensor. If your iPad supports Face ID, tap on “Face ID & Passcode.”
- Enter your current passcode, if applicable: If you have already set up a passcode on your iPad, you will be prompted to enter it before proceeding. If this is your first time setting a passcode, skip this step and move to the next one.
- Set up a new passcode: Tap on “Turn Passcode On” or “Set Passcode” and follow the on-screen instructions to create a new passcode. You can choose a six-digit numeric code, a custom alphanumeric code, or use Touch ID/Face ID if enabled.
- Verify your passcode: Enter the new passcode again to confirm it.
- Enable Touch ID/Face ID (if available): If your iPad supports Touch ID or Face ID, you will have the option to set it up. Follow the on-screen instructions to register your fingerprint or face.
Setting up Touch ID or a passcode ensures that unauthorized users cannot access your iPad without your permission. Keep in mind that it’s important to choose a passcode that is easy for you to remember, but difficult for others to guess.
With Touch ID, you can unlock your iPad and authorize various actions with just your fingerprint. If your iPad supports Face ID, the facial recognition feature offers an even more convenient and secure way to authenticate.
Now that you have set up Touch ID or a passcode, it’s time to move on to the next step and configure your location services.
Step 5: Enabling or Disabling Location Services
Location Services on your iPad allow various apps and services to determine your approximate location. It can be useful for navigation, weather updates, and personalized recommendations. Follow these steps to enable or disable Location Services:
- Open the Settings app: Locate and tap on the Settings app on your iPad’s home screen.
- Find and select “Privacy”: Scroll down and tap on “Privacy.” It is usually indicated by a hand-shaped icon.
- Select “Location Services”: On the Privacy screen, tap on “Location Services” to access the location settings.
- Enable or disable Location Services: On the Location Services screen, you will see a toggle switch. If you want to enable Location Services for all apps, toggle the switch to the “ON” position. If you prefer to disable it completely, toggle the switch to the “OFF” position.
- Customize Location Services: If you decide to enable Location Services, you can customize the settings for each individual app by tapping on the app’s name. This allows you to grant or deny location access on a per-app basis.
- Choose location accuracy: Depending on your preferences, you can choose the accuracy level for location services. Tap on “System Services” within the Location Services settings to access this option. From there, you can toggle specific features like “Find My iPad” and “Compass Calibration.”
Enabling Location Services can enhance your iPad experience by providing location-aware features and services. However, if you have privacy concerns or simply don’t want apps to track your location, you can disable Location Services entirely or customize it for individual apps.
Now that you have configured Location Services, you can proceed to the next step and set up your Apple ID and iCloud account.
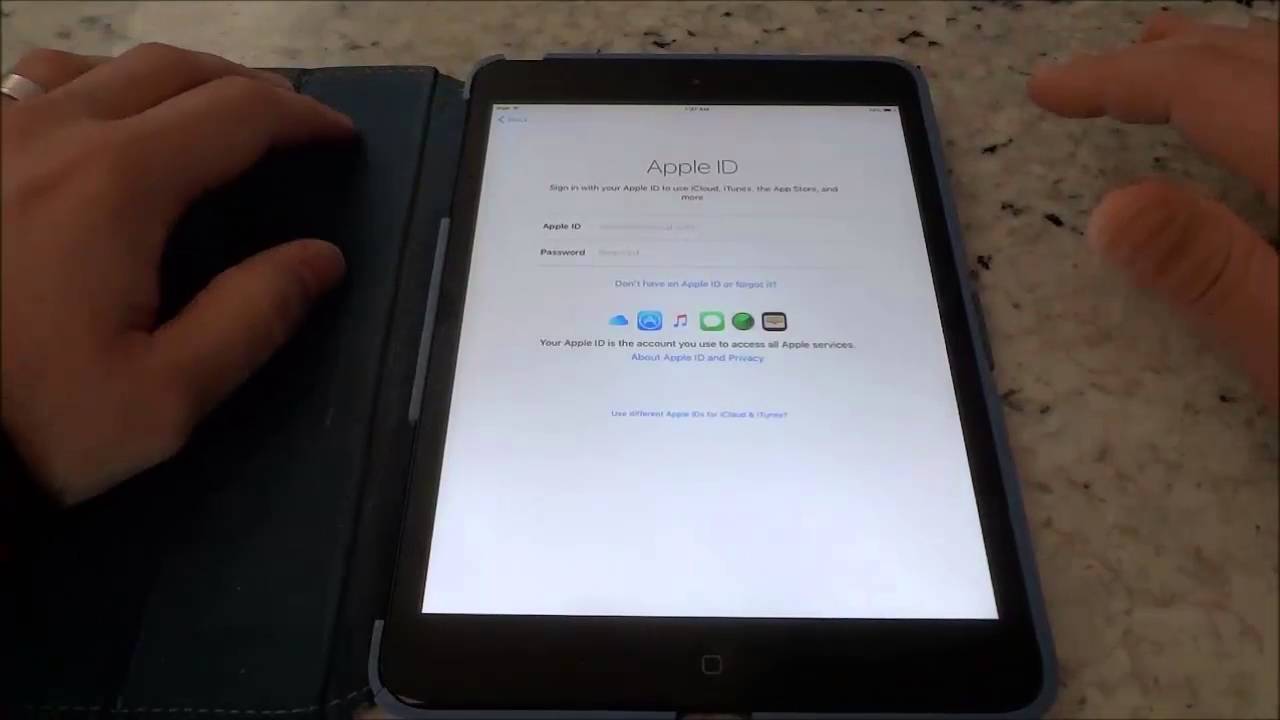
Step 6: Setting up Apple ID and iCloud
An Apple ID is essential for accessing various Apple services and features, including iCloud, the App Store, iTunes, and more. Follow these steps to set up your Apple ID and iCloud account on your iPad:
- Open the Settings app: Locate and tap on the Settings app on your iPad’s home screen.
- Select “Sign in to your iPad”: If you haven’t set up an Apple ID or are using a new device, you will see the option to sign in with your Apple ID. Tap on it.
- Create a new Apple ID: If you don’t have an Apple ID, tap on “Don’t have an Apple ID or forgot it?”. You will be guided through the process of creating a new Apple ID. Follow the on-screen prompts to provide the necessary information, such as your name, email address, password, and security questions.
- Sign in with existing Apple ID: If you already have an Apple ID, enter your email address and password in the respective fields to sign in.
- Set up iCloud: Once you have signed in with your Apple ID, you will be prompted to set up iCloud. Enable the toggle switch next to “iCloud” to activate it. You can choose to use the default settings or customize the options based on your preferences.
- Choose iCloud services: Within the iCloud settings, you can select which services you want to sync with iCloud, such as Mail, Contacts, Calendars, Photos, and more. Enable the toggle switches next to the services you wish to use.
Setting up an Apple ID and iCloud account allows you to seamlessly sync your data across multiple devices, access iCloud backup, and enjoy various iCloud services. Make sure to remember your Apple ID and password for future use.
Now that you have set up your Apple ID and iCloud, you can move on to the next step and restore from an iCloud backup or set up your iPad as a new device.
Step 7: Restoring from iCloud Backup
If you have previously backed up your iPad to iCloud, you can easily restore your data and settings during the setup process. Follow these steps to restore your iPad from an iCloud backup:
- On the Apps & Data screen: After signing in with your Apple ID and setting up iCloud, you will see the “Apps & Data” screen. Tap on “Restore from iCloud Backup.”
- Select a backup: You will be prompted to choose an iCloud backup to restore from. Tap on the backup that contains the data and settings you want to restore. Ensure that the backup is recent and contains the information you need.
- Wait for the restore process: Your iPad will begin the restore process, which may take some time depending on the size of the backup and your internet connection speed. Make sure your iPad is connected to a reliable Wi-Fi network and keep it plugged in to ensure a successful restore.
- Complete the setup: Once the restore is complete, follow the on-screen instructions to complete the setup process. You may need to sign in again with your Apple ID and adjust other settings as desired.
Restoring from an iCloud backup allows you to transfer your apps, settings, and data to your iPad quickly and efficiently. This ensures that you can continue where you left off and have all your information readily available.
Alternatively, if you prefer to set up your iPad as a new device without restoring from a backup, you can choose the “Set Up as New iPad” option on the “Apps & Data” screen. This is ideal if you want a fresh start or do not have an iCloud backup available.
With your iPad now restored from an iCloud backup or set up as new, you can proceed to the next steps to configure additional settings and personalize your device.
Step 8: Setting Up Siri
Siri, Apple’s virtual assistant, allows you to perform various tasks and get information using voice commands. Here’s how to set up Siri on your iPad:
- Open the Settings app: Locate and tap on the Settings app on your iPad’s home screen.
- Select “Siri & Search”: Scroll down and tap on “Siri & Search” within the Settings app.
- Enable Siri: Toggle the switch next to “Listen for “Hey Siri” or “Press Home for Siri” to enable Siri. If you want to activate Siri with your voice, make sure to choose “Listen for ‘Hey Siri'”.
- Train Siri to recognize your voice: If you choose to use “Hey Siri,” you will be prompted to train Siri to recognize your voice. Follow the on-screen instructions to complete the setup process.
- Customize Siri settings: Within the Siri settings, you can further personalize your Siri experience. For example, you can select the preferred language and voice for Siri, and enable or disable Siri suggestions for specific apps.
Once you have set up Siri, you can start using the virtual assistant by saying, “Hey Siri” followed by your request or by pressing and holding the Home button (on older iPad models) or the Side button (on newer iPad models).
Siri can assist you with a wide range of tasks, including sending messages, making phone calls, setting reminders, checking the weather, launching apps, and much more. Take some time to explore Siri’s capabilities and discover how it can enhance your iPad experience.
Now that Siri is set up, you can move on to the next step and customize the display and brightness settings on your iPad.
Step 9: Customizing Display and Brightness
Customizing the display and brightness settings on your iPad allows you to optimize the visual experience and adjust it to your liking. Follow these steps to customize the display and brightness on your device:
- Open the Settings app: Locate and tap on the Settings app on your iPad’s home screen.
- Select “Display & Brightness”: Scroll down and tap on “Display & Brightness” within the Settings app.
- Adjust the brightness: Use the brightness slider to adjust the brightness level of your iPad’s screen. Slide it to the left to decrease brightness or to the right to increase it. Alternatively, you can enable Auto-Brightness, which automatically adjusts the screen brightness based on ambient light conditions.
- Choose a display mode: If you have an iPad that supports it, you can select the desired display mode from the options available. For example, you can choose between Standard or Zoomed mode, depending on your preference for text and app icon sizes.
- Configure Night Shift: Night Shift reduces blue light emission from your iPad’s screen, which can help improve your sleep quality. You can schedule Night Shift to activate automatically during specific times or adjust its intensity manually.
- Access Accessibility settings: Within the Display & Brightness settings, you can find a link to Accessibility settings. This allows you to further enhance the visual experience by adjusting features like text size, bold text, and color filters.
Customizing the display and brightness settings ensures that your iPad’s screen looks comfortable and visually appealing. Adjusting the brightness level can also help conserve battery life by reducing power consumption.
Take some time to experiment with different settings and find the combination that suits your preferences. Now that you have customized the display and brightness, you can proceed to the next step and add email and other accounts to your iPad.
Step 10: Adding Email and Other Accounts
Adding email and other accounts to your iPad allows you to easily access and manage your various online accounts from a single device. Follow these steps to add email and other accounts:
- Open the Settings app: Locate and tap on the Settings app on your iPad’s home screen.
- Select “Mail” or “Passwords & Accounts”: Scroll down and tap on either “Mail” or “Passwords & Accounts” within the Settings app. The option may vary depending on your iOS version.
- Add an email account: Tap on “Add Account” and select the email provider from the list. Enter your email address and password, then follow the on-screen prompts to complete the setup process. Your iPad will automatically configure the settings for popular email providers like Gmail, Yahoo, and iCloud.
- Add other accounts: To add other types of accounts, such as social media, cloud storage, or productivity apps, tap on “Add Account” and select the appropriate option. Enter your account credentials and follow the instructions to complete the setup.
- Configure account settings: Once you have added an account, you can further customize its settings. For example, you can choose how often your device checks for new emails, enable or disable mailbox syncing, or adjust notification preferences.
Adding and configuring email and other accounts ensures that you can conveniently access your messages, contacts, and other data on your iPad. This saves you the trouble of switching between multiple devices or apps.
Feel free to add all your essential accounts to your iPad and take advantage of the device’s unified management capabilities. Now that you have added email and other accounts, you can move on to the next step and explore the App Store to download your favorite apps.
Step 11: Downloading Apps from the App Store
The App Store is a treasure trove of apps that can enhance the functionality and entertainment value of your iPad. Follow these steps to download apps from the App Store:
- Locate the App Store: Open the App Store app from your iPad’s home screen. It is represented by a blue icon with a white letter “A” on it.
- Search for an app: Use the search bar at the top of the App Store to find a specific app. You can enter keywords or the app’s name to initiate a search. Alternatively, you can browse through the featured, top charts, or categories sections to discover new apps.
- Select the desired app: Tap on the app you want to download to view its details, screenshots, reviews, and ratings. Make sure to read the app’s description and check user reviews to ensure it meets your needs and preferences.
- Tap “Get” or the price: If the app is free, tap on “Get” to start the download. If the app has a price, the button will display the app’s price instead. Tap on the price button and confirm your purchase using your Apple ID password or Touch ID/Face ID.
- Wait for the download: Once you tap on “Get” or purchase the app, the download will begin, and you will see a progress indicator on the app’s icon. The length of the download will depend on the app’s size and your internet connection speed.
- Access the downloaded app: Once the download is complete, the app’s icon will appear on your iPad’s home screen. You can tap on the icon to launch the app and start using it.
Downloading apps from the App Store enriches your iPad’s capabilities and opens up a world of possibilities. Whether you’re looking for productivity tools, social media apps, games, or any other type of app, the App Store has a vast selection to choose from.
Feel free to explore the categories, top charts, and editor’s picks to discover new and popular apps. Download the apps that catch your interest and make the most out of your iPad’s functionality.
Now that you know how to download apps, you can move on to the next step and configure the Notification Center and Control Center to suit your preferences.
Step 12: Configuring Notification Center and Control Center
Configuring the Notification Center and Control Center on your iPad allows you to have better control over how you receive and view notifications, as well as quick access to various settings and functions. Follow these steps to configure the Notification Center and Control Center:
- Open the Settings app: Locate and tap on the Settings app on your iPad’s home screen.
- Select “Notifications”: Scroll down and tap on “Notifications” within the Settings app. This is where you can customize how your iPad handles notifications.
- Customize notification preferences: Within the Notifications settings, you can individually customize the notification settings for each app installed on your iPad. Tap on an app to access its notification settings, where you can adjust the alert style, sounds, badges, and more.
- Manage Notification Center widgets: Scroll further down the Notifications settings screen to access the “Notification Center” section. Here, you can customize the widgets that appear in your iPad’s Today View, which can provide you with quick access to information and actions from various apps.
- Access Control Center settings: Go back to the main Settings app screen and tap on “Control Center.” This is where you can customize the controls that appear in the Control Center and their order.
- Customize Control Center contents: Within the Control Center settings, you can add or remove controls, rearrange their order, and even customize the appearance of Control Center shortcuts.
Customizing the Notification Center and Control Center allows you to optimize how you receive and interact with notifications and access commonly used controls and features. By tailoring these settings to your preferences, you can make your iPad more intuitive and efficient to use.
Take some time to explore the available options and experiment with different settings to find the setup that works best for you. Now that you have configured the Notification Center and Control Center, you can proceed to the next step and set up restrictions and privacy settings on your iPad.
Step 13: Setting Up Restrictions and Privacy
Setting up restrictions and privacy settings on your iPad allows you to control access to certain apps, features, and content, as well as protect your personal information. Follow these steps to set up restrictions and privacy:
- Open the Settings app: Locate and tap on the Settings app on your iPad’s home screen.
- Select “Screen Time”: Scroll down and tap on “Screen Time” within the Settings app. This is where you can configure various restrictions and privacy settings.
- Enable Screen Time: If you haven’t set up Screen Time before, you will be prompted to enable it. Tap on “Turn On Screen Time” and follow the on-screen instructions to proceed.
- Set up restrictions: Within the Screen Time settings, tap on “Content & Privacy Restrictions” to access options for managing app usage, content restrictions, privacy settings, and more. You can customize the level of access and control based on your preferences.
- Manage app limits: If you want to set time limits on specific apps or app categories, go back to the main Screen Time settings and tap on “App Limits.” From there, you can set daily or weekly app usage limits to help manage screen time.
- Protect privacy: To configure privacy settings, navigate to the main Settings app screen and tap on “Privacy.” Here, you can individually manage the permissions of apps to access various features and personal data, such as location, camera, microphone, and more.
- Review other privacy settings: Within the Privacy settings, you can explore further options, such as managing advertising preferences, controlling data access for specific apps, and reviewing website tracking.
Setting up restrictions and privacy on your iPad gives you peace of mind by ensuring that you have control over the content accessed on your device and protecting your personal information from unauthorized access.
Take the time to review and configure these settings according to your preferences and needs. This will allow you to create a safer and more secure environment while using your iPad. Now that you have set up restrictions and privacy, you can proceed to the next step and enable Family Sharing if desired.
Step 14: Enabling Family Sharing
Enabling Family Sharing on your iPad allows you to share iTunes and App Store purchases, Apple Music subscriptions, iCloud storage, and more with your family members. Follow these steps to set up Family Sharing:
- Open the Settings app: Locate and tap on the Settings app on your iPad’s home screen.
- Select your name: Scroll down and tap on your name at the top of the Settings app. If you haven’t set up an Apple ID on your device, you will need to sign in first.
- Tap on “Set Up Family Sharing”: On your Apple ID page, tap on “Set Up Family Sharing” to initiate the setup process.
- Follow the on-screen instructions: You will be guided through a series of steps to configure Family Sharing. This includes inviting family members to join, sharing app purchases, enabling the family calendar, setting up parental controls for children, and more.
- Customize sharing settings: After setting up Family Sharing, you can customize sharing settings based on your preferences. For example, you can adjust whether to share your location with family members, share purchased apps and content, and manage shared payment methods.
- Add family members: If you want to add additional family members to your Family Sharing group, you can do so by going to “Settings” > “Family Sharing” and tapping on “Add Member.” Follow the instructions to send an invitation to join your family group.
Enabling Family Sharing not only allows you to easily share purchases and subscriptions with your family members, but it also helps you manage and monitor your family’s device and content usage through Parental Controls.
Take advantage of Family Sharing to create a connected and shared experience for your family members while maintaining individual accounts and settings. Now that you have enabled Family Sharing, you can proceed to the next step and configure Apple Pay on your iPad.
Step 15: Configuring Apple Pay
Configuring Apple Pay on your iPad allows you to make secure and convenient payments for purchases in stores, apps, and on the web. Follow these steps to set up Apple Pay:
- Open the Settings app: Locate and tap on the Settings app on your iPad’s home screen.
- Select “Wallet & Apple Pay”: Scroll down and tap on “Wallet & Apple Pay” within the Settings app.
- Add a credit or debit card: Tap on “Add Card” to add a credit or debit card to your iPad. You can choose to add a card by capturing its details with the camera or by manually entering the card information.
- Verify the card: After adding a card, it may require verification. The verification process varies depending on your card issuer, but it usually involves providing additional security details or completing an authentication method.
- Set a default card and billing address: If you have added multiple cards, you can designate one as the default card by tapping on it and selecting “Set as Default Card.” You can also add and manage billing addresses associated with your cards.
- Enable features and services: Within the Apple Pay settings, you can enable additional features like Automatic Selection, which allows your iPad to automatically select the appropriate payment card based on your location and transaction history.
Once you have set up Apple Pay and added your cards, you can conveniently make purchases by simply holding your iPad near a compatible payment terminal and authenticating the transaction with Touch ID or Face ID.
Note that not all stores and apps accept Apple Pay, so it’s important to look for the Apple Pay logo or check with the merchant. Also, keep in mind that Apple Pay is available in selected countries and regions.
With Apple Pay configured on your iPad, you can make secure and contactless payments with ease. Now that you have set up Apple Pay, you can proceed to the next step and configure Find My iPad to locate your device if it’s lost or stolen.
Step 16: Setting Up Find My iPad
Setting up Find My iPad on your device allows you to locate, track, and remotely manage your iPad if it gets lost or stolen. Follow these steps to set up Find My iPad:
- Open the Settings app: Locate and tap on the Settings app on your iPad’s home screen.
- Select your Apple ID: Scroll down and tap on your name at the top of the Settings app. If you haven’t signed in with your Apple ID, you will need to do so first.
- Tap on “Find My”: On the Apple ID page, tap on “Find My” to access the Find My iPad settings.
- Toggle on “Find My iPad”: Enable the toggle switch next to “Find My iPad.” This allows your iPad to be located using the Find My app or the iCloud website.
- Enable “Send Last Location”: By enabling the “Send Last Location” feature, your iPad will automatically send its location to Apple when the battery is critically low, helping you track its last known location before the battery dies.
- Activate Activation Lock: Activation Lock is automatically enabled when you turn on Find My iPad. This security feature requires your Apple ID and password to erase your device or reactivate it, making it challenging for anyone else to use or sell your iPad if it’s lost or stolen.
Setting up Find My iPad is crucial for safeguarding your device and ensuring that you can locate it if it goes missing. It also provides added security by protecting your personal data from unauthorized access.
If you ever misplace your iPad, you can use the Find My app on another iOS device or access iCloud through a web browser to track its location, make it play a sound, lock it remotely, or even erase its content if necessary.
Now that Find My iPad is set up, you can proceed to the next step and learn how to transfer files between devices using AirDrop.
Step 17: Transferring Files via AirDrop
AirDrop is a convenient feature that allows you to wirelessly transfer files, photos, and other content between Apple devices, including iPads. Follow these steps to transfer files via AirDrop:
- Make sure AirDrop is enabled on both devices: On your iPad, swipe down from the top-right corner of the screen to access Control Center. Tap on the “AirDrop” icon, and choose “Contacts Only” or “Everyone” to enable AirDrop.
- Open the file or content you want to share: Locate the file or content you wish to transfer on your iPad. This can be a photo, document, webpage, or any other compatible item.
- Tap on the “Share” button: Look for the “Share” button within the app or file viewer you’re using. It usually appears as a square with an upward-pointing arrow.
- Select the receiving device: On the Share Sheet that appears, you will see a list of nearby AirDrop-enabled devices. Tap on the device you want to send the file to.
- Accept the transfer on the receiving device: On the receiving device, a notification will appear, indicating that someone is attempting to send a file via AirDrop. Accept the transfer by tapping on the “Accept” button.
- Confirm the transfer on the sending device: Once the transfer is accepted on the receiving device, a confirmation message will appear on your iPad. Tap on the “Done” or “Close” button to finalize the transfer.
AirDrop makes it incredibly easy to share files between Apple devices without the need for cables or internet connectivity. It uses Bluetooth and Wi-Fi to establish a direct connection between the devices, ensuring fast and secure file transfers.
Keep in mind that AirDrop works best when the devices are in close proximity to each other, ideally within 30 feet (approximately 9 meters) or less. It’s also important to note that both devices need to have AirDrop enabled and be using compatible versions of iOS or iPadOS.
Now that you know how to transfer files via AirDrop, you can easily share photos, documents, and other content with friends, colleagues, or your other Apple devices. Proceed to the next step to learn how to connect external devices to your iPad.
Step 18: Connecting External Devices
Your iPad is not just a standalone device – it also has the versatility to connect with various external devices, expanding its functionality. Follow these steps to connect external devices to your iPad:
- Check for device compatibility: Ensure that the external device you wish to connect is compatible with your iPad and has the necessary ports or wireless capabilities.
- Use a physical connection: If the external device requires a physical connection, such as a wired keyboard, camera, or MIDI controller, you may need the relevant adapter or cable to connect it to your iPad. Apple offers various adapters and cables that allow you to connect different types of devices via the Lightning or USB-C port on your iPad.
- Pair via Bluetooth: For wireless devices like headphones, speakers, or keyboards that have Bluetooth capabilities, ensure that Bluetooth is enabled on your iPad by going to “Settings” > “Bluetooth.” Put the external device into pairing mode and select it from the list of available devices on your iPad to establish a connection.
- Connect wirelessly: Some devices, such as wireless printers or smart TVs, may connect to your iPad over Wi-Fi or through a specific app. Consult the device’s documentation or manufacturer’s website for instructions on how to establish a wireless connection and access its features from your iPad.
- Set up external device: Depending on the device and its capabilities, you may need to install a companion app or adjust specific settings on your iPad to fully utilize the connected device’s features. Follow the instructions provided by the device manufacturer to set up and configure the external device correctly.
Connecting external devices to your iPad opens up a world of possibilities, allowing you to enhance productivity, enjoy multimedia content, and explore new creative avenues. Whether it’s linking a keyboard for typing, a camera for importing photos, or a monitor for extended display, the versatility of your iPad lends itself to a wide range of uses.
Always consult the documentation provided with the external device and follow the manufacturer’s instructions for the best results. Now that you know how to connect external devices to your iPad, you can explore the limitless potential that comes with expanding your iPad’s capabilities.
Step 19: Setting Up Apple Music and iTunes
Apple Music and iTunes provide access to a vast library of music, podcasts, movies, and TV shows that you can enjoy on your iPad. Follow these steps to set up Apple Music and iTunes:
- Open the Music app: Locate and tap on the Music app on your iPad’s home screen. The app icon resembles a colorful music note on a white background.
- Sign in with your Apple ID: If prompted, sign in to the Music app with your Apple ID and password. If you don’t have an Apple ID, you can create one during the setup process.
- Select your music preferences: The Music app will ask you about your music preferences, allowing you to choose genres and artists you like. This information helps tailor recommendations and personalize your music experience.
- Subscribe to Apple Music: If you’re not already an Apple Music subscriber, you will be presented with options to start a free trial or subscribe to the service. Follow the prompts to complete the subscription process, providing your payment details if necessary.
- Browse and listen to music: Once you’re signed in and subscribed, you can browse through the vast Apple Music catalog, explore playlists, listen to radio stations, and even save music for offline listening.
- Access iTunes content: To access additional content such as movies, TV shows, podcasts, and audiobooks, open the iTunes app on your iPad. You can sign in with your Apple ID and explore the various categories to find and enjoy your favorite media content.
By setting up Apple Music and iTunes on your iPad, you gain access to a world of entertainment and the ability to curate your music library, discover new artists, and enjoy multimedia content on your device.
Whether you prefer to stream music, download your favorite songs for offline listening, or enjoy movies and TV shows on the go, Apple Music and iTunes offer a comprehensive entertainment experience.
Now that you have set up Apple Music and iTunes, you can immerse yourself in a world of music, podcasts, movies, and more on your iPad.
Step 20: Accessibility Features and Settings
Your iPad offers a range of accessibility features and settings to ensure that everyone can use and enjoy their device to the fullest extent. Follow these steps to explore and configure accessibility options on your iPad:
- Open the Settings app: Locate and tap on the Settings app on your iPad’s home screen.
- Select “Accessibility”: Scroll down and tap on “Accessibility” within the Settings app. This is where you can find a variety of accessibility features and settings.
- Explore accessibility features: Within the Accessibility settings, you will find a wide range of options to meet your specific needs. You can adjust display settings, enable voice control, customize gestures, enhance audio and visual accessibility, and much more.
- Enable specific accessibility features: Tap on the feature you want to enable, such as VoiceOver, Zoom, or AssistiveTouch, and follow the on-screen instructions to configure and activate the selected accessibility option.
- Customize accessibility settings: Within each accessibility feature, you can further customize settings to suit your preferences. Adjust parameters such as text size, color filters, speech feedback, and gesture recognition to enhance your accessibility experience.
- Access additional accessibility options: Apart from the main Accessibility settings, you can delve into specific areas such as Display & Text Size, Hearing Devices, Interaction, and more. These sub-settings offer additional customization and fine-tuning of accessibility options.
Exploring and configuring accessibility features and settings on your iPad allows you to personalize your device and adapt it to your particular needs. The broad range of options available ensures that you can optimize your iPad’s accessibility according to your vision, hearing, motor, and other accessibility requirements.
By taking advantage of these accessibility features, you can make your iPad more comfortable, usable, and inclusive for yourself or for others who may have accessibility needs.
Now that you are familiar with the accessibility features and settings, you can explore and customize them to create a tailored and accessible iPad experience.
Troubleshooting Tips
While using your iPad, you may encounter certain issues or challenges. Here are some troubleshooting tips to help you address common problems and ensure a smooth user experience:
- Restart your iPad: If you are experiencing any issues, start by restarting your iPad. This can resolve minor software glitches and restore normal functionality.
- Update your software: Keeping your iPad’s software up to date ensures that you have the latest bug fixes and improvements. Go to “Settings” > “General” > “Software Update” to check for and install any available updates.
- Check your internet connection: If you are having trouble accessing the internet or certain online services, ensure that your Wi-Fi or cellular data connection is active and stable. You can toggle Airplane Mode on and off or restart your router to reset the connection.
- Clear storage space: If your iPad is running low on storage, it may cause performance issues. Delete unwanted apps, photos, and videos, and offload data to iCloud or an external storage solution to free up space.
- Reset settings: If you are experiencing persistent problems, resetting certain settings on your iPad can often resolve them. Go to “Settings” > “General” > “Reset” and choose the appropriate option, such as “Reset All Settings” or “Reset Network Settings” (note that this will not delete your data).
- Contact Apple Support: If you have tried the above steps and are still experiencing issues, reach out to Apple Support for further assistance. They can provide guidance and troubleshooting specific to your situation.
Remember to regularly backup your iPad’s data to iCloud or a computer to ensure that you can easily restore your information if needed. Additionally, consider referring to the user manual or Apple’s support website for more detailed troubleshooting information and advice.
By following these troubleshooting tips and seeking assistance when necessary, you can quickly address common issues and keep your iPad running smoothly.