
Reasons for Installing Fonts for Photoshop Only
When working with Photoshop, it is essential to have a diverse selection of fonts at your disposal. Installing fonts specifically for Photoshop can provide numerous benefits and enhance your design workflow. Here are some compelling reasons why you should consider installing fonts for Photoshop only:
- Optimal Performance: Installing fonts exclusively for Photoshop can help improve the program’s performance and efficiency. By only loading the necessary fonts, you reduce the burden on your system’s resources, ensuring smoother operation and faster rendering of text layers.
- Design Consistency: Installing fonts for Photoshop only allows you to keep your font library organized and tailored to your specific design needs. Having a curated collection of fonts ensures design consistency across projects, resulting in a more cohesive and professional-looking visual identity.
- Easy Font Management: Working with a dedicated set of fonts for Photoshop simplifies font management and helps avoid clutter. By keeping your font selection limited to those used within Photoshop, you can quickly find and select the appropriate typeface for your design, saving you time and effort.
- Improved Licensing Compliance: Installing fonts specifically for Photoshop helps ensure compliance with font licensing agreements. Some font licenses may restrict usage to specific software or platforms. By keeping fonts separate for Photoshop, you can easily manage licensing restrictions and prevent any potential violations.
- Enhanced Creativity: A diverse and well-curated font library can stimulate your creativity and provide you with more options for expressing your design ideas. By installing fonts specifically for Photoshop, you can explore and experiment with different typography styles, elevating the overall impact and visual appeal of your designs.
By installing fonts exclusively for Photoshop, you can optimize performance, maintain design consistency, simplify font management, ensure licensing compliance, and boost your creative possibilities. It’s a practical approach that can enhance your design workflow and contribute to the overall quality of your Photoshop projects.
Steps to Install Fonts for Photoshop Only
Installing fonts for Photoshop only is a straightforward process that allows you to enhance your design capabilities. Follow these steps to install fonts exclusively for Photoshop:
- Step 1: Select Your Fonts – Choose the fonts that you want to install for Photoshop. You can download fonts from reputable websites or purchase them from font foundries.
- Step 2: Download and Extract the Font Files – Once you have selected the fonts, download them to your computer and extract the font files if they are in a compressed format like .zip or .rar.
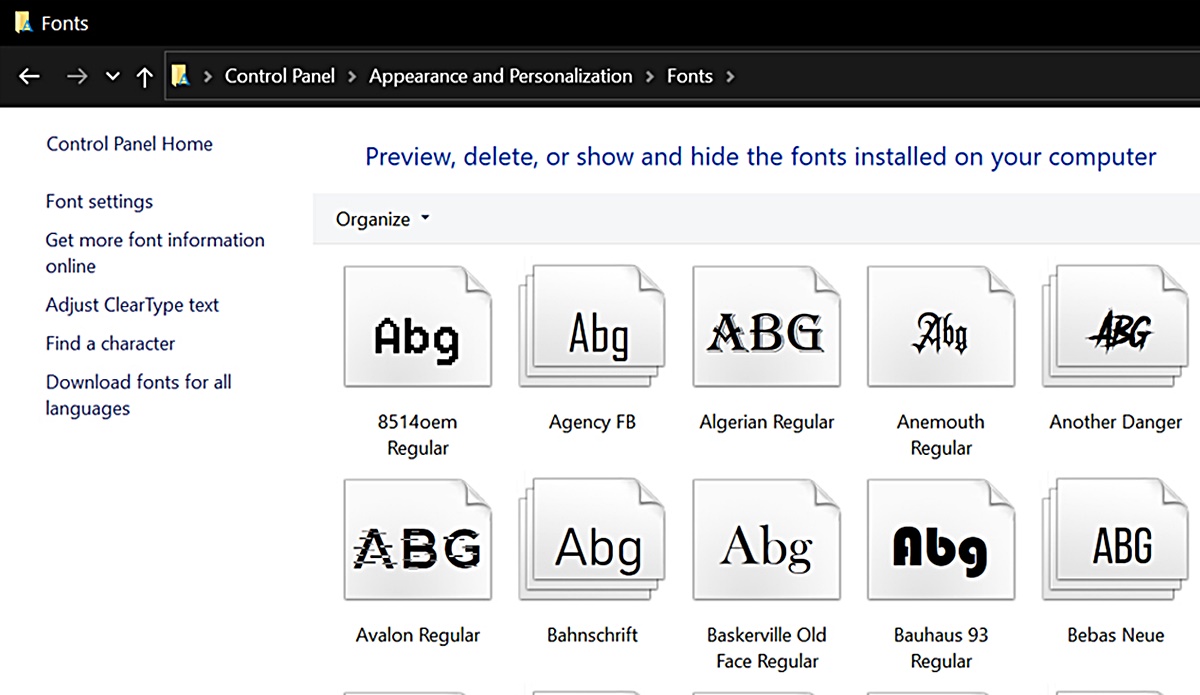
- Step 3: Open the Fonts Folder – In Windows, go to the Control Panel and search for “Fonts.” Click on the “Fonts” folder to open it.
- Step 4: Install Fonts via Drag and Drop – Drag and drop the font files from the extraction location into the Fonts folder. Alternatively, you can right-click on the font files and select “Install” to automatically add them to the Fonts folder.
- Step 5: Restart Photoshop – After installing the fonts, close and reopen Photoshop to ensure that the newly installed fonts are loaded and available for use.
Note: It is recommended to install a limited number of fonts to avoid overwhelming your system and slowing down Photoshop’s performance. Only install fonts that you regularly use or require for specific projects.
By following these steps, you can easily install fonts exclusively for Photoshop and expand your creative possibilities with a wider range of typography options.
Method 1: Installing Fonts via Windows Font Folder
One of the most common methods for installing fonts for Photoshop only is through the Windows Font Folder. Here’s a step-by-step guide on how to install fonts using this method:
- Step 1: Download the Fonts – Start by downloading the desired fonts to your computer. Make sure they are in a compatible font file format, such as .ttf or .otf.
- Step 2: Locate the Fonts Folder – Open File Explorer and navigate to the Windows directory (usually located in the C: drive). Within the Windows folder, you will find a folder named “Fonts.”
- Step 3: Install the Fonts – Copy or move the downloaded font files into the Fonts folder. You can do this by dragging and dropping the files or using the copy-paste function.
- Step 4: Refresh the Font List – After installing the fonts, it may take a moment for Windows to recognize and display them in Photoshop. To speed up this process, go to the Fonts folder, select all the installed fonts, right-click, and choose “Install.” This will refresh the font list.
- Step 5: Restart Photoshop – To ensure that the newly installed fonts are available in Photoshop, close and reopen the program. The fonts should now appear in the font dropdown menu when working on text layers.
By using the Windows Font Folder method, you can easily install fonts for Photoshop only and have them readily accessible for all your design projects.
Method 2: Installing Fonts via Adobe Creative Cloud App
If you have an Adobe Creative Cloud subscription, you can conveniently install fonts for Photoshop using the Adobe Creative Cloud app. Here’s a step-by-step guide on how to install fonts using this method:
- Step 1: Open the Adobe Creative Cloud App – Launch the Adobe Creative Cloud app on your computer. Ensure that you are signed in with your Adobe ID and have an active subscription.
- Step 2: Navigate to the Fonts Section – In the app, locate the “Fonts” section. This section will allow you to browse and install various font options.
- Step 3: Explore and Select Fonts – Browse through the available font collection and choose the fonts you want to install specifically for Photoshop. You can filter the fonts by various categories or use the search function to find specific fonts.
- Step 4: Install the Fonts – Once you’ve selected the fonts, click on the “Install” button next to each font. The Creative Cloud app will automatically download and install the fonts on your computer.
- Step 5: Restart Photoshop – After the installation is complete, close and reopen Photoshop to ensure that the newly installed fonts are visible and accessible in the font dropdown menu.
Using the Adobe Creative Cloud app to install fonts provides a convenient and seamless experience. You can easily manage and update your font collection directly within the app, ensuring that you have the latest font options at your disposal for your Photoshop projects.
Method 3: Installing Fonts via Font Manager Software
Another efficient way to install fonts specifically for Photoshop is by using font manager software. Font manager applications provide robust features for managing and organizing your font collection. Here’s a step-by-step guide on how to install fonts using font manager software:
- Step 1: Choose a Font Manager Software – There are various font manager software options available for both Windows and Mac. Research and select a font manager that best suits your needs and preferences.
- Step 2: Download and Install the Font Manager Software – Visit the official website of the font manager software you have chosen and download the appropriate version for your operating system. Follow the installation instructions to install the software on your computer.
- Step 3: Import Fonts into the Font Manager – Open the font manager software and import the fonts you want to use in Photoshop. This can typically be done by dragging and dropping the font files into the font manager interface or using the import function provided by the software.
- Step 4: Activate Fonts – Once you have imported the fonts into the font manager, activate them to make them available for use in Photoshop. Most font manager software allows you to activate or deactivate fonts individually or in batches.
- Step 5: Restart Photoshop – Close and reopen Photoshop to ensure that the activated fonts are loaded and accessible within the program. You can now use the installed fonts in your Photoshop projects.
Using font manager software provides a centralized and organized approach to managing your fonts. It allows you to enable or disable specific fonts as needed, making the font selection process efficient and tailored to your design requirements.
Troubleshooting Common Issues
While installing fonts for Photoshop only, you may encounter some common issues. Here are a few troubleshooting tips to help you resolve these issues:
- Font Not Showing Up in Photoshop: If a newly installed font is not appearing in Photoshop’s font list, try restarting Photoshop to refresh the font cache. If the issue persists, ensure that you have installed the font correctly and that it is compatible with your operating system.
- Font Rendering Issues: In some cases, fonts may not render correctly in Photoshop, leading to distorted or unreadable text. This can be due to compatibility issues or faulty font files. Try reinstalling the font or using an alternative version or format of the font.
- Font Activation Errors (for font manager software): If you encounter errors while activating fonts using font manager software, make sure you have the latest version of the software installed. Additionally, check for any specific font licensing restrictions or conflicts that may prevent the fonts from being activated.
- System Performance Issues: Installing too many fonts, especially high-quality or resource-intensive fonts, can slow down your system and affect Photoshop’s performance. Consider managing and organizing your font collection to include only the fonts you regularly use.
- Font Licensing Compliance: Ensure that you have the appropriate licenses for the fonts you install. Some fonts may have limitations on usage, such as personal or commercial use restrictions. Abiding by font licensing agreements is crucial to avoid any legal issues.
If you encounter any persistent issues with installing fonts or using them in Photoshop, consult official documentation, support forums, or contact font designers or font manager software support for further assistance. Troubleshooting these issues will help you maintain a smooth and efficient font installation process for your Photoshop projects.