
Why should I wipe my Dell laptop?
Wiping your Dell laptop is a crucial step to protect your privacy and ensure the security of your personal information. Whether you’re planning to sell or give away your laptop, or simply want a fresh start, wiping your laptop ensures that all data is permanently erased. There are several important reasons why you should consider wiping your Dell laptop:
1. Protect your personal information: Your laptop contains a wealth of personal data, including sensitive information such as bank details, passwords, and personal documents. Wiping your laptop ensures that this data cannot be accessed by anyone after you part ways with your device.
2. Prevent identity theft: By permanently deleting your personal data, you significantly reduce the risk of identity theft. Without wiping your laptop, someone else could potentially access your accounts, steal your identity, and compromise your financial security.
3. Ensure a fresh start: Wiping your Dell laptop allows you to start afresh with a clean operating system. This can help improve the performance and speed of your laptop, as it removes any unnecessary files, software, or malware that may have accumulated over time.
4. Comply with data protection regulations: In some cases, businesses and organizations are legally obligated to wipe their devices when disposing of them or transferring them to someone else. By wiping your laptop, you demonstrate responsible data management and compliance with relevant regulations.
5. Protect your digital footprint: With the increasing prevalence of online threats, it is important to protect your digital footprint. By wiping your laptop, you minimize the potential for someone to track your online activities, browsing history, and preferences.
6. Ensure a clean slate for the new user: If you plan to sell or donate your Dell laptop, wiping it ensures that the new user starts with a clean slate. This ensures that your files and data cannot be recovered, protecting both your privacy and the privacy of the new owner.
7. Maintain a professional image: If you’re using your Dell laptop for work purposes, wiping it before passing it on to someone else helps maintain a professional image. It ensures that no confidential work-related information or sensitive client data is left on the device.
By taking the time to wipe your Dell laptop, you can safeguard your personal information, prevent identity theft, and comply with data protection laws. It provides you with a fresh start and peace of mind, knowing that your laptop is clean and ready for its next chapter.
Backup your important files
Before you proceed with wiping your Dell laptop, it is essential to backup all your important files to ensure that you do not lose any valuable data. Here’s how you can backup your files:
1. Identify your important files: Take some time to identify the files that are important to you. These may include documents, photos, videos, music, or any other personal files that you want to keep.
2. External storage device: Connect an external storage device such as a USB flash drive, external hard drive, or SSD to your Dell laptop. Make sure the device has enough storage space to accommodate all your files.
3. Manually transfer files: Go through your files and manually copy and paste them from your laptop’s internal storage to the connected external storage device. You can do this by opening the respective folders and dragging the files into the external storage device.
4. Use backup software: If you have a large number of files or want an automated process, consider using backup software. There are various backup programs available that can facilitate the backup process and ensure that your files are copied securely and efficiently.
5. Cloud storage: Another option is to utilize cloud storage services such as Google Drive, Dropbox, or OneDrive. These platforms allow you to upload your files to their servers, keeping them safe and accessible online. Make sure to sign up for a reliable and secure cloud storage provider.
6. Verify the backup: Once you have completed the backup process, double-check that all your files have been successfully transferred and are accessible on the external storage device or cloud storage platform.
Backing up your important files is crucial to ensure that no data is lost during the wiping process. It provides you with a safety net, allowing you to restore your valuable files to your Dell laptop once the wiping and reinstallation process is complete.
Sign out of your accounts and delete personal data
Before wiping your Dell laptop, it is important to sign out of all your accounts and delete any personal data stored on the device. This ensures that your sensitive information remains secure and inaccessible to others. Here are the steps you should follow:
1. Sign out of all accounts: Start by signing out of all the accounts you have logged into on your Dell laptop. This includes email accounts, social media accounts, online banking accounts, and any other platforms that require login credentials. Remember to sign out of all your browsers as well.
2. Clear browsing data: Open your web browser’s settings and clear all browsing data, including cookies, cache, and browsing history. This prevents anyone from accessing your browsing activity and personal information.
3. Delete personal files: Go through your laptop’s files and delete any personal documents, photos, videos, or other files that contain sensitive information. You may want to use the recycle bin or permanently delete the files using a file shredder program for added security.
4. Delete saved passwords: If you have saved passwords in your web browsers or password manager, make sure to remove them. This prevents anyone from accessing your accounts even if they gain access to your laptop.
5. Remove autofill data: Clear autofill data from your web browsers, especially if it includes personal information such as addresses, phone numbers, or credit card details. This eliminates the risk of someone using your information for malicious purposes.
6. Disconnect from syncing services: If you use syncing services like Dropbox or Google Drive, disconnect your laptop from these services to ensure that none of your files remain accessible to others.
7. Unlink your laptop from remote access: If you have enabled remote access to your Dell laptop, disable it to prevent unauthorized access. This is particularly important if you used a service like TeamViewer or any other remote desktop software.
By signing out of your accounts and deleting personal data, you significantly minimize the risk of your information falling into the wrong hands. It is important to be thorough in this process to ensure the privacy and security of your personal information.
Use the built-in factory reset option
If you’re looking for a convenient and straightforward way to wipe your Dell laptop, you can utilize the built-in factory reset option. This feature allows you to restore your laptop to its original factory settings, effectively erasing all data and settings. Follow these steps to use the built-in factory reset option:
1. Backup your important files: Before proceeding with the factory reset, make sure you have backed up all your important files as this process will erase all data on your laptop.
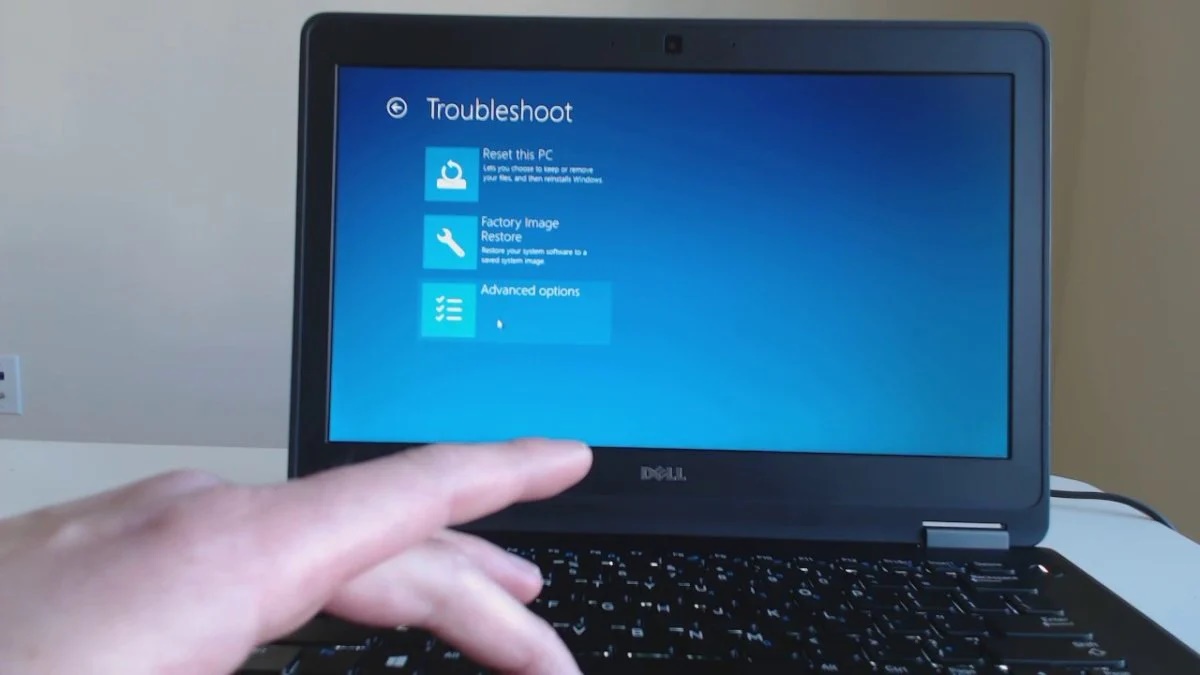
2. Access the Recovery options: Restart your Dell laptop and continuously press the appropriate key (usually F8, F11, or Esc) to access the boot menu or recovery options. The key may vary depending on your Dell laptop model, so consult the user manual or Dell’s support website for specific instructions.
3. Select factory reset: Once you’re in the recovery options menu, look for an option that says “Factory Reset,” “Restore Factory Settings,” or something similar. Select this option using the arrow keys on your keyboard and press Enter.
4. Follow the on-screen instructions: The factory reset process will begin, and you may be prompted to confirm your choice or enter a password. Follow the on-screen instructions carefully to ensure the successful execution of the factory reset.
5. Wait for the reset to complete: The factory reset process may take some time, as it depends on the hardware specifications of your Dell laptop. Allow the process to complete uninterrupted, and make sure your laptop is connected to a power source to avoid any interruptions due to low battery.
6. Set up your laptop: Once the factory reset is complete, your laptop will reboot, and you will be greeted with the initial setup screen. Follow the on-screen prompts to set up your laptop, including language preferences, user account creation, and other necessary settings.
By using the built-in factory reset option, you can easily wipe your Dell laptop without the need for advanced technical knowledge or external tools. It provides a straightforward and reliable method to restore your laptop to its fresh-out-of-the-box state, ensuring that all your data is permanently erased.
Use the Windows 10 reset feature
If you’re using a Dell laptop running Windows 10, another effective method to wipe your laptop is by utilizing the Windows 10 reset feature. This feature allows you to reinstall Windows while removing all personal files and applications. Here’s how you can use the Windows 10 reset feature:
1. Backup your important files: Begin by backing up any files that you want to keep as the reset process will delete all your personal files.
2. Open the Start menu: Click on the Start menu button located at the bottom left corner of your screen, usually represented by the Windows logo.
3. Access the Settings menu: In the Start menu, click on the gear icon to open the Settings menu.
4. Select Update & Security: In the Settings menu, click on the “Update & Security” option.
5. Choose Recovery: In the left-hand menu of the Update & Security section, select “Recovery.”
6. Reset this PC: Under the “Reset this PC” section, click on the “Get started” button.
7. Select the reset option: You’ll be presented with two options: “Keep my files” and “Remove everything.” Choose the option that suits your needs. If you want to completely wipe your laptop, select “Remove everything.”
8. Choose the reset method: Next, you’ll be asked to choose between two reset methods: “Just remove my files” and “Remove files and clean the drive.” The second option is more secure as it ensures that the deleted files cannot be recovered. Select the desired reset method.
9. Initiate the reset: Click on the “Reset” button to start the reset process. Windows will then begin reinstalling the operating system and removing all personal files and applications.
10. Follow the on-screen instructions: During the reset process, you may be asked to confirm your choices or provide additional information. Follow the on-screen instructions to complete the reset.
Once the Windows 10 reset process is finished, your Dell laptop will be wiped clean, and you will have a fresh installation of the operating system. You’ll need to set up your laptop again, create a user account, and reinstall any necessary applications.
Create a USB recovery drive
Creating a USB recovery drive for your Dell laptop is a smart step to take before wiping it. This USB recovery drive allows you to reinstall the operating system and recover your laptop in case of any future issues. Here’s how you can create a USB recovery drive:
1. Gather the necessary requirements: You will need a USB flash drive with a capacity of at least 16 GB. Make sure the USB drive is empty or doesn’t contain any important data, as it will be formatted during the process.
2. Open the Start menu and search for “Create a recovery drive”: Click on the Windows Start menu, type “Create a recovery drive” in the search bar, and select the corresponding option from the search results.
3. Launch the Recovery Drive tool: The “Create a recovery drive” tool will open. Ensure that the “Back up system files to the recovery drive” option is checked. This option allows you to have a full system recovery option on the USB drive.
4. Select the USB drive: Connect the empty USB flash drive to your laptop. In the Recovery Drive tool, select the USB drive from the available list of drives. Make sure you choose the correct drive to avoid formatting the wrong USB device.
5. Start the creation process: Click on the “Next” button to begin the creation process. The tool will then format the USB drive and start copying the necessary recovery files onto it. This process may take some time, so be patient and avoid interrupting it.
6. Complete the creation process: Once the creation process is complete, the tool will display a message confirming the successful creation of the USB recovery drive. Click on the “Finish” button, and you’re done!
7. Store the USB recovery drive in a safe place: Store the USB recovery drive in a safe and easily accessible location. Ensure that you label it properly so that you can easily identify it in the future.
The USB recovery drive you have created will serve as a valuable resource if you ever need to reinstall the operating system or recover your Dell laptop in case of any system issues. It provides you with peace of mind knowing that you have a reliable backup option to restore your laptop to its original state.
Format the hard drive manually
If you prefer a more hands-on approach, you can choose to format the hard drive of your Dell laptop manually. This method gives you complete control over the wiping process. However, it’s important to note that this process permanently deletes all data on the hard drive, so be absolutely certain you have backed up any important files before proceeding. Here’s how you can format the hard drive manually:
1. Backup your important files: Safeguard your important files by creating backups on an external storage device or cloud storage platform.
2. Open the Start menu and access Disk Management: Click on the Windows Start menu, type “Disk Management” in the search bar, and select the “Create and format hard disk partitions” option from the search results.
3. Select the hard drive: In the Disk Management window, locate the hard drive you want to format from the list of available drives. Exercise caution to ensure you are selecting the correct drive.
4. Right-click and choose Format: Right-click on the selected hard drive and choose the “Format” option from the context menu. A dialog box will appear.
5. Choose the file system and allocation unit size: In the format dialog box, select the desired file system (such as NTFS or FAT32) and the allocation unit size. The default options are usually suitable for most users.
6. Provide a volume label: Optionally, you can assign a volume label to the formatted hard drive. This label will serve as the drive’s name in the operating system.
7. Perform the formatting: Double-check all the formatting settings and click on the “OK” or “Format” button to initiate the formatting process. A warning message will appear, indicating that all data on the drive will be permanently deleted.
8. Confirm the formatting: Carefully read and understand the warning message, as formatting a hard drive erases all data irreversibly. If you have already backed up your important files and are ready to proceed, click on “OK” to confirm the formatting.
9. Wait for the process to complete: The formatting process may take some time, depending on the size of the hard drive. Be patient and avoid interrupting the process.
Once the formatting process is complete, your Dell laptop’s hard drive will be completely wiped, with all data erased. You can then proceed with reinstalling the operating system and setting up your laptop anew.
Verify that all data has been wiped
After wiping your Dell laptop, it is crucial to verify that all data has been properly erased to ensure the privacy and security of your personal information. Here are some steps you can take to verify that all data has been wiped:
1. Perform a file search: Use the search functionality on your Dell laptop to look for any personal files, documents, or media that may have remained after the wiping process. Search for specific file names, extensions, or keywords to ensure thoroughness.
2. Check disk space: Open the “File Explorer” or “This PC” on your Dell laptop and check the disk space of each drive. If the total used space is significantly lower after the wiping process, it indicates that files have been successfully wiped.
3. Inspect system folders: Navigate to system folders such as the “Documents,” “Downloads,” and “Desktop” folders. Check if any files or folders were left behind during the wiping process, and ensure they have been completely deleted.
4. Review installed programs: Open the “Programs and Features” or “Apps & Features” section in the Control Panel or Settings of your Dell laptop. Verify that all installed programs have been removed and there are no remnants of applications that were present before the wiping process.
5. Clear browser data: Open your web browser and clear any remaining saved passwords, cookies, cache, and browsing history. This helps ensure that no trace of your online activities or personal information is left behind.
6. Use data recovery software: For added peace of mind, you can use data recovery software to scan your Dell laptop and confirm that no recoverable data exists. This software can detect and attempt to recover deleted files, allowing you to verify the effectiveness of the wiping process.
By thoroughly verifying that all data has been wiped from your Dell laptop, you can be confident that your personal information is secure and cannot be accessed by anyone. Taking these steps ensures that your privacy is protected, especially if you plan to sell, donate, or dispose of your laptop.
Reinstall the operating system
After wiping your Dell laptop, it is necessary to reinstall the operating system to ensure the laptop is fully functional and ready for use. Reinstalling the operating system provides a fresh start with a clean and optimized system. Here’s how you can reinstall the operating system on your Dell laptop:
1. Prepare the installation media: Obtain the installation media for your operating system, such as a USB flash drive or a DVD. This media should contain a valid copy of the operating system you want to install, such as Windows or Linux.
2. Connect the installation media: Insert the USB flash drive or DVD into the appropriate port on your Dell laptop. Make sure your laptop is powered on and connected to a power source during this process.
3. Restart your laptop: Restart your Dell laptop and access the boot menu by continuously pressing the appropriate key (e.g., F12, F2, or Del) during the startup process. The key to access the boot menu may vary depending on your Dell laptop model.
4. Select the installation media: In the boot menu, choose the option that corresponds to the installation media you inserted in the previous step. Use the arrow keys to navigate and press Enter to select.
5. Follow the on-screen prompts: The installation process will begin, and you will be guided through a series of on-screen prompts. Carefully follow the instructions to install the operating system. Note that the specific steps may vary depending on the operating system you’re installing.
6. Customize the installation: During the installation process, you may be prompted to customize certain settings, such as language preferences, time zone, keyboard layout, and user account creation. Adjust these settings according to your preferences.
7. Wait for the installation to complete: The installation process may take some time, depending on the speed of your Dell laptop and the complexity of the operating system. Be patient and avoid interrupting the installation process.
8. Complete the initial setup: Once the operating system installation is complete, your Dell laptop will restart. Follow the on-screen prompts to complete the initial setup, including creating a user account and configuring basic settings.
By reinstalling the operating system, your Dell laptop will have a fresh installation, free from any previous data or settings. Reinstalling ensures optimal performance and provides a clean slate for you to begin using your laptop once again.
Restore your backed up files
After wiping and reinstalling the operating system on your Dell laptop, it’s time to restore your backed-up files. Restoring your files ensures that you have access to your important data and settings, allowing you to continue where you left off. Here’s how you can restore your backed-up files:
1. Connect your backup device: If you backed up your files to an external storage device such as a USB flash drive or external hard drive, connect the device to your Dell laptop.
2. Access your backup files: Open the file explorer or file manager on your Dell laptop and navigate to the location where you stored your backed-up files. If you utilized cloud storage, log in to your account from the web or install the respective cloud storage application.
3. Copy and paste your files: Select the files and folders you want to restore and copy them to the appropriate locations on your Dell laptop. You can use the drag-and-drop method or right-click and select “Paste” to move the files.
4. Organize your restored files: Once the files have been copied, take the time to organize them in a way that makes sense to you. Create folders and subfolders to ensure a structured system for your files.
5. Reinstall necessary applications: If you had specific applications installed before the wiping process, reinstall them from their official sources or use installation files you backed up. Ensure you have valid licenses or activation keys ready, if required.
6. Configure settings: Make sure to configure any settings or preferences within applications or systems that were backed up, ensuring your customizations and preferences are restored.
7. Verify file integrity: Double-check that all your files have been successfully restored and are accessible. Open different file types to ensure they open without any issues.
Restoring your backed-up files allows you to regain access to your important data and settings, minimizing any disruption caused by the wiping and reinstallation process. It ensures that you can continue working and enjoying your Dell laptop with your personal files and configurations intact.